1. Introduction
This manual provides detailed instructions for the safe and effective use of your OLIGHT RN 400 LED Bike Light. Please read this manual thoroughly before operation and retain it for future reference. The RN 400 is a compact and powerful bicycle headlight designed for urban riding and daily commuting, offering 400 lumens of brightness, USB-C recharging, and IPX7 waterproofing.
2. Package Contents
Verify that all items listed below are included in your package:
- RN 400 LED Bike Light x 1
- Handlebar Mount x 1
- Silicon Strap x 4 (various sizes for different handlebar diameters)
- USB-C Charging Cable x 1
- 3mm Hex Key x 1 (for mount adjustment)

Image: Contents of the OLIGHT RN 400 package, including the light, mount, straps, USB-C cable, and hex key.
3. Setup and Installation
3.1 First Use: Unlocking the Device
Before initial use, the RN 400 bike light is in a locked state. To unlock, press and hold the power button for approximately 3 seconds. The indicator light will flash red and then turn green, signifying it is unlocked and ready for use. If the button flashes red and the light does not turn on, it is still locked.

Image: Illustration showing the power button being held for 3 seconds to unlock the light, transitioning from a red indicator to a green indicator.
3.2 Mounting the Light
The RN 400 features a universal quarter-turn mount compatible with Garmin-style interfaces. It can be securely installed on handlebars, helmets, or under a camera mount.
- Select the appropriate silicon strap for your handlebar diameter (28.6-35.0 mm).
- Attach the handlebar mount to your desired location using the silicon strap. Ensure it is tight and stable.
- Align the RN 400 with the mount and twist it clockwise until it clicks securely into place.
- For helmet or under-camera mounting, utilize compatible Garmin-style adapters (not included unless specified).

Image: Step-by-step diagram illustrating the installation of the RN 400 onto a bicycle handlebar using the provided mount and hex key.

Image: Visual representation of the RN 400 mounted on a handlebar, a helmet, and under a camera, demonstrating its versatile Garmin-compatible mounting system.
4. Operating Instructions
4.1 Power On/Off
- To Turn On: Press the power button once.
- To Turn Off: Press and hold the power button for approximately 1 second.
4.2 Mode Selection
The RN 400 offers multiple lighting modes for various riding conditions:
- Cycle Modes: While the light is on, short press the power button to cycle through modes: Low → Mid → High → Flash 1 → Flash 2.
- Mode Details:
- Low: 100 lumens, 3 hours 30 minutes runtime
- Mid: 200 lumens, 1 hour 40 minutes runtime
- High: 400 lumens, 1 hour runtime
- Flash 1: 0-200 lumens, 7 hours runtime
- Flash 2: 0-200 lumens, 5 hours 30 minutes runtime

Image: Two cyclists demonstrating the use of the RN 400 in different scenarios: urban riding and daily commuting, highlighting its effective illumination.
5. Charging
The RN 400 is equipped with a USB Type-C charging port for convenient and fast recharging.
- Connect the provided USB-C cable to the charging port on the light and to a USB power source (e.g., computer, wall adapter).
- During charging, the power button indicator will display a red breathing light.
- Once fully charged, the indicator will turn solid green.

Image: The RN 400 connected to a laptop via its USB-C charging port, illustrating the charging process.
6. Battery Indicator
The power button serves as a battery level indicator, providing real-time status:
- Green: 21% - 100% battery remaining.
- Red: 11% - 20% battery remaining.
- Flashing Red: 1% - 10% battery remaining (recharge immediately).
To check the battery status while the light is off, short press the power button. The indicator will display the current power level for three seconds.
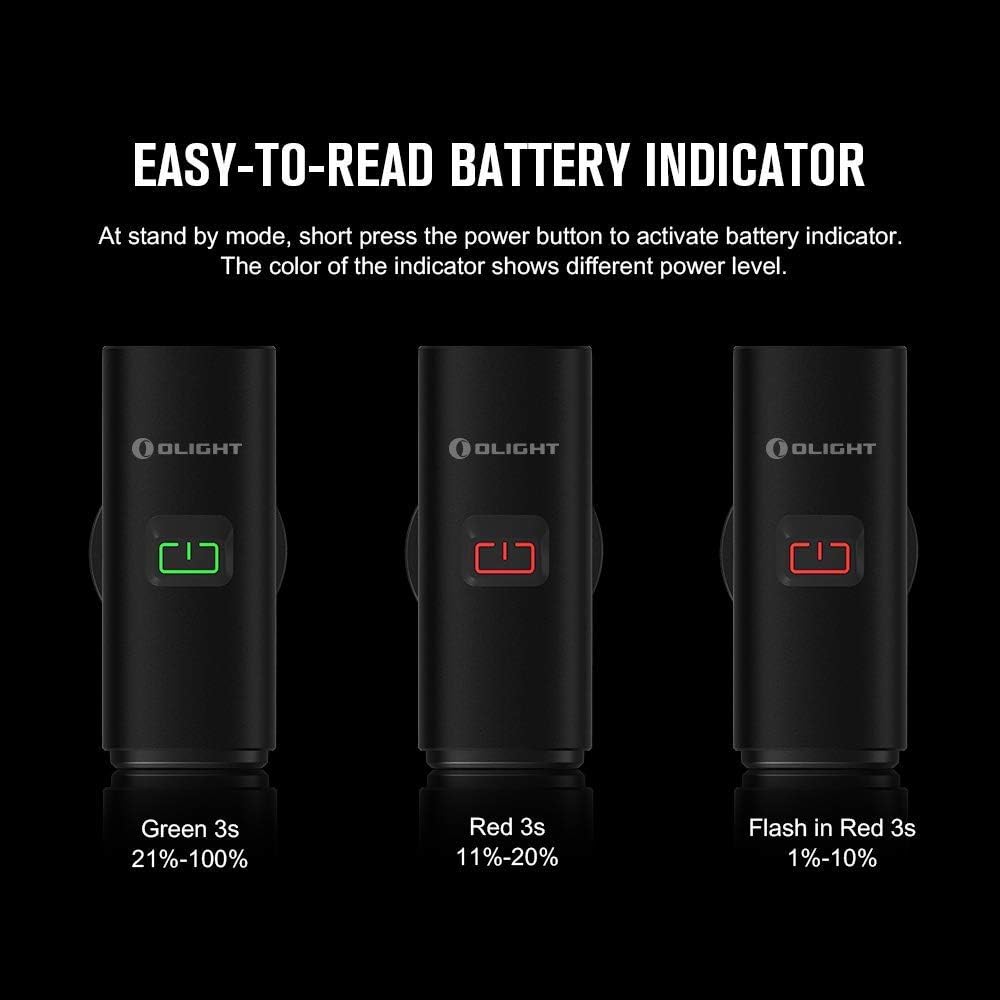
Image: Three illustrations of the RN 400's power button indicator showing green (21%-100%), red (11%-20%), and flashing red (1%-10%) battery levels.
7. Key Features
7.1 Anti-Glare Lens
The RN 400 features an anti-glare lens design that directs the light beam downward. This design prevents blinding oncoming motorists or pedestrians, enhancing safety for all road users.

Image: Comparison illustrating the anti-glare beam of the RN 400, which levels off the upper light to avoid dazzling others, versus a common bicycle light beam.
7.2 Superior Waterproof Rating
With an IPX7 waterproof rating, the RN 400 can withstand water immersion up to 1 meter depth for 30 minutes. This ensures reliable performance even in heavy rain, reducing weather-related interference during cycling.

Image: The RN 400 submerged in water, demonstrating its IPX7 waterproof capability. A small icon indicates 1m waterproof depth.
7.3 High Efficiency Optical Lens
The RN 400 utilizes a high-efficiency optical lens to deliver a maximum output of 400 lumens. Its side lighting design also enhances visibility in traffic, making riders more noticeable to others.
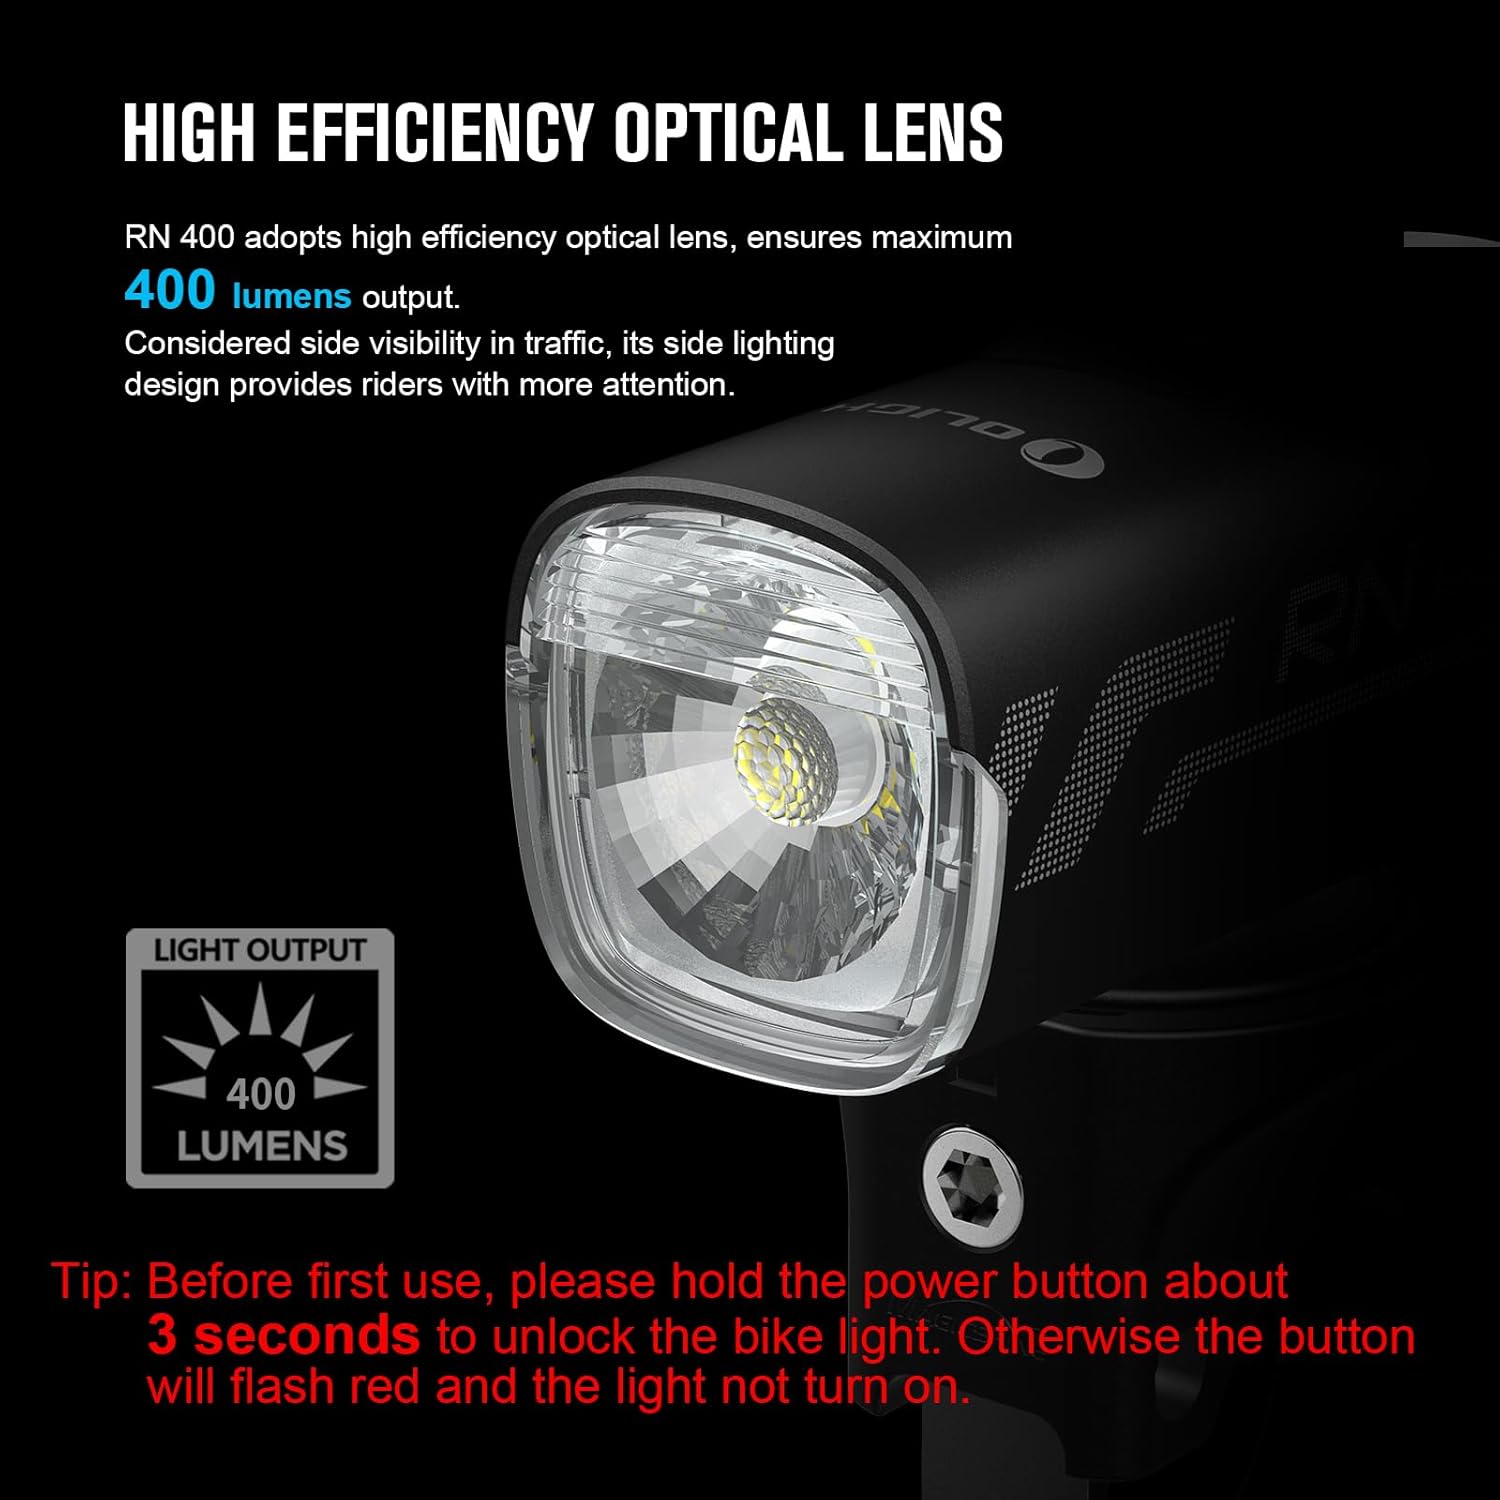
Image: Close-up view of the RN 400's optical lens, highlighting its design for 400 lumens light output and side visibility.
7.4 Durable Metal Construction
The housing of the RN 400 is constructed from durable, heat-dissipating A6061-T6 aluminum material. It undergoes military-specification oxidation for enhanced anti-scratch properties and overall robustness.

Image: A detailed view of the RN 400's aluminum body, emphasizing its durable construction and anti-scratch finish.
8. Maintenance
To ensure the longevity and optimal performance of your OLIGHT RN 400, follow these maintenance guidelines:
- Cleaning: Wipe the light body and lens with a soft, damp cloth. Avoid abrasive cleaners or solvents that could damage the finish or lens.
- Charging Port: Keep the USB-C charging port clean and free of debris. Ensure the rubber cover is properly sealed when not charging to maintain waterproof integrity.
- Storage: Store the light in a cool, dry place when not in use. If storing for extended periods, charge the battery to approximately 50% every few months to preserve battery health.
- Mount: Periodically check the handlebar mount and silicon straps for wear and tear. Replace if necessary to ensure secure attachment.
9. Troubleshooting
If you encounter issues with your RN 400, refer to the following common problems and solutions:
- Light Does Not Turn On:
- Ensure the light is unlocked. Press and hold the power button for 3 seconds until the indicator turns green.
- Check the battery level. If the indicator is red or flashing red, the battery may be too low. Charge the device.
- Light Does Not Charge:
- Verify that the USB-C cable is securely connected to both the light and the power source.
- Try a different USB-C cable or power adapter to rule out faulty accessories.
- Ensure the charging port is clean and free of obstructions.
- Light Falls Off Mount:
- Ensure the mount is securely fastened to the handlebar with the correct size silicon strap.
- Confirm the light is fully twisted and clicked into the mount.
- Inspect the mount and light's locking mechanism for any damage or wear.
For persistent issues not resolved by these steps, please contact OLIGHT customer support.
10. Specifications
| Feature | Detail |
|---|---|
| Model | RN 400 |
| Brightness | 400 Lumens (Max) |
| Power Source | Battery Powered (USB Type-C Rechargeable) |
| Water Resistance Level | IPX7 (Waterproof up to 1m for 30 minutes) |
| Material | A6061-T6 Aluminum |
| Item Weight | 85 Grams |
| Product Dimensions (LxWxH) | 2.83" x 1.22" x 1.22" |
| Mounting Type | Handlebar Mount (Garmin Compatible) |
| Color | Black |
11. Warranty and Support
The OLIGHT RN 400 LED Bike Light comes with a Lifetime Warranty, reflecting OLIGHT's commitment to quality and customer satisfaction. For warranty claims, technical assistance, or any product-related inquiries, please visit the official OLIGHT website or contact their customer support directly.
For more information and support, please visit: www.olightworld.com


