
1. Introduction
This manual provides detailed instructions for the safe and efficient operation, setup, and maintenance of your SINGER SC220 Electronic Sewing Machine. Please read this manual thoroughly before using the machine to ensure proper function and to prevent damage or injury. Keep this manual for future reference.
2. Important Safety Instructions
When using an electrical appliance, basic safety precautions should always be followed, including the following:
- Read all instructions before using this sewing machine.
- Keep fingers away from all moving parts. Special care is required around the sewing machine needle.
- Always use the proper needle plate. The wrong plate can cause the needle to break.
- Do not pull or push fabric while stitching. This may deflect the needle, causing it to break.
- Switch the sewing machine off when making any adjustments in the needle area, such as threading the needle, changing the needle, threading the bobbin, or changing the presser foot.
- Always unplug the sewing machine from the electrical outlet when removing covers, lubricating, or when making any other user servicing adjustments mentioned in the instruction manual.
- Never operate the sewing machine if it has a damaged cord or plug, if it is not working properly, or if it has been dropped or damaged.
- Do not operate where aerosol (spray) products are being used or where oxygen is being administered.
- This appliance is not intended for use by persons (including children) with reduced physical, sensory or mental capabilities, or lack of experience and knowledge, unless they have been given supervision or instruction concerning use of the appliance by a person responsible for their safety.
3. Product Overview
The SINGER SC220 is an electronic sewing machine designed for various sewing tasks. It features an electronic screen for stitch selection and an integrated LED light for improved visibility.
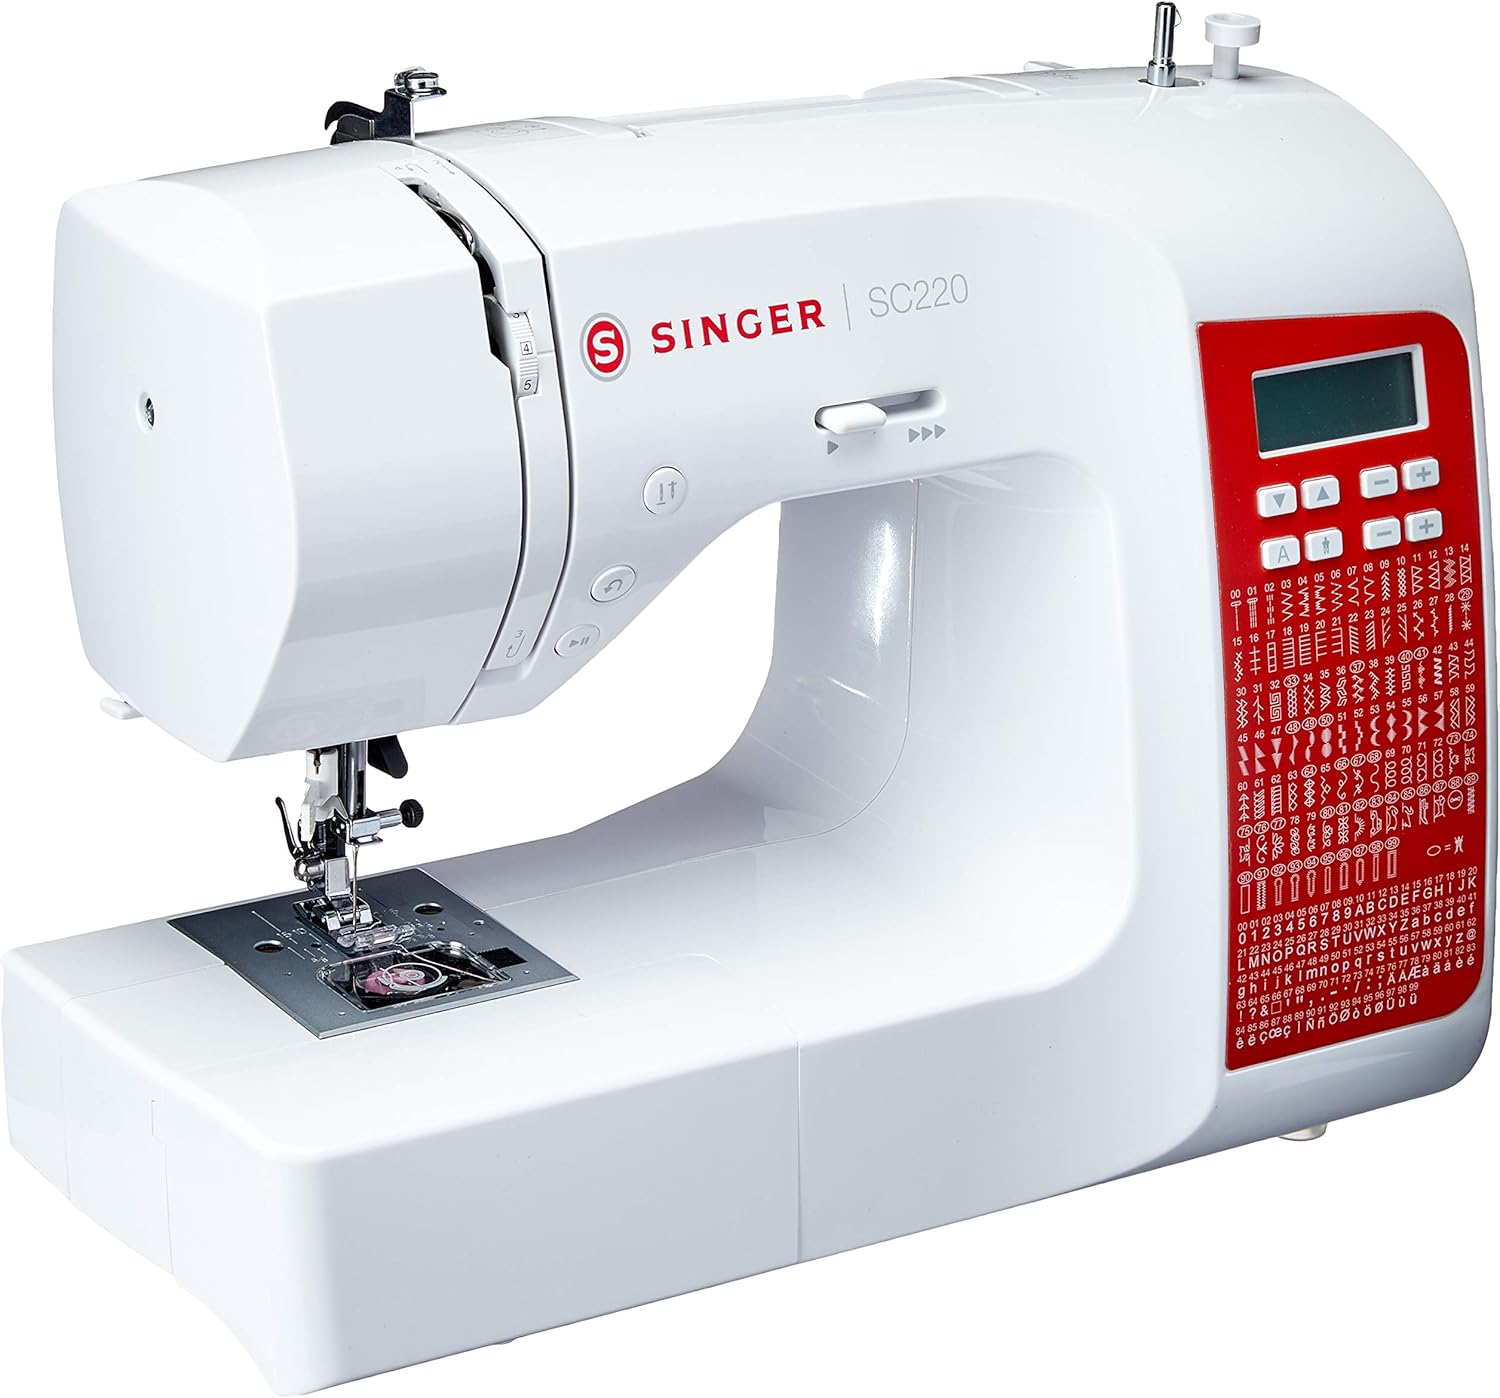
Figure 3.1: Overall view of the SINGER SC220 Electronic Sewing Machine. This image shows the machine from a front-right angle, highlighting its compact design, the SINGER logo, model number SC220, and the red control panel with an electronic display and stitch selection buttons.
Key Features:
- Electronic Stitch Selection: Easily choose from a variety of stitches using the electronic screen and control buttons.
- Overlock Stitch Capability: Finish seams professionally to prevent fraying.
- Automatic Bobbin Winding: Simplifies the bobbin preparation process.
- Integrated LED Light: Illuminates the sewing area for better visibility.
- Free Arm: Allows for easy sewing of cylindrical items like sleeves and pant hems.

Figure 3.2: Front view of the SINGER SC220. This image provides a clear view of the machine's front, including the electronic display, stitch selection buttons, and a comprehensive stitch chart printed on the red panel.

Figure 3.3: Close-up of the needle area and bobbin case. This image details the presser foot, needle, and the transparent cover for the drop-in bobbin system, essential for threading and maintenance.
4. Setup
4.1 Unpacking and Placement
- Carefully remove the machine from its packaging.
- Place the machine on a stable, flat surface.
- Ensure adequate lighting and space for comfortable operation.
4.2 Connecting Power and Foot Pedal
- Locate the power cord and foot pedal.
- Insert the foot pedal plug into the corresponding jack on the right side of the machine.
- Insert the power cord plug into the power input jack on the right side of the machine.
- Plug the power cord into a suitable electrical outlet.

Figure 4.1: Rear view of the SINGER SC220. This image displays the back of the machine, clearly showing the power switch, the power cord input, and the foot pedal connection port.

Figure 4.2: The electronic foot pedal. This image shows the foot pedal used to control the sewing speed of the machine.
4.3 Winding the Bobbin
- Place a spool of thread on the spool pin.
- Guide the thread through the upper thread guide and around the bobbin winding tension disc.
- Place an empty bobbin onto the bobbin winder spindle.
- Wrap the thread clockwise several times around the bobbin.
- Push the bobbin winder spindle to the right.
- Press the foot pedal lightly to start winding. Stop when the bobbin is full.
- Cut the thread and push the spindle back to the left.
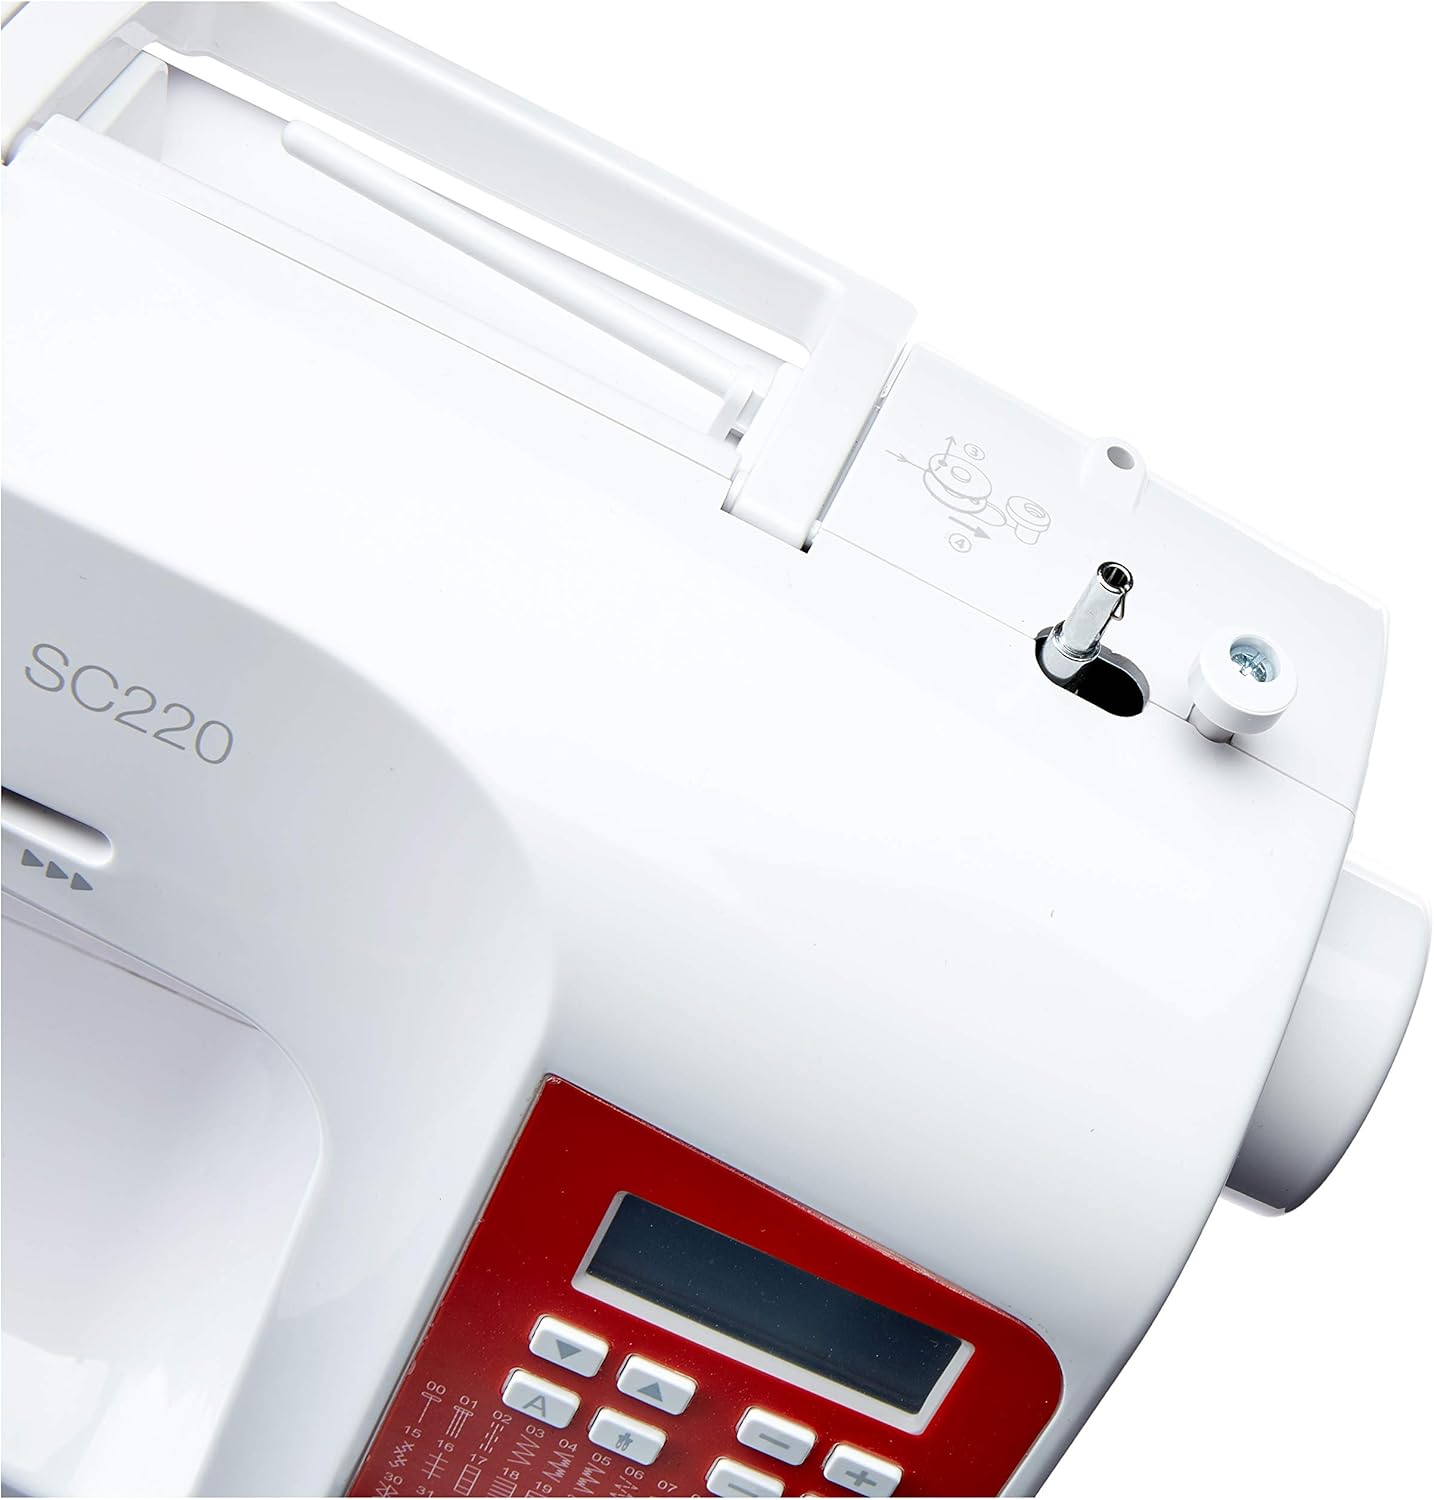
Figure 4.3: Top view of the SINGER SC220. This image illustrates the top of the machine, showing the spool pin, thread guides, and the bobbin winder mechanism.
4.4 Threading the Upper Thread
- Raise the presser foot lifter.
- Place a spool of thread on the spool pin.
- Follow the numbered threading path indicated on the machine, guiding the thread through all guides and tension discs.
- Bring the thread down through the take-up lever.
- Thread the needle from front to back.
4.5 Inserting the Bobbin
- Open the bobbin cover plate.
- Insert the wound bobbin into the bobbin case, ensuring the thread unwinds in the correct direction (usually counter-clockwise).
- Guide the bobbin thread through the tension spring and into the thread guide slot.
- Replace the bobbin cover plate.
- Turn the handwheel towards you to lower and raise the needle, catching the bobbin thread. Pull both threads under the presser foot and to the back.
5. Operating Instructions
5.1 Turning On/Off
Locate the power switch on the right side of the machine (refer to Figure 4.1). Flip the switch to the 'I' position to turn on the machine and the LED light. Flip to 'O' to turn off.
5.2 Stitch Selection
The SINGER SC220 features an electronic display and buttons for stitch selection. Refer to the stitch chart on the machine's front panel (Figure 3.2) to identify desired stitches.
- Use the '+' and '-' buttons to scroll through available stitch patterns.
- The selected stitch number will appear on the electronic display.
- The machine will automatically set the recommended stitch length and width for the chosen stitch. These can often be adjusted further using dedicated buttons if available.
5.3 Basic Sewing
- Place the fabric under the presser foot.
- Lower the presser foot.
- Gently press the foot pedal to start sewing. The harder you press, the faster the machine will sew.
- Guide the fabric gently with both hands, ensuring it feeds evenly. Do not pull or push the fabric forcefully.
- To reverse stitch (for securing seams), press and hold the reverse button (usually marked with a reverse arrow).
- When finished, raise the needle to its highest position, lift the presser foot, and pull the fabric out.
- Cut the threads using the thread cutter located on the side of the machine.
5.4 Using the Free Arm
To use the free arm, slide off the accessory storage compartment from the base of the machine. This exposes the narrow free arm, ideal for sewing cuffs, sleeves, and other small, circular items.
6. Maintenance
Regular maintenance ensures the longevity and optimal performance of your SINGER SC220 sewing machine.
6.1 Cleaning the Bobbin Area
- Turn off and unplug the machine.
- Remove the needle, presser foot, and bobbin cover plate.
- Carefully remove the bobbin case and hook race.
- Use a small brush (often included with the machine) to remove lint and dust from the bobbin area and feed dogs.
- Reassemble the components.
6.2 Changing the Needle
Change the needle regularly, especially after 8-10 hours of sewing or if it becomes bent or dull.
- Turn off and unplug the machine.
- Loosen the needle clamp screw.
- Remove the old needle.
- Insert a new needle with the flat side facing the back of the machine, pushing it up as far as it will go.
- Tighten the needle clamp screw securely.
6.3 Storage
When not in use, cover the machine with a dust cover to protect it from dust and debris. Store in a dry, cool place.
7. Troubleshooting
This section addresses common issues you might encounter with your SINGER SC220.
| Problem | Possible Cause | Solution |
|---|---|---|
| Machine does not start | Power cord not plugged in; power switch off; bobbin winder engaged. | Check power connection; turn power switch on; disengage bobbin winder. |
| Skipped stitches | Incorrect needle; bent needle; improper threading; wrong needle size for fabric. | Change needle; re-thread machine; use correct needle type/size. |
| Thread breaking | Improper threading; thread tension too tight; poor quality thread; bent needle. | Re-thread machine; adjust tension; use good quality thread; replace needle. |
| Fabric not feeding | Presser foot not lowered; feed dogs clogged with lint; stitch length set to zero. | Lower presser foot; clean feed dogs; adjust stitch length. |
| Needle breaking | Bent needle; pulling fabric forcefully; wrong needle size; needle not fully inserted. | Replace needle; guide fabric gently; use correct needle; ensure needle is fully inserted. |
8. Specifications
| Feature | Specification |
|---|---|
| Brand | Singer |
| Model Number | SC220 (230322123) |
| Color | White/Red |
| Product Dimensions (L x W x H) | 31 x 19 x 41 cm (12.2 x 7.5 x 16.1 inches) |
| Material | Plastic |
| Item Weight | 5.3 Kilograms (11.7 lbs) |
| Power Source | Corded Electric |
| Electric | Yes |
9. Warranty and Support
For warranty information, please refer to the documentation included with your purchase or visit the official SINGER website. For technical support or service, contact SINGER customer service through their official channels.


