
1. Introduction
This manual provides detailed instructions for the installation, operation, and maintenance of your ATOTO F7 XE 8-inch Car Stereo Receiver (Model: F7G1A8XE). Please read this manual thoroughly before using the product to ensure proper functionality and safety. Keep this manual for future reference.

Image 1.1: The ATOTO F7 XE Car Stereo Receiver, highlighting its wireless CarPlay and Android Auto capabilities.
2. Key Features
- Wireless & Wired CarPlay/Android Auto: Seamless smartphone integration for navigation, music, calls, and messages.
- 8-inch 1280*720 IPS Display: Full HD screen with a 178° full-viewing angle for clear visibility.
- MirrorLink: Display unsupported apps from your phone onto the head unit screen.
- Live Rear-View (LRV): Real-time rear-view display while driving forward (requires ATOTO AC-HD02LR camera, sold separately).
- HD 720P Rear-View Camera Input: Supports high-definition camera input with parking guidelines.
- Built-in Amplifier: Max. 4*49W with RMS 4*29W, 10-band EQ with 7 presets for enhanced audio.
- Bluetooth 5.0: Hands-free calls and audio streaming.
- AM/FM Tuner: Built-in radio tuner with RBDS.
- USB/SD Media Playback: Supports external storage devices up to 2TB SSD and Micro SD cards up to 512GB.
- Fast Charging: Inner PMS firmware provides faster charging (max. 1.5 A) for smartphones via the "Phone Link" USB port.
- Video Outputs: 2 RCA Headrest Video Outputs for connecting to external monitors.
3. Setup & Installation
3.1 Physical Installation
The ATOTO F7G1A8XE is designed for universal single DIN installation, but can also be mounted into a double DIN opening using the included DIN pocket. The 8-inch display screen is attached to the chassis with a joint, allowing for adjustment of height and viewing angle (up or down) to prevent blocking vents or buttons.

Image 3.1: The ATOTO F7 XE head unit showing its single DIN chassis and adjustable 8-inch display.
Important: When installing the display module, ensure all screw holes are tightened to prevent issues like stripes, screen freezes, or blurry screens. Additional accessories (dash frame kit, wiring harness, antenna adapter, CANBUS data interface) may be required for specific vehicles and are not included.
3.2 Wiring Connections
The unit comes with various wiring harnesses and connections for power, speakers, and external devices. Ensure correct connections according to your vehicle's wiring diagram.
- Power Looms: Two ISO looms (A and B) are provided. The only difference is the reversed red and yellow power cables. If the unit does not retain memory after installation, try using the other loom.
- USB Ports: One USB port is labeled "Phone Link" for wired CarPlay/Android Auto and fast charging. Another USB port is for external storage devices (up to 2TB SSD) and media playback.
- Micro SD Slot: Located on the side of the unit, supports up to 512GB for media files.
- RCA Outputs: For connecting to external amplifiers (4-CH Audio Out, Separate Subwoofer Out) and headrest monitors (2 Video Outputs).
- Camera Inputs: Dedicated inputs for reversing camera (720P HD) and front camera.
- Microphone Input: For the included external microphone, enhancing hands-free call quality.
Video 3.1: An unboxing video of the ATOTO F7 XE 8-inch Single DIN Car Stereo, showcasing the unit and its various included cables and accessories.
Video 3.2: Another unboxing video of the ATOTO F7G1A8XE 8-inch Android Car Stereo, providing a closer look at the components and connections.
3.3 Steering Wheel Controls
The F7 XE supports steering wheel controls. To configure them, navigate to Settings > System Settings > Steering Wheel Control Select > Key Settings. From there, you can assign functions to your steering wheel buttons.
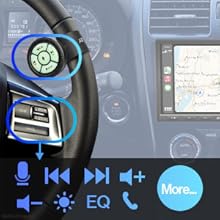
Image 3.2: Illustration of steering wheel controls and their integration with the ATOTO F7 XE head unit.
4. Operating Instructions
4.1 Power On and Boot Time
The unit boots up quickly. Upon turning on your vehicle's ignition, the ATOTO F7 XE will display the boot logo (customizable) and quickly transition to the main interface.
Video 4.1: A demonstration of the ATOTO F7G1A8XE's boot-up sequence and initial interface.
4.2 User Interface Overview
The main dashboard is designed for simplicity. It displays time and date, Bluetooth music controls, and prominent icons for key functions like Android Auto, Radio, Apple Music (if applicable), and Apple CarPlay. Physical buttons are also available for common actions like home and volume control.
4.3 Wireless CarPlay & Android Auto
The F7 XE supports both wireless and wired CarPlay and Android Auto. Once initially paired via Bluetooth, your phone will automatically connect wirelessly when you enter the vehicle. This allows access to navigation apps (Google Maps, Apple Maps, Waze), music streaming (Spotify, YouTube Music), phone calls, and messages directly from the head unit screen.

Image 4.1: The ATOTO F7 XE displaying both Wireless CarPlay and Android Auto interfaces.
For wired connections, use the factory/original USB cable. The "Phone Link" USB port also supports fast charging for your smartphone while connected.

Image 4.2: A smartphone connected to the ATOTO F7 XE, illustrating its fast charging capability.
Video 4.2: A demonstration of the ATOTO F7G1A8XE's Wireless Android Auto and CarPlay functionality, showing app access and navigation.
4.4 MirrorLink
MirrorLink allows you to display apps not natively supported by CarPlay or Android Auto directly on the 8-inch screen. Note that certain video streaming services may not support MirrorLink.
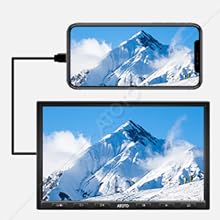
Image 4.3: A smartphone screen being mirrored onto the ATOTO F7 XE head unit.
4.5 Bluetooth Audio & Phone Calls
Connect your smartphone via Bluetooth 5.0 for hands-free calls and streaming music. The interface displays track name, artist, and album, with controls for playback. The included external microphone ensures clear call quality.
4.6 Radio & Media Playback
Access the built-in FM/AM radio tuner with RBDS. You can also play media files from USB drives (up to 2TB SSD) or Micro SD cards (up to 512GB). The unit supports playing FM/AM radio or USB/SD music in the background while using CarPlay or Android Auto navigation.
Video 4.3: A brief overview of the radio settings and interface on the ATOTO head unit.
4.7 Rear & Front Camera
The F7 XE supports HD 720P rear-view camera input with parking guidelines. The Live Rear-View (LRV) feature allows you to see a real-time rear-view even when moving forward, requiring the ATOTO AC-HD02LR camera (sold separately).

Image 4.4: The ATOTO F7 XE screen showing both Live Rear-View and parking guidelines for enhanced safety.
4.8 SiriusXM Ready
The F7G1A8XE is SiriusXM ready. A SiriusXM Connect Vehicle Tuner and subscription are required (sold separately) to access SiriusXM satellite radio services.

Image 4.5: The SiriusXM logo, indicating the ATOTO F7 XE's compatibility with SiriusXM services.
5. Audio Settings
The F7 XE features a built-in amplifier (max. 4*49W, RMS 4*29W) and a 10-band graphic equalizer to customize your audio experience. Access audio settings via Settings > Audio & EQ Settings.
- Balance/Fader: Adjust the audio distribution within your vehicle.
- Equalizer (EQ): Utilize the 10-band graphic EQ to fine-tune frequencies or select from 7 preset modes (Standard, R&B, Rock, Pop, Hip Hop, Jazz, Dance, Custom).
6. Display Settings
Customize your display experience through Settings > Display Settings.
- Brightness Control: Adjust the display brightness for day and night driving conditions.
- Boot Logo Settings: Select a custom boot logo from a variety of car brands.
- Panel Key Lighting: Choose from six different colors to match your vehicle's interior lighting.
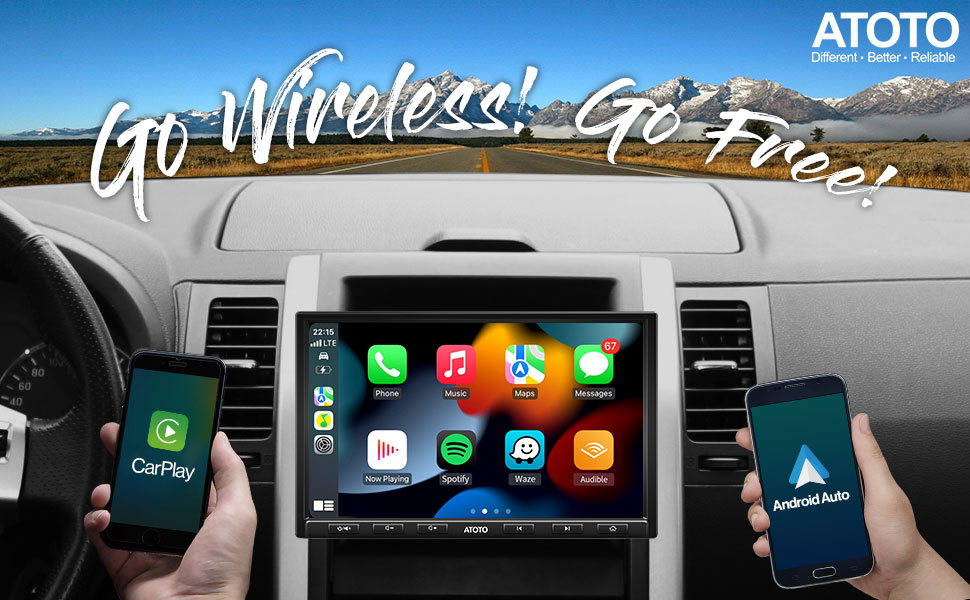
Image 6.1: The ATOTO F7 XE's 8-inch 1280*720 IPS display, showcasing its wide 178° viewing angle and clear visibility.

Image 6.2: Demonstrates the excellent visibility of the ATOTO F7 XE screen from various angles.
7. Specifications
| Feature | Detail |
|---|---|
| Model Number | F7G1A8XE |
| Display Screen | 8-inch 1280*720 IPS, 178° Full-Viewing Angle |
| Operating System | Linux 4.9.217 |
| CarPlay/Android Auto | Wireless & Wired |
| Bluetooth | 5.0 (Hands-free calls, streaming music) |
| Amplifier | Max. 4*49W, RMS 4*29W |
| Equalizer | 10-band EQ with 7 presets |
| USB/SD Storage | USB up to 2TB SSD, Micro SD up to 512GB (FAT32 or NTFS) |
| Rear-View Camera Input | HD 720P (ATOTO AC-HD02LR required for LRV) |
| SiriusXM | Ready (Tuner and subscription required) |
| Mounting Style | SAH08D (Single DIN Adaptive Head Unit, Double DIN with pocket) |
8. Troubleshooting
If you encounter any issues with your ATOTO F7 XE, please refer to the following common troubleshooting tips:
- No Power/Memory Loss: Check power cable connections. Ensure the correct ISO loom is used (red and yellow power cables may need to be reversed depending on vehicle wiring).
- Unstable CarPlay/Android Auto Connection: For wired connections, use the factory/original USB cable that came with your phone. Non-manufacturer cables can cause instability. Ensure your phone's operating system is up to date for wireless functionality (iOS 9.0+ for Wireless CarPlay, Android 11.0+ for Wireless Android Auto, or specific Google/Samsung phones with Android 10.0/9.0).
- Screen Issues (Stripes, Freezes, Blurry): Verify that all screws for the display module are securely tightened during installation.
- Poor Call Quality: Ensure the external microphone is properly connected and positioned.
- Steering Wheel Controls Not Working: Follow the configuration steps in Section 3.3 to program the controls.
For further assistance, please contact ATOTO's professional customer support team.
9. Warranty & Support
ATOTO provides professional customer support to assist with any problems concerning the installation, operation, or other aspects of your ATOTO products. For the latest updates and support, please visit the ATOTO Brand Store on Amazon or their official website.
Regular firmware updates are provided to enhance features and improve user experience. Check for available updates through the unit's settings.