1. Introduction
This instruction manual provides comprehensive guidance for the assembly, operation, and maintenance of the Whadda WSSA200 Animated Snowman Soldering Kit. This kit is designed as an educational and engaging project for hobbyists and makers, resulting in an animated snowman decoration with LED lighting.
Please read this manual thoroughly before beginning assembly to ensure proper function and safety.
2. Safety Instructions
Soldering involves high temperatures and can produce fumes. Adhere to the following safety precautions:
- Always work in a well-ventilated area to avoid inhaling solder fumes.
- Wear appropriate eye protection (safety glasses) to shield against splashes or flying debris.
- Use a soldering iron stand to prevent accidental burns.
- Ensure the soldering iron is unplugged and cooled down before storing.
- Avoid touching the hot tip of the soldering iron or freshly soldered components.
- Keep a fire extinguisher or fire blanket nearby.
- Keep children and pets away from the work area during soldering.
- Wash hands thoroughly after handling solder, especially lead-based solder.
3. Package Contents
The Whadda WSSA200 kit includes all necessary electronic components and a printed circuit board (PCB) to assemble the animated snowman. A typical kit contains:
- Printed Circuit Board (PCB) with snowman design
- Various LEDs (Light Emitting Diodes) in different colors
- Resistors
- Capacitors
- Transistors
- Integrated Circuits (ICs)
- Battery holder (for 9V battery)
- DC power jack
- On/Off switch
- Mounting hardware (screws, standoffs)
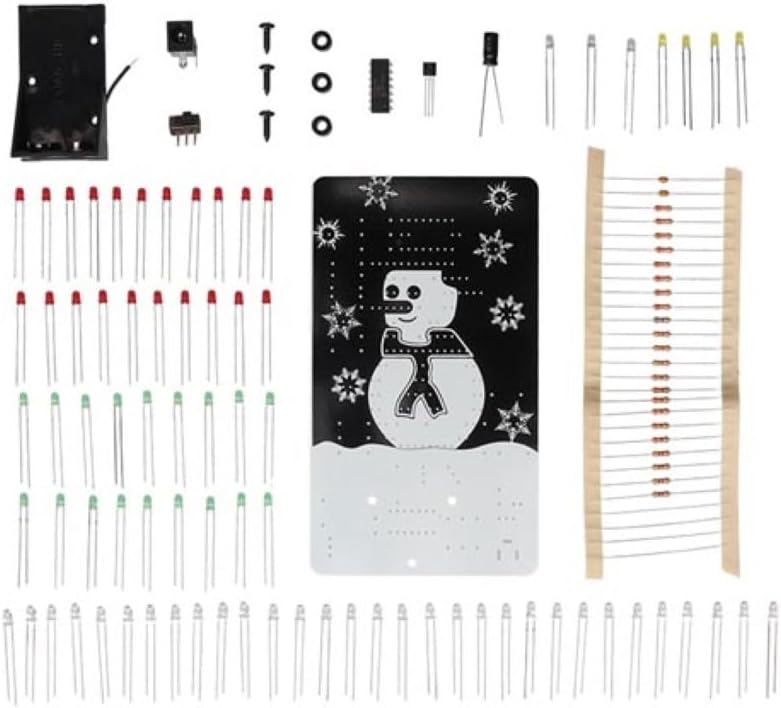
Figure 3.1: All components included in the Whadda WSSA200 soldering kit, laid out on a surface. This image displays the PCB, various LEDs, resistors, capacitors, integrated circuits, a battery holder, DC power jack, and an on/off switch.
4. Assembly Instructions (Setup)
Follow these steps carefully to assemble your Whadda WSSA200 kit. A basic understanding of soldering techniques is recommended.
- Component Identification: Before soldering, identify all components. Match them with the labels on the PCB. Pay close attention to resistor values (color codes) and capacitor types.
- Solder Smallest Components First: Begin by soldering the smallest components (resistors, diodes) to the PCB. This prevents larger components from obstructing access to solder pads.
- Observe Polarity: For polarized components like LEDs, diodes, electrolytic capacitors, and integrated circuits, ensure they are inserted in the correct orientation as indicated on the PCB. Incorrect polarity can damage components. LEDs have a longer lead for the anode (+) and a shorter lead for the cathode (-), often marked with a flat edge on the LED body.
- Solder LEDs: Carefully solder all LEDs into their designated positions. Ensure they are flush with the board or at a consistent height for aesthetic purposes.
- Solder Larger Components: Proceed with soldering larger components such as transistors, IC sockets (if used), the DC power jack, and the on/off switch.
- Install Battery Holder: Solder the battery holder wires to the designated pads on the PCB.
- Inspect Solder Joints: After soldering each section, visually inspect all solder joints. They should be shiny, smooth, and cone-shaped, connecting the component lead to the PCB pad without bridging to adjacent pads.
- Clean PCB: If desired, use isopropyl alcohol and a brush to clean any flux residue from the PCB.
- Mounting: Secure the PCB using the provided mounting hardware if applicable.

Figure 4.1: Front view of the fully assembled Whadda WSSA200 kit, showcasing the LED snowman design and snowflakes.
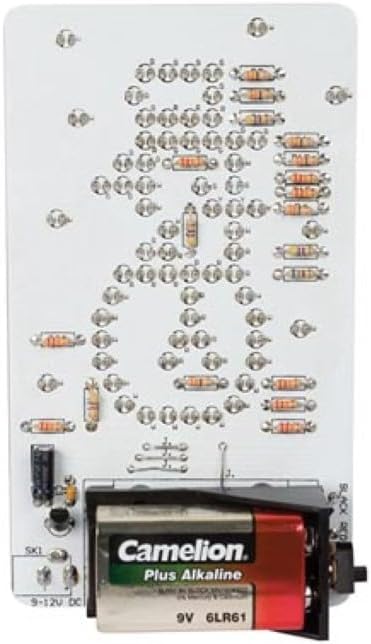
Figure 4.2: Back view of the assembled Whadda WSSA200 kit, showing the soldered components, battery holder with a 9V battery, and power input options.
5. Operating Instructions
Once assembled, your animated snowman is ready for operation.
- Power Source:
- Insert a 9V battery (not included) into the battery holder.
- Alternatively, connect an external 9V to 12V DC power supply to the DC power jack.
- It is not necessary to remove the battery when using an external power supply.
- Power On: Locate the on/off switch on the PCB and slide it to the "ON" position.
- Animation: The LEDs will illuminate in an animated sequence, creating the effect of a moving snowman and twinkling snowflakes.
- Power Off: To turn off the device, slide the on/off switch to the "OFF" position.

Figure 5.1: The Whadda WSSA200 Animated Snowman kit fully illuminated, demonstrating its animated LED display in a low-light environment.
6. Maintenance
The Whadda WSSA200 kit requires minimal maintenance.
- Cleaning: Use a soft, dry cloth to gently wipe the PCB and components to remove dust. Avoid using liquids directly on the electronics.
- Battery Replacement: If using a 9V battery, replace it when the LED animation becomes dim or stops functioning. Ensure the device is switched off before replacing the battery.
- Storage: Store the kit in a dry, cool place away from direct sunlight and extreme temperatures when not in use.
7. Troubleshooting
If your animated snowman is not functioning as expected, consider the following:
- No Power/No Lights:
- Check if the on/off switch is in the "ON" position.
- If using a 9V battery, ensure it is fresh and correctly inserted with proper polarity.
- If using an external power supply, verify it is providing 9-12V DC and is correctly connected.
- Inspect all power connections and solder joints for continuity and proper contact.
- Some LEDs Not Lighting Up:
- Check the polarity of the non-functioning LEDs. They might be inserted backward.
- Inspect the solder joints for those specific LEDs. A cold joint or a short circuit could be the cause.
- Ensure the LED itself is not faulty.
- Erratic Animation:
- Verify all integrated circuits and transistors are correctly oriented and securely soldered.
- Check for any solder bridges between adjacent traces or component leads on the PCB.
- Ensure all resistors and capacitors are of the correct value and properly soldered.
8. Specifications
| Feature | Detail |
|---|---|
| Model Number | WSSA200 |
| Power Supply | 9 to 12 VDC max. or 9 V battery (not included) |
| Power Consumption | 60 mA |
| Dimensions | 80 x 140 mm / 3.2 x 5.6 inches |
| Item Weight | Approximately 3.87 ounces (unassembled components) |
| Usage | Amateur / Educational |
9. Warranty and Support
This Whadda WSSA200 soldering kit is provided as a DIY project. Due to the nature of self-assembly, warranty typically covers manufacturing defects in components prior to assembly. Damage resulting from incorrect assembly, soldering errors, or improper use is generally not covered.
For technical support or inquiries regarding component defects, please contact Whadda customer service through their official website or your point of purchase. Please have your model number (WSSA200) ready when contacting support.


