Introduction
Thank you for choosing the Syantek Wireless Remote Control Outlet Kit. This kit provides a convenient solution for controlling household appliances and lighting with ease. Designed for simplicity and expandability, it allows you to manage multiple devices from a distance, enhancing comfort and energy efficiency in your home. This manual will guide you through the setup, operation, and maintenance of your new remote control outlets.

Image: The Syantek Wireless Remote Control Outlet Kit, featuring five compact white plug-in outlets and two matching remote controls, ready for use.
Package Contents
- 5 x Syantek Wireless Remote Control Outlets
- 2 x Syantek Remote Controls (with pre-installed 12V/23A batteries)
- 1 x User Manual (this document)
Product Features
- Programmable & Expandable: Easily activate multiple devices with one button or control one device with multiple remotes. Sync remote outlets together regardless of frequency differences.
- Compact Design: Each remote control outlet occupies only one wall socket, being smaller than most indoor wireless outlets.
- High Quality & Strong Signal: ETL and FCC approved for safety and quality assurance. The strong RF signal operates through doors and walls up to 100 feet without interfering with other electronics.
- Convenient & Energy Saving: Turn off lights and appliances from anywhere in your home. Helps eliminate standby power and reduce energy consumption. Outlets remain off after a power interruption.
- User-Friendly: Ideal for individuals with limited mobility, offering instant control over various devices with a simple button press.

Image: Visual representation of the product's programmable and expandable features, highlighting benefits like space-saving, customized control, 100-foot remote range, and energy efficiency.
Setup Instructions
- Unpack: Carefully remove all components from the packaging.
- Insert Batteries (Remotes): The remote controls come with pre-installed 12V/23A batteries. If replacement is needed, refer to the Maintenance section.
- Plug in Outlets: Plug each Syantek wireless receiver outlet into a standard 3-prong wall socket. Ensure the outlet is securely seated. The compact design allows for use in the top or bottom socket without blocking the other.
- Connect Appliances: Plug your desired appliance or light into the Syantek receiver outlet.
- Initial Test: The outlets are typically pre-programmed to the remotes. Press the 'ON' or 'OFF' button corresponding to the outlet number (1-5) on your remote to test functionality.
If an outlet does not respond, proceed to the 'Programming/Pairing' section.
Operating Instructions
The Syantek Wireless Remote Control Outlet Kit offers straightforward operation for your connected devices.
- Turning On/Off: Each remote control features numbered 'ON' and 'OFF' buttons (1-5). Press the 'ON' button corresponding to the desired outlet to turn on the connected device. Press the 'OFF' button to turn it off.
- Range: The strong RF signal allows control from up to 100 feet away, even through walls and doors.
- Power Outage Memory: In the event of a power interruption, the outlets are designed to remain in their 'OFF' state when power is restored, preventing unexpected activation and saving energy.
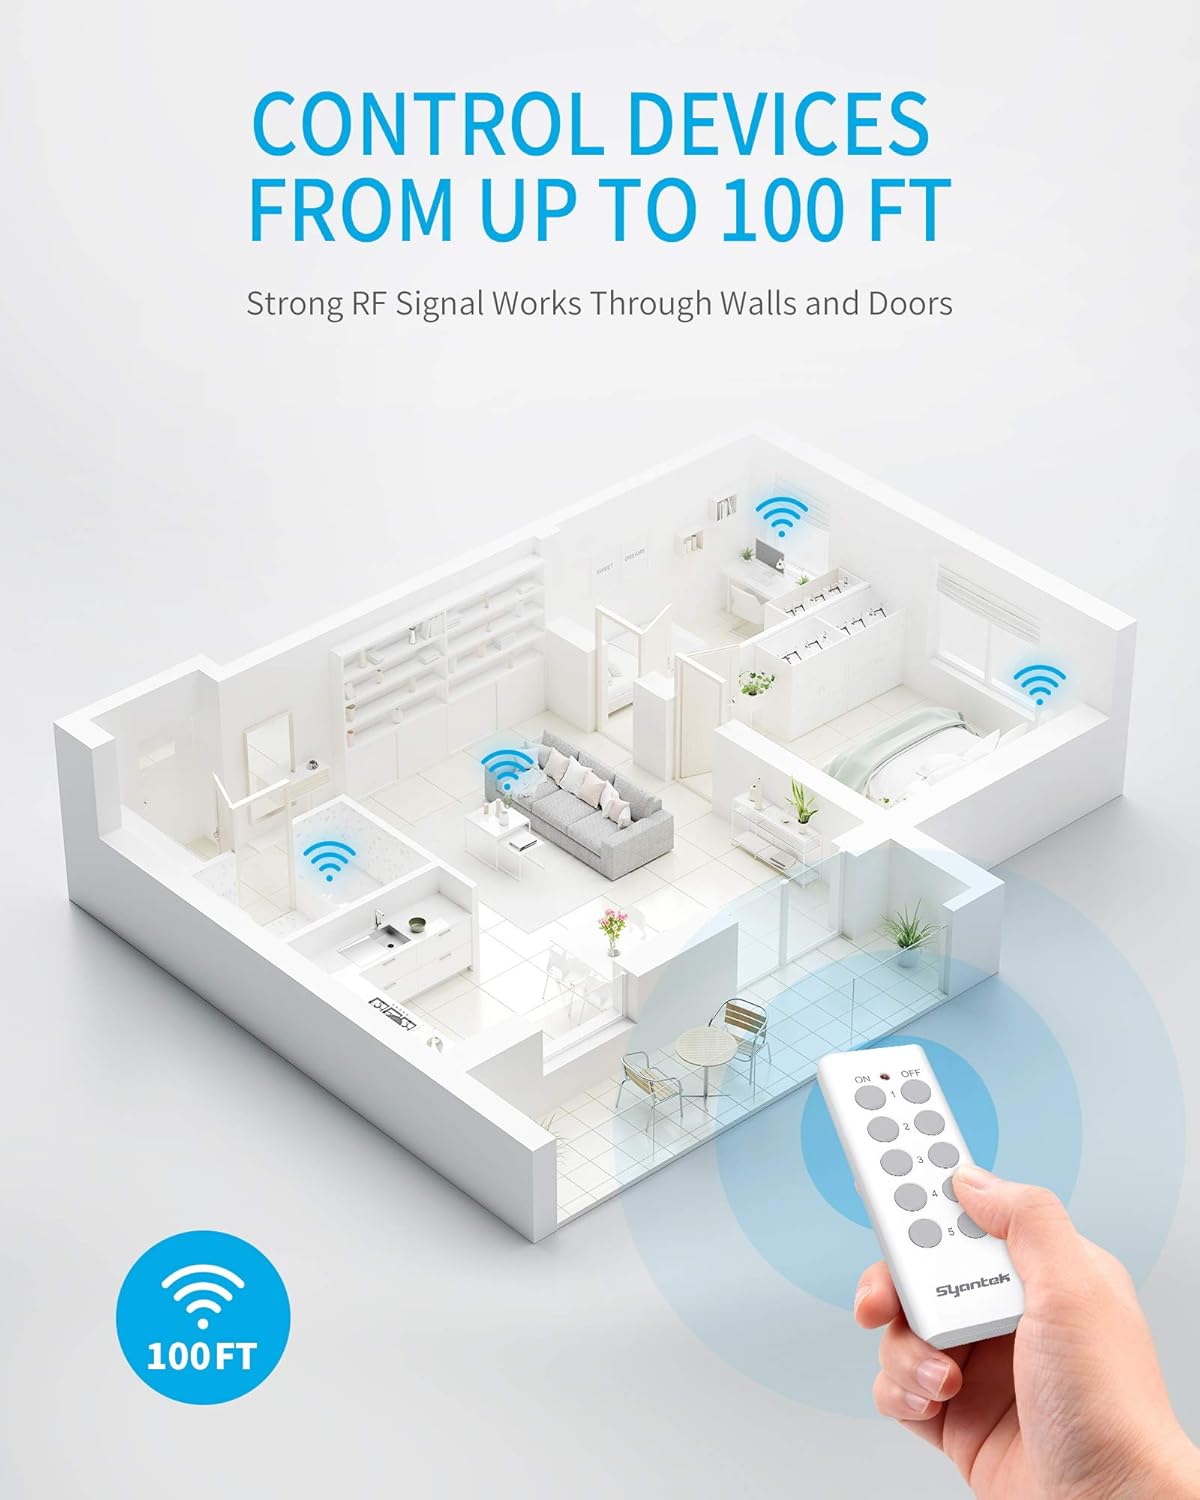
Image: An illustration demonstrating the 100-foot wireless control range of the Syantek remote, showing signals passing through walls to control devices in different rooms.
Demonstration Video
Video: A short demonstration showing the Syantek remote control being used to turn a Christmas tree's lights on and off, highlighting the ease of use and convenience.
Programming / Pairing Instructions
Your Syantek outlets and remotes are typically pre-programmed. However, if you need to re-program or pair additional remotes/outlets, follow these steps:
- Clear Existing Pairing (Optional): To clear an existing pairing, press and hold the 'Program Button' on the side of the receiver outlet for approximately 5 seconds until the indicator light flashes rapidly. Release the button.
- Enter Pairing Mode: Plug the receiver outlet into a wall socket. Press and hold the 'Program Button' on the side of the receiver outlet for about 3 seconds until the indicator light begins to flash slowly.
- Pair with Remote: While the indicator light is flashing slowly, press the desired 'ON' or 'OFF' button (e.g., '1 ON' or '1 OFF') on the remote control. The indicator light on the receiver outlet will stop flashing and remain solid for a moment, then turn off, indicating successful pairing.
- Test: Test the newly paired outlet by pressing its corresponding 'ON' and 'OFF' buttons on the remote.
You can pair multiple remotes to one outlet or one remote to multiple outlets, offering flexible control options.

Image: A visual guide to the programmable and expandable nature of the system, showing how a single remote can manage multiple outlets and how a single outlet can be controlled by multiple remotes.
Safety Information
- For indoor use only.
- Do not exceed the maximum load rating of the device. Refer to specifications.
- Ensure proper grounding.
- Do not immerse in water or expose to excessive moisture.
- Keep out of reach of children.
- Do not disassemble or attempt to repair the device.
Maintenance
- Cleaning: Wipe the outlets and remotes with a dry, soft cloth. Do not use liquid cleaners or solvents.
- Remote Battery Replacement: The remote controls use 12V/23A batteries. If the remote's indicator light does not illuminate or the range decreases significantly, it may be time to replace the battery. To replace, open the battery compartment on the back of the remote, remove the old battery, and insert a new 12V/23A battery, ensuring correct polarity.
- Storage: When not in use for extended periods, store the kit in a cool, dry place away from direct sunlight.
Troubleshooting
| Problem | Possible Cause | Solution |
|---|---|---|
| Outlet not responding to remote. | Low remote battery, out of range, or pairing issue. | Replace remote battery. Ensure outlet is within 100 ft range. Re-program/pair the outlet and remote (refer to 'Programming/Pairing Instructions'). |
| Indicator light on remote does not light up. | Remote battery is dead or incorrectly installed. | Replace the 12V/23A battery, ensuring correct polarity. |
| Connected appliance does not turn on. | Appliance is not plugged in correctly, appliance switch is off, or outlet is not receiving power. | Ensure appliance is securely plugged into the wireless outlet. Check if the appliance's own power switch is in the 'ON' position. Verify the wall socket has power. |
| Interference with other devices. | Rare, but possible with other RF devices. | Move the outlet or the interfering device to a different location. The system is designed to minimize interference. |
Specifications
| Attribute | Detail |
|---|---|
| Model Number | BH9907U-5-2 |
| Product Dimensions | 3.11 x 2.44 x 1.34 inches (per outlet) |
| Weight | 1.26 Pounds (total package) |
| Voltage | 120V AC |
| Material | Polycarbonate (PC) |
| Connector Type | Wireless |
| Remote Battery Type | 12V/23A |
| Certifications | FCC Certified, ETL Listed |

Image: Detailed view of the compact design, showing the dimensions of both the remote control and the plug-in outlet, along with labels for the program indicator, program button, and 3-prong plug.
Warranty and Support
For specific warranty information and details regarding product support, please refer to the official Syantek website or contact their customer service directly. Typically, warranty information is provided with your purchase documentation or available online.
If you encounter any issues not covered in this manual or require further assistance, please visit the Syantek Store on Amazon or the manufacturer's official website for contact information and additional resources.


