
1. Introduction
Thank you for choosing the Kobalt 24V Max 3/8-inch Brushless Right Angle Cordless Drill. This manual provides essential information for the safe operation, maintenance, and troubleshooting of your tool. Please read this manual thoroughly before initial use and retain it for future reference.
2. Safety Information
Always observe basic safety precautions to reduce the risk of fire, electric shock, and personal injury when operating power tools. Keep this information accessible for all users.
General Power Tool Safety
- Work Area Safety: Keep the work area clean and well-lit. Cluttered or dark areas invite accidents. Do not operate power tools in explosive atmospheres, such as in the presence of flammable liquids, gases, or dust.
- Electrical Safety: Avoid body contact with grounded surfaces such as pipes, radiators, ranges, and refrigerators. There is an increased risk of electric shock if your body is grounded.
- Personal Safety: Always wear eye protection. Use appropriate safety equipment such as dust masks, non-skid safety shoes, hard hats, or hearing protection when necessary. Dress properly; avoid loose clothing or jewelry.
- Tool Use and Care: Do not force the power tool. Use the correct power tool for your application. Disconnect the battery pack from the power tool before making any adjustments, changing accessories, or storing power tools.
Specific Drill Safety
- Secure the workpiece. Use clamps or a vise to hold the workpiece. This is safer than using your hand and it frees both hands to operate the tool.
- Hold the tool firmly. Maintain a firm grip on the drill to control torque reaction.
- Be aware of hidden wiring or plumbing. Before drilling into walls, floors, or ceilings, check for hidden electrical wires, gas pipes, or water pipes.
3. Product Overview
The Kobalt 24V Max Right Angle Drill is designed for drilling and driving in confined spaces. It features a brushless motor for extended runtime and durability.
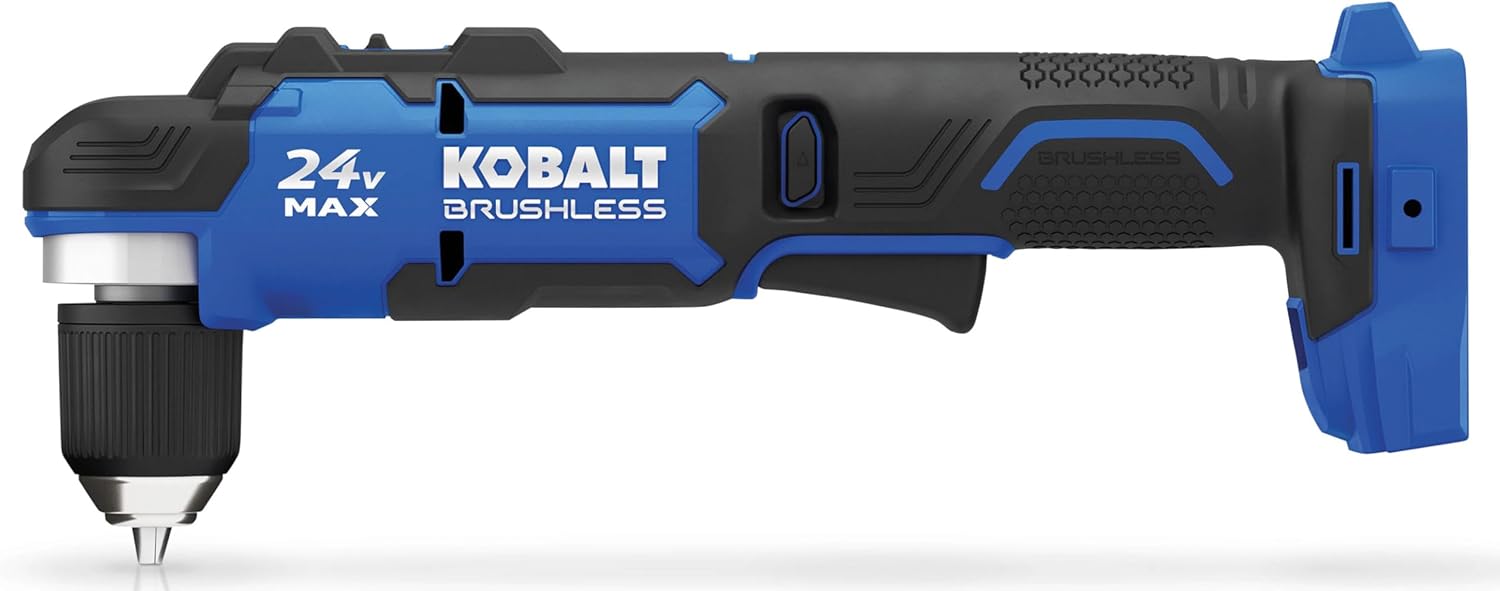
An image showing the Kobalt 24-volt Max 3/8-inch Brushless Right Angle Cordless Drill. The drill is predominantly blue and black, featuring a compact right-angle design. The chuck is visible at the front, and the battery slot is at the rear. '24V MAX' and 'KOBALT BRUSHLESS' branding are visible on the side.
Key Components
- 3/8-inch Chuck: For securing drill bits and driver bits.
- Variable Speed Trigger: Controls the drilling speed based on pressure applied.
- Forward/Reverse Switch: Changes the direction of rotation.
- Speed Selector Switch: Toggles between low (0-600 RPM) and high (0-2000 RPM) speed settings.
- 4-Mode Clutch Settings: Adjusts torque for various applications.
- LED Work Light: Illuminates the work area before and after rotation.
- 24V Max Battery Interface: For connecting compatible Kobalt 24V Max battery packs (battery sold separately).
4. Setup
Battery Installation and Removal
- To Install: Align the battery pack with the battery port on the tool. Slide the battery pack into the tool until it clicks securely into place.
- To Remove: Press the battery release button located on the battery pack. Pull the battery pack out of the tool.
Note: Ensure the battery is fully charged before use. This tool is sold as 'tool only' and does not include a battery or charger.
Chuck Operation (Installing/Removing Bits)
- To Open Chuck: Rotate the chuck collar counter-clockwise until the jaws are open wide enough to accept the desired bit.
- To Install Bit: Insert the drill bit or driver bit into the chuck jaws. Ensure the bit is centered and fully seated.
- To Close Chuck: Rotate the chuck collar clockwise until the bit is firmly gripped by the jaws. Hand-tighten the chuck to prevent the bit from slipping during operation.
- To Remove Bit: Rotate the chuck collar counter-clockwise to loosen the jaws and remove the bit.
5. Operating Instructions
Powering On/Off and Variable Speed Control
- To start the drill, press the variable speed trigger.
- To stop the drill, release the trigger.
- The speed of the drill is controlled by the amount of pressure applied to the trigger. Pressing the trigger further increases the speed.
Speed Settings
The drill features two mechanical speed settings:
- Low Speed (0-600 RPM): Use for high-torque applications, such as driving large fasteners or drilling large holes.
- High Speed (0-2000 RPM): Use for faster drilling in softer materials or smaller holes.
To change the speed setting, locate the speed selector switch on top of the drill. Slide the switch to the desired position (1 for low speed, 2 for high speed). Ensure the drill is stopped before changing speed settings.
Clutch Settings
The 4-mode clutch allows you to adjust the torque output to prevent over-driving screws or damaging the workpiece. Rotate the clutch collar to select the desired setting. Higher numbers indicate higher torque.
Forward/Reverse Rotation
The forward/reverse switch is located above the trigger. Push the switch to the left for forward rotation (drilling/driving). Push it to the right for reverse rotation (removing screws/bits). Center position locks the trigger for safety.
LED Work Light
The integrated LED light illuminates the work area when the trigger is pressed. It also features a pre-light and afterglow function, staying on briefly before and after rotation to enhance visibility.
6. Maintenance
Regular maintenance ensures optimal performance and extends the life of your tool.
Cleaning
- Keep the tool's air vents clear and free of debris to prevent overheating.
- Use a clean, dry cloth to wipe down the exterior of the tool. Do not use solvents or harsh chemicals.
- Periodically clean the chuck jaws to ensure proper bit gripping.
Storage
- Store the tool in a dry, secure location, out of reach of children.
- Remove the battery pack from the tool before storage.
- Avoid storing the tool in direct sunlight or areas with extreme temperatures.
Battery Care
- Always use the specified charger for your Kobalt 24V Max battery packs.
- Do not store battery packs in a discharged state for extended periods.
- Protect battery packs from moisture and extreme temperatures.
7. Troubleshooting
This section addresses common issues you might encounter with your drill.
| Problem | Possible Cause | Solution |
|---|---|---|
| Drill does not start | Battery not installed correctly Battery discharged Forward/Reverse switch in center (locked) position | Reinstall battery pack securely Charge battery pack Move switch to forward or reverse position |
| Loss of power during operation | Battery low Overload | Charge battery pack Reduce pressure on the tool or use a lower speed setting |
| Bit slips in chuck | Chuck not tightened sufficiently Bit shank is dirty or damaged | Retighten chuck firmly Clean or replace the bit |
| Excessive vibration | Bent or damaged bit Loose chuck | Replace the bit Ensure chuck is tightened properly |
8. Specifications
Technical specifications for the Kobalt 24V Max Right Angle Cordless Drill.
| Feature | Specification |
|---|---|
| Brand | Kobalt |
| Model Number | KRAD 1224B-03 |
| Power Source | Battery Powered (24V Max Lithium-Ion) |
| Motor Type | Brushless |
| Chuck Size | 3/8-inch |
| Maximum Torque | 250 in-lbs |
| Speed Settings | 0-600 RPM (Low) / 0-2000 RPM (High) |
| Clutch Settings | 4 Modes |
| Item Weight | 3.28 pounds |
| Product Dimensions | 13.11 x 4.88 x 3.19 inches |
| UPC | 692042011627 |
9. Warranty and Support
For warranty information or technical support, please refer to the documentation included with your purchase or visit the official Kobalt website. Keep your proof of purchase for warranty claims.
For further assistance, you may contact Kobalt customer service through their official channels.