1. Introduction
This manual provides essential instructions for the installation, operation, and maintenance of your new HQparts carburetor. This carburetor is designed as a replacement part for specific Harbor Freight Chicago Electric generator models. Please read this manual thoroughly before attempting any installation or maintenance procedures.
Important Compatibility Note: Amazon compatibility information may not be 100% accurate and is primarily for search purposes. Before purchasing or installing, carefully compare the provided images, model numbers, and OEM part numbers to ensure proper fitment for your specific generator. For further verification, you may contact the seller with photos of your old parts or the model number.
2. Product Components
Your HQparts carburetor package includes the following items:
- 1 x Carburetor assembly
- 3 x Gaskets (various sizes for proper sealing)
- 1 x Fuel Filter
- 1 x Fuel Line
- 1 x Intake Manifold

Figure 1: Complete HQparts Carburetor Replacement Kit. This image displays all components included in the package: the main carburetor unit, a fuel filter, a fuel line, various gaskets, and an intake manifold.
3. Setup and Installation
Safety First: Always ensure the generator is turned off, cooled down, and disconnected from any power source (e.g., spark plug wire removed) before beginning any installation or maintenance. Work in a well-ventilated area and wear appropriate personal protective equipment.
- Prepare the Generator: Turn off the fuel supply valve. Place a suitable container under the carburetor to catch any residual fuel.
- Remove Air Filter Assembly: Carefully detach the air filter housing and any associated components to gain access to the carburetor.
- Disconnect Fuel Line: Use pliers to loosen the clamp on the fuel line connected to the old carburetor. Disconnect the fuel line and allow any remaining fuel to drain.
- Disconnect Linkages and Wires: Carefully note or photograph the connections of any throttle linkages, choke linkages, and electrical wires (if present) to the old carburetor. Disconnect them.
- Remove Old Carburetor: Unbolt the old carburetor from the engine. Ensure all old gaskets are removed from the mounting surfaces.
- Install New Gaskets and Intake Manifold: Place the new gaskets in their correct positions between the engine, intake manifold, and the new carburetor. Ensure they are properly aligned to prevent air or fuel leaks. Install the new intake manifold if replacing.
- Mount New Carburetor: Carefully position the new HQparts carburetor onto the mounting studs, ensuring it aligns with the gaskets and intake manifold. Secure it with the original bolts, tightening them evenly.
- Reconnect Linkages and Wires: Reattach all throttle and choke linkages, and any electrical wires, exactly as they were on the old carburetor. Verify smooth operation of the throttle and choke.
- Install New Fuel Filter and Fuel Line: Replace the old fuel filter with the new one provided. Connect the new fuel line from the fuel tank to the new fuel filter, and then from the fuel filter to the carburetor. Secure all connections with clamps.
- Reassemble Air Filter: Reinstall the air filter housing and any other components removed earlier.
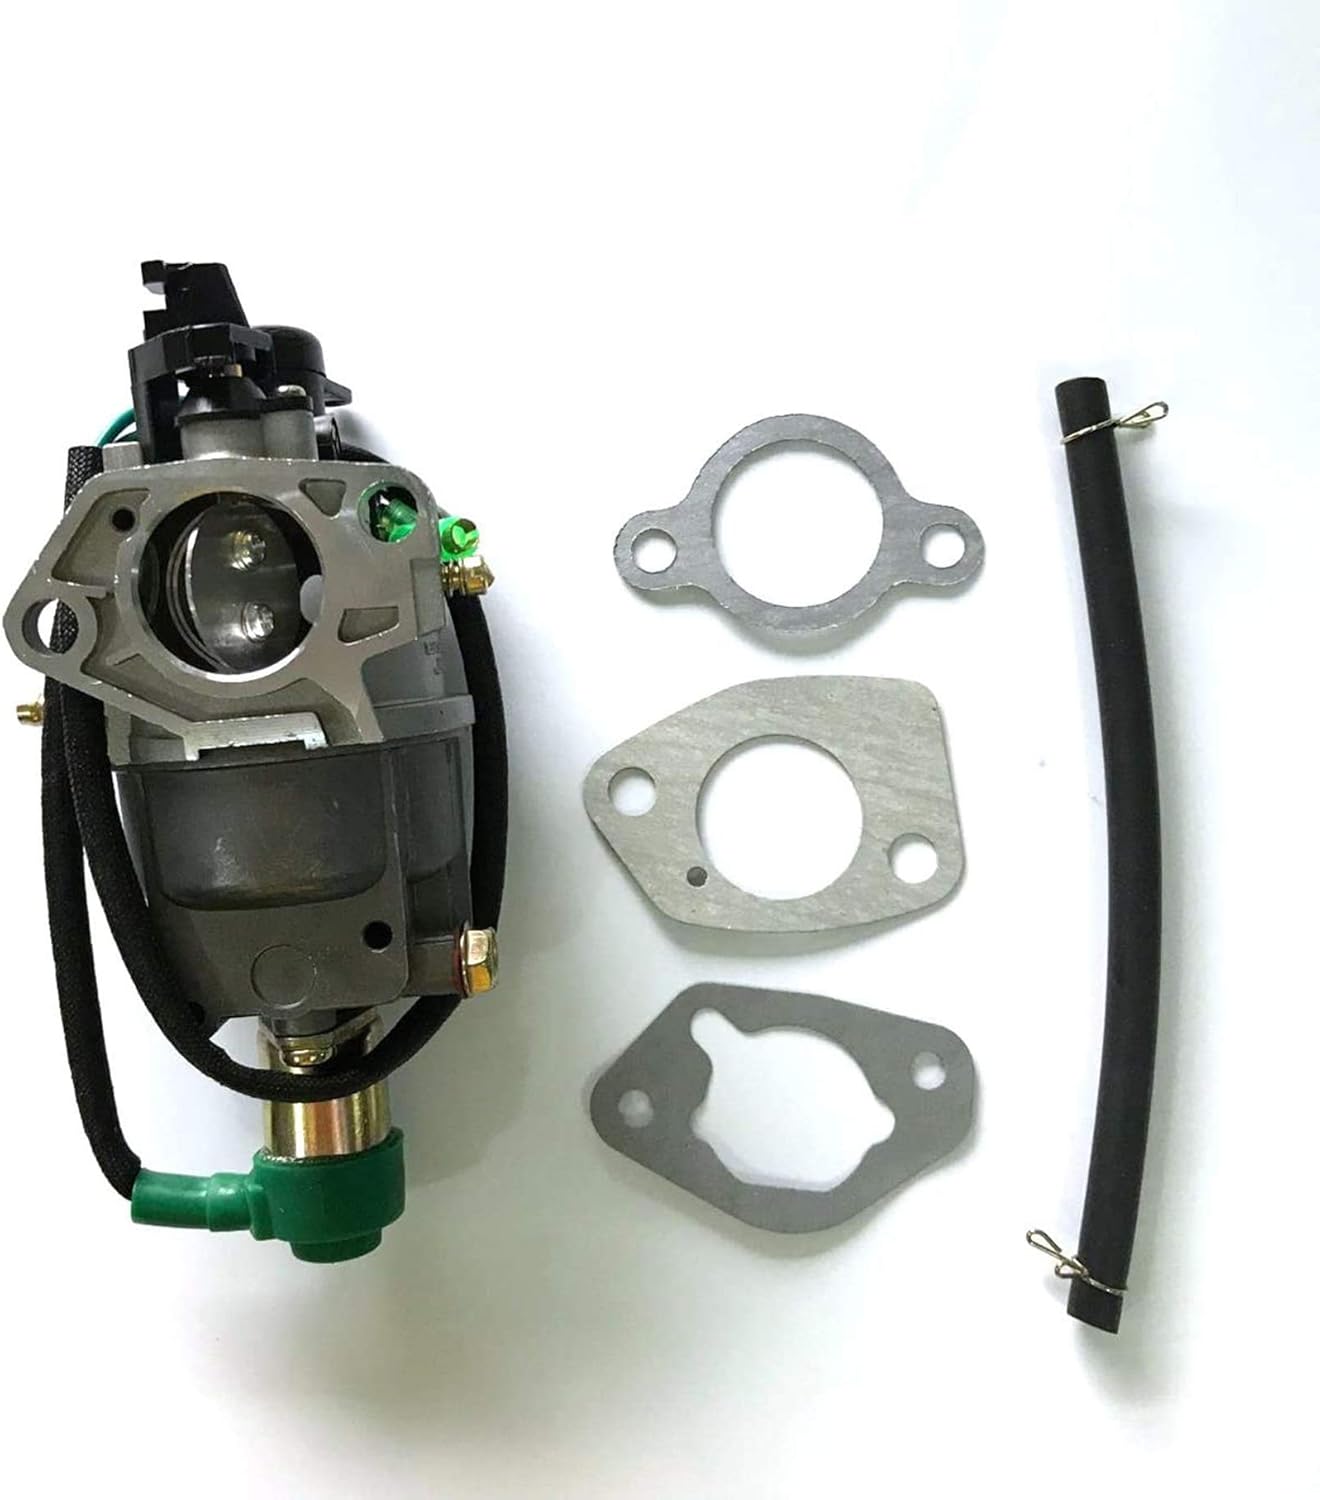
Figure 2: Close-up view of the HQparts carburetor, showing the included gaskets and fuel line. This illustrates the primary components involved in the mounting and fuel connection process.
4. Operating Instructions (After Carburetor Replacement)
After successful installation, follow these steps to prepare your generator for operation:
- Restore Fuel Supply: Open the fuel supply valve on the generator. Allow a few minutes for the fuel to flow into the carburetor float bowl. You may need to prime the carburetor if your generator has a priming bulb.
- Check for Leaks: Visually inspect all fuel line connections and carburetor mounting points for any signs of fuel leakage. Address any leaks immediately before proceeding.
- Reconnect Spark Plug Wire: Reattach the spark plug wire.
- Start Generator: Follow your generator's specific starting procedure (e.g., set choke, turn ignition, pull recoil starter or press electric start button).
- Initial Run and Adjustment: Allow the generator to run for a few minutes. The engine should run smoothly. If the engine runs rough or stalls, minor idle speed or mixture adjustments may be necessary. Refer to your generator's original owner's manual for specific adjustment procedures, if applicable.
5. Maintenance
Regular maintenance ensures optimal performance and longevity of your carburetor and generator.
- Fuel Quality: Always use fresh, clean fuel. Stale or contaminated fuel is a primary cause of carburetor issues. Consider using a fuel stabilizer if the generator will be stored for extended periods.
- Fuel Filter: Inspect and replace the fuel filter periodically, or if it appears clogged or dirty. A clean fuel filter prevents debris from reaching the carburetor.
- Carburetor Cleaning: If the generator experiences fuel-related issues (e.g., rough running, hard starting), the carburetor may require cleaning. This typically involves disassembling the carburetor, cleaning jets and passages with carburetor cleaner, and replacing gaskets. This procedure should only be performed by individuals with appropriate mechanical knowledge.
- Storage: Before long-term storage, it is recommended to run the generator until the fuel tank is empty, or drain the fuel from the tank and carburetor float bowl to prevent fuel degradation and gumming.
6. Troubleshooting
If your generator experiences issues after carburetor replacement, consider the following common troubleshooting steps:
- Generator Not Starting:
- Check fuel level and ensure the fuel valve is open.
- Verify spark plug is clean and properly gapped.
- Ensure choke is set correctly for starting.
- Confirm all fuel lines are securely connected and not kinked.
- Check for proper installation of gaskets; air leaks can prevent starting.
- Rough Running / Stalling:
- Inspect fuel filter for clogs.
- Ensure fuel is fresh and free of water or debris.
- Check for loose connections on the carburetor or intake manifold.
- Verify throttle and choke linkages are operating freely and correctly.
- Fuel Leaks:
- Tighten all fuel line clamps.
- Inspect gaskets for proper seating and damage.
- Ensure the carburetor float bowl is securely tightened.
If issues persist after performing these checks, it is recommended to consult a qualified service technician or refer to your generator's original service manual.
7. Specifications
| Product Type | Replacement Carburetor Assembly |
| Brand | HQparts |
| Compatibility | Harbor Freight Chicago Electric 98838, 98839, 13HP, 6500W Generators |
| Included Components | Carburetor, 3 Gaskets, Fuel Filter, Fuel Line, Intake Manifold |
8. Warranty and Support
For specific warranty information regarding your HQparts carburetor, please refer to the documentation provided at the time of purchase or contact the seller directly. If you require technical assistance or have questions about installation and compatibility, please reach out to the HQparts customer support team through your purchase platform.


