
Osprey Ariel Plus 70
Osprey Ariel Plus 70 Women's Backpacking Backpack Instruction Manual
Model: Ariel Plus 70
Introduction
The Osprey Ariel Plus 70 is a women's-specific backpacking backpack designed for extended trips and heavy loads. It features a robust LightWire frame for stable carry, custom adjustable fit components, and integrated organizational elements. This manual provides detailed instructions for the proper setup, operation, and maintenance of your backpack.

Image: The Osprey Ariel Plus 70 backpack in black, showcasing its overall design and multiple compartments from a side perspective.
Key Features
- Custom Fit System: Features a Fit-on-the-Fly hipbelt, Fit-on-the-Fly shoulder straps, and an adjustable torso length for personalized comfort and stability.
- Load Capacity: Engineered for a stable, close-to-body carry, suitable for managing substantial loads on challenging terrain.
- Removable DayLid: The top lid detaches and converts into a functional daypack for shorter excursions from base camp.
- Integrated Raincover: Includes a raincover made with bluesign approved fabrics and DWR treatments free from PFAS, ensuring gear protection in wet conditions.
- Sleeping Bag Compartment: A zippered lower compartment with a removable divider allows for organized storage of a sleeping bag.
Setup and Fitting
Achieving a proper fit is crucial for comfort and load distribution. The Ariel Plus 70 offers extensive adjustability.
1. Torso Length Adjustment
The backpack's torso length can be adjusted to match your back length. Loosen the webbing straps at the top of the shoulder harness and slide the harness up or down along the frame until the hipbelt sits comfortably over your hip bones and the shoulder straps curve over your shoulders without gapping or digging.

Image: A hiker wearing the Osprey Ariel Plus 70 backpack, demonstrating the effectiveness of the custom fit system during movement.
2. Fit-on-the-Fly Hipbelt Adjustment
The hipbelt extends and retracts to provide a custom wrap around your hips. Adjust the hipbelt pads by pulling them forward or pushing them back along the main hipbelt webbing until they comfortably cup your hip bones. Secure the main hipbelt buckle and tighten the webbing.
3. Fit-on-the-Fly Shoulder Strap Adjustment
The shoulder straps can also be adjusted for a precise fit. Ensure the straps are snug but not restrictive, allowing for full range of motion. The load lifter straps, located above the shoulder straps, should be tightened to pull the pack closer to your body, transferring weight to the hipbelt.
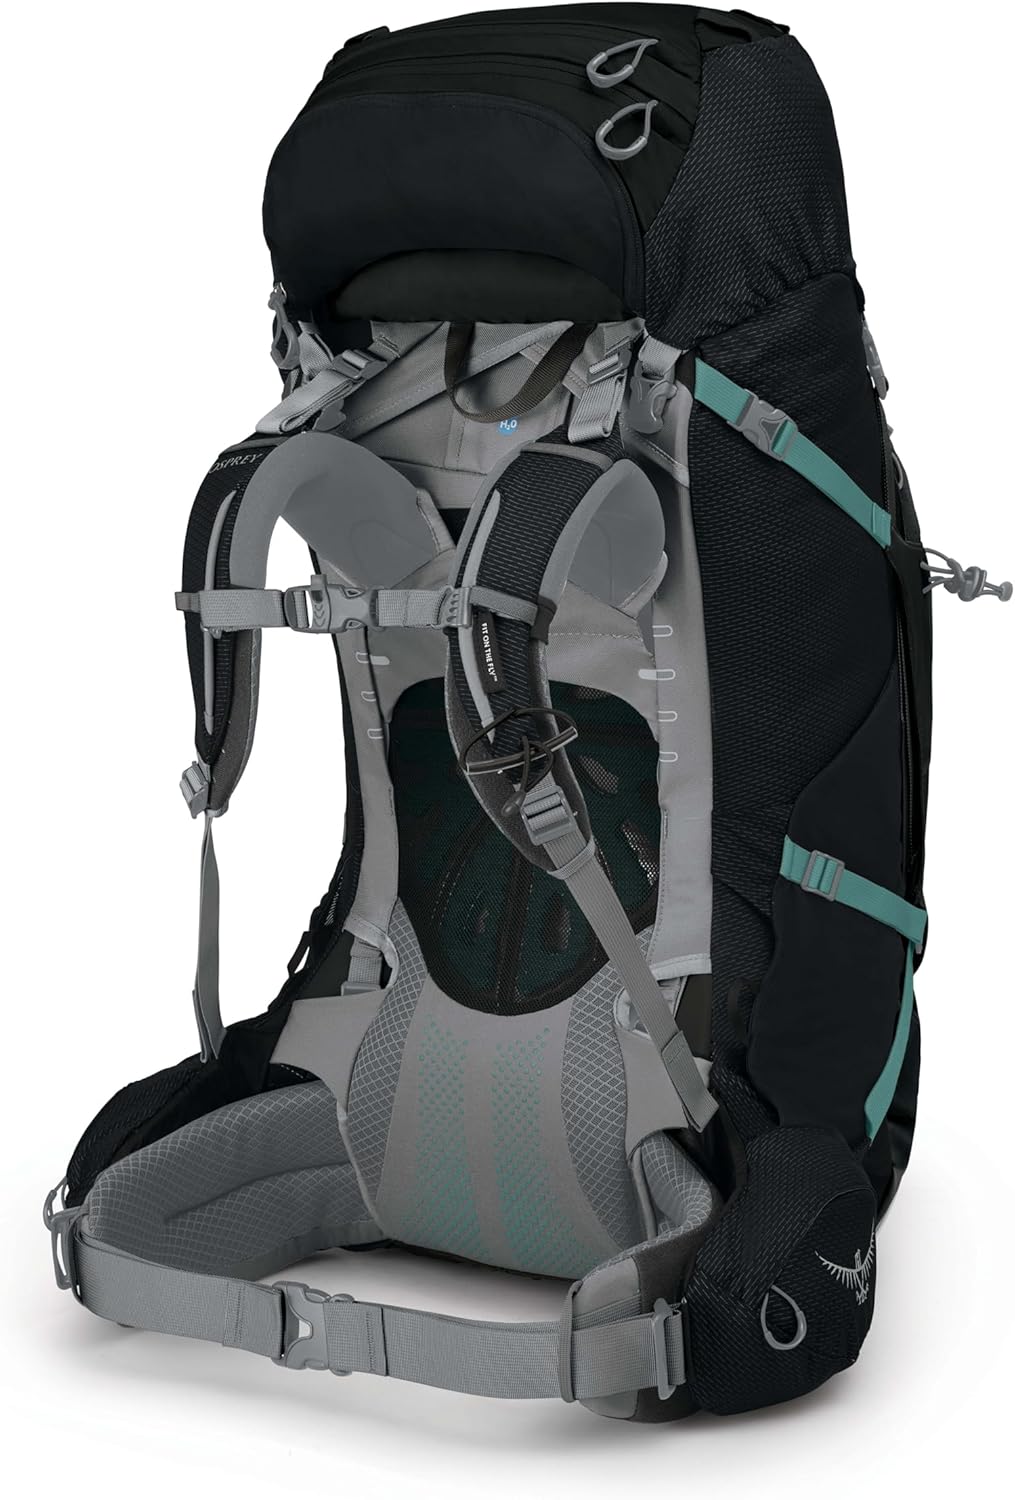
Image: Rear view of the Osprey Ariel Plus 70, highlighting the adjustable harness system and padded hipbelt for a customized fit.
4. Sternum Strap
Adjust the sternum strap across your chest to a comfortable height and tension. This helps stabilize the shoulder straps and distribute weight.
5. Sizing Chart Reference
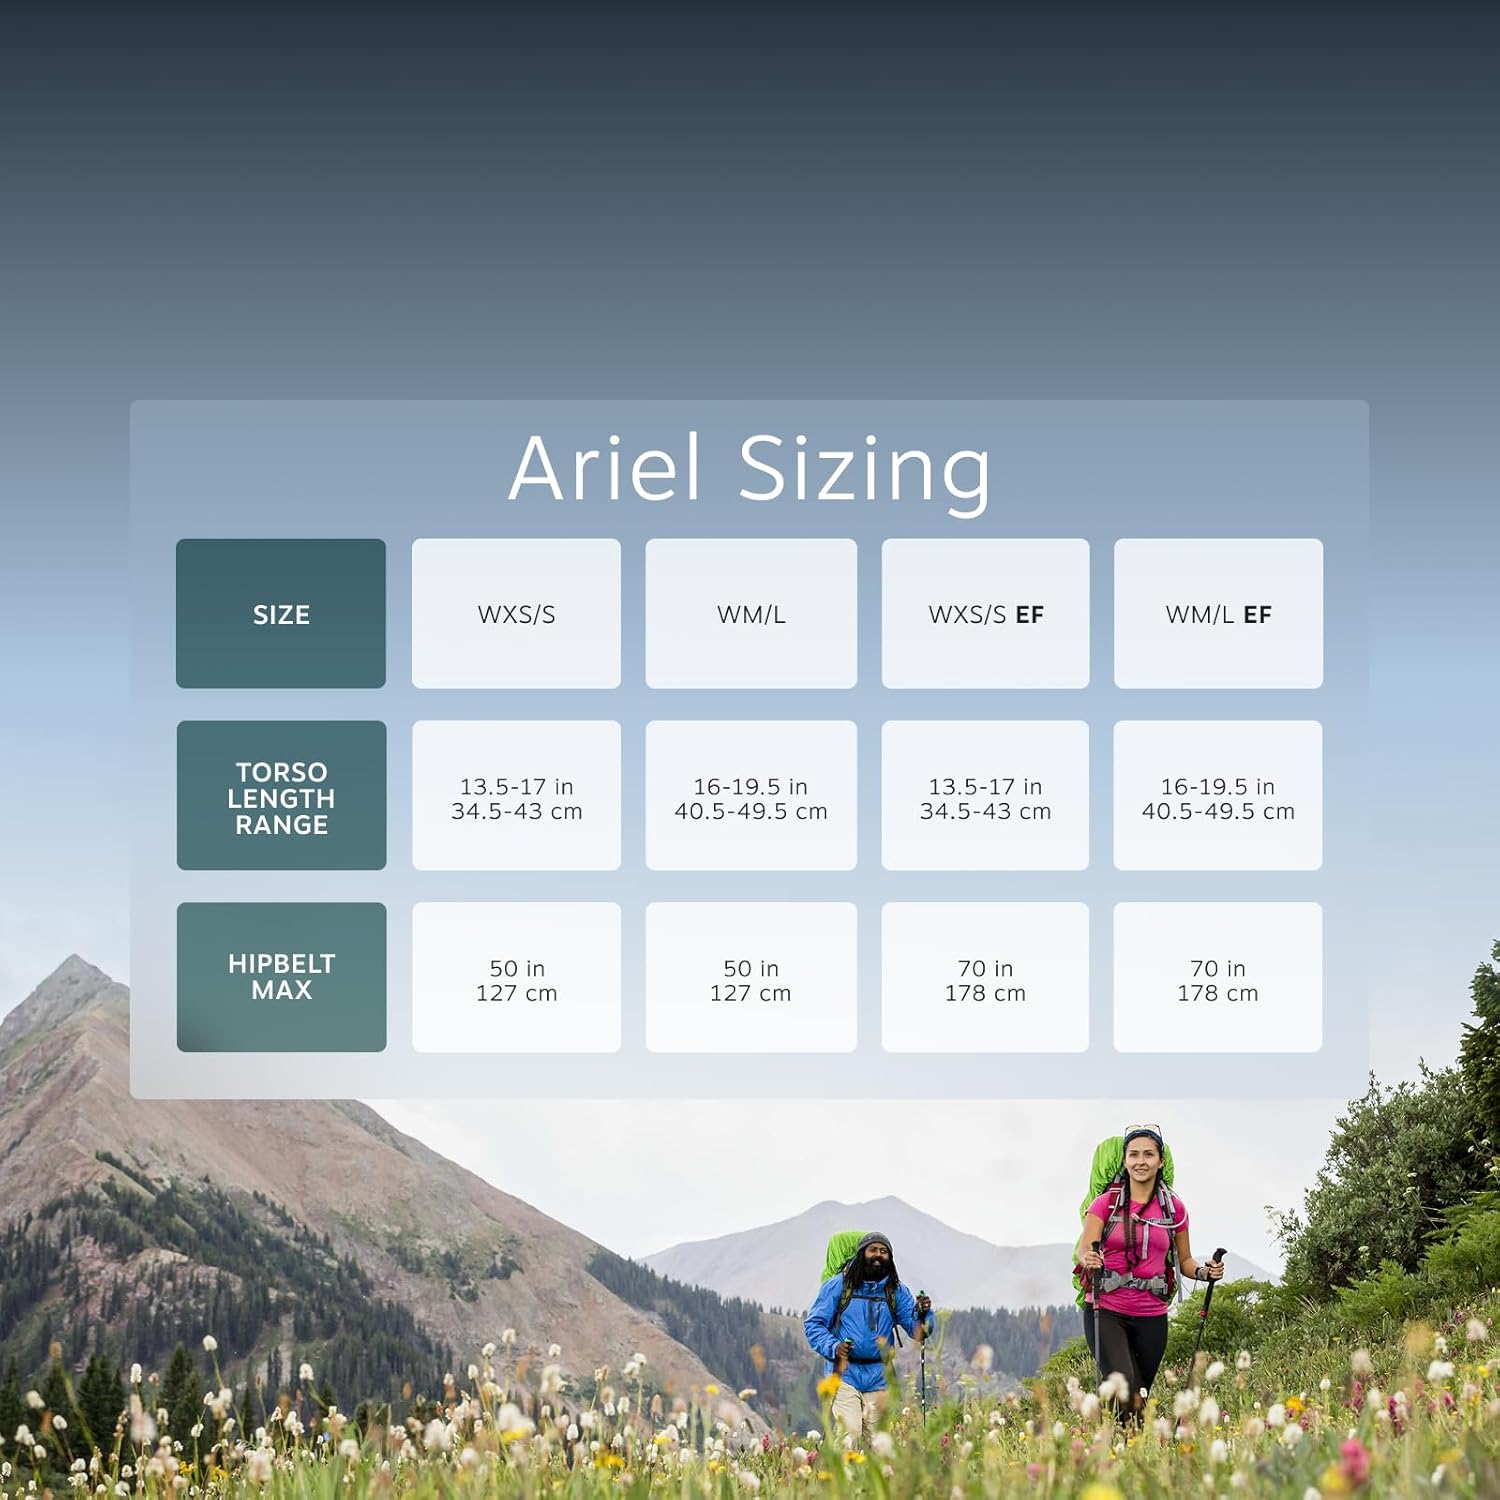
Image: A detailed sizing chart for Osprey Ariel backpacks, providing torso length ranges and maximum hipbelt measurements for different sizes (WXS/S, WM/L).
Operating the Backpack
Packing Your Backpack
Distribute weight evenly, placing heavier items closer to your back and centered. Lighter, bulkier items can go further from your back, and frequently accessed items in external pockets.
Using the DayLid
To convert the top lid into a daypack:
- Unclip the top lid from the main pack body.
- Locate the hidden shoulder straps within the lid.
- Attach the straps to the designated loops on the lid to form a small daypack.

Image: A person wearing the detachable top lid of the Ariel Plus 70, converted into a compact daypack for shorter excursions.

Image: Front view of the Osprey DayLid, showcasing its compact design and zippered pockets when used as a standalone daypack.
Deploying the Raincover
The integrated raincover is stored in a dedicated pocket, typically at the bottom of the pack. Pull it out and stretch it over the entire backpack, securing it with the elasticized edges and toggle closures to protect your gear from rain.
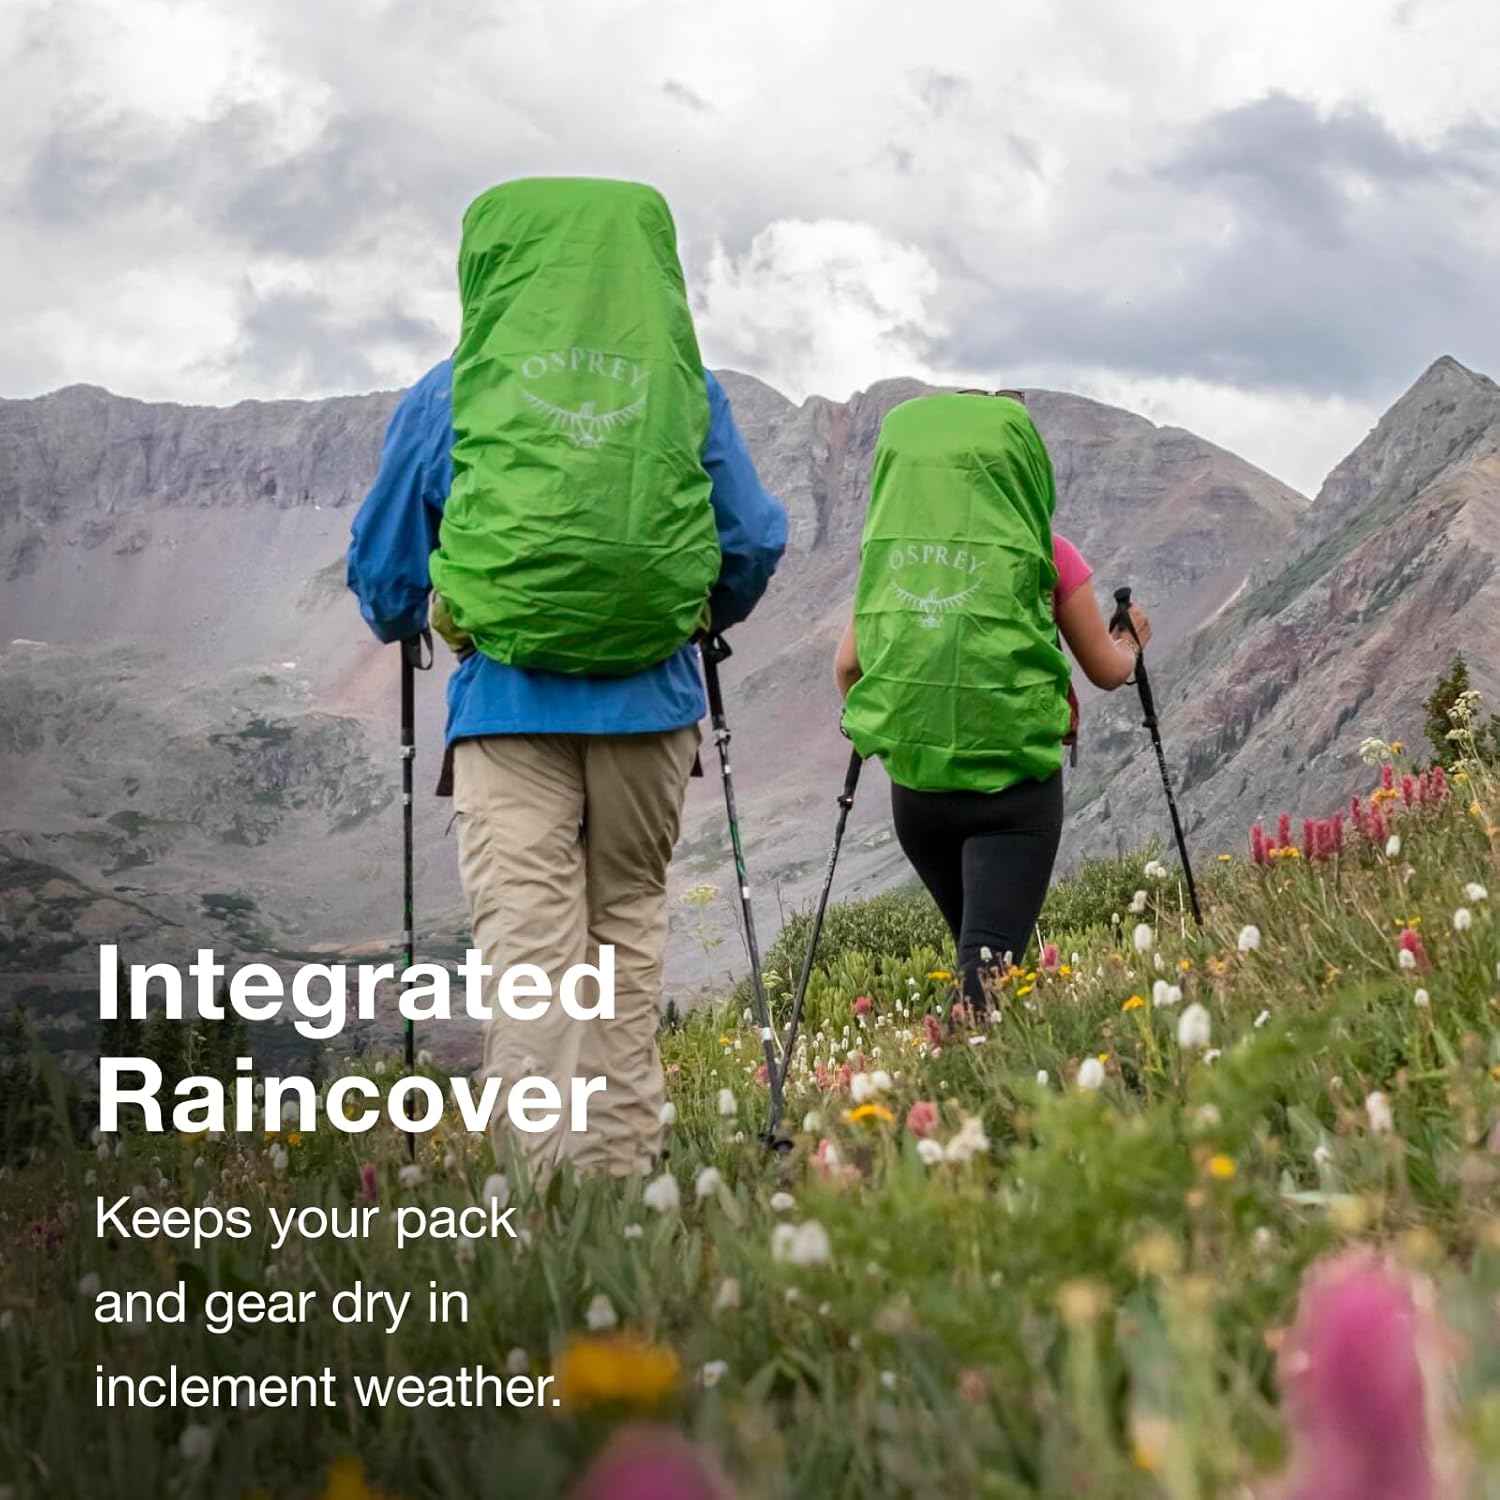
Image: Two hikers on a trail, demonstrating the integrated raincovers deployed over their Osprey backpacks for weather protection.
Maintenance
Cleaning Instructions
To maintain the longevity of your Osprey Ariel Plus 70 backpack, follow these care instructions:
- Hand Wash Only: Do not machine wash or tumble dry.
- Use mild soap and cold water.
- Scrub gently with a soft brush or cloth to remove dirt.
- Rinse thoroughly to remove all soap residue.
- Hang to air dry completely in a shaded, well-ventilated area. Avoid direct sunlight or heat sources.
- Ensure the pack is completely dry before storing to prevent mildew.
Storage
Store your backpack in a cool, dry place away from direct sunlight and extreme temperatures. Ensure all zippers are closed and straps are loosely buckled to maintain the pack's shape.
Troubleshooting
Discomfort During Wear
- Issue: Shoulder pain or hip discomfort.
- Solution: Re-evaluate your fit. Ensure the torso length is correct, the hipbelt is centered on your hip bones, and the load lifter straps are engaged. Adjust the Fit-on-the-Fly components for a snug, custom fit.
Pack Feels Unstable
- Issue: Backpack sways or feels off-balance.
- Solution: Check your packing. Heavy items should be close to your back and centered. Utilize compression straps to cinch down the load and prevent shifting.
Difficulty Accessing Items
- Issue: Cannot easily reach frequently needed gear.
- Solution: Plan your packing. Place essential items in hipbelt pockets, side pockets, or the top lid for quick access.
Specifications
| Feature | Detail |
|---|---|
| Model | Ariel Plus 70 |
| Capacity | 70 Liters / 4272 cubic inches |
| Dimensions (H x W x D) | 29.53 x 14.96 x 13.39 inches (75 x 38 x 34 cm) |
| Weight | 5.54 lbs (2.51 kg) |
| Department | Women's |
| Manufacturer | Osprey |
| Care Instructions | Hand Wash Only |
| Origin | Imported |
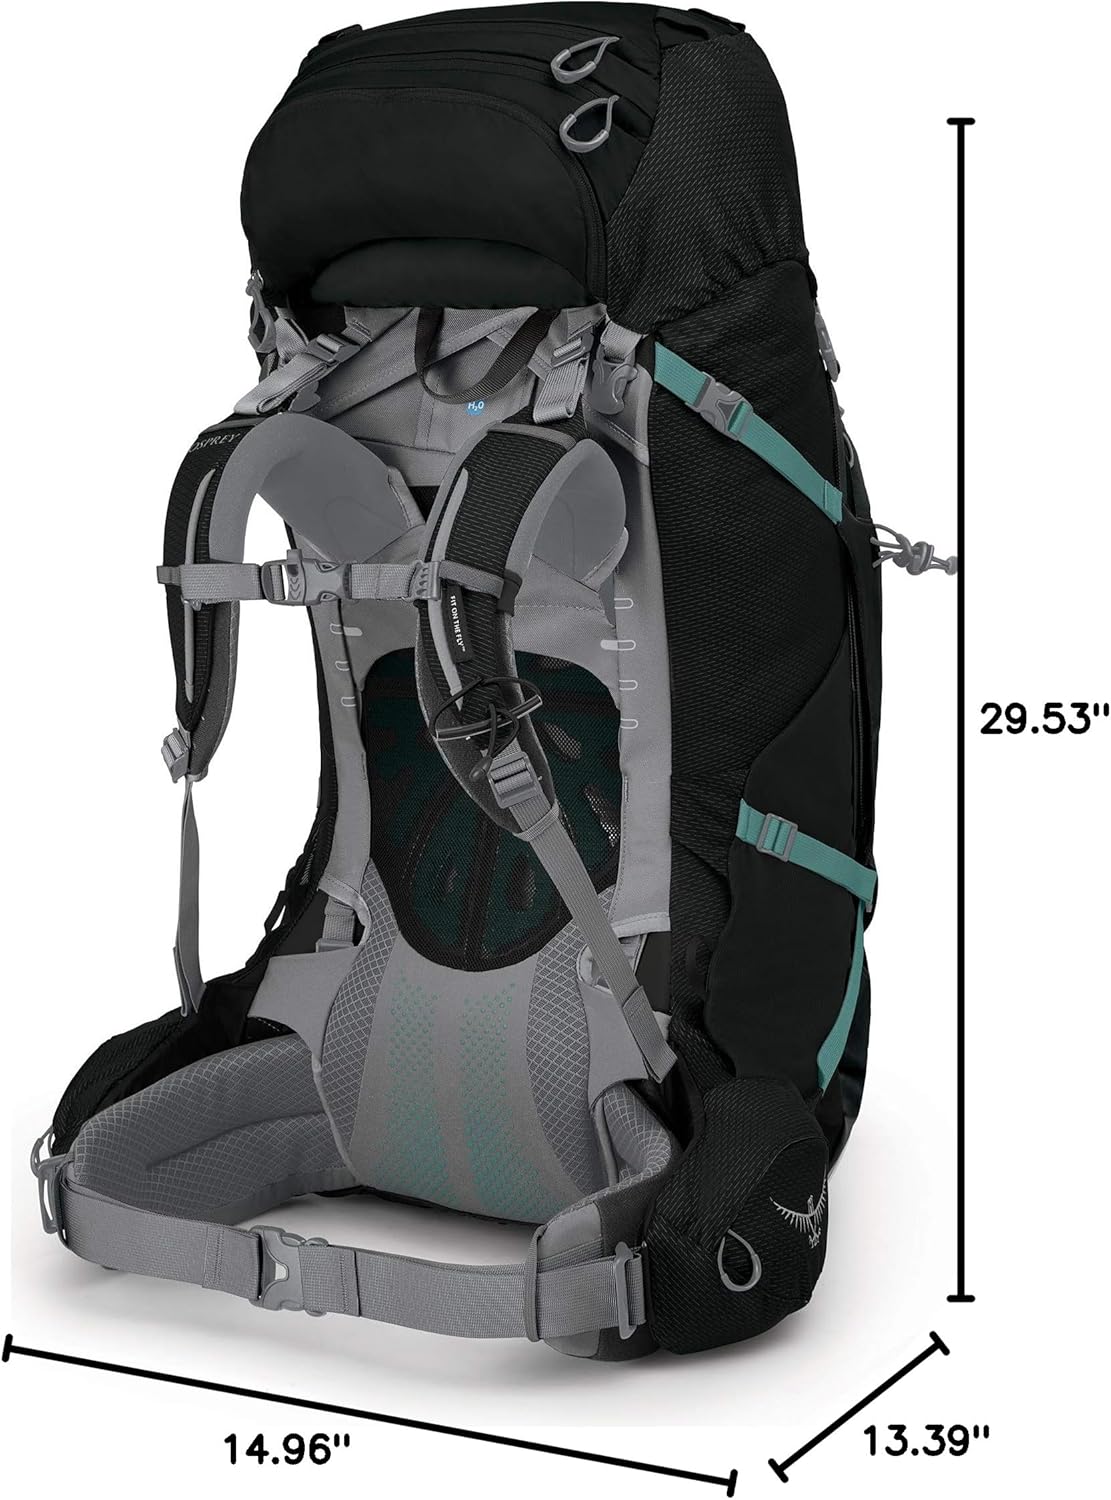
Image: The Osprey Ariel Plus 70 backpack with its key dimensions (height, width, depth) clearly indicated.
Warranty and Support
Osprey All Mighty Guarantee
Osprey is committed to the durability and quality of its products. Under the All Mighty Guarantee, if your product sustains damage for any reason, Osprey will repair or replace it at no cost. This commitment ensures your gear withstands the test of time and adventure.

Image: The Osprey All Mighty Guarantee emblem, stating 'Any Reason. Any Product. Any Era.', highlighting their comprehensive product warranty.
For more details or to initiate a warranty claim, please visit the official Osprey website or contact their customer support.
Related documentsAriel Plus 70


Ask a question about this manual
Ask about setup, troubleshooting, compatibility, parts, safety, or missing instructions. Manuals+ will review the question and use this page’s manual context to help answer it.