1. Introduction
This manual provides detailed instructions for the operation and maintenance of your Tera Mini 1D Laser Barcode Scanner, Model 5200C. Please read this manual thoroughly before using the device to ensure proper functionality and to prevent damage.
2. Package Contents
- Barcode Scanner x1
- USB Cable x1
- 2.4G Dongle x1
- User Manual x1
3. Product Overview
The Tera Mini 1D Laser Barcode Scanner 5200C is a compact and lightweight device designed for efficient 1D barcode scanning. It features multiple connection modes and a durable design.

Image: Tera Mini 1D Laser Barcode Scanner 5200C. This image shows the compact design of the scanner.

Image: Tera Mini 1D Laser Barcode Scanner 5200C held in hand, demonstrating its small size and portability.

Image: Dimensions of the Tera Mini 1D Laser Barcode Scanner 5200C, highlighting its compact and lightweight design (3.4in/87mm length, 1.57in/40mm width, 1.4oz/39g weight).
4. Charging the Scanner
The scanner is equipped with a 650mAh rechargeable battery. To charge the device:
- Connect the provided USB cable to the scanner's charging port.
- Connect the other end of the USB cable to a power source (e.g., computer USB port, 5V1A USB wall adapter).
Important Note:
- Do not use quick charge adapters.
- Suggested charging current: 5V1A.
- This scanner does not support USB Power Delivery (USB PD) charging. Avoid using USB PD standard power adapters and data cables.
- Use the original USB cable included in the package for charging.

Image: The Tera Mini 1D Laser Barcode Scanner 5200C being charged via USB cable, illustrating the 650mAh battery capacity and charging time.

Image: Recommended charging voltage/current (5V/1A) and maximum charging voltage/current (5V/1.2A) for the scanner, with a warning against USB PD chargers.
5. Connection Modes
The Tera 5200C scanner offers three connection methods:
5.1. 2.4GHz Wireless Mode
This mode uses the included 2.4G USB dongle for wireless connection to your computer. The transmission distance can reach up to 656ft (200m) in a barrier-free environment and 98ft (30m) with obstacles.
- Plug the 2.4G USB dongle into an available USB port on your computer.
- Turn on the scanner. It will automatically connect to the dongle.
- Scan barcodes, and the data will be transmitted wirelessly to your computer.
Video: Demonstrates the 2.4GHz wireless connection mode, showing the scanner connecting to a laptop via a USB dongle and scanning a barcode.
5.2. Bluetooth Mode
Connect the scanner to Bluetooth-enabled devices such as smartphones, tablets, or computers.
- Ensure Bluetooth is enabled on your host device (e.g., smartphone, tablet).
- Turn on the scanner.
- On your host device, search for Bluetooth devices and select "BarCode ScannerHID" to pair.
- Once connected, scanned data will appear on your device.
Video: Illustrates the Bluetooth connection process, showing how to pair the scanner with a smartphone and scan barcodes.
5.3. USB Wired Mode
For a direct and reliable connection, use the USB wired mode (Plug and Play).
- Connect the scanner to your computer using the provided USB cable.
- The scanner will be recognized as a keyboard input device.
- Scan barcodes, and the data will be input directly into any active text field.
Video: Shows the USB wired connection, demonstrating how to connect the scanner to a laptop via USB cable for direct data input.

Image: Diagram illustrating the three connection methods: Bluetooth, 2.4GHz Wireless, and USB 2.0 Wired, along with compatible systems (Apple, Android, Windows, X, Linux).
6. Operating Modes
The scanner supports various operating modes to suit different scanning needs.
6.1. Instant Upload Mode
In this mode, scanned barcodes are immediately transmitted to the connected device.
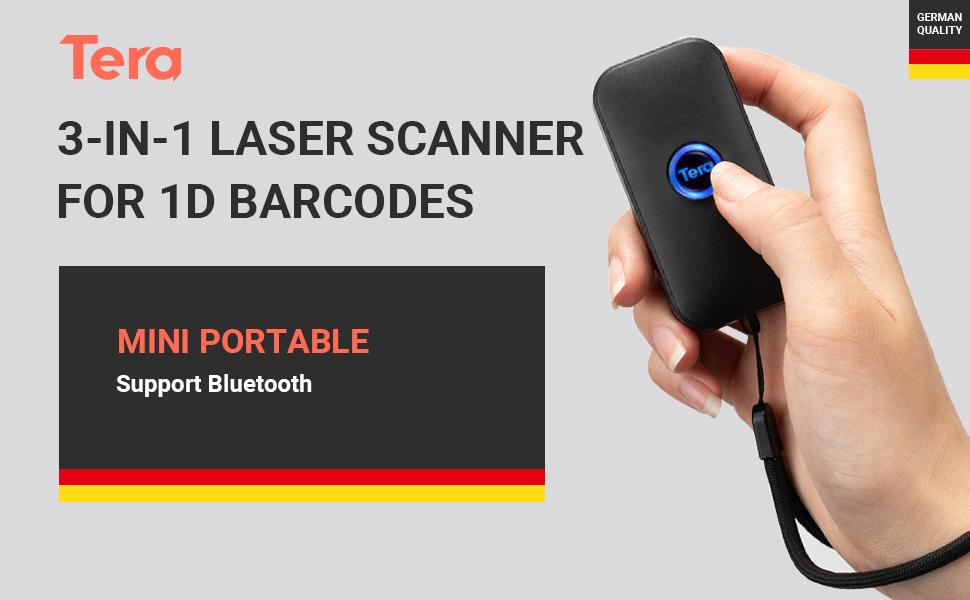
Image: Depicts the Instant Upload Mode, where scanned data is immediately sent to the connected computer.
6.2. Storage Mode
When out of range or not connected, the scanner can store up to 50,000 barcodes in its built-in memory. Data can be uploaded later when a connection is established.
Image: Illustrates the Storage Mode, showing the scanner storing barcodes internally for later upload to a computer.
6.3. Trigger Mode
In Trigger Mode, the scanner activates the laser and scans only when the scan button is pressed.
Video: Demonstrates the Trigger Mode, where the user manually presses the button to initiate each scan.
6.4. Automatic Mode (Hands-free Continuous Auto-Scan)
In Automatic Mode, the scanner's positioning light flashes continuously, allowing for hands-free, continuous scanning without pressing the button for each scan.
Video: Shows the Automatic Mode, where the scanner continuously scans barcodes without manual trigger presses, ideal for hands-free operation.
6.5. Audio, Vibration, and Mute Modes
The scanner provides feedback options for successful scans:
- Audio Mode: Provides an audible beep upon successful scan.
- Vibration Mode: Provides tactile feedback (vibration) upon successful scan, useful in quiet environments or when an audible beep is undesirable.
- Mute Mode: Disables both audio and vibration feedback.
Video: Demonstrates the Audio, Vibration, and Mute modes, showing the different feedback options for successful barcode scans.
7. Scanning Capabilities
The Tera 5200C is designed to accurately capture various 1D barcodes and offers advanced decoding abilities.
- Supported 1D Barcodes: UPC/EAN, Code39, Interleaved 2 of 5, Code93, Code 128, Codabar, Industry25, Matrix25, etc.
- Advanced Decoding: Supports scanning of damaged barcodes, distortion barcodes, colorful barcodes, and reflective barcodes.
Video: Shows the scanner's ability to read various types of barcodes, including damaged, reflective, and colorful codes, and 1D/2D digital barcodes.

Image: Illustrates the scanner's capability to add time prefix and suffix to scanned barcode data, enhancing data management.
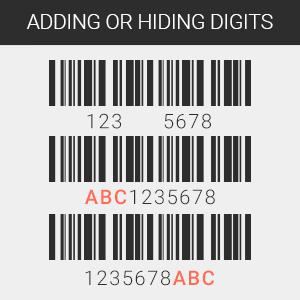
Image: Shows the scanner's support for multiple languages, including English, Spanish, German, Japanese, French, and Italian.

Image: Demonstrates the feature of adding or hiding digits from scanned barcode data, providing flexibility in data output.
8. Compatibility
The Tera 5200C barcode scanner offers high compatibility with a wide range of devices and operating systems.
- Devices: Laptops, PCs, POS systems, smartphones, tablets (iPhone, iPad, Android devices).
- Operating Systems: Windows XP/7/8/10, Mac OS, Linux, Windows Mobile.

Image: Shows the scanner's compatibility with desktop computers, notebooks, tablets, and smartphones.
9. Specifications
| Feature | Detail |
|---|---|
| Brand | Tera |
| Model | 5200C |
| Connectivity Technology | Bluetooth, 2.4G Wireless, USB Wired |
| Compatible Devices | Smartphone, Tablet, PC, POS |
| Power Source | Battery Powered (650mAh rechargeable battery) |
| Product Dimensions | 0.99 x 3.99 x 7.98 cm; 159 g |
| Scan Type | 1D Laser |
| Storage Capacity | Up to 50,000 barcodes (in Storage Mode) |
10. Troubleshooting
- Scanner not connecting via Bluetooth: Ensure Bluetooth is enabled on your device and the scanner is in pairing mode. Forget previous connections and try pairing again.
- No data transmission: Check if the scanner is properly connected (wired, 2.4G dongle, or Bluetooth). Ensure the correct operating mode (Instant Upload or Storage) is selected.
- Scanner not charging: Verify that the USB cable is securely connected and the power source meets the 5V1A requirement. Avoid USB PD chargers.
- Unable to scan certain barcodes: Ensure the barcode is a supported 1D type. Check for damage or poor print quality. Adjust scanning distance.
11. Warranty and Support
For warranty information, technical support, or further assistance, please refer to the official Tera website or contact their customer service. Keep your purchase receipt for warranty claims.

Image: Tera customer support representatives available to assist with product inquiries and technical issues.