
1. Important Safety Information
Read all instructions carefully before using the appliance. Keep this manual for future reference.
- Ensure the unit is placed on a stable, level surface to prevent tipping.
- Do not operate the unit with a damaged cord or plug.
- Keep the air intake and exhaust clear of obstructions.
- Do not insert objects into the air outlets.
- Unplug the unit before cleaning or servicing.
- This appliance is for indoor use only.
2. Product Overview
The COLZER Portable Air Conditioner is a versatile 3-in-1 unit designed to provide cooling, fan, and dehumidification functions for your living space. It features a compact design and comes with a remote control for convenient operation.

Figure 2.1: Front view of the COLZER Portable Air Conditioner unit.
Package Contents:
- Portable Air Conditioner Unit
- Exhaust Hose
- Window Venting Kit (Window Slider Kit, Exhaust Hose Adapter)
- Remote Control
- Drain Hose (for dehumidifier mode)
- User Manual
3. Setup and Installation
Proper installation is crucial for optimal performance of your portable air conditioner. Follow these steps carefully.
3.1 Unit Placement
- Place the unit on a firm, level floor.
- Maintain at least 20 inches (50 cm) of clearance from walls or other objects to ensure proper airflow.
- Ensure the unit is near a grounded electrical outlet.
3.2 Window Kit Installation
- Assemble the window slider kit to fit your window opening. The kit is adjustable for various window sizes.
- Open the window and place the assembled window slider kit into the window frame. Extend the slider to fit snugly and secure it in place.
- Attach the exhaust hose adapter to the opening in the window slider kit.
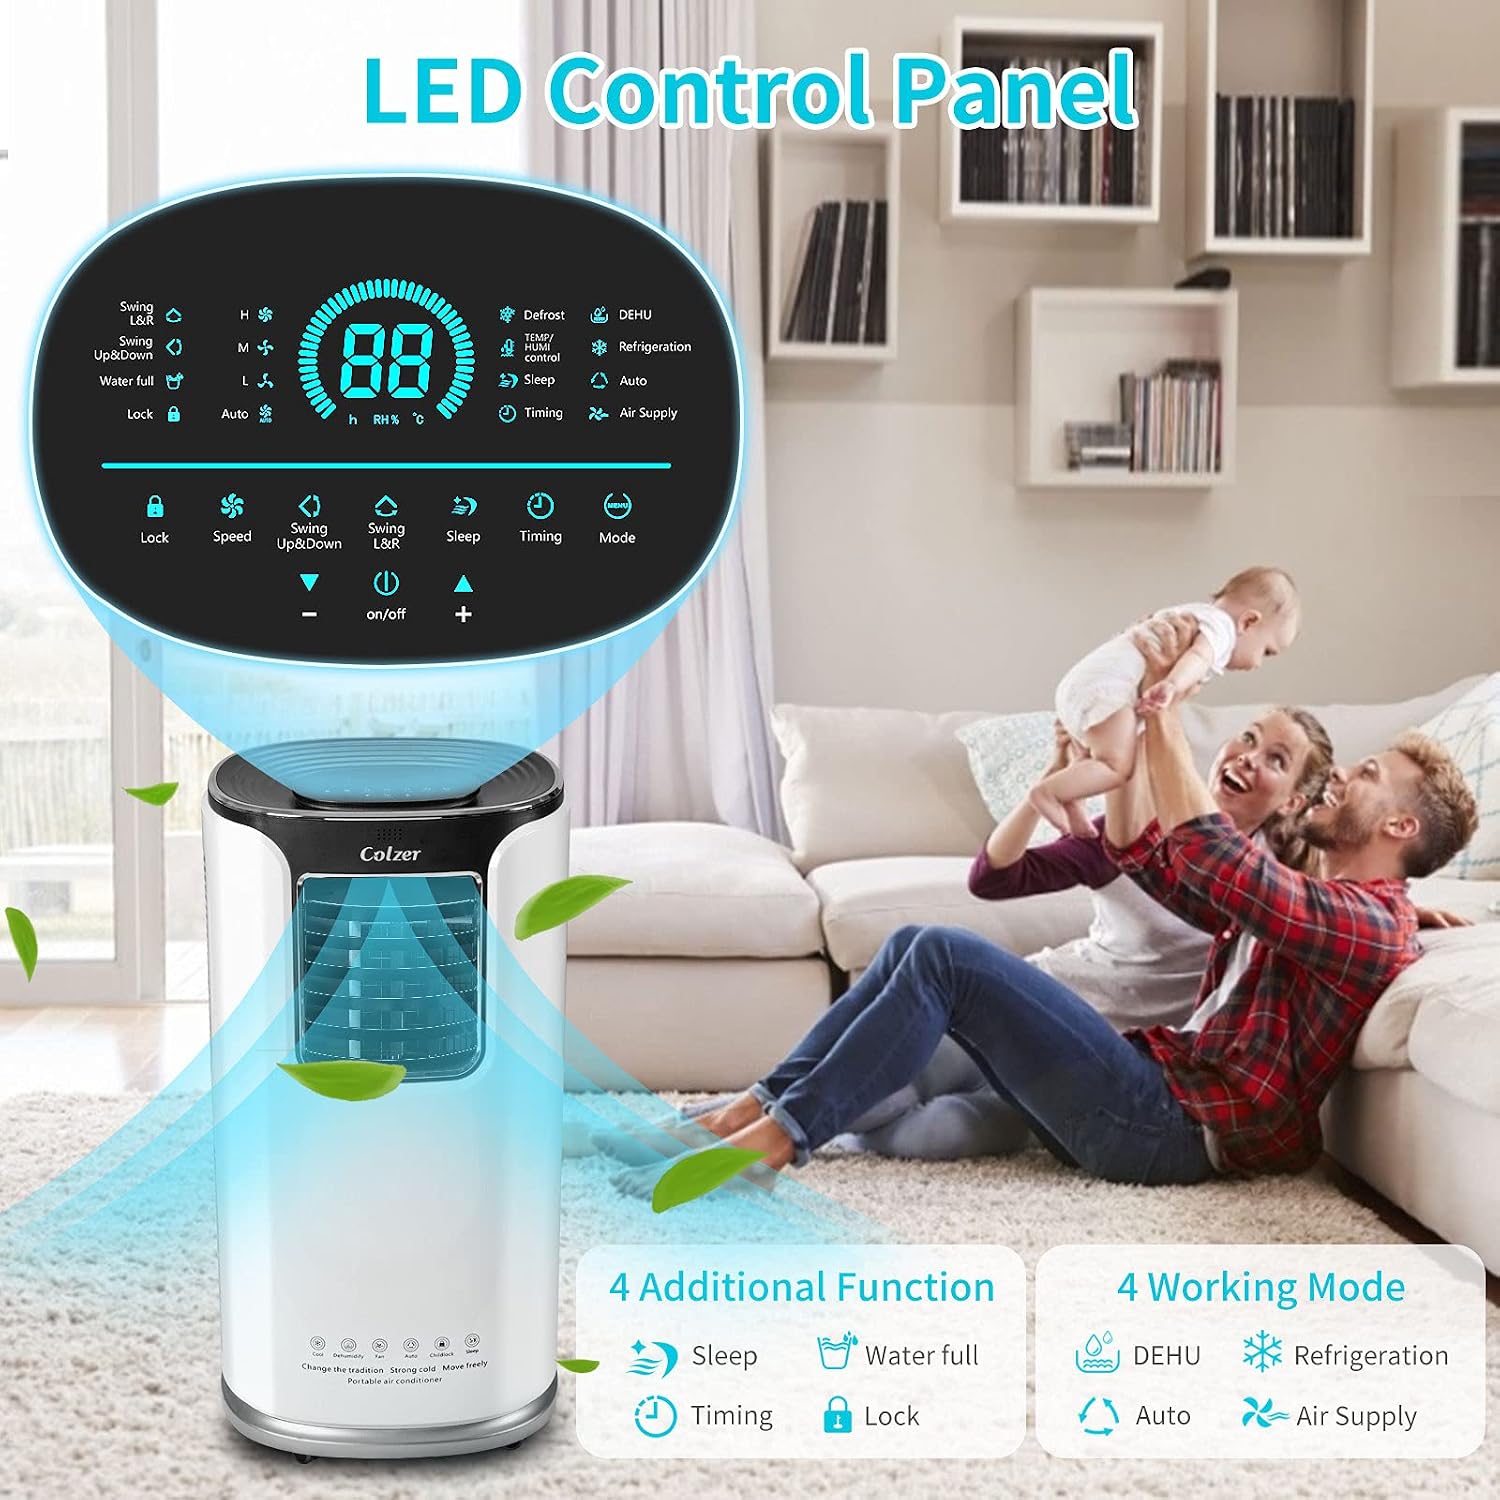
Figure 3.1: Portable AC unit connected to the window venting kit.
3.3 Exhaust Hose Connection
- Screw one end of the exhaust hose onto the exhaust hose adapter that is already attached to the window kit.
- Connect the other end of the exhaust hose to the exhaust outlet on the back of the portable air conditioner unit. Ensure both connections are secure to prevent air leakage.
- Extend the exhaust hose as straight as possible, avoiding sharp bends or kinks, which can reduce efficiency.
3.4 Power Connection
- Plug the power cord into a grounded 120V, 60Hz electrical outlet. Do not use extension cords.
4. Operating Instructions
Your COLZER Portable Air Conditioner can be operated using the control panel on the unit or the included remote control.
4.1 Control Panel Overview

Figure 4.1: Digital display and control buttons on the unit.
- Power Button: Turns the unit ON or OFF.
- Mode Button: Cycles through Cool, Fan, and Dry (Dehumidify) modes.
- Temperature Up/Down Buttons: Adjusts the desired temperature in Cool mode.
- Fan Speed Button: Selects fan speed (Low, Medium, High) in Cool or Fan mode.
- Timer Button: Sets the auto-on or auto-off timer.
- Sleep Button: Activates sleep mode for quieter operation and gradual temperature adjustment.
4.2 Remote Control Functions

Figure 4.2: Remote control for convenient operation.
The remote control duplicates most functions of the control panel. Ensure there are no obstructions between the remote and the unit's receiver.
- Insert two AAA batteries (not included) into the remote control.
- Point the remote control directly at the unit's display panel.
4.3 Operating Modes
- Cool Mode:
Press the Mode button until the "Cool" indicator lights up. Use the Up/Down arrows to set your desired temperature. The unit will cool the room to the set temperature.
- Fan Mode:
Press the Mode button until the "Fan" indicator lights up. In this mode, the unit circulates air without cooling. Use the Fan Speed button to select desired airflow.
- Dry (Dehumidify) Mode:
Press the Mode button until the "Dry" indicator lights up. The unit will remove moisture from the air. In this mode, continuous drainage is recommended. Connect the drain hose to the continuous drain port.
5. Maintenance
Regular maintenance ensures efficient operation and extends the lifespan of your air conditioner.
5.1 Air Filter Cleaning
Clean the air filter every two weeks or more frequently if the unit is used in a dusty environment.
- Unplug the unit from the power outlet.
- Locate the air filter panel, usually on the back or side of the unit.
- Remove the filter.
- Wash the filter with warm, soapy water. Rinse thoroughly and allow it to air dry completely before reinstalling. Do not expose to direct sunlight.
- Reinstall the dry filter and close the panel.
5.2 Water Drainage
The unit has an internal water tank that collects condensed water. When the tank is full, the unit will stop operating and display an error code (e.g., "FL").
- Manual Drainage: Place a shallow pan under the drain port at the bottom rear of the unit. Remove the drain plug to allow water to flow out. Replace the plug once drained.
- Continuous Drainage (Recommended for Dry Mode): Connect the provided drain hose to the continuous drain port and route it to a floor drain or a larger container. Ensure the hose is sloped downwards for proper drainage.
5.3 Storage
If storing the unit for an extended period:
- Drain all condensed water completely.
- Clean the air filter.
- Run the unit in Fan mode for a few hours to dry the interior.
- Unplug the power cord and wrap it neatly.
- Store the unit in a cool, dry place, covered to protect it from dust.
6. Troubleshooting
Before contacting customer support, refer to the following table for common issues and solutions.
| Problem | Possible Cause | Solution |
|---|---|---|
| Unit does not turn on. | No power; power cord unplugged; circuit breaker tripped. | Check power connection; reset circuit breaker. |
| Unit does not cool effectively. | Air filter dirty; exhaust hose blocked or kinked; room too large; windows/doors open. | Clean air filter; check exhaust hose; ensure proper room size; close windows/doors. |
| Unit is noisy. | Unit not on a level surface; fan speed too high. | Place on a level surface; reduce fan speed. |
| Water leakage. | Drain plug loose; continuous drain hose not properly connected or blocked. | Ensure drain plug is secure; check drain hose connection and clear any blockages. |
| "FL" error code displayed. | Internal water tank is full. | Drain the water tank as described in Section 5.2. |
7. Specifications
| Feature | Detail |
|---|---|
| Brand | COLZER |
| Model Number | B08LKG4GKH |
| Cooling Power | 10,000 BTU (ASHRAE) / 14,000 BTU (SACC) |
| Coverage Area | Up to 400 Sq Ft |
| Voltage | 120 Volts |
| Refrigerant | R 410A |
| Control Method | Remote Control, On-unit Panel |
| Functions | Cool, Fan, Dehumidify |
| Color | White |
| UPC | 610452347464 |
Note: Specifications are subject to change without notice for product improvement.
8. Warranty and Support
COLZER products are manufactured to high-quality standards. For warranty information, please refer to the warranty card included with your purchase or visit the official COLZER website.
For technical support, troubleshooting assistance, or to inquire about replacement parts, please contact COLZER customer service. Contact details are typically found on the product packaging or the official brand website.
Online Resources: www.colzer.com (Example link, replace with actual if available)