1. Introduction
This manual provides instructions for the safe and efficient operation of your Jancane Digital Film & Slide Scanner. This device is designed to convert various film and slide formats into digital JPEG images. Please read this manual thoroughly before using the scanner and retain it for future reference.

Image 1.1: Jancane Digital Film & Slide Scanner in a typical use environment.
2. Safety Information
- Do not expose the scanner to water or moisture.
- Avoid placing the scanner near heat sources or in direct sunlight.
- Use only the power adapter provided with the device.
- Do not attempt to disassemble or repair the scanner yourself. Refer all servicing to qualified personnel.
- Keep the scanner and its accessories out of reach of children.
3. Package Contents
Verify that all items listed below are included in your package:
- Jancane Digital Film & Slide Scanner
- USB Cable
- TV Out Cable
- HDMI Cable
- 35mm Film Holder
- 126 Film Holder
- 110 Film Holder
- Super 8 Film Holder
- Cleaning Brush
- Power Adapter
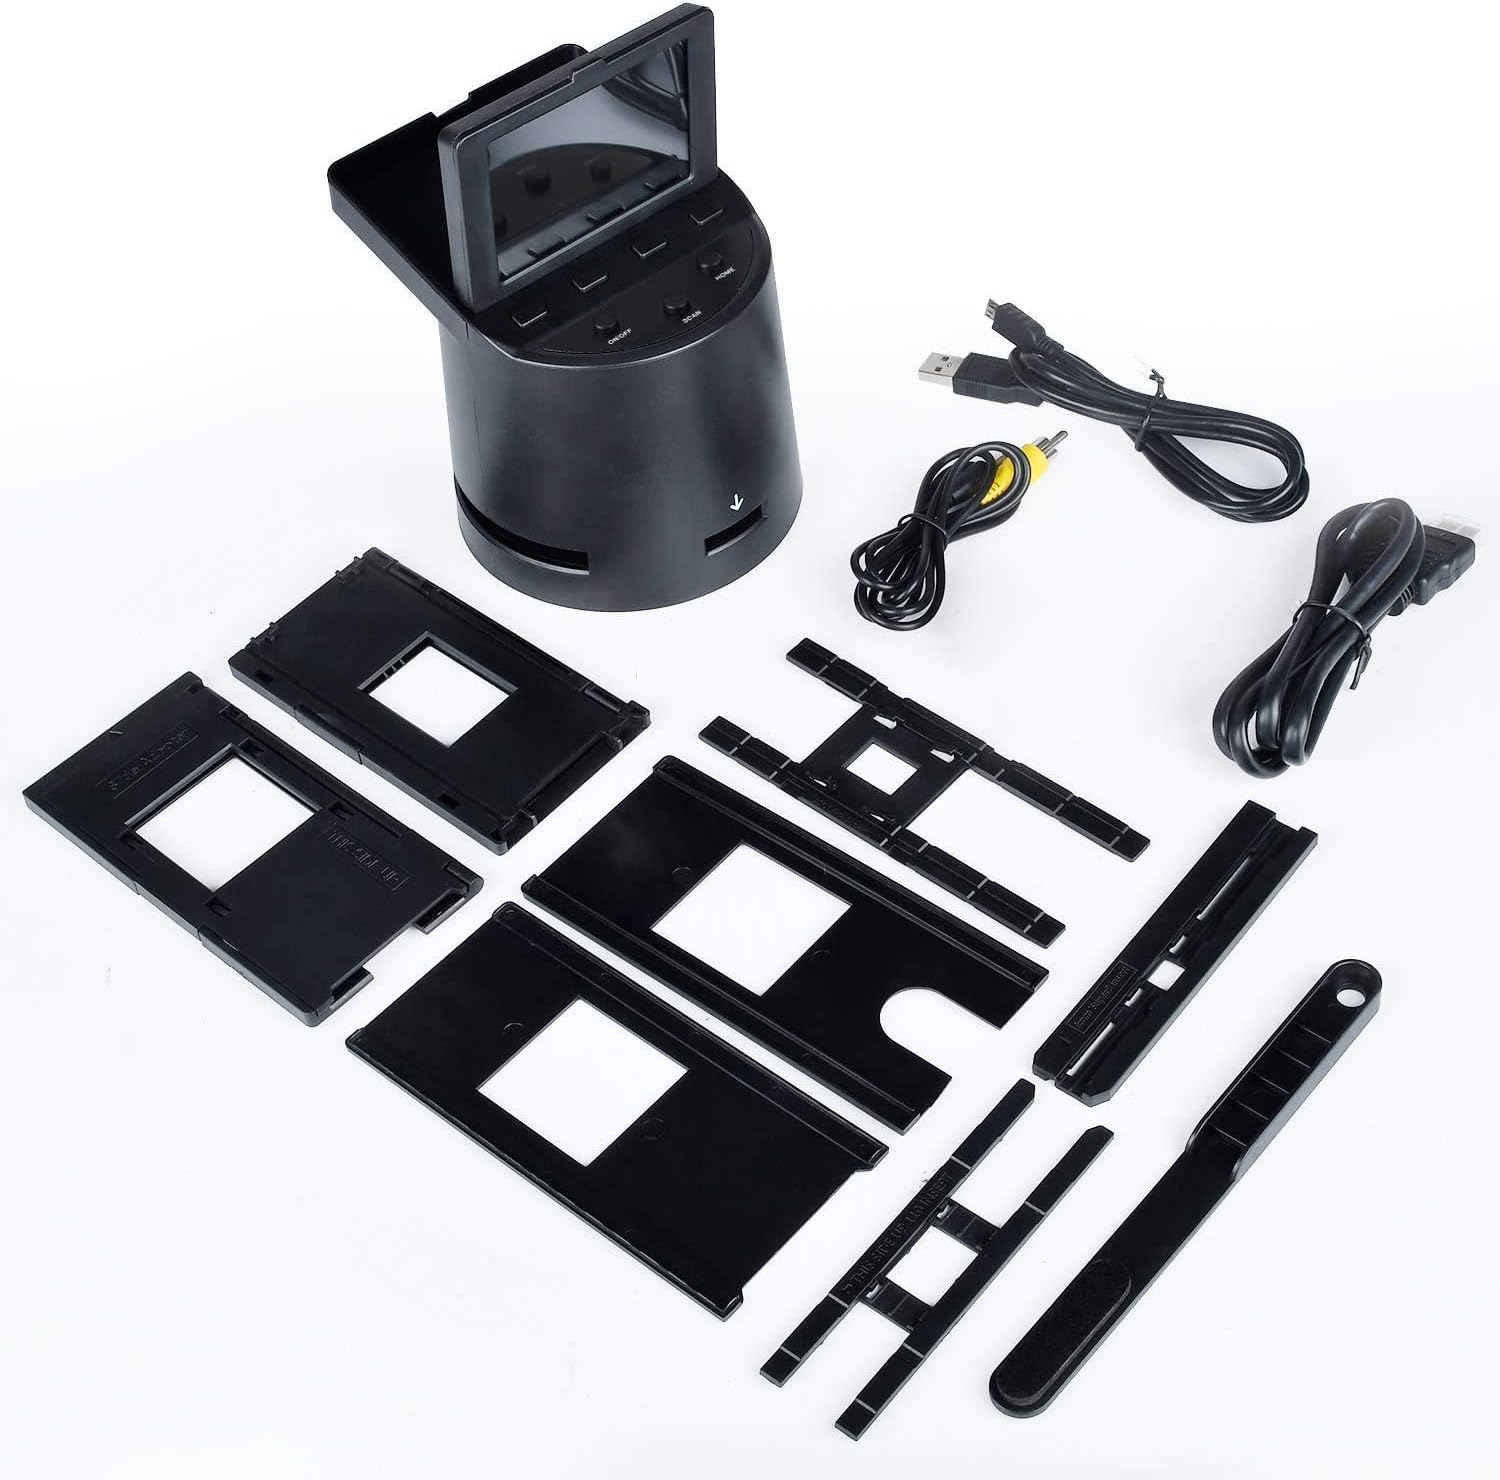
Image 3.1: Contents of the Jancane Digital Film & Slide Scanner package.
4. Product Overview
4.1 Supported Film and Slide Types
The Jancane Digital Film & Slide Scanner supports the following formats:
- 35mm Film
- 126 Film
- 110 Film
- Super 8 Film
- 35mm Slides
- 126 Slides
- 110 Slides
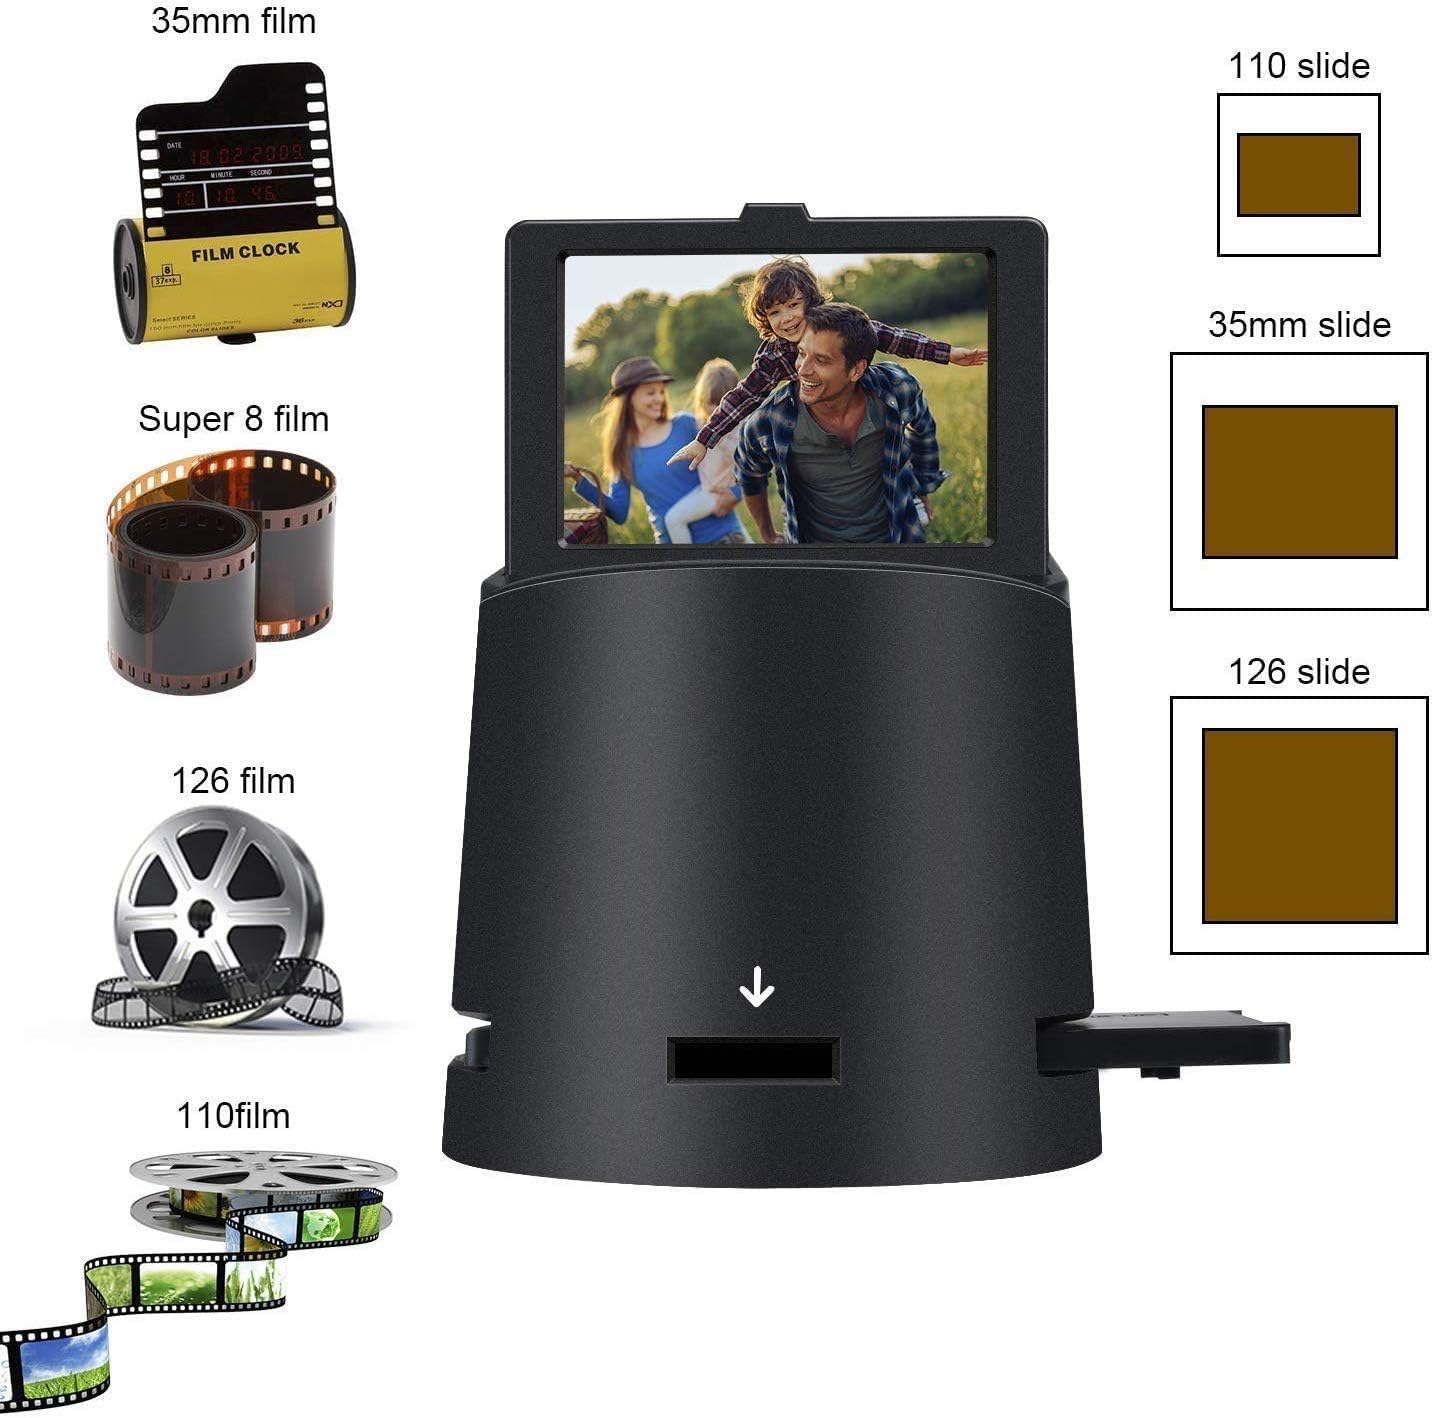
Image 4.1: Various film and slide types compatible with the scanner.
4.2 Scanner Ports and Controls
Familiarize yourself with the ports and controls on your scanner:
- TV OUT: Connects to a television for viewing scanned images.
- SD Card Slot: For inserting an SD card to save scanned images.
- USB Port: Connects to a computer for data transfer or power.
- HDMI Port: Connects to an HDMI-compatible display for high-definition viewing.
- LCD Screen: 3.5-inch tilt-up display for previewing and navigating menus.
- Control Buttons: For navigating menus, adjusting settings, and initiating scans.

Image 4.2: Rear view of the scanner with labeled ports.
5. Setup
- Power Connection: Connect the power adapter to the scanner's USB port and plug it into a power outlet. Alternatively, connect the scanner to a computer via the USB cable.
- Insert SD Card: Insert a compatible SD card (not included) into the SD card slot on the back of the scanner. Ensure it is inserted correctly until it clicks into place.
- Power On: Press the power button to turn on the scanner. The LCD screen will illuminate.
- Language Selection: If prompted, select your preferred language using the navigation buttons and confirm.
6. Operating Instructions
6.1 Loading Film or Slides
Select the appropriate film or slide holder for your media type. Gently insert your film or slide into the holder, ensuring it is flat and correctly aligned. For continuous film strips, use the designated film holders that allow for feeding.

Image 6.1: Continuous loading of film into the scanner.
6.2 Scanning Process
- Insert the loaded film or slide holder into the scanner's input slot.
- On the LCD screen, select the film type (e.g., 35mm Negative, 35mm Slide).
- Adjust exposure and color settings as needed using the scanner's control buttons.
- Preview the image on the LCD screen.
- Press the 'Scan' or 'Capture' button to digitize the image. The scanned image will be saved to the inserted SD card.
6.3 Transferring Images to a Computer
- Connect the scanner to your computer using the USB cable.
- Turn on the scanner. It should appear as a removable storage device on your computer.
- Navigate to the scanner's storage (or the SD card) and copy the JPEG files to your computer.
- Alternatively, remove the SD card from the scanner and insert it into a compatible card reader connected to your computer.
7. Maintenance
- Cleaning the Lens: Use the provided cleaning brush to gently remove dust from the scanner's lens and film path. Do not use liquid cleaners directly on the lens.
- Exterior Cleaning: Wipe the exterior of the scanner with a soft, dry cloth.
- Storage: When not in use, store the scanner in a cool, dry place away from direct sunlight and dust.
8. Troubleshooting
| Problem | Possible Cause | Solution |
|---|---|---|
| Scanner does not power on. | Power cable not connected properly or faulty. | Ensure power cable is securely connected to both the scanner and a working power outlet. Try a different USB port or power adapter. |
| Images have white lines or dots. | Dust or debris on the scanner lens or film. | Clean the scanner lens and film path with the provided brush. Ensure film is clean before scanning. |
| Film does not feed. | Film not inserted correctly into the holder or holder not properly aligned. | Ensure film is flat and correctly seated in the appropriate film holder. Verify the holder is inserted straight into the scanner. |
| Computer does not recognize scanner. | USB cable issue or driver problem. | Try a different USB port or cable. Restart both the scanner and computer. Ensure the scanner is powered on. |
| Poor image quality / exposure. | Incorrect settings or dirty film. | Adjust exposure and color balance settings on the scanner. Clean the film and scanner lens. |
9. Specifications
- Product Dimensions: 4.7 x 4.1 x 4.1 inches
- Item Weight: 1.81 pounds
- Supported Film Types: 35mm, 126, 110, Super 8 Films & Slides
- Sensor: 22 Megapixels
- LCD Screen: 3.5-inch Tilt-Up
- Output Format: JPEG
- Connectivity: USB, HDMI, TV Out, SD Card Slot
- Compatibility: MAC and PC
10. Warranty Information
Please refer to the warranty card included with your product for detailed warranty terms and conditions. Keep your purchase receipt as proof of purchase for any warranty claims.
11. Customer Support
For technical assistance or customer service inquiries, please contact Jancane customer support through the retailer's platform or the contact information provided in your product packaging. When contacting support, please have your product model number (B08LB22WGY) and purchase date available.


