1. Introduction
This manual provides comprehensive instructions for the installation, operation, and maintenance of your ASUS Dual NVIDIA GeForce RTX 3070 OC Edition Gaming Graphics Card. Please read this manual thoroughly before installation and use to ensure proper functionality and to prevent damage.
The ASUS Dual GeForce RTX 3070 is designed to deliver high-performance graphics, leveraging the NVIDIA Ampere architecture. It features advanced cooling technologies and robust construction for a balanced and reliable gaming experience.
2. Package Contents
Verify that all items are present in your product package:
- ASUS Dual NVIDIA GeForce RTX 3070 OC Edition Graphics Card (Model: DUAL-RTX3070-O8G)
- Collection Card
- Speedsetup Manual

Image: The ASUS Dual NVIDIA GeForce RTX 3070 OC Edition Graphics Card shown alongside its retail packaging, highlighting the product and its branding.
3. Specifications
| Feature | Detail |
|---|---|
| Graphics Coprocessor | NVIDIA GeForce RTX 3070 |
| Memory | 8 GB GDDR6 |
| Memory Speed | 14000 MHz |
| Max Screen Resolution | 7680x4320 |
| Video Output Interface | DisplayPort, HDMI (2x Native HDMI 2.1, 3x Native DisplayPort 1.4a) |
| Dimensions (LxWxH) | 16 x 9.2 x 3.5 inches |
| Item Weight | 4.07 pounds |
| Fan Design | Axial-tech Fan Design |
| Additional Features | Dual BIOS, Protective Backplate, GPU Tweak II support |

Image: Rear view of the graphics card, illustrating the two HDMI 2.1 ports and three DisplayPort 1.4a outputs for display connectivity.
4. Installation and Setup
4.1 System Requirements
- PCI Express-compliant motherboard with one dual-width x16 graphics slot.
- Minimum 650W power supply with two 8-pin PCIe power connectors.
- Operating System: Windows 10 64-bit or Linux 64-bit.
- 8GB system memory (16GB recommended).
4.2 Hardware Installation
- Prepare your system: Power off your computer and disconnect all cables. Open your computer case.
- Remove existing graphics card (if applicable): Unscrew any retaining screws and carefully unlatch the PCIe slot retention clip. Gently pull the old card out of the slot.
- Install the ASUS RTX 3070: Align the graphics card with an available PCIe x16 slot on your motherboard. Press down firmly until the card is securely seated and the retention clip locks into place.
- Secure the card: Use screws to fasten the graphics card to the computer case.
- Connect power cables: Connect two 8-pin PCIe power connectors from your power supply to the corresponding ports on the graphics card. Important: Ensure dedicated cables are used; avoid splitters for optimal power delivery.
- Close the case: Replace the side panel of your computer case.
- Connect display: Connect your monitor to one of the DisplayPort or HDMI outputs on the graphics card.

Image: A close-up view of the graphics card, indicating the location for the two 8-pin PCIe power connectors.
4.3 Software Installation
- Power on your system: Turn on your computer.
- Install NVIDIA drivers: Download the latest graphics drivers for the NVIDIA GeForce RTX 3070 from the official NVIDIA website (www.nvidia.com/drivers). Follow the on-screen instructions for installation.
- Install ASUS GPU Tweak II: For advanced monitoring and overclocking, download and install ASUS GPU Tweak II from the official ASUS support website (www.asus.com/support).
5. Operation
5.1 Basic Operation
Once drivers are installed, your graphics card will automatically handle display output. You can adjust display settings through your operating system's display configuration or the NVIDIA Control Panel.
5.2 Axial-tech Fan Design
The card features an Axial-tech fan design with a smaller fan hub and a barrier ring to increase downward air pressure, enhancing cooling efficiency.
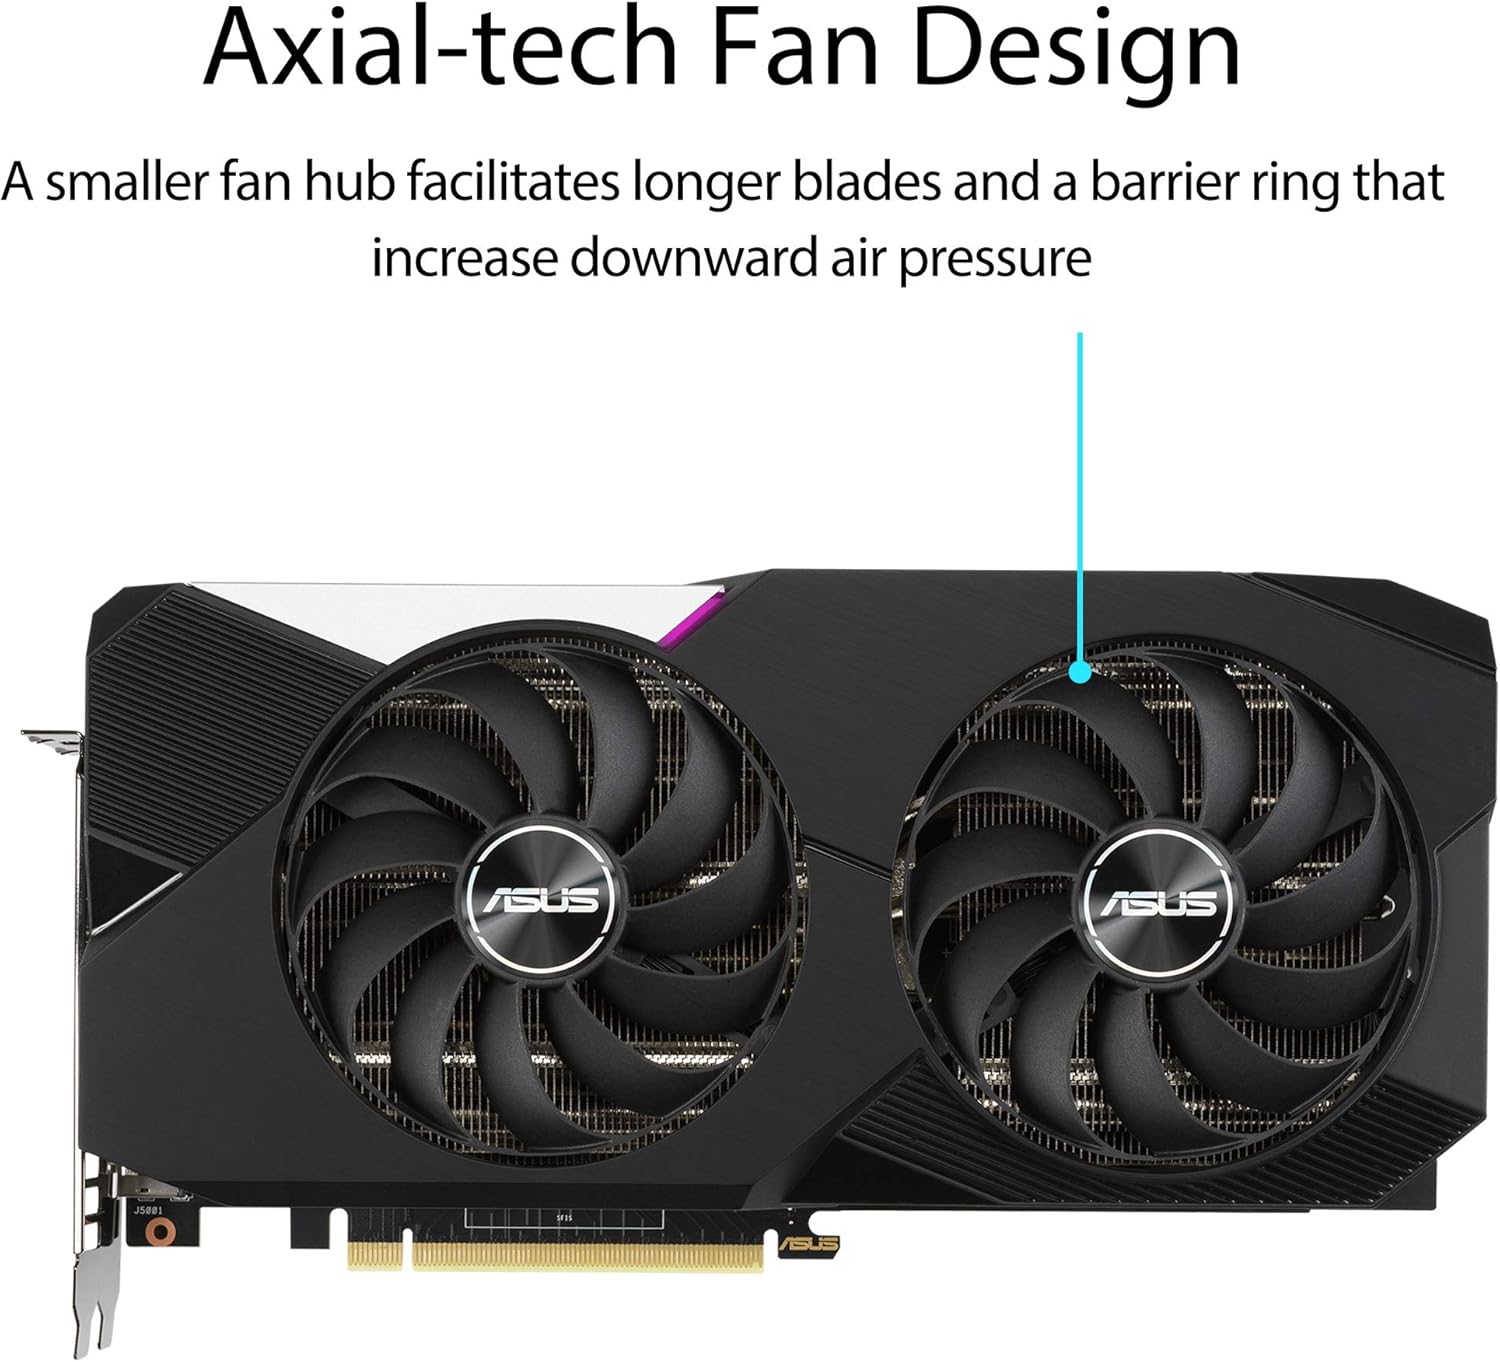
Image: A detailed view of the Axial-tech fan design, illustrating the fan blades and barrier ring that optimize airflow.
5.3 0dB Technology
An advanced controller allows the fans to stop completely when the GPU temperature is below 55 degrees Celsius, providing silent operation during light loads or idle states.

Image: The graphics card with an annotation pointing to the fan, explaining the 0dB technology feature for silent operation at low temperatures.
5.4 Subtle Lighting
The shroud of the graphics card features a subtle illuminated strip that provides a stylish accent to your PC build.

Image: The graphics card featuring its subtle lighting strip, which adds an aesthetic element to the PC build.
5.5 Dual BIOS
The card includes a Dual BIOS feature, allowing users to switch between two distinct BIOS profiles, typically a Performance mode and a Quiet mode, to suit their preferences for clock speeds and fan curves.
5.6 GPU Tweak II
ASUS GPU Tweak II software provides an intuitive interface for performance tuning, thermal control, and system monitoring. Users can adjust GPU clock speed, memory clock, voltage, and fan speed profiles.
6. Maintenance
- Dust Removal: Periodically clean dust from the fans and heatsink using compressed air. Ensure the system is powered off and unplugged before cleaning.
- Driver Updates: Regularly check the NVIDIA website for the latest graphics drivers to ensure optimal performance and compatibility.
- Software Updates: Keep ASUS GPU Tweak II updated for the best experience and access to new features.
7. Troubleshooting
- No Display Output:
- Ensure the graphics card is fully seated in the PCIe slot.
- Verify that all PCIe power connectors are securely attached.
- Check that the monitor cable is correctly connected to the graphics card and the monitor.
- Test with a different display cable or monitor if possible.
- System Instability or Crashes:
- Ensure your power supply meets the minimum wattage requirement (650W).
- Update to the latest NVIDIA graphics drivers.
- Monitor GPU temperatures using GPU Tweak II to ensure it's not overheating.
- If overclocking, revert to default settings to rule out instability.
- Poor Performance:
- Ensure the latest graphics drivers are installed.
- Check background applications that might be consuming system resources.
- Verify that the card is operating in Performance mode if Dual BIOS is available.
8. Protective Backplate
The graphics card is equipped with a rigid protective backplate. This backplate serves to prevent PCB flex and protect against trace damage, enhancing the card's durability and structural integrity.

Image: The reverse side of the graphics card, clearly displaying the robust protective backplate designed to prevent bending and damage.
9. Auto-Extreme Technology
This graphics card is manufactured using Auto-Extreme Technology, an automated manufacturing process that enhances reliability by completing all soldering in a single pass. This reduces thermal strain on components and eliminates the use of harsh cleaning chemicals, resulting in a more environmentally friendly production process and a more reliable final product.
10. Warranty and Support
For warranty information and technical support, please refer to the official ASUS support website or the warranty card included with your product. You can find drivers, manuals, and FAQs at:
Please retain your proof of purchase for warranty claims.


