
1. Introduction
Thank you for choosing the GRIFEMA GA1003 Wall-Mounted Key Safe. This robust and weather-resistant key box provides a secure solution for storing keys, access cards, and other small valuables. Designed for both indoor and outdoor use, it features a 4-digit combination lock for enhanced security and ease of access. Please read this manual carefully before installation and use to ensure proper operation and longevity of your key safe.

Image: The GRIFEMA GA1003 Wall-Mounted Key Safe, showing its grey and black design with the 4-digit combination dial visible on the front. The image also shows the key safe open, revealing the interior compartment and a set of keys.
2. Key Features
- High Security: Equipped with a 4-digit combination lock offering 10,000 possible combinations, significantly more secure than 3-digit locks.
- Robust Construction: Made from durable aluminum alloy for the lock case and zinc alloy for the password wheel, ensuring resistance against hammering and sawing.
- Weather-Resistant: Designed to withstand various weather conditions, including rain, frost, and rust, making it suitable for outdoor installation.
- Large Capacity: Spacious interior capable of holding up to 5 keys and 1 card, or other small valuables like credit cards or jewelry.
- Easy to Use: Simple mechanism for setting and resetting the combination code.
- Wall-Mounted Design: Securely attaches to a wall or other solid surface for permanent installation.

Image: A close-up of the key safe's combination lock, highlighting the 4-digit dial. A hand is shown holding a key with a house-shaped keychain, emphasizing the product's purpose.

Image: The key safe mounted on a brick wall, with a hammer next to it, illustrating its robust and impact-resistant construction. Icons below indicate "Easy to use," "Safe and reliable," and "Waterproof."
3. Product Specifications
| Model Number | GA1003 |
| Dimensions (L x W x H) | 13 x 10 x 5 cm (approx. 4.7" x 3.5" x 1.6") |
| Weight | 430 grams (approx. 456g from description) |
| Material | Aluminum Alloy (lock case), Zinc Alloy (password wheel) |
| Lock Type | 4-Digit Mechanical Combination Lock |
| Capacity | Up to 5 keys + 1 card (or similar small items) |
| Color | Grey |
| Mounting Type | Wall Mount |
| Components Included | 1 x Secure Key Box, Mounting Screws, Wall Plugs |

Image: A detailed diagram showing the dimensions of the GRIFEMA GA1003 key safe in both inches and millimeters, including its height, width, and depth. A warning about not removing the spring steel is also visible.
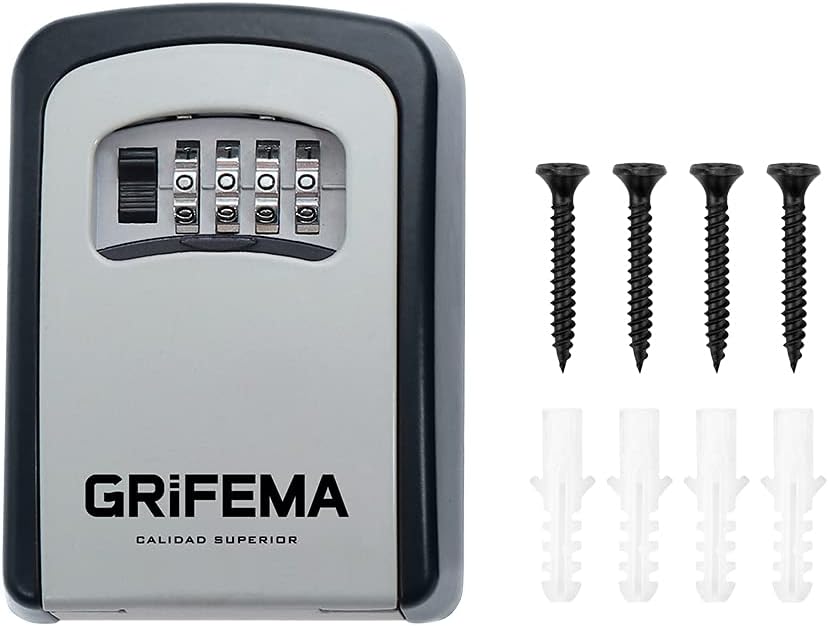
Image: The GRIFEMA GA1003 key safe displayed alongside the included mounting hardware: four black screws and four white wall plugs.
4. Installation Guide
The GRIFEMA GA1003 key safe is designed for wall mounting on a solid surface. Follow these steps for secure installation:
- Choose a Location: Select a discreet and secure location on a solid wall (e.g., brick, concrete, sturdy wood). Ensure the surface is flat and stable.
- Mark Drill Holes: Open the key safe and hold it against the desired mounting surface. Use a pencil to mark the positions of the four mounting holes.
- Drill Holes: Using an appropriate drill bit for your wall type, drill holes at the marked positions. The depth should be sufficient for the wall plugs.
- Insert Wall Plugs: Gently tap the provided wall plugs into the drilled holes until they are flush with the wall surface.
- Mount the Key Safe: Align the key safe's mounting holes with the wall plugs. Insert the provided screws through the key safe's holes and into the wall plugs. Tighten the screws firmly until the key safe is securely fastened to the wall. Do not overtighten.

Image: A four-step visual guide demonstrating the installation process: 1. Adjusting hole position, 2. Punching holes with a drill, 3. Embedding expansion tubes (wall plugs), and 4. Fixing the lock box with screws.
5. Operating Instructions
5.1 Opening the Key Safe (Default Code)
The factory default combination for your GRIFEMA GA1003 key safe is 0000.
- Rotate the dials to align with the default code 0000.
- Pull down the front cover to open the key safe.
5.2 Setting/Changing the Combination Code
It is highly recommended to change the default code immediately after installation. Choose a memorable but secure 4-digit combination.
- Open the Key Safe: Dial the current combination (default is 0000) and open the key safe.
- Locate the Reset Lever: Inside the key safe, on the back of the door mechanism, you will find a small reset lever.
- Move Reset Lever: Push the reset lever from position 'A' to position 'B' (or from left to right, depending on the model's orientation). You may need a small tool like a pen tip to do this.
- Set New Combination: While the lever is in position 'B', rotate the dials to your desired new 4-digit combination. Make sure the numbers are clearly aligned.
- Return Reset Lever: Push the reset lever back to position 'A'. This locks in your new combination.
- Test New Combination: Close the key safe door. Scramble the dials. Then, dial your new combination to ensure it opens correctly. Do not close the key safe until you have successfully tested the new code.

Image: A four-panel visual guide demonstrating how to set the combination code: 1. Dialing the original code, 2. Pushing the reset lever to position B, 3. Setting the new combination and pushing the lever back to A, and 4. Closing and testing the new combination.
5.3 Storing Items
The key safe is designed to hold keys, key cards, and other small valuables. Ensure items are placed neatly inside and do not obstruct the closing mechanism.

Image: A hand placing a set of keys into the open key safe, with an illustration showing that it can hold 5 keys and 1 card, demonstrating its large capacity.

Image: Two scenarios for key storage. The top image shows a hand placing keys into the wall-mounted key safe, with a green checkmark indicating correct usage. The bottom images show keys hidden under a mat or a rock, with red X marks, indicating insecure and incorrect methods of key storage.
6. Maintenance
- Cleaning: Wipe the exterior of the key safe with a soft, damp cloth. Avoid using abrasive cleaners or solvents that could damage the finish.
- Lubrication: Periodically, apply a small amount of silicone-based lubricant to the combination dials and the hinge mechanism to ensure smooth operation, especially if exposed to harsh weather.
- Inspection: Regularly check the mounting screws to ensure they remain tight. Inspect the key safe for any signs of wear, damage, or corrosion.
- Weather Protection: While weather-resistant, prolonged exposure to extreme conditions may affect longevity. Consider a sheltered mounting location if possible.
7. Troubleshooting
| Problem | Possible Cause | Solution |
|---|---|---|
| Key safe will not open. | Incorrect combination entered. Dials not aligned correctly. | Double-check the combination. Ensure each number is precisely aligned with the indicator mark. Try rotating the dials a few times to clear any residual tension before entering the code. |
| Dials are stiff or hard to turn. | Dirt/debris accumulation. Lack of lubrication. | Clean the dials with a soft brush. Apply a small amount of silicone-based lubricant to the moving parts of the dials. |
| Key safe door does not close properly. | Items inside are obstructing the mechanism. Damage to the hinge or latch. | Ensure no items are blocking the door. Check for any visible damage to the hinge or latch. |
| Cannot reset the combination. | Reset lever not fully moved. Incorrect current code entered. | Ensure the key safe is open with the current correct code. Make sure the reset lever is pushed completely to position 'B' before setting the new code, and then returned to 'A'. |
8. Warranty Information
GRIFEMA products are manufactured to high-quality standards. For specific warranty details regarding your GA1003 key safe, please refer to the warranty card included with your purchase or visit the official GRIFEMA website. The warranty typically covers manufacturing defects under normal use conditions.
9. Customer Support
If you encounter any issues or have questions not covered in this manual, please contact GRIFEMA customer support. You can find contact information on the official GRIFEMA website or through your retailer.
For more information, visit the GRIFEMA Store on Amazon.