
Introduction
Thank you for choosing the Duramax ECO PENT ROOF 8x4 Galvanized Metal Garden Shed. This shed is designed for optimal storage of tools and garden machinery, featuring a robust galvanized metal construction with an electrostatic paint finish for enhanced durability and corrosion resistance. Its double sliding doors maximize interior space utilization. This manual provides essential information for the safe assembly, operation, and maintenance of your new garden shed.

Image: The Duramax ECO PENT ROOF 8x4 shed, showcasing its anthracite gray finish and pent roof design in a landscaped garden.
Safety Information
Before beginning assembly or using the shed, please read and understand all safety instructions. Failure to follow these instructions may result in injury or damage to the product.
- Level Surface: Ensure a completely level and stable surface for both the assembly and long-term use of the shed. An uneven base can compromise structural integrity.
- Heavy Components: Exercise extreme caution when handling heavy or large metal components. It is recommended to have at least two people for assembly.
- Assembly Instructions: Always follow the provided assembly instructions carefully, step by step. Do not skip steps or attempt shortcuts.
- Protective Gear: Wear appropriate personal protective equipment, including work gloves to prevent cuts from sharp edges, and eye protection during assembly.
- Children and Pets: Keep children and pets away from the assembly area to prevent accidents.
- Tools: Use only the recommended tools for assembly. Ensure all tools are in good working condition.
Setup and Assembly
The assembly of your Duramax shed requires careful attention to detail and is best performed by two people. Allow ample time for the process.
- Site Preparation: Prepare a firm, level foundation (e.g., concrete slab, paved area) that is slightly larger than the shed's base dimensions. This is crucial for stability and proper door operation.
- Unpack and Identify Parts: Carefully unpack all components and verify against the parts list in your detailed assembly manual. Components are often stamped or clearly marked.
- Base Frame Assembly: Assemble the base frame according to the instructions, ensuring it is square and level.
- Wall Panel Installation: Attach the wall panels to the base frame. Pay close attention to the orientation of each panel. Secure all fasteners as directed.
- Roof Structure Assembly: Construct the roof support beams and attach them to the top of the wall panels.
- Roof Panel Installation: Install the roof panels, ensuring proper overlap and sealing to prevent water ingress.
- Door Frame and Track Installation: Assemble and install the door frame and the upper and lower tracks for the sliding doors.
- Door Installation: Carefully hang the double sliding doors onto their tracks. Adjust as necessary for smooth operation.
- Final Checks: Ensure all screws and fasteners are tightened securely. Check for any gaps or misalignments.

Image: An interior view of the shed, illustrating the robust roof support structure and the vertical wall panels, indicating the internal framework.
Operating Instructions
The Duramax ECO PENT ROOF shed features double sliding doors for convenient access and efficient use of space.
- Opening Doors: To open, grasp the door handle and slide the door horizontally along its track. The double doors allow for a wide opening.
- Closing Doors: Slide the doors back until they meet in the center. Ensure they are fully closed to protect contents from weather and secure the shed.
- Securing the Shed: The shed is designed to accommodate a padlock (not included) for added security. Attach the padlock through the designated holes on the door handles.
- Ventilation: The shed includes integrated vents near the roofline to promote air circulation and reduce condensation. Ensure these vents remain unobstructed.

Image: The shed with its double sliding doors fully open, demonstrating the ample storage capacity for various garden tools and equipment.
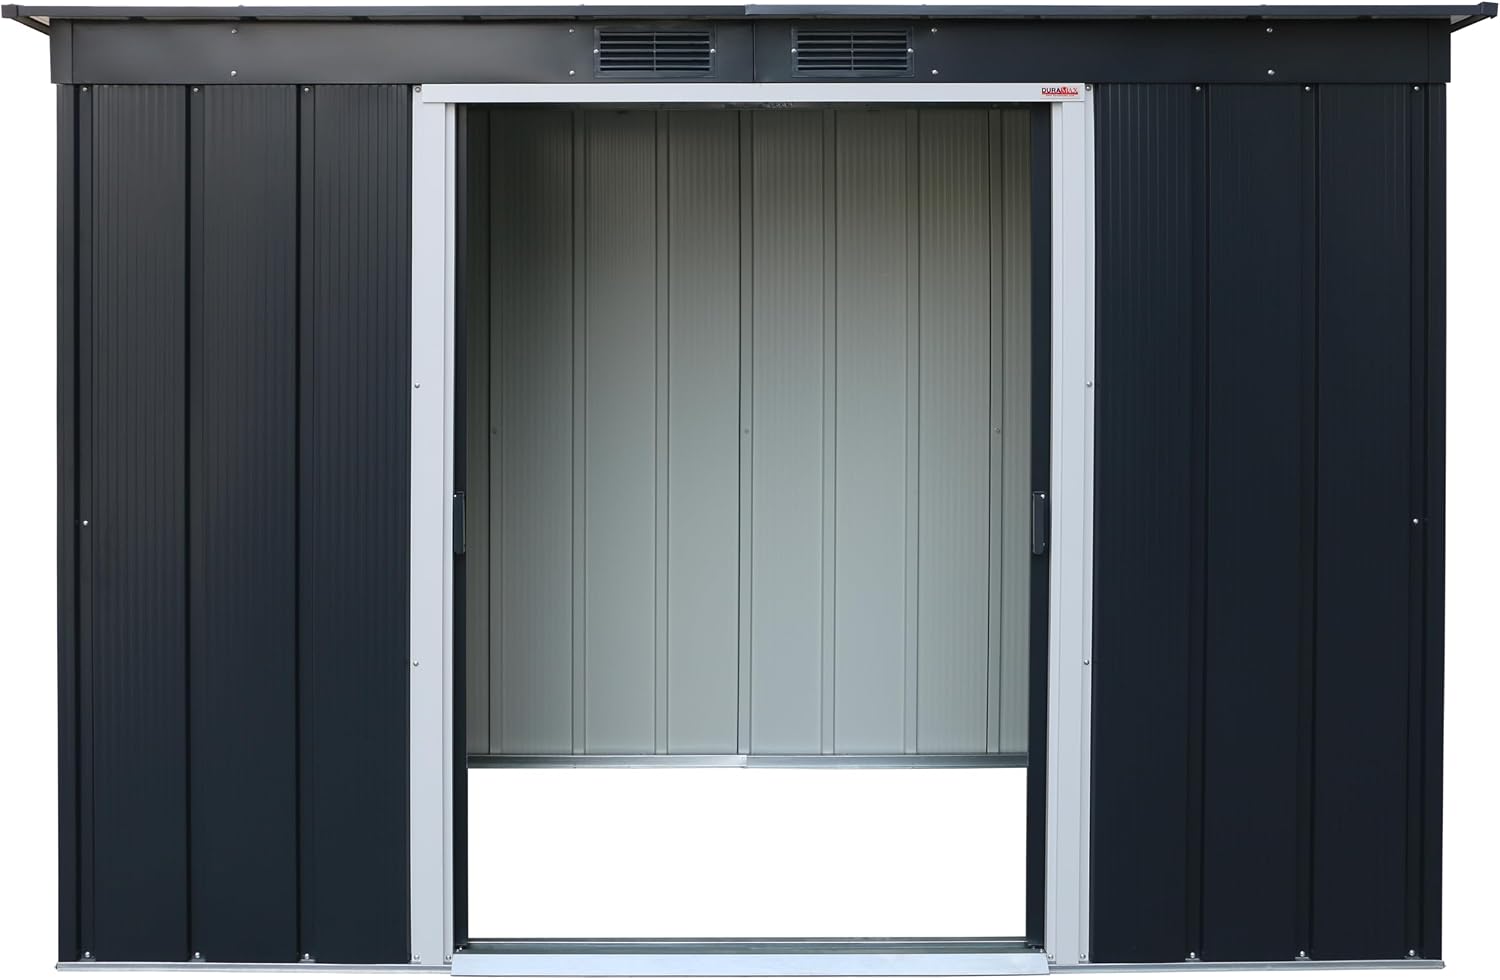
Image: A close-up view of the shed's black door handles, designed for easy operation and padlock compatibility.
Maintenance
Regular maintenance will ensure the longevity and optimal performance of your Duramax shed.
- Cleaning: Clean the exterior surfaces periodically with mild soap and water. Avoid abrasive cleaners or harsh chemicals that could damage the finish. Rinse thoroughly.
- Corrosion Protection: The shed features an anti-corrosion treatment and galvanized metal. However, inspect for any signs of rust, especially in areas where the finish might be scratched. Touch up with appropriate rust-inhibiting paint if necessary.
- Fastener Checks: Periodically check all screws and bolts to ensure they remain tight. Re-tighten any loose fasteners to maintain structural integrity.
- Door Tracks: Keep the door tracks clean and free of debris (leaves, dirt) to ensure smooth operation of the sliding doors. Lubricate the tracks with a silicone-based spray if doors become stiff.
- Drainage: Ensure that water drains away from the shed's base to prevent pooling, which can lead to corrosion or foundation issues.
Troubleshooting
Here are solutions to common issues you might encounter:
- Water Leakage at Corners: If water enters the shed during heavy rain, particularly at the corners, inspect the assembly for any gaps or improperly sealed joints. Ensure all roof panels are correctly overlapped and fastened. Applying a weather-resistant sealant to critical seams may be necessary.
- Difficulty During Assembly (Misaligned Holes): Some users report minor misalignments in pre-drilled holes or weak embossing. If this occurs, carefully re-check the orientation of the panels. Minor adjustments or gentle persuasion may be required. Avoid forcing components, which could cause damage. Patience is key during assembly.
- Doors Not Sliding Smoothly: Check the door tracks for any obstructions like dirt, leaves, or small stones. Clean the tracks thoroughly. If the problem persists, apply a silicone-based lubricant to the tracks. Ensure the shed's base is perfectly level, as an uneven foundation can affect door alignment.
- Shed Feels Flimsy During Assembly: The shed gains significant rigidity as more components are added and fasteners are tightened. Continue with the assembly steps as instructed; the structure will become more stable as it progresses.
Specifications
Key specifications for the Duramax ECO PENT ROOF 8x4 Garden Shed:

Image: A technical diagram illustrating the key dimensions of the Duramax ECO PENT ROOF 8x4 shed, including height, width, and depth.
| Feature | Detail |
|---|---|
| Brand | Duramax |
| Model Number | 0638801500261 |
| Color | Anthracite |
| Material | Galvanized Metal (Alloy Steel frame) |
| Product Dimensions (D x W x H) | 1.81m x 2.63m x 1.23m (181cm x 263cm x 123cm) |
| Item Weight | 60 Kilograms |
| Floor Surface Area | 3.25 square meters |
| Door Style | Double Sliding Doors |
| Door Width | 104 Centimeters |
| Door Height | 170 Centimeters |
| Water Resistance Level | Waterproof |
| UV Protection | Moderate |
| Assembly Required | Yes |
Warranty Information
Duramax, a leading brand with over 25 years of experience, offers a 20-year warranty on this product. This warranty covers manufacturing defects and material integrity under normal use and maintenance. Please retain your proof of purchase for any warranty claims.
Customer Support
Should you require further assistance, have questions not covered in this manual, or need to report a defect, please contact your retailer or the Duramax customer service department. Refer to the contact information provided with your purchase documentation.
When contacting support, please have the following information ready:
- Product Model: ECO PENT ROOF 8x4
- Model Number: 0638801500261
- Date of Purchase
- Description of the issue


