1. Introduction
This manual provides detailed instructions for the installation, operation, and maintenance of your Cerwin Vega Mobile VPAS10v2 10-inch Low Profile Active Powered Subwoofer. Please read this manual thoroughly before attempting installation or operation to ensure proper use and to prevent damage.
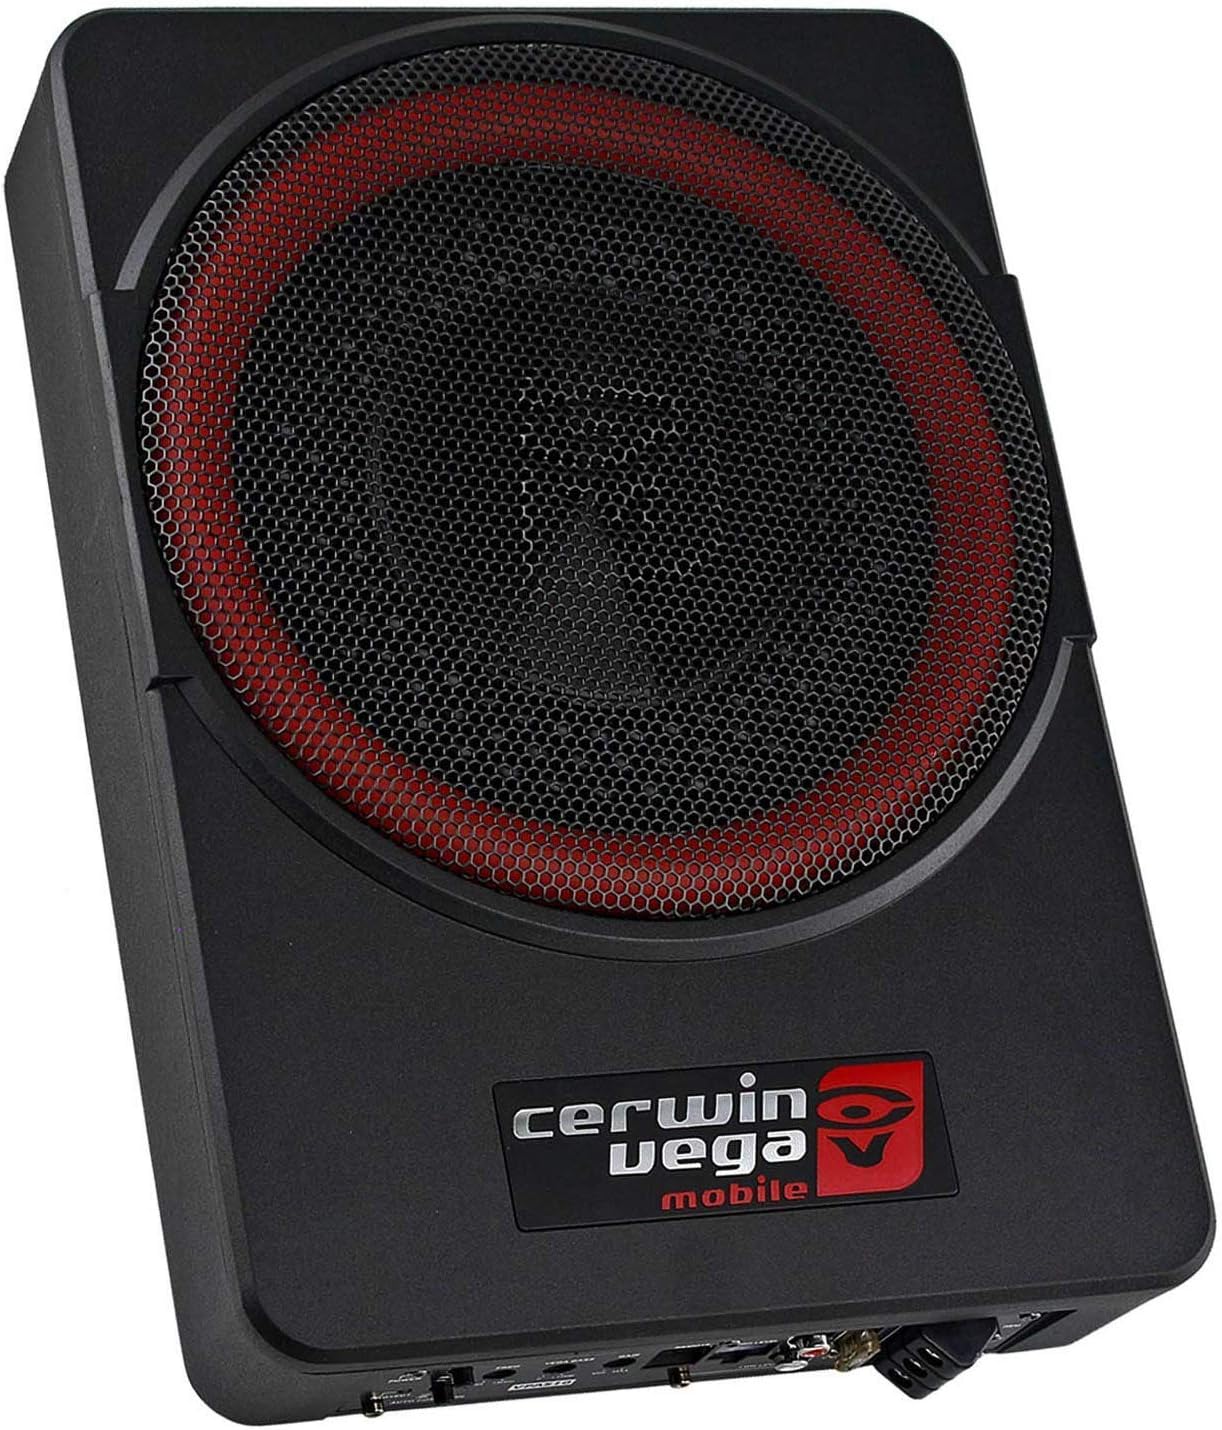
Image 1.1: Front view of the Cerwin Vega Mobile VPAS10v2 subwoofer, showcasing its compact design and speaker grille.
2. Safety Information
- Always disconnect the vehicle's battery negative terminal before any installation or wiring.
- Ensure all wiring is properly routed and secured to prevent pinching or damage.
- Avoid installing the subwoofer in locations exposed to direct sunlight, excessive heat, or moisture.
- This product is designed for 12-volt DC automotive electrical systems.
- Do not attempt to open or modify the unit. Refer all servicing to qualified personnel.
- Ensure adequate ventilation around the unit to prevent overheating, especially during prolonged use at high volumes.
- Proposition 65 Warning: This product may contain chemicals known to the State of California to cause cancer and birth defects or other reproductive harm.
3. Package Contents
Verify that all items are present in the package:
- Cerwin Vega Mobile VPAS10v2 Powered Subwoofer
- Remote Level Control Knob
- Wiring Harness (Power, Ground, Remote, High-Level Input)
- Mounting Brackets and Screws
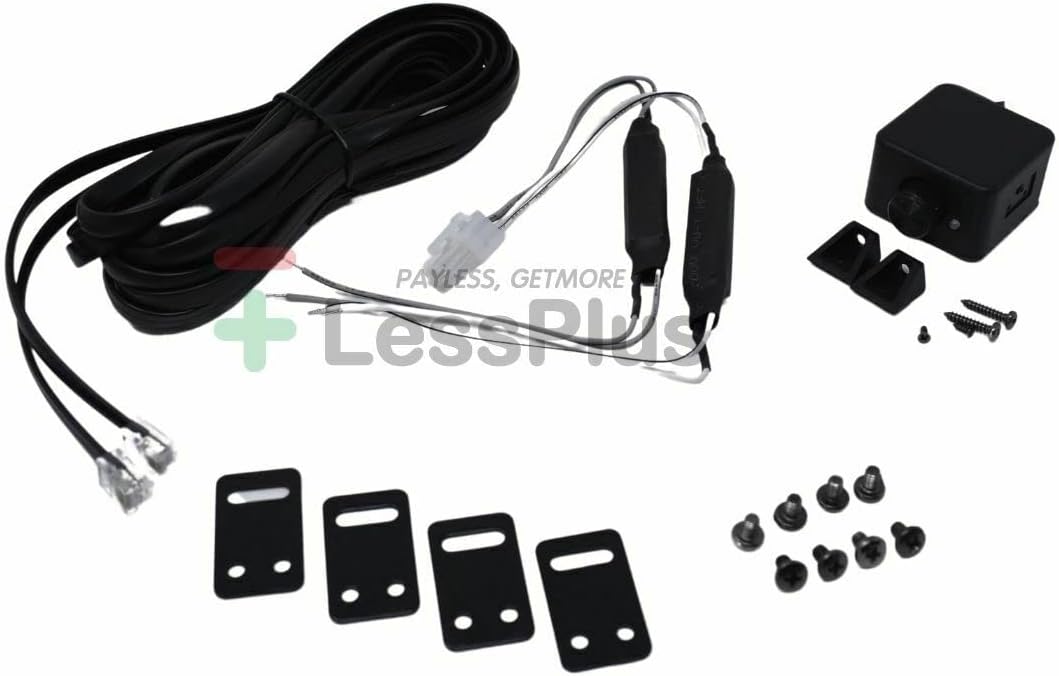
Image 3.1: All components included with the VPAS10v2 subwoofer, including the remote knob, wiring harness, and mounting hardware.
4. Product Features
- Power Output: 200W RMS / 550W Max
- Subwoofer Diameter: 10 Inches
- Input Options: RCA (Low Level) and High Level Input
- Sub Sonic Filter: 30Hz
- VEGA Bass Boost: 0 to +12dB
- LPF Filter: 85Hz-150Hz (Low Pass Filter)
- Phase Inverter: 0 or 180 degree
- Remote Control: Included for Subwoofer Level adjustment
- Turn-On: Soft Delayed Remote Turn On, Auto Power On function
- Enclosure Material: Cast Aluminum
- Impedance: 4 Ohm
- Signal-to-Noise Ratio: 90 dB
- Frequency Response: 30 Hz (lower limit)
5. Setup and Installation
5.1 Choosing a Mounting Location
The VPAS10v2 is designed for low-profile installation, commonly under seats or in other confined spaces. Ensure the chosen location allows for adequate air circulation around the unit to prevent overheating. The unit dimensions are approximately 13.6 x 9.6 x 2.6 inches.

Image 5.1: The VPAS10v2 subwoofer shown installed discreetly under a vehicle seat, demonstrating its low-profile design.
5.2 Wiring Connections
Refer to the control panel image for connection points. All wiring should be done with the vehicle's battery disconnected.

Image 5.2: Close-up view of the VPAS10v2 control panel, detailing power, input, and adjustment controls.
Power Connections:
- +12V (Power): Connect directly to the positive terminal of the vehicle's battery using a suitable gauge power cable with an inline fuse (25A recommended, typically included).
- GND (Ground): Connect to a clean, unpainted metal surface of the vehicle chassis. Ensure a solid connection for optimal performance and safety.
- REM (Remote Turn-On): Connect to the remote turn-on output of your head unit. This signal turns the subwoofer on and off with your car stereo.
Audio Input Connections:
- Low Level Input (RCA): Use RCA cables to connect to the subwoofer pre-out of your head unit. This is the preferred method for best audio quality.
- High Level Input: If your head unit does not have RCA outputs, use the included high-level input harness to connect to your vehicle's speaker wires. The unit features an "Auto Power On" function that can detect an audio signal from high-level inputs to turn on the subwoofer.
Remote Level Control:
- Connect the remote level control knob to the "REMOTE" port on the subwoofer. Mount the knob in an accessible location for easy adjustment of the subwoofer's output level.
6. Operating Instructions
Once installed and wired, you can adjust the subwoofer's settings using the controls on the unit and the remote level knob.
6.1 Control Panel Adjustments
- GAIN (Input Level): Adjust this control to match the output level of your head unit. Start at minimum and slowly increase until you hear distortion, then back off slightly.
- LPF (Low Pass Filter): This control sets the upper frequency limit for the subwoofer, ranging from 85Hz to 150Hz. Adjust it to blend the subwoofer's output smoothly with your main speakers.
- VEGA BASS (Bass Boost): Provides an adjustable bass boost from 0 to +12dB at 45Hz. Use sparingly to avoid distortion.
- PHASE: Select 0° or 180°. This adjusts the phase of the subwoofer's output relative to your main speakers. Choose the setting that provides the most impactful and cohesive bass response from your listening position.
- AUTO POWER ON: If using high-level inputs, set this switch to ON. The subwoofer will automatically turn on when it detects an audio signal. If using the remote turn-on wire, set this to OFF.
6.2 Remote Level Control
The included remote knob allows for convenient adjustment of the subwoofer's output level from the driver's seat without needing to access the unit directly.
7. Maintenance
- Keep the subwoofer clean by wiping it with a soft, dry cloth. Do not use harsh chemicals or abrasive cleaners.
- Ensure that the area around the subwoofer remains clear of obstructions to allow for proper heat dissipation.
- Periodically check all wiring connections for tightness and corrosion.
- If the fuse blows, replace it only with a fuse of the same type and rating (25A).
8. Troubleshooting
| Problem | Possible Cause | Solution |
|---|---|---|
| No sound from subwoofer |
|
|
| Subwoofer cuts out or overheats |
|
|
| Distorted sound |
|
|
| Weak or muddy bass |
|
|
9. Specifications
| Feature | Specification |
|---|---|
| Model Name | VPAS10v2 |
| Speaker Type | Subwoofer |
| Subwoofer Diameter | 10 Inches |
| Power Output (RMS) | 200W |
| Power Output (Max) | 550W |
| Impedance | 4 Ohm |
| Frequency Response | 30 Hz (lower limit) |
| Signal-to-Noise Ratio | 90 dB |
| Input Voltage | 12 Volts DC |
| LPF Filter Range | 85Hz-150Hz |
| Bass Boost | 0 to +12dB |
| Material | Aluminum (Cast Enclosure) |
| Product Dimensions | 13.6 x 9.6 x 2.6 inches |
| Item Weight | 12.85 pounds |
| Control Method | Remote |
| Connectivity Technology | RCA, Wired |
10. Warranty and Support
This Cerwin Vega Mobile product comes with a Limited Warranty. Please refer to the warranty card included with your product for specific terms and conditions. For technical support or warranty claims, please contact Cerwin Vega Mobile customer service or visit their official website.
For additional information and support, you may visit the Cerwin Vega Mobile CV Store on Amazon.


