1. Introduction
Thank you for choosing the QUMOX 1080P HD USB Computer Webcam. This manual provides essential information for setting up, operating, maintaining, and troubleshooting your webcam. Please read these instructions carefully to ensure optimal performance and longevity of your device.
2. Product Overview
The QUMOX 1080P HD USB Computer Webcam is designed for high-definition video communication, streaming, and recording. It features a plug-and-play design, a built-in noise-reduction microphone, and wide compatibility with various operating systems and applications.
Key Features:
- Full HD 1080p Resolution: Delivers clear and sharp video at 1920x1080P.
- Plug and Play: No additional drivers or software required for installation.
- Built-in Noise Reduction Microphone: Captures clear audio by filtering out background noise.
- 110-Degree Wide-Angle Lens: Provides a broad field of view for video conferencing and streaming.
- Automatic Low Light Correction: Enhances video quality in dim lighting conditions.
- Versatile Mounting Clip: Allows for flexible placement on monitors, laptops, or flat surfaces.
Product Components:
The QUMOX webcam consists of the main camera unit, an integrated mounting clip, and a 1.8-meter (6-foot) USB power cable.

Figure 2.1: Front-side view of the QUMOX 1080P HD USB Computer Webcam. This image displays the webcam with its integrated mounting clip, showing the lens and the 'HD 1080P' marking on the front panel.

Figure 2.2: Front view of the QUMOX 1080P HD USB Computer Webcam. This image provides a direct view of the webcam's front, highlighting the lens and the 'HD 1080P' label.
3. Setup Instructions
The QUMOX webcam is designed for simple plug-and-play operation, requiring no driver installation on most compatible systems.
3.1 System Requirements
- Windows 7/8/10 or later
- MacOS 10.6 or above
- Chrome OS 29.0.1547 or above
- Android V5.0 or above
3.2 Physical Installation
- Position the Webcam: Open the flexible mounting clip and place the webcam on top of your computer monitor, laptop screen, or a flat surface. Adjust the clip to securely hold the webcam in place.
- Connect to Computer: Insert the USB connector of the webcam into an available USB port on your computer.
- Automatic Recognition: Your operating system should automatically detect and configure the webcam. This process typically takes a few moments. No additional software or drivers are usually needed.
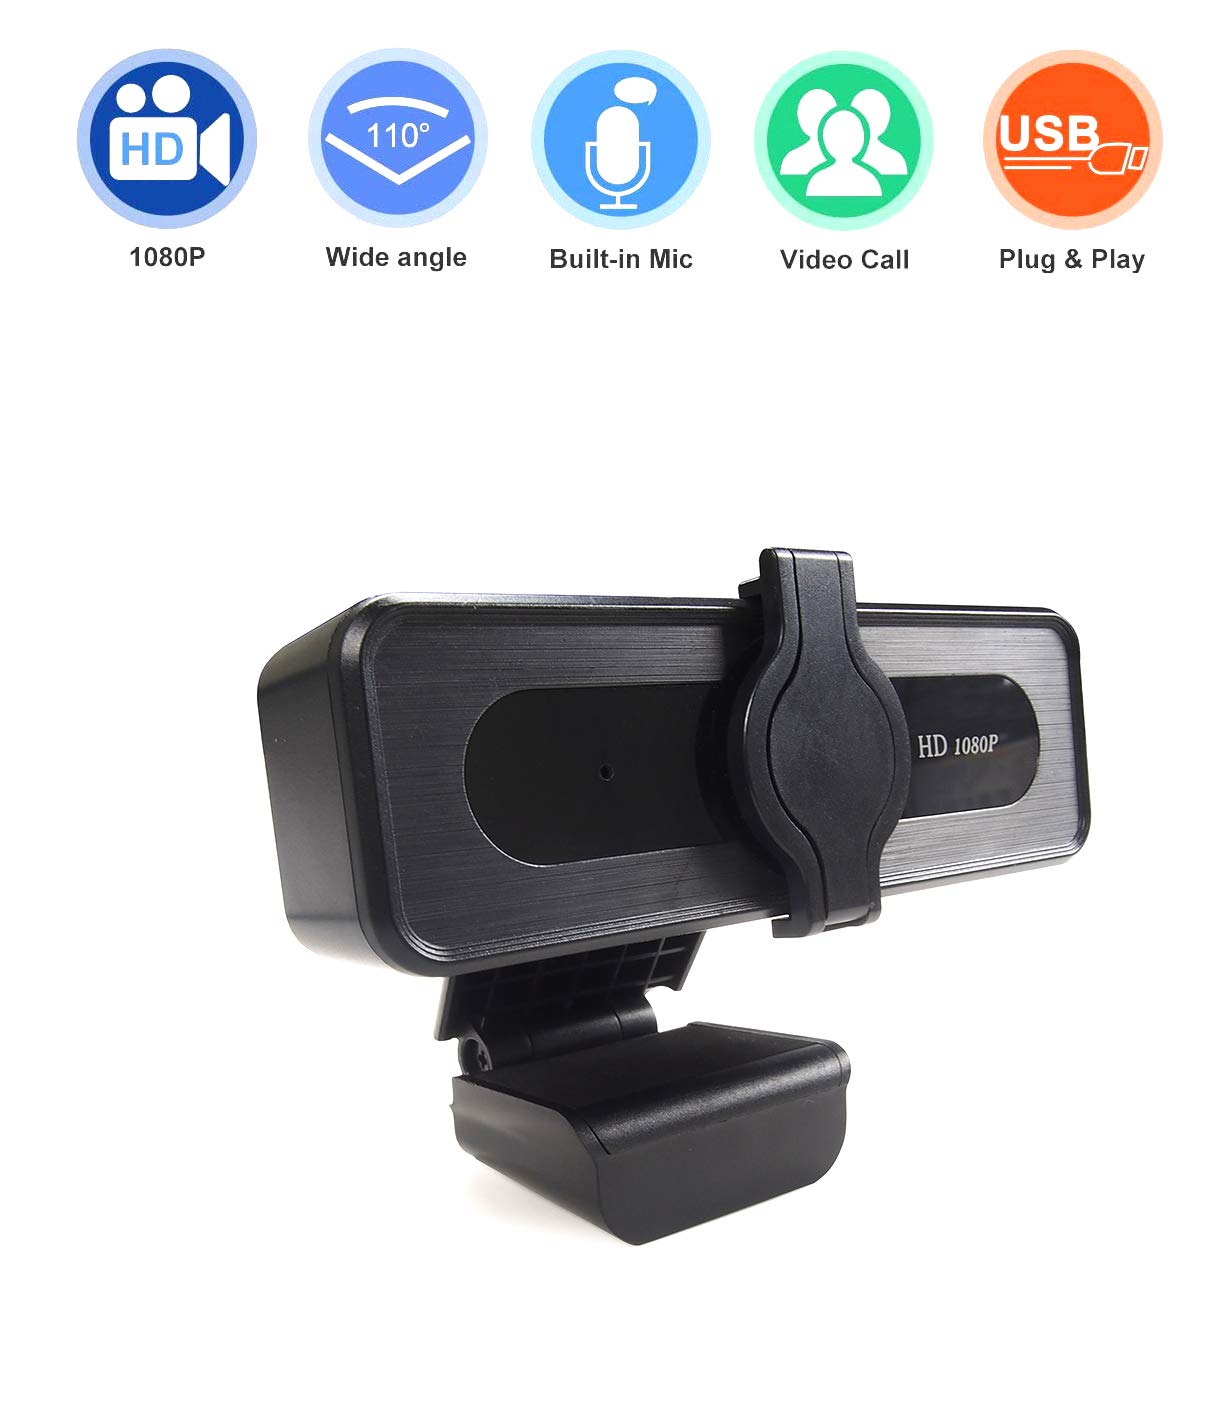
Figure 3.1: Side view of the QUMOX webcam demonstrating its flexible mounting clip. This image illustrates how the clip can be adjusted to secure the webcam on various surfaces.
4. Operating Instructions
Once installed, your QUMOX webcam is ready for use with various video communication and streaming applications.
4.1 Using with Applications
- Launch Application: Open your preferred video conferencing, streaming, or recording software (e.g., Skype, Zoom, YouTube, OBS, Facetime).
- Select Webcam: In the application's settings (usually under 'Audio & Video' or 'Camera'), select the QUMOX webcam as your primary video and audio input device. The webcam will typically appear as 'USB Camera' or similar.
- Start Communication: Begin your video call, stream, or recording. The webcam's indicator light (if present) may illuminate when in use.
4.2 Microphone Functionality
The built-in omnidirectional microphone automatically reduces background noise, providing clear audio for your communications. Ensure the QUMOX webcam's microphone is selected as the audio input device in your application settings for optimal performance.

Figure 4.1: Graphic illustrating the extensive compatibility of the QUMOX webcam with various platforms and applications. This image shows icons for YouTube, Twitch, Facebook LIVE, Skype, Xbox One, and OBS, along with text indicating compatibility with Windows, Mac OS, Chrome OS, and Android 5.
5. Maintenance
Proper care ensures the longevity and performance of your QUMOX webcam.
- Cleaning the Lens: Gently wipe the camera lens with a soft, lint-free cloth. For stubborn smudges, use a small amount of lens cleaning solution applied to the cloth, not directly to the lens.
- Cleaning the Body: Use a soft, dry cloth to clean the body of the webcam. Avoid using harsh chemicals or abrasive materials.
- Storage: When not in use for extended periods, store the webcam in a clean, dry place away from extreme temperatures.
- Avoid Damage: Do not drop the webcam or expose it to excessive moisture.
6. Troubleshooting
If you encounter issues with your QUMOX webcam, refer to the following common solutions:
- Webcam Not Detected:
- Ensure the USB cable is securely plugged into both the webcam and your computer.
- Try plugging the webcam into a different USB port.
- Restart your computer.
- Check your operating system's device manager (Windows) or System Information (Mac) to see if the webcam is listed.
- No Video Output:
- Verify that the webcam is selected as the video input device in your application's settings.
- Ensure no other application is currently using the webcam, as some systems only allow one application to access it at a time.
- Check privacy settings in your operating system to ensure applications have permission to access the camera.
- No Audio Input (Microphone):
- Confirm that the QUMOX webcam's microphone is selected as the audio input device in your application's settings and your operating system's sound settings.
- Check microphone volume levels in your system settings.
- Ensure privacy settings allow applications to access the microphone.
- Poor Video Quality:
- Ensure adequate lighting in your environment.
- Clean the webcam lens as described in the Maintenance section.
- Check your internet connection speed if experiencing lag or pixelation during online calls.
7. Specifications
| Feature | Specification |
|---|---|
| Brand | QUMOX |
| Model Number | QXWC002 |
| Resolution | 1080p (Full HD) |
| Field of View | 110 degrees |
| Focus Type | Fixed focus |
| Microphone | Built-in, Omnidirectional with Noise Reduction |
| Connectivity | USB 2.0 |
| Cable Length | 1.8 meters (6 feet) |
| Special Features | Low Light Correction, Plug and Play |
| Compatible Devices | Laptop, Personal Computer |
| Hardware Platform | Mac, PC, Laptop |
| Product Dimensions | 17 x 11 x 5 cm |
| Item Weight | 160 g |
8. Warranty and Support
For warranty information and technical support, please refer to the documentation provided at the time of purchase or contact your retailer. Keep your proof of purchase for any warranty claims.