Introduction
This manual provides detailed instructions for the installation, operation, and maintenance of your Soundstream TXP1.6000D Monoblock Class D Car Audio Amplifier. Please read this manual thoroughly before attempting installation or operation to ensure proper use and to prevent damage to the unit or your vehicle's audio system.
The Soundstream TXP1.6000D is a high-performance monoblock amplifier designed for powerful subwoofer applications, featuring 1-ohm minimum impedance operation and advanced protection circuits.
Safety Information
WARNING: High Power Amplifier. Speaker connector with live DC output. DO NOT TOUCH the speaker output within the amplifier. It MUST be installed by professionals.
- Always disconnect the vehicle's battery negative terminal before starting any installation.
- Ensure all wiring is properly routed and secured to prevent pinching or damage.
- Use appropriate gauge power and ground wires as specified in the installation section.
- Avoid mounting the amplifier in areas exposed to direct sunlight, excessive heat, moisture, or dust.
- Do not operate the amplifier if it is damaged or malfunctioning. Refer to the troubleshooting section or contact qualified service personnel.
- This product contains chemicals known to the State of California to cause cancer and birth defects or other reproductive harm.
Package Contents
Verify that all items are present in the package:
- Soundstream TXP1.6000D Amplifier
- Hardware (mounting screws, etc.)
- User Manual (this document)
- Dash Mount Gain Control Module
Features
The Soundstream TXP1.6000D amplifier incorporates several advanced features for optimal performance and reliability:
- 1-ohm Minimum Impedance Monoblock Operation
- LED Accent Lighting Illuminates Circuit Board
- Silicone Steel Alloy Core Power Supply Transformers
- Military Grade SMT PCB for Dynamic Performance
- Direct Short, Thermal, & Overload Protection Circuits
- 200mV-6V High Level or Low-Level RCA Input & Output
- Variable 12dB High Pass, Low Pass, & Subsonic Crossovers
- Dash Mount Gain Control Module Included
Setup and Installation
Proper installation is crucial for the performance and longevity of your amplifier. It is recommended that installation be performed by a qualified professional.
Mounting the Amplifier
Choose a mounting location that is dry, well-ventilated, and protected from direct sunlight or excessive heat. Ensure sufficient airflow around the amplifier's heatsink. Secure the amplifier using the provided hardware.

Figure 1: Angled view of the Soundstream TXP1.6000D amplifier, highlighting its design and heatsink.
Wiring Connections
All wiring should be done with the vehicle's battery disconnected. Use high-quality, appropriate gauge wiring for power, ground, and speaker connections.
Power and Ground Connections

Figure 2: Power input terminals (GND, REM, +12V) on the amplifier.
- +12V (Power): Connect a fused power cable directly from the positive terminal of the vehicle's battery. The fuse should be located within 18 inches of the battery.
- GND (Ground): Connect a ground cable of the same gauge as the power cable to a clean, unpainted metal surface of the vehicle's chassis. Ensure a solid electrical connection.
- REM (Remote Turn-On): Connect a remote turn-on wire from your head unit or other switched 12V source. This turns the amplifier on and off with your audio system.
The amplifier requires a large power feed, with a minimum of 300 amps recommended for optimal performance.
Speaker Connections

Figure 3: Rear panel with speaker output terminals and audio controls.
Connect your subwoofer(s) to the speaker output terminals. The TXP1.6000D is designed for 1-ohm minimum impedance monoblock operation. Ensure your subwoofer(s) impedance matches the amplifier's capabilities.
RCA Input/Output Connections
Connect the RCA input from your head unit or signal processor to the amplifier's RCA input jacks. The amplifier supports 200mV-6V high-level or low-level RCA input.

Figure 4: Overview of amplifier connections, including RCA inputs and the remote gain control port.
If using the RCA output, connect it to another amplifier for additional speakers.
Dash Mount Gain Control Module
Connect the included dash mount gain control module to the "REMOTE" port on the amplifier's control panel. This allows for convenient adjustment of the amplifier's output level from the driver's seat.
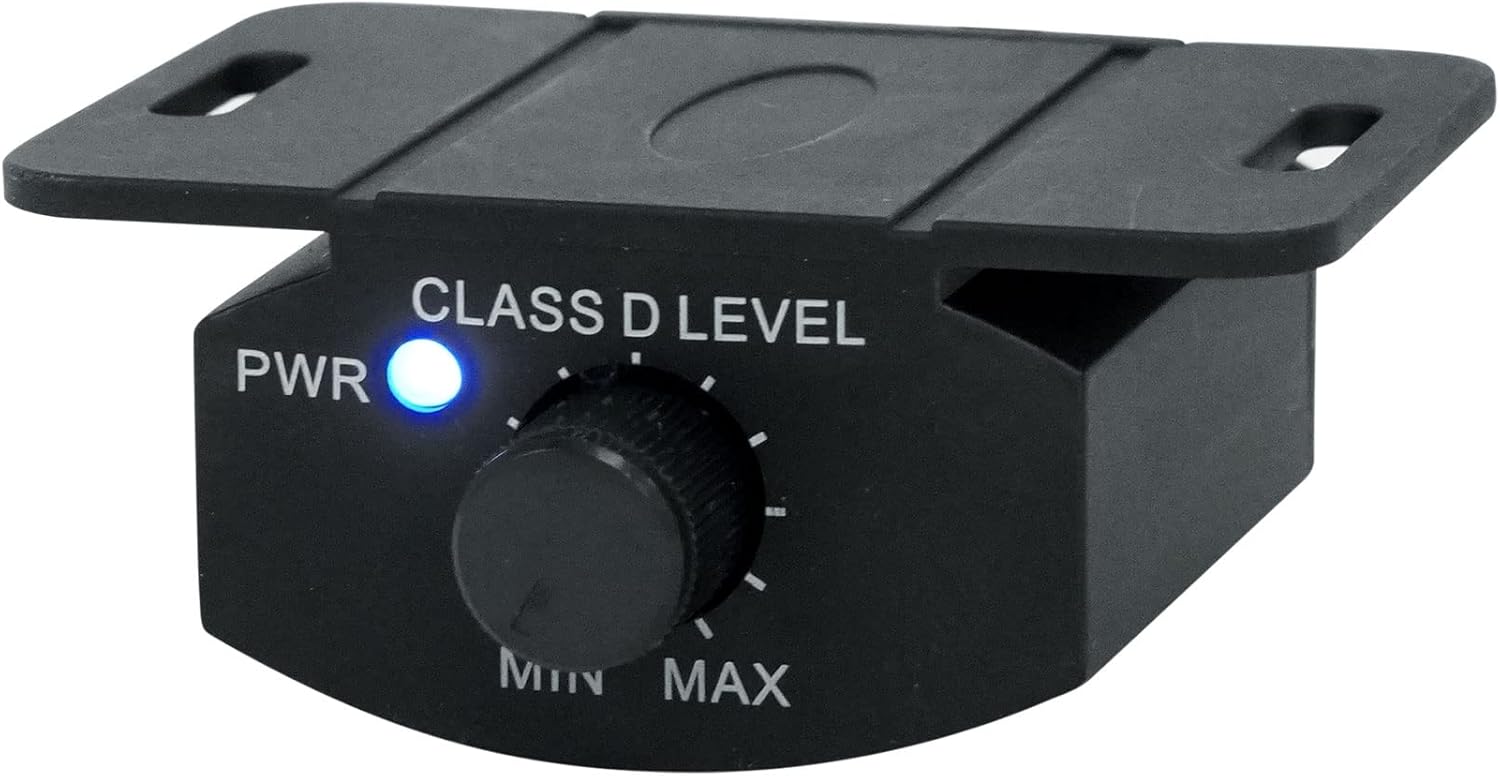
Figure 5: Dash Mount Gain Control Module (front view).
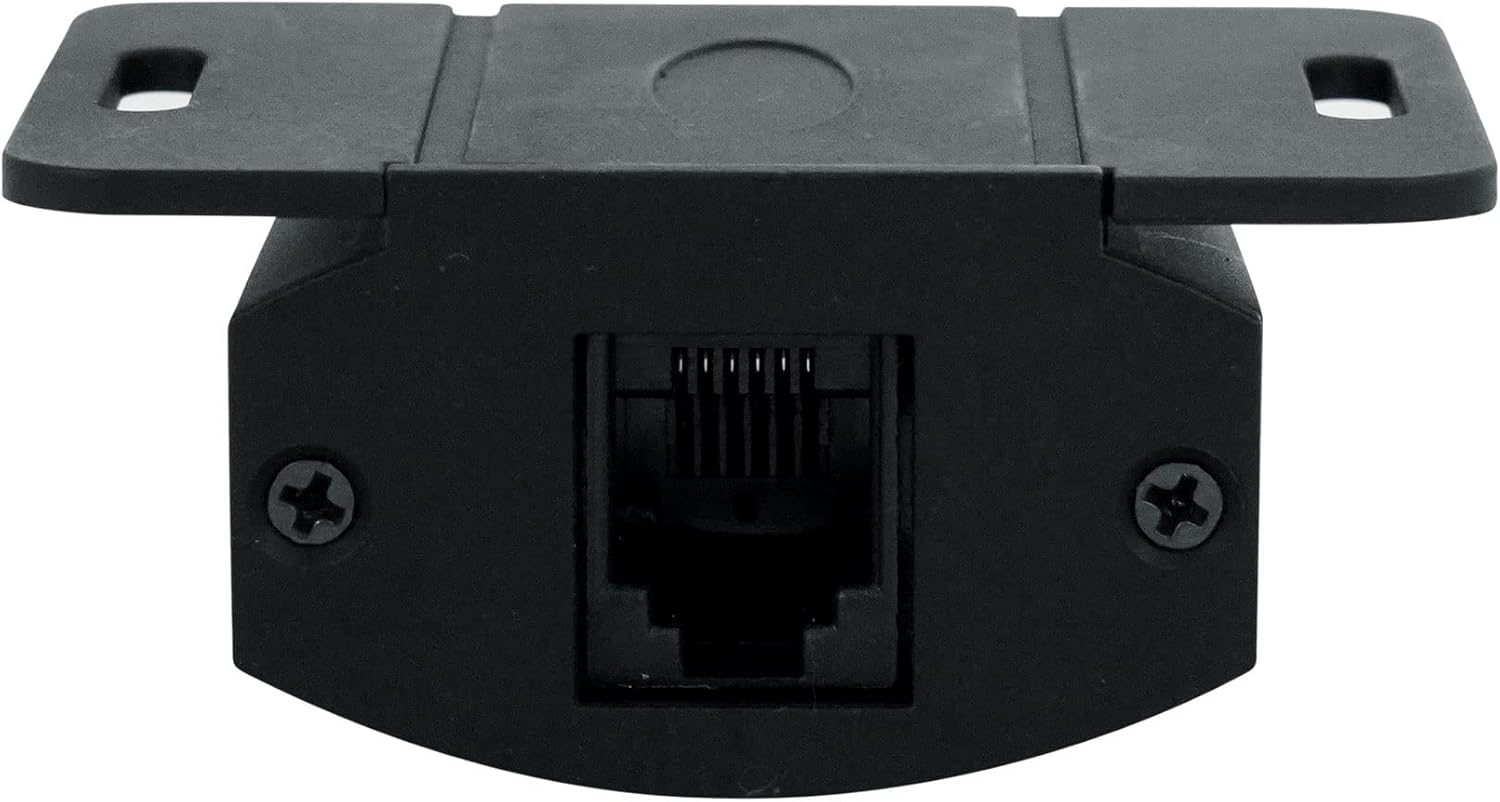
Figure 6: Dash Mount Gain Control Module (rear view with RJ45 port).
Operating Instructions
Once the amplifier is properly installed and wired, you can proceed with adjusting its settings.
Control Panel Overview

Figure 7: Amplifier control panel details.
The control panel features several adjustable settings:
- BASS BOOST (FREQ, LEVEL, GAIN): Adjusts the bass emphasis. FREQ sets the center frequency, LEVEL adjusts the boost amount, and GAIN controls the overall input sensitivity.
- CROSSOVER (LOW, HIGH): Variable 12dB high-pass, low-pass, and subsonic crossovers. Adjust these to filter frequencies sent to your subwoofer(s) for optimal sound quality and protection.
- GAIN: Sets the input sensitivity of the amplifier to match the output of your head unit. This is NOT a volume control. Set it carefully to avoid clipping.
- PRT (Protection) / CLIP / PWR (Power) LEDs: Indicators for amplifier status. PWR (blue) indicates normal operation. CLIP (white) indicates signal clipping. PRT (red) indicates a protection mode (short circuit, thermal, overload).
Setting the Gain
Setting the gain correctly is critical to prevent distortion and damage. It is recommended to use an oscilloscope or a digital multimeter for precise gain setting. If not available, follow these steps:
- Turn the amplifier's gain control all the way down (minimum).
- Set your head unit's volume to about 75-80% of its maximum.
- Play a test tone (e.g., 50Hz at 0dB) through your system.
- Slowly increase the amplifier's gain until you hear audible distortion or the CLIP indicator lights up.
- Back off the gain slightly until the distortion disappears or the CLIP light turns off.
The dash mount gain control module can then be used for fine-tuning the bass level during normal listening.
Maintenance
The Soundstream TXP1.6000D amplifier requires minimal maintenance. Follow these guidelines to ensure its longevity:
- Keep the amplifier clean and free of dust and debris. Use a soft, dry cloth for cleaning.
- Ensure that the heatsink fins are not obstructed to allow for proper cooling.
- Periodically check all wiring connections for tightness and corrosion. Loose connections can cause performance issues or damage.
- Avoid exposing the amplifier to extreme temperatures or humidity.
Troubleshooting
If you experience problems with your amplifier, refer to the following common issues and solutions:
| Problem | Possible Cause | Solution |
|---|---|---|
| No Power (PWR LED off) | Blown fuse, loose power/ground/remote wire, no 12V at remote terminal. | Check inline fuse, verify all power, ground, and remote connections. Test for 12V at the remote terminal when the head unit is on. |
| Protection Mode (PRT LED on) | Short circuit in speaker wiring, amplifier overheating, impedance too low, DC offset. | Check speaker wiring for shorts. Ensure proper ventilation. Verify speaker impedance. Disconnect speakers and RCA inputs, then power on. If PRT LED is off, reconnect one by one to isolate the issue. |
| No Sound | RCA cables disconnected, gain too low, speaker wires disconnected, head unit settings. | Check RCA connections, increase gain, verify speaker wiring. Check head unit's audio output settings. |
| Distorted Sound (CLIP LED on) | Gain set too high, poor ground connection, damaged speakers. | Reduce gain setting. Verify ground connection. Inspect speakers for damage. |
| Engine Noise/Whine | Poor ground, RCA cables routed near power wires, faulty RCA cables. | Improve ground connection. Reroute RCA cables away from power wires. Try different RCA cables. |
If the problem persists after following these steps, contact Soundstream customer support or a qualified car audio technician.
Specifications
| Feature | Specification |
|---|---|
| Model Number | TXP1.6000D |
| Output Power | 6000 Watts (Max) |
| Number of Channels | 1 (Monoblock) |
| Minimum Impedance | 1 Ohm |
| Minimum Supply Voltage | 6 Volts (DC) |
| Maximum Supply Voltage | 16 Volts (DC) |
| Input Sensitivity | 200mV-6V (High Level or Low-Level RCA) |
| Crossovers | Variable 12dB High Pass, Low Pass, & Subsonic |
| Dimensions (L x W x H) | 11 x 9.5 x 4.5 inches |
| Item Weight | 5.26 pounds |
| Material | Silicone Steel Alloy, Military Grade SMT PCB |
| Manufacturer | Soundstream |
| UPC | 709483061064 |
Warranty and Support
For warranty information and technical support, please refer to the official Soundstream website or contact your authorized Soundstream dealer. Keep your purchase receipt as proof of purchase for warranty claims.
Online resources and FAQs may also be available on the manufacturer's website: www.soundstream.com


