1. Introduction
This manual provides essential information for the safe and effective operation, setup, and maintenance of your YIHUA 862BD+ Professional Soldering & Rework Station. This 2-in-1 station combines a hot air rework station and a soldering iron, designed for various electronic repair and assembly tasks. Please read this manual thoroughly before using the device.
2. Safety Instructions
To prevent injury or damage to the equipment, always observe the following safety precautions:
- Electrical Safety: This unit is designed to operate on 110-127V US mains electricity. DO NOT use the product on mains electricity at 220V. Ensure the power outlet is properly grounded.
- Heat Hazard: The soldering iron tip and hot air nozzle reach very high temperatures. Always use caution and avoid direct contact with skin or flammable materials. Allow components to cool before handling.
- Ventilation: Use the station in a well-ventilated area to avoid inhaling solder fumes, which can be harmful. Consider using a fume extractor.
- Eye Protection: Always wear safety glasses to protect your eyes from solder splashes or flying debris.
- Work Area: Keep your work area clean and free of clutter. Ensure no flammable liquids or gases are near the station.
- Children and Pets: Keep the device out of reach of children and pets.
- Maintenance: Disconnect the power cord before performing any maintenance or cleaning.
3. Package Contents
Verify that all items listed below are included in your package:
- YIHUA 862BD+ Professional Soldering & Rework Station Main Unit
- Hot Air Gun
- Soldering Iron
- Soldering Iron Holder
- Hot Air Gun Holder
- 50g 0.8mm Lead-Free Solder Wire
- 5 x Assorted Soldering Iron Tips
- 4 x Assorted Hot Air Nozzles (#2300 bundle: 3 round-shape, 1 square-shape)
- Cleaning Sponge
- 1 x Pair ESD-Safe Tweezers
- 1 x Solder Sucker
- 1 x Cleaning Kit (Brass Ball)
- 1 x IC Extractor
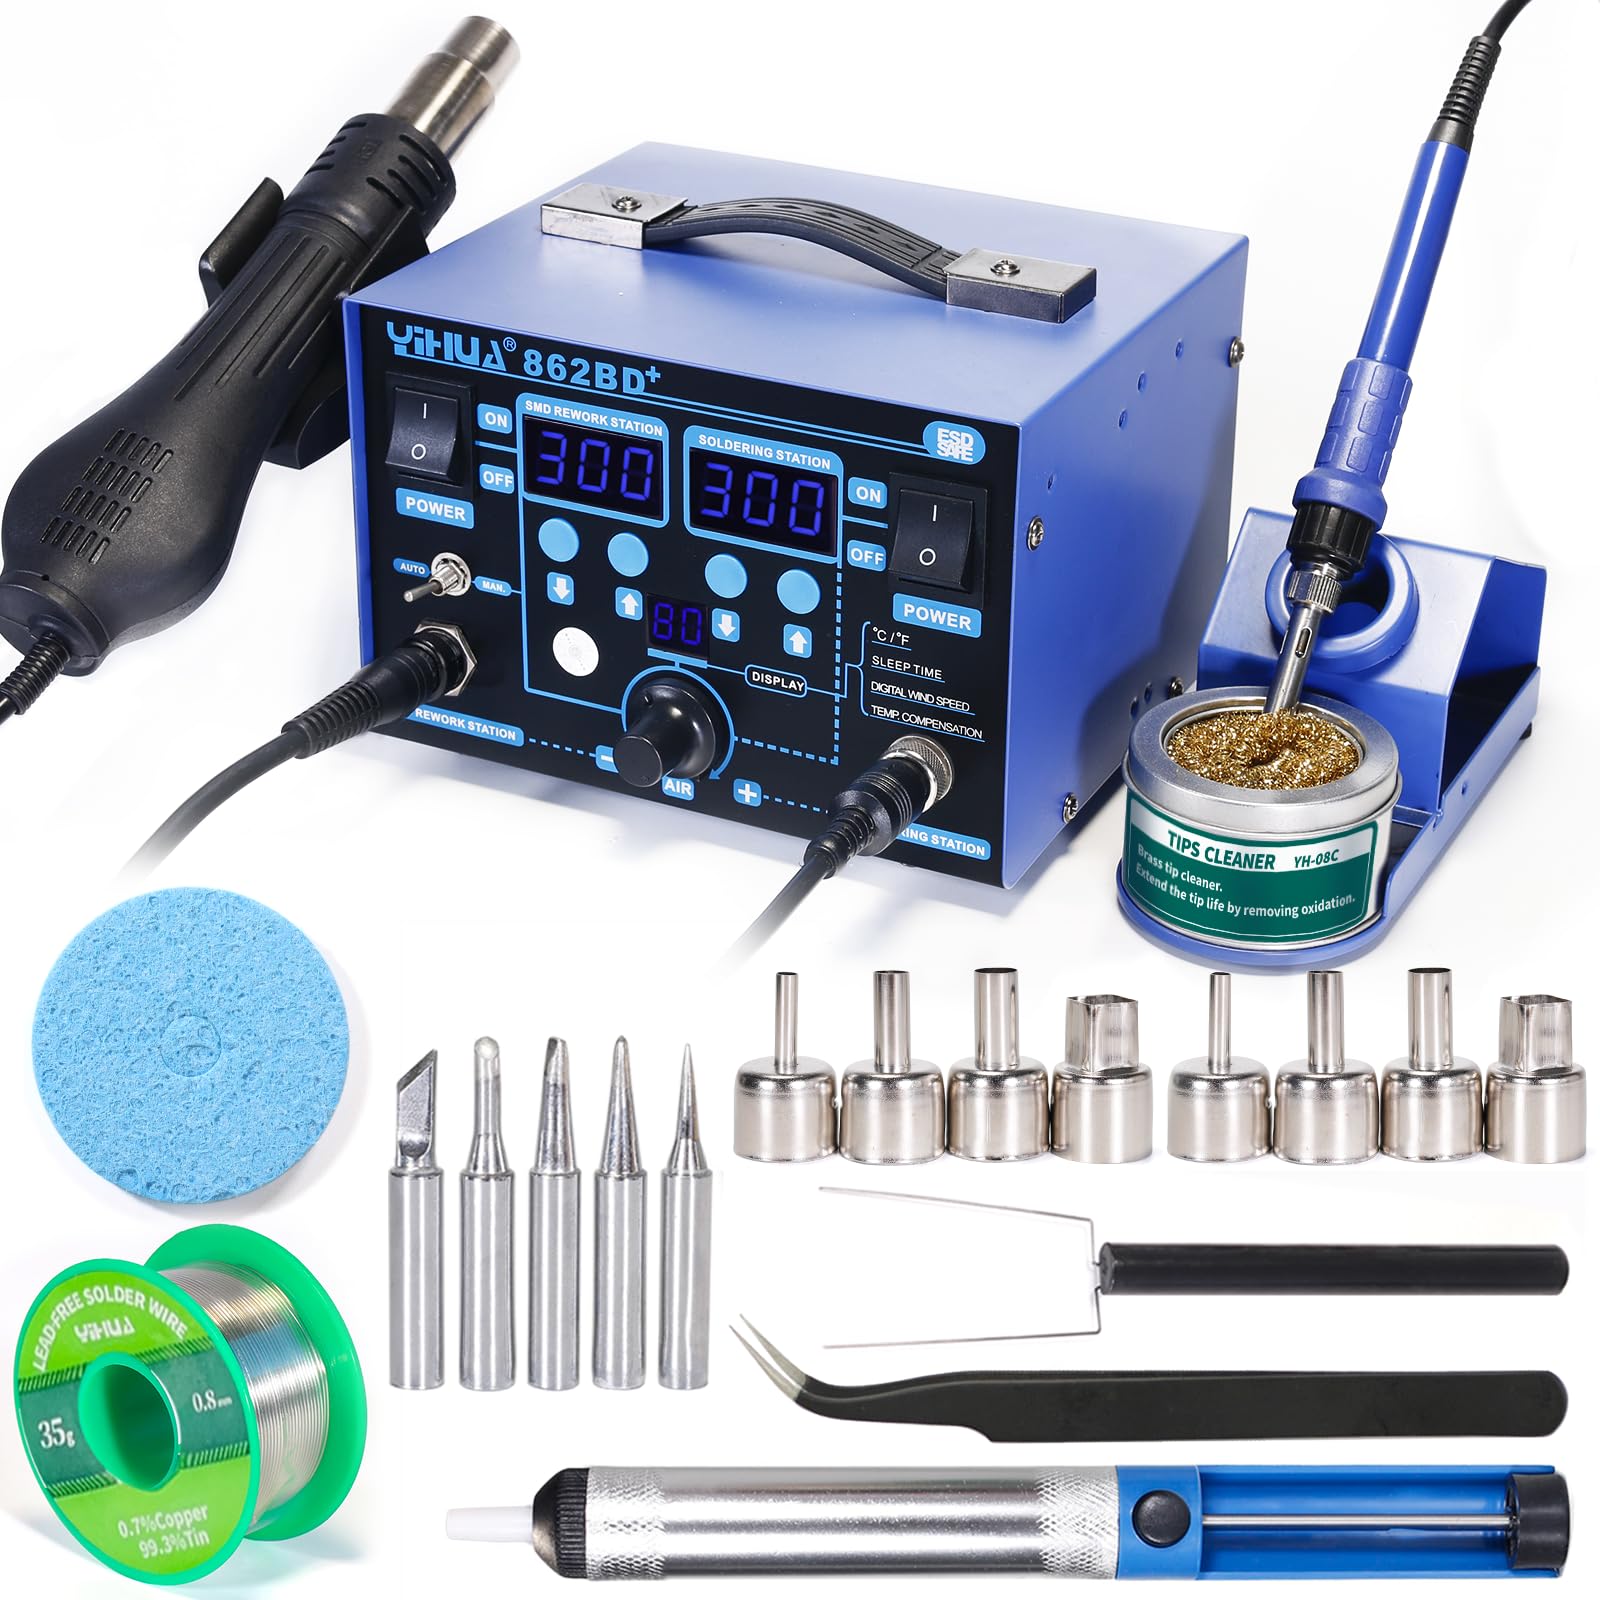
Figure 3.1: YIHUA 862BD+ Soldering & Rework Station with all included accessories.

Figure 3.2: Assorted hot air nozzles for various applications.
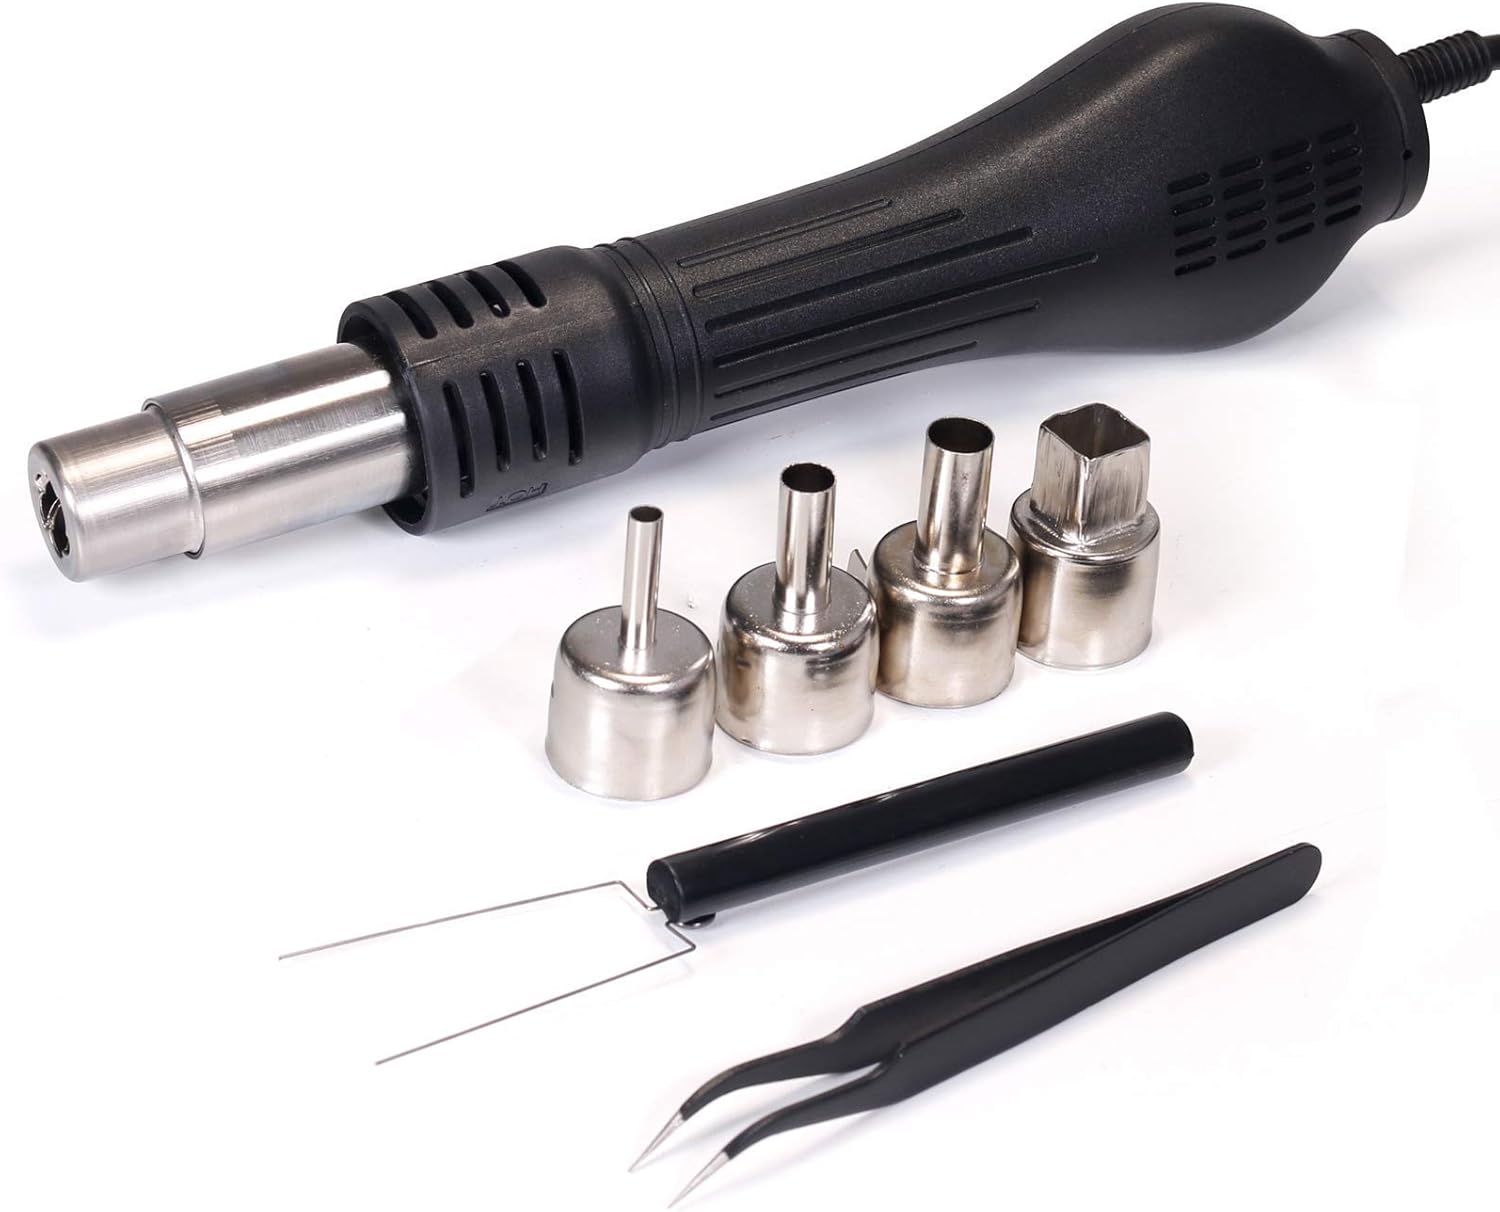
Figure 3.3: Spool of lead-free solder wire.

Figure 3.4: Soldering iron with its stand and brass tip cleaner.
4. Setup
Follow these steps for initial setup:
- Unpacking: Carefully remove all components from the packaging and inspect for any damage.
- Placement: Place the main unit on a stable, heat-resistant surface in a well-ventilated area. Ensure adequate space around the unit for airflow.
- Connect Hot Air Gun: Plug the hot air gun connector into the designated port on the main unit. Secure it if necessary. Place the hot air gun in its holder.
- Connect Soldering Iron: Plug the soldering iron connector into the designated port on the main unit. Place the soldering iron in its stand.
- Power Connection: Ensure both the SMD Rework Station and Soldering Station power switches are in the OFF position. Connect the power cord to the main unit and then to a 110-127V AC grounded power outlet.
5. Operating Instructions
5.1. General Operation
- Power On: Flip the respective power switches (SMD Rework Station and/or Soldering Station) to the ON position. The digital displays will illuminate.
- Temperature Adjustment: Use the temperature control knobs or buttons for each station to set the desired temperature. The unit features temperature stabilization to maintain the set temperature steadily.
- Power Off: After use, turn off both power switches and allow the hot air gun and soldering iron to cool down completely before storing.
5.2. Temperature Display Unit (°F/°C) Conversion
To switch between Fahrenheit (°F) and Celsius (°C) temperature display:
- Turn on the SMD rework station power switch only.
- Simultaneously press and hold the REWORK STATION ▲ (up) button and the SOLDERING STATION ▼ (down) button for 2 seconds.
- Press the SOLDERING STATION ▲ (up) button to display °C or ▼ (down) button to display °F.
- Stop operating for 4 seconds to exit the setting and save your selection.

Figure 5.1: Guide for converting temperature display between Fahrenheit and Celsius.
5.3. Hot Air Rework Station
- Temperature Range: 212-896°F (100-480°C).
- Nozzle Selection: Choose an appropriate nozzle from the #2300 set (round or square) for your specific component size and application. Attach it securely to the hot air gun.
- Airflow Adjustment: Use the airflow control knob to adjust the air volume. Start with lower airflow for delicate components and increase as needed.
- Operation: Direct the hot air stream evenly over the component to be reworked. Avoid concentrating heat on one spot for too long.
5.4. Soldering Station
- Temperature Range: 392-896°F (200-480°C).
- Tip Selection: Select an appropriate soldering iron tip for your task. Ensure it is securely fastened.
- Tinning the Tip: Before first use and periodically during operation, tin the tip by applying a small amount of solder to it. This helps prevent oxidation and improves heat transfer.
- Soldering: Apply the heated tip to both the component lead and the PCB pad simultaneously. Feed solder onto the joint, not directly onto the iron tip. Remove the solder, then the iron, allowing the joint to cool naturally.
6. Maintenance
Regular maintenance ensures optimal performance and longevity of your station:
- Soldering Iron Tip Cleaning: Regularly clean the soldering iron tip using the brass ball cleaner or a damp sponge. This removes oxidation and old solder, maintaining efficient heat transfer.
- Hot Air Nozzle Cleaning: Ensure hot air nozzles are free from debris or solder residue. Clean them gently with a brush or appropriate tool when cool.
- Unit Cleaning: Wipe the main unit and handles with a soft, dry cloth. Do not use abrasive cleaners or solvents.
- Storage: Store the station in a dry, dust-free environment when not in use. Ensure all components are cool before storage.
7. Troubleshooting
If you encounter issues, refer to the following common problems and solutions:
| Problem | Possible Cause | Solution |
|---|---|---|
| Station does not power on | Power cord not connected; Power switch off; Faulty outlet | Check power cord connection; Ensure power switches are ON; Test outlet with another device |
| Soldering iron not heating | Iron not connected; Heating element failure; Incorrect temperature setting | Check iron connection; Contact support if element is faulty; Verify temperature setting |
| Hot air gun not blowing air or heating | Gun not connected; Fan or heating element failure; Airflow blocked | Check gun connection; Ensure nozzle is clear; Contact support if internal components are faulty |
| Poor solder joints | Tip not clean; Incorrect temperature; Insufficient heat transfer | Clean and re-tin tip; Adjust temperature; Ensure proper contact with joint |
8. Specifications
| Feature | Specification |
|---|---|
| Model | YIHUA 862BD+ |
| Voltage | 110 Volts (US Standard) |
| Hot Air Temperature Range | 212-896°F (100-480°C) |
| Soldering Station Temperature Range | 392-896°F (200-480°C) |
| Included Components | Air Gun, Soldering Iron, Assorted Nozzles, Tips, Solder Wire, Cleaning Kit, etc. |
| Material | Copper (for certain components) |
9. Warranty and Support
YIHUA provides a 12-month US-exclusive manufacturer technical coverage for this product. For any technical assistance or support, please utilize the 24/7 professional assistance available on Amazon. Refer to your purchase documentation for specific contact details or visit the official YIHUA store on Amazon.


