1. Introduction and Overview
The MT-VIKI 8 Port KVM Switch HDMI (Model MT-801HK-C-us) is designed to allow a single console (monitor, keyboard, and mouse) to control up to eight desktop computers, laptops, or servers. This device supports 4K@30Hz resolution and includes a 4-port USB 2.0 hub for sharing peripherals. It is suitable for 1U 19-inch rack mounting environments.
This manual provides detailed instructions for the installation, operation, and maintenance of your KVM switch, ensuring optimal performance and longevity.
2. Package Contents
Please verify that all items listed below are included in your package. If any items are missing or damaged, please contact your vendor.
- 1x 8 Port KVM HDMI Switch (MT-801HK-C-us)
- 1x Wire-Desktop Controller (1.5m cable)
- 1x IR Remote Control
- 4x HDMI KVM Cables (1.5m)
- 4x HDMI KVM Cables (1.8m)
- 1x Power Adapter
- 1x User Manual
- 1x Set of Rack Mount Ears & Screws

Figure 2.1: Contents of the MT-VIKI 8 Port KVM Switch package.
3. Product Features
The MT-VIKI 8 Port KVM Switch HDMI offers a range of features designed for efficient multi-computer management:
- High Resolution Support: Supports resolutions up to 3840*2160 4K@30Hz.
- Multi-Computer Control: Manages up to 8 computers or servers using a single monitor, keyboard, and mouse.
- Integrated USB Hub: Features 4 USB 2.0 ports for connecting and sharing peripherals such as printers, USB drives, and other USB devices.
- Multiple Switching Methods: Offers three convenient ways to switch between connected computers: front panel buttons, a wire-desktop selector, and an IR remote control.
- Plug and Play: No software installation is required for operation.
- Wide Compatibility: Compatible with various operating systems including Windows 10/8/8.1/7/Vista/XP, Mac OS, and Linux.
- EDID Storage: Incorporates EDID storage to ensure optimal video transmission and display settings.
- Super Widescreen Support: Designed to support super widescreen displays.
- Wireless Peripheral Support: Compatible with wireless keyboards and mice.
- Rack Mountable: Designed for 1U 19-inch rack installation.
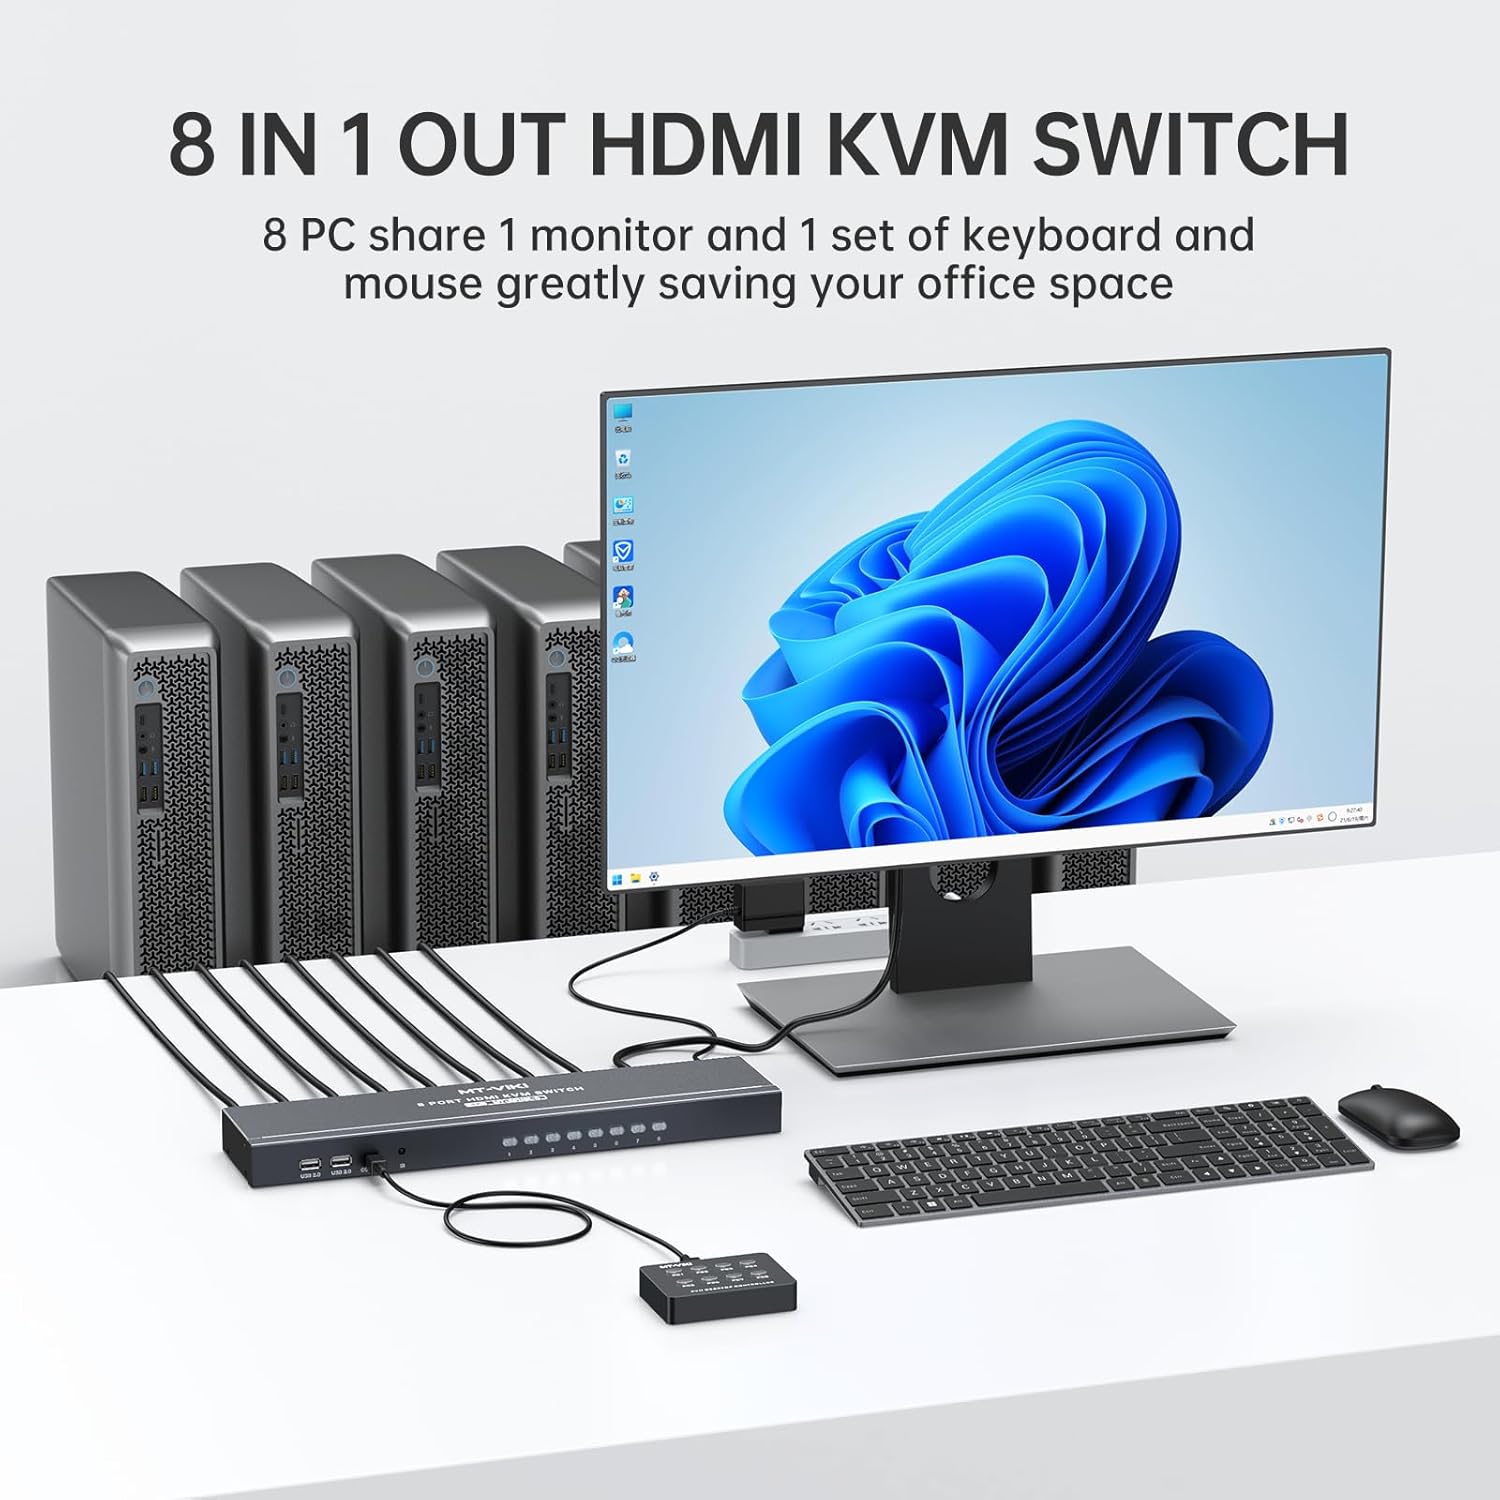
Figure 3.1: Key features including 4K@30Hz resolution and switching methods.

Figure 3.2: Example of sharing office devices like a printer via the KVM switch's USB hub.
4. Setup Instructions
Follow these steps to properly set up your MT-VIKI 8 Port KVM Switch HDMI:
4.1 Connection Diagram

Figure 4.1: KVM Switch Connection Diagram.
4.2 Step-by-Step Installation
- Power Off All Devices: Before starting, ensure all computers, the monitor, and the KVM switch are powered off and unplugged from their power sources.
- Connect Monitor: Connect your HDMI monitor to the 'HDMI OUT' port on the KVM switch using an HDMI cable.
- Connect Keyboard and Mouse: Connect your USB keyboard and USB mouse to the dedicated USB ports on the KVM switch (usually labeled with keyboard and mouse icons).
- Connect Computers: For each computer you wish to connect:
- Use the provided 2-in-1 HDMI & USB KVM cables.
- Plug the HDMI connector of the KVM cable into an 'HDMI IN' port on the KVM switch (e.g., HDMI IN 1).
- Plug the HDMI pigtail of the KVM cable into the HDMI output of your computer.
- Plug the USB pigtail of the KVM cable into a USB port on your computer. This connection is crucial for data transmission and power supply to the KVM cable.
- Connect Optional Peripherals: If you wish to share other USB devices (e.g., printer, USB drive), connect them to the USB 2.0 hub ports on the KVM switch.
- Connect Desktop Controller (Optional): If using the wire-desktop controller, plug its cable into the 'CONTROL IR' port on the KVM switch.
- Apply Power: Connect the power adapter to the 'DC 5V' port on the KVM switch and then plug it into a power outlet.
- Power On Devices: First, power on the KVM switch. Then, power on your monitor, followed by the connected computers.
Important Note: Ensure the HDMI connector with the USB pigtail is correctly plugged into the computer or server, and the other end into the KVM switch. Incorrect connection of the USB pigtail can prevent the KVM switch from functioning properly.

Figure 4.2: KVM switch in a typical office setup.
5. Operating Instructions
The MT-VIKI 8 Port KVM Switch HDMI provides three methods for switching between connected computers:
5.1 Front Panel Button Switching
Press the numbered buttons (1-8) on the front panel of the KVM switch to directly select the corresponding computer input. The LED indicator for the selected port will illuminate.
5.2 Wire-Desktop Controller Switching
The included wire-desktop controller provides a convenient way to switch inputs from your desk. Simply press the numbered buttons on the controller to select the desired computer. This is particularly useful when the KVM switch is rack-mounted or not easily accessible.
5.3 IR Remote Control Switching
Use the provided IR remote control to switch between computers. Point the remote at the KVM switch and press the corresponding number button (1-8) for the desired input. Ensure there are no obstructions between the remote and the KVM switch's IR receiver.
Figure 5.1: Visual representation of the three switching methods.
6. Maintenance
To ensure the longevity and optimal performance of your MT-VIKI KVM switch, consider the following maintenance guidelines:
- Cleaning: Regularly clean the exterior of the KVM switch with a soft, dry cloth. Avoid using liquid cleaners or aerosols, which may damage the device.
- Ventilation: Ensure the KVM switch is placed in a well-ventilated area. Do not block any ventilation openings. Proper airflow prevents overheating.
- Cable Management: Keep cables organized and free from kinks or excessive bending. This helps prevent signal degradation and physical damage to the cables and ports.
- Environmental Conditions: Operate the device within recommended temperature and humidity ranges. Avoid extreme temperatures, direct sunlight, and high moisture environments.
- Power Supply: Use only the original power adapter provided with the KVM switch.
7. Troubleshooting
If you encounter issues with your KVM switch, refer to the following troubleshooting tips:
7.1 No Display on Monitor
- Check HDMI Cables: Ensure all HDMI cables are securely connected to both the KVM switch and the computers/monitor.
- Verify Power: Confirm the KVM switch and all connected computers/monitor are powered on.
- Correct Input Selected: Make sure the correct input port is selected on the KVM switch.
- Resolution Compatibility: Ensure your monitor supports the output resolution of the connected computers.
- Restart Devices: Try restarting the KVM switch, monitor, and computers in sequence.
7.2 Keyboard or Mouse Not Responding
- Check USB Connections: Verify that the USB cables from the keyboard and mouse are securely plugged into the dedicated KVM USB ports.
- Check KVM Cables: Ensure the USB pigtail of the KVM cable is correctly connected to the computer's USB port. This is essential for keyboard/mouse functionality.
- Try Different USB Ports: If available, try connecting the keyboard/mouse to different USB ports on the KVM switch.
- Direct Connection Test: Connect the keyboard and mouse directly to a computer to confirm they are functional.
7.3 Switching Issues
- Verify Power: Ensure the KVM switch has stable power.
- Remote Control: If using the IR remote, check battery levels and ensure a clear line of sight to the KVM switch.
- Desktop Controller: Ensure the desktop controller is securely connected to the KVM switch.
- Front Panel Buttons: Test switching using the front panel buttons to isolate the issue.
7.4 Other USB Devices Not Working
- Check USB 2.0 Hub Ports: Ensure the device is connected to one of the USB 2.0 hub ports on the KVM switch.
- Power Requirements: Some high-power USB devices may require external power or a powered USB hub if the KVM switch's power supply is insufficient.
- Driver Installation: Ensure necessary drivers for the USB device are installed on the active computer.
8. Specifications
| Feature | Specification |
|---|---|
| Model Number | MT-801HK-C-us |
| Brand | MT-VIKI |
| Product Dimensions (L x W x H) | 18.11 x 7.01 x 4.25 inches |
| Weight | 1 Pound |
| Video Connector Type | HDMI |
| USB Connector Type | USB 2.0 |
| Max Resolution | 4K@30Hz (3840x2160@30Hz) |
| Operation Mode | ON-OFF |
| Operating Voltage | 5 Volts |
| Current Rating | 2 Amps |
| Circuit Type | 8-way |
| Actuator Type | Push Button |
| Control Methods | Front Panel Buttons, Wire-Desktop Controller, IR Remote Control |
| Rack Mount | 1U 19-inch |
9. Warranty and Support
For warranty information and technical support, please refer to the official MT-VIKI website or contact your authorized reseller. Keep your purchase receipt for warranty claims.


