
PowerSmart PS76138A-DP
PowerSmart 20V 4-1/2 Inch Cordless Mini Circular Saw User Manual
Model: PS76138A-DP
Brand: PowerSmart
1. Introduction
This manual provides essential information for the safe operation, maintenance, and troubleshooting of your PowerSmart 20V 4-1/2 Inch Cordless Mini Circular Saw, Model PS76138A-DP. Please read and understand all instructions before using the tool to ensure personal safety and optimal performance.
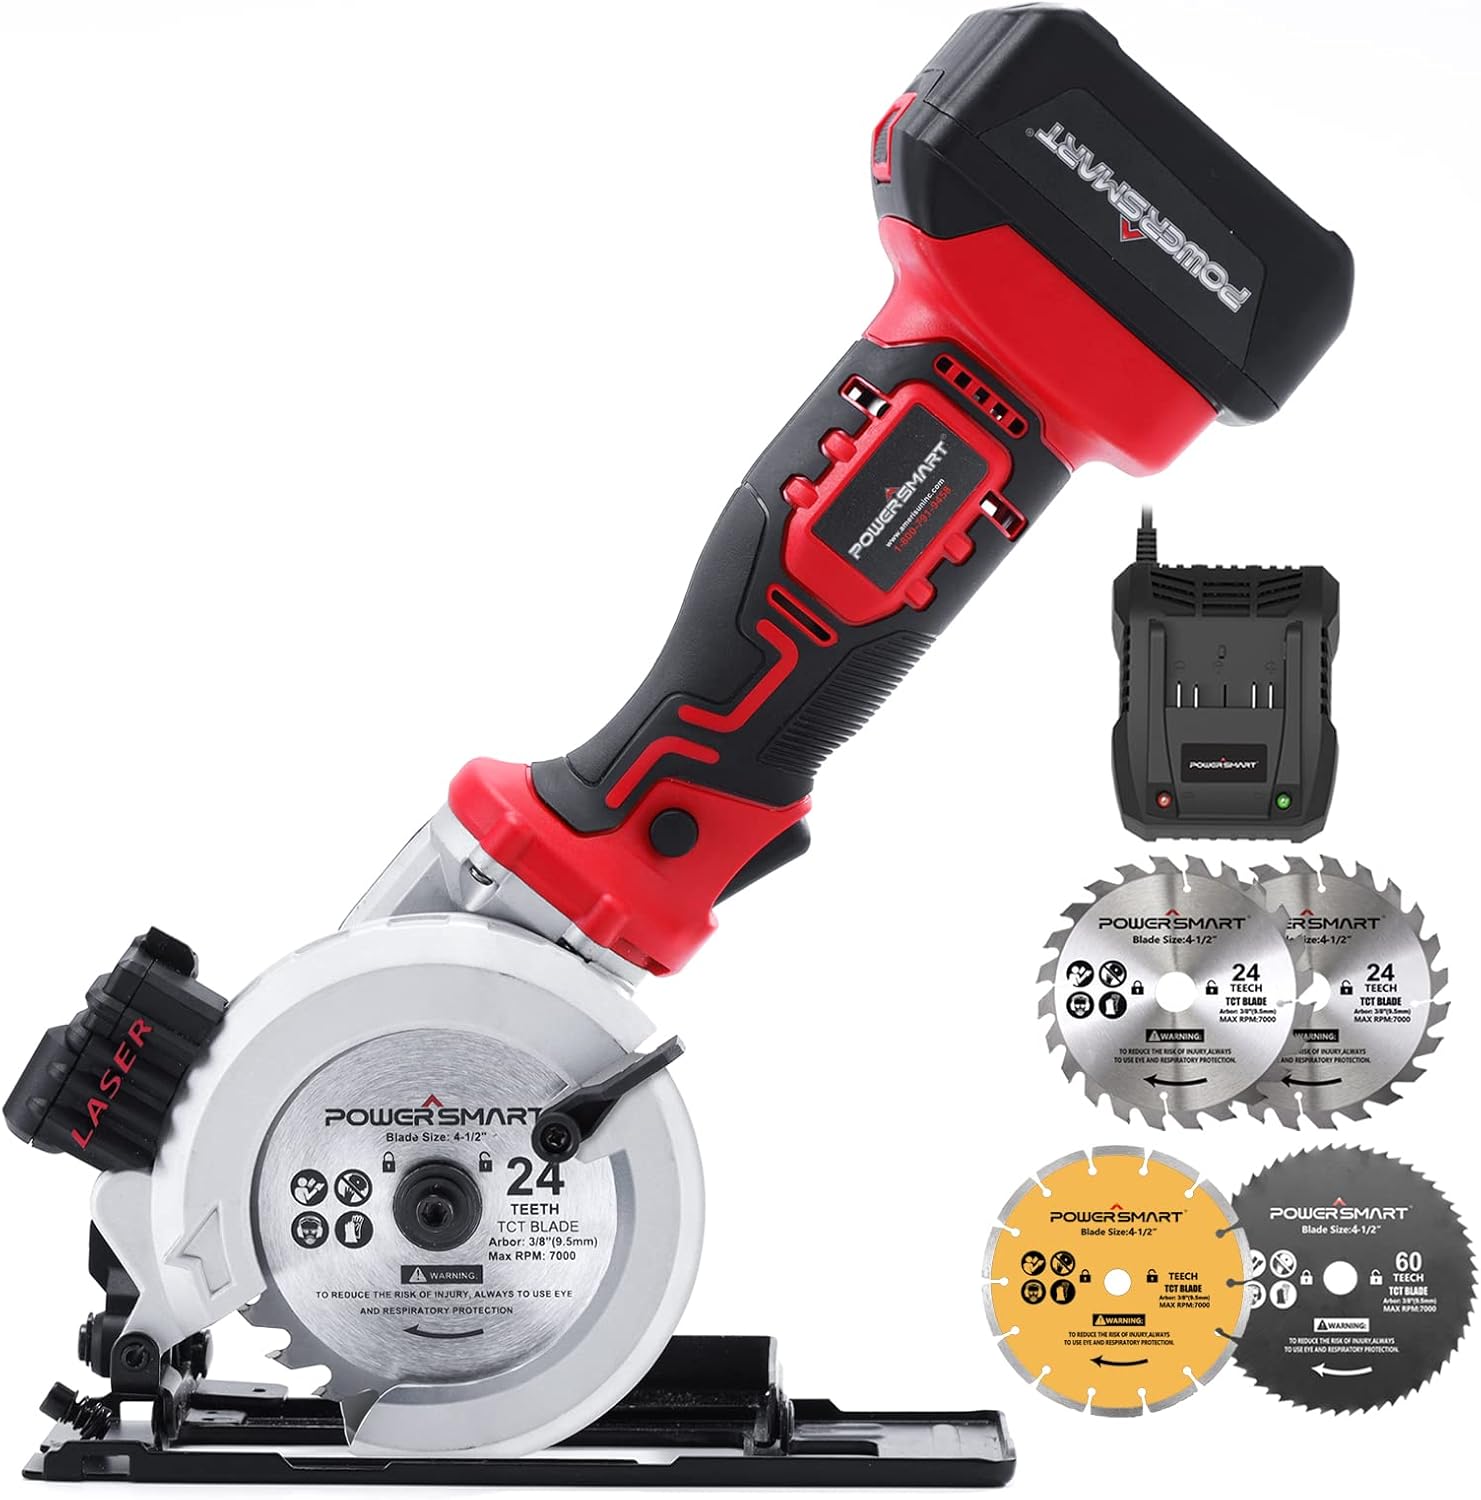
Figure 1: PowerSmart 20V 4-1/2 Inch Cordless Mini Circular Saw with included accessories.
2. Safety Information
Always follow basic safety precautions to reduce the risk of fire, electric shock, and serious personal injury. Keep this manual for future reference.
General Safety Rules:
- Work Area Safety: Keep your work area clean and well-lit. Cluttered or dark areas invite accidents. Do not operate power tools in explosive atmospheres, such as in the presence of flammable liquids, gases, or dust.
- Electrical Safety: Avoid body contact with earthed or grounded surfaces such as pipes, radiators, ranges, and refrigerators. There is an increased risk of electric shock if your body is earthed or grounded.
- Personal Safety: Always wear eye protection. Use a dust mask, non-skid safety shoes, hard hat, or hearing protection for appropriate conditions. Dress properly. Do not wear loose clothing or jewelry. Keep your hair, clothing, and gloves away from moving parts.
- Tool Use and Care: Do not force the power tool. Use the correct power tool for your application. Disconnect the battery pack from the power tool before making any adjustments, changing accessories, or storing power tools.
- Battery Pack Safety: Recharge only with the charger specified by the manufacturer. A charger that is suitable for one type of battery pack may create a risk of fire when used with another battery pack.
- Double Protection Switch: The saw features a double protection switch designed to prevent accidental starting, enhancing safety during operation.
3. Package Contents
Verify that all items listed below are included in your package. If any parts are missing or damaged, contact PowerSmart customer service.
- 1 x PowerSmart Mini Circular Saw
- 1 x 20V 4.0Ah Lithium-Ion Battery
- 1 x Fast Charger
- 2 x 4-1/2" 24T Carbide-tipped Blades (for wood)
- 1 x 4-1/2" 60T HSS Blade (for soft metal)
- 1 x 4-1/2" Diamond Blade (for tile)
- 1 x Hex Wrench
- 1 x Scale Ruler
- 1 x Dust Exhaust Pipe
- 1 x User Manual (this document)
4. Product Overview and Components
Familiarize yourself with the parts of your circular saw before operation.

Figure 2: Key components of the PowerSmart Mini Circular Saw.
- Spindle Lock Button: Used to lock the spindle for blade changes.
- Laser Guard: Protects the laser guide and projects a cutting line.
- Vacuum Adaptor: Connects to a vacuum system for dust extraction.
- Angle Lock Button: Secures the bevel cutting angle.
- Depth Clamp Button: Adjusts and locks the cutting depth.
- 20V 4.0Ah Battery: Provides power to the saw.
- Switch Trigger: Activates the saw.
- Safety Button: Must be pressed before the switch trigger can be engaged.
- Base Plate: Supports the saw on the workpiece.
- Rip Guide Locking Screw: Secures the parallel guide.
- Aluminum Blade Guard: Protects the blade during operation.
5. Setup
5.1 Charging the Battery
The 20V 4.0Ah Lithium-Ion battery requires approximately 2.5 hours for a full recharge. Ensure the battery is fully charged before first use.
- Connect the fast charger to a standard power outlet.
- Slide the battery pack onto the charger until it clicks into place.
- Monitor the charger's indicator lights for charging status.
- Once fully charged, remove the battery from the charger.

Figure 3: Charging the 4.0Ah Lithium-Ion Battery.
5.2 Installing/Replacing the Blade
Always disconnect the battery before changing blades.

Figure 4: Steps for replacing the saw blade.
- Ensure the battery is removed from the saw.
- Press and hold the spindle lock button.
- Use the hex wrench to loosen the blade bolt by turning it counter-clockwise.
- Remove the outer flange and the old blade.
- Place the new blade onto the spindle, ensuring the teeth are pointing in the correct direction (indicated by an arrow on the blade and saw).
- Replace the outer flange and tighten the blade bolt clockwise with the hex wrench while holding the spindle lock button.
- Ensure the blade is securely fastened before use.
6. Operating Instructions
6.1 Basic Operation
- Insert a charged battery pack into the saw.
- Position the saw on the workpiece, ensuring the blade is clear of the material.
- Press the safety button, then squeeze the switch trigger to start the saw.
- Allow the blade to reach full speed (up to 4,500 RPM) before beginning the cut.
- Guide the saw smoothly through the material, maintaining a firm grip.
- Release the switch trigger to stop the saw.
6.2 Adjusting Cutting Depth and Bevel Angle

Figure 5: Adjusting cutting depth and bevel angle.
- Cutting Depth: Loosen the depth clamp button, adjust the base plate to the desired depth, and then securely tighten the depth clamp button. The saw can cut up to 2 inches deep.
- Bevel Angle: Loosen the angle lock button, tilt the base plate to the desired angle (up to 45 degrees), and then securely tighten the angle lock button.
6.3 Using the Laser Guide and Parallel Guide

Figure 6: Utilizing the laser guide for precise cuts.
- Laser Guide: The built-in laser projects a red line onto your workpiece, indicating the cutting path for improved accuracy. Ensure the laser is clean and unobstructed.
- Parallel Guide: Insert the parallel guide into the slot on the base plate and secure it with the rip guide locking screw. This allows for straight cuts along an edge or for cutting strips of consistent width. The included 5-inch scale ruler assists with precise measurements.
6.4 Dust Extraction System

Figure 7: Connecting the saw to a dust extraction system.
Attach the dust exhaust pipe to the vacuum adaptor on the saw and connect it to a compatible vacuum cleaner. This system helps to keep your work area clean by collecting sawdust and debris during operation.
6.5 Cutting Different Materials

Figure 8: Examples of cutting various materials.
- Wood: Use the 24T Carbide-tipped blades. The saw is capable of cutting nominal 2-inch lumber.
- Soft Metal: Use the 60T HSS blade for cutting soft metals.
- Tile: Use the Diamond blade for cutting tile.
- Always ensure the correct blade is installed for the material being cut.
7. Maintenance
Regular maintenance ensures the longevity and safe operation of your tool.
- Cleaning: Keep the tool's ventilation openings clean to prevent overheating. Use a soft, damp cloth to clean the exterior. Do not use harsh chemicals or abrasive cleaners.
- Blade Care: Inspect blades before each use for sharpness and damage. Replace dull or damaged blades immediately. Store blades properly to prevent damage.
- Battery Care: Store batteries in a cool, dry place away from direct sunlight. Do not store fully discharged batteries for extended periods.
- General Inspection: Periodically check all screws and fasteners for tightness. Ensure all moving parts operate smoothly.
8. Troubleshooting
If you encounter issues with your circular saw, refer to the following common problems and solutions.
| Problem | Possible Cause | Solution |
|---|---|---|
| Saw does not start | Battery not charged or improperly inserted; Safety button not pressed; Faulty switch. | Ensure battery is fully charged and correctly inserted. Press the safety button before the trigger. If problem persists, contact support. |
| Blade not turning | Spindle lock engaged; Blade jammed; Internal mechanical issue. | Release spindle lock. Clear any obstructions. If motor runs but blade doesn't turn, contact support. |
| Poor cutting performance | Dull or incorrect blade; Incorrect cutting depth/angle; Forcing the saw. | Replace with a sharp, appropriate blade for the material. Adjust cutting depth and angle. Allow the saw to do the work, do not force it. |
| Excessive vibration | Damaged or unbalanced blade; Loose components. | Inspect and replace blade if damaged. Check all screws and fasteners for tightness. |
For issues not covered here, or if solutions do not resolve the problem, please contact PowerSmart customer support.
9. Specifications
| Feature | Specification |
|---|---|
| Model Number | PS76138A-DP |
| Voltage | 20 Volts |
| Battery Type | Lithium-Ion |
| Battery Capacity | 4.0Ah |
| No Load Speed | 4500 RPM |
| Blade Diameter | 4.5 Inches (4-1/2") |
| Cutting Angle | 0-45 Degrees (Bevel) |
| Max Cutting Depth (90°) | 2 Inches |
| Item Weight | 8.18 pounds (3.72 kg) |
| Product Dimensions | 5.98"L x 2.83"W x 2.36"H |
| Special Feature | Brushless Motor, Laser Guide |
| Included Blades | 2x 24T Carbide-tipped, 1x 60T HSS, 1x Diamond |
10. Warranty and Support
This PowerSmart product qualifies for a 2-year warranty. In the event of a defect or malfunction under normal use within the warranty period, PowerSmart will repair or replace the product at no charge.
For warranty claims, technical assistance, or any questions regarding your PowerSmart 20V 4-1/2 Inch Cordless Mini Circular Saw, please contact PowerSmart customer service. Our service team is dedicated to providing premium support to help solve any problems you may encounter.
Please refer to the contact information provided on the PowerSmart official website or your purchase documentation for the most current support channels.
Ask a question about this manual
Ask about setup, troubleshooting, compatibility, parts, safety, or missing instructions. Manuals+ will review the question and use this page’s manual context to help answer it.