1. Introduction
Thank you for choosing the Hifonics GE14004 4-Channel Class A/B Car Amplifier. This amplifier is designed to deliver high-quality audio performance for your vehicle's sound system. With a maximum output of 1400 Watts, this amplifier features a robust design, including a MOSFET power supply, variable crossovers, and bass boost capabilities. This manual provides essential information for proper installation, operation, and maintenance to ensure optimal performance and longevity of your amplifier.
2. Safety Instructions
- Always disconnect the vehicle's battery negative terminal before starting any electrical work.
- Ensure all wiring is properly routed and secured to prevent damage from sharp edges or moving parts.
- Use appropriate gauge wiring for power and ground connections as specified in the installation section.
- Install the amplifier in a location that allows for adequate ventilation to prevent overheating.
- Avoid mounting the amplifier in areas exposed to moisture or excessive vibration.
- If you are unsure about any installation steps, consult a professional car audio installer.
- This amplifier is equipped with 2-way protection circuitry. Do not attempt to bypass or modify these safety features.
3. Setup and Installation
3.1 Mounting the Amplifier
The Hifonics GE14004 amplifier is designed for surface mounting. Choose a secure location in your vehicle that is dry, well-ventilated, and protected from direct sunlight or excessive heat. Ensure there is sufficient space around the amplifier for air circulation to prevent overheating. Avoid mounting on carpeted surfaces that may restrict airflow.
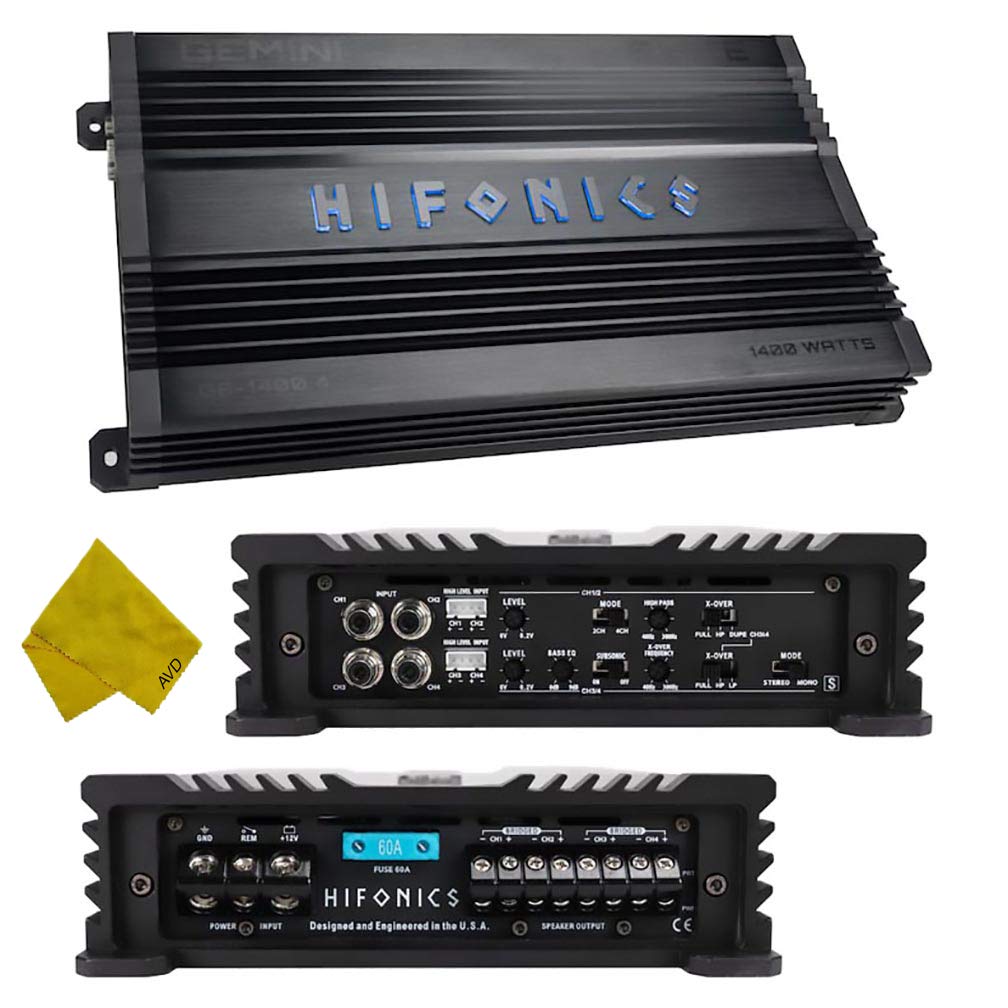
Image 1: Top view of the Hifonics GE14004 4-Channel Car Amplifier, showing the Hifonics logo and Gemini series branding. This view illustrates the heat sink design for thermal dissipation.
3.2 Wiring Connections
Proper wiring is crucial for amplifier performance and safety. Refer to the diagrams below for correct connections.
3.2.1 Input and Control Panel

Image 2: Front panel of the Hifonics GE14004 amplifier, displaying RCA inputs (CH1-CH4), high-level inputs, gain level controls (LEVEL), mode switches (2CH, 4CH, FULL, HP, LP), crossover frequency adjustments (X-OVER), bass EQ, and subsonic filter controls.
- RCA Inputs: Connect your head unit's RCA outputs to the amplifier's RCA inputs (CH1-CH4). The RCA Jacks allow for daisy-chaining multiple amplifiers without splitter cords.
- High-Level Inputs: If your head unit does not have RCA outputs, use the high-level inputs.
- Gain Control (LEVEL): Adjusts the input sensitivity to match the output of your head unit.
- Mode Switch: Select between 2-channel or 4-channel operation.
- Crossover (X-OVER):
- FULL: Full range audio.
- HP (High Pass): Allows frequencies above the set point (40Hz-300Hz) to pass.
- LP (Low Pass): Allows frequencies below the set point (40Hz-300Hz) to pass.
- Bass EQ: Adjusts bass boost.
- Subsonic Filter: Filters out ultra-low frequencies (10Hz-40Hz) that are inaudible and can damage subwoofers.
- Phase Shift: Adjusts the phase from 0-180 degrees.
3.2.2 Power and Speaker Output Panel

Image 3: Rear panel of the Hifonics GE14004 amplifier, showing the power input terminals (GND, REM, +12V), the 60A fuse, and speaker output terminals (CH1-CH4, bridged options).
- GND (Ground): Connect to a clean, unpainted metal surface of the vehicle chassis. Use a short cable of the same gauge as the power cable.
- REM (Remote Turn-On): Connect to the remote output of your head unit. This turns the amplifier on and off with your head unit.
- +12V (Power): Connect directly to the positive terminal of the vehicle's battery. Install an in-line fuse holder (not included) within 18 inches of the battery.
- Fuse: The amplifier includes a 60A fuse. Do not replace with a fuse of a different rating.
- Speaker Outputs: Connect your speakers to these terminals. The amplifier supports 2 Ohm stable operation. For bridged mode, refer to the markings on the amplifier.
4. Operating Instructions
After completing all wiring connections, double-check them before reconnecting the vehicle's battery.
- Initial Power-Up: Reconnect the battery. Turn on your head unit. The amplifier should power on, indicated by an LED indicator (if present).
- Gain Adjustment: Start with the amplifier's gain control set to minimum. Play a familiar piece of music at a moderate volume on your head unit. Slowly increase the amplifier's gain until you hear distortion, then back off slightly. This sets the maximum clean output.
- Crossover Settings: Adjust the High Pass (HP) and Low Pass (LP) filters according to your speaker types and desired sound. For full-range speakers, use HP. For subwoofers, use LP.
- Bass Boost and Subsonic Filter: Adjust these controls to fine-tune the bass response. Use the subsonic filter to protect subwoofers from damaging low frequencies.
- Phase Shift: Experiment with the phase shift (0-180 degrees) to achieve optimal bass integration with your other speakers.
5. Maintenance
- Cleaning: Periodically clean the amplifier's exterior with a soft, dry cloth. Do not use harsh chemicals or solvents. Ensure ventilation fins are free from dust and debris.
- Connections: Regularly check all power, ground, remote, and speaker connections to ensure they are secure and free from corrosion. Loose connections can lead to poor performance or damage.
- Fuse Replacement: If the fuse blows, replace it only with a fuse of the exact same rating (60A). A repeatedly blown fuse indicates a problem that requires professional diagnosis.
6. Troubleshooting
| Problem | Possible Cause | Solution |
|---|---|---|
| Amplifier does not turn on. |
|
|
| No sound output. |
|
|
| Distorted sound. |
|
|
| Amplifier overheats. |
|
|
7. Specifications
| Model Number | GE14004 |
| Amplifier Class | Class A/B |
| Number of Channels | 4 |
| Output Power (Max) | 1400 Watts |
| Power Rating (RMS) |
|
| Frequency Response | 10Hz - 22KHz |
| Variable Low Pass Crossover | 40Hz - 300Hz |
| Variable High Pass Crossover | 40Hz - 300Hz |
| Subsonic Filter | 10Hz - 40Hz |
| Phase Shift | 0 - 180 degrees |
| Power Supply | Ultra-Fi MOSFET |
| Protection Circuitry | 2-way protection |
| Mounting Type | Surface Mount |
| Operating Temperature | Up to 40 Degrees Celsius |
| Item Weight | 8.92 pounds |
| Package Dimensions | 18.11 x 10.98 x 4.17 inches |
| Compliance | FCC |
8. Warranty and Support
For warranty information and technical support, please refer to the documentation provided with your purchase or contact the manufacturer directly. Keep your proof of purchase for warranty claims.
Manufacturer: Hifonics


