
1. Introduction
This manual provides comprehensive instructions for the installation and use of your HumanCentric Wall Mount, designed specifically for the Sonos Arc and Sonos Arc Ultra soundbars. This mount offers a secure and minimalist solution for integrating your soundbar into your home entertainment system. Please read these instructions carefully before beginning installation to ensure proper setup and optimal performance.
2. Safety Information
WARNING: Improper installation can result in serious personal injury or damage to your equipment. If you do not understand these instructions or have doubts about the safety of the installation, please contact a qualified professional.
- Ensure the mounting surface can safely support the combined weight of the mount and the Sonos Arc/Arc Ultra soundbar.
- Always use the appropriate tools and hardware for your specific wall type (drywall, wood stud, concrete).
- Do not overtighten screws, as this may damage the mount or the wall.
- Keep small parts away from children.
- Verify all connections are secure before placing the soundbar on the mount.
3. Package Contents
Please verify that all components are present before beginning installation:
- Wall Mount Bracket (Main Assembly)
- Mounting Hardware Kit (screws, anchors, washers)
- Instruction Manual

Image: Detailed view of the HumanCentric Wall Mount and included hardware components.
4. Tools Required (Not Included)
- Phillips Head Screwdriver
- Drill
- Drill Bits (appropriate for your wall type)
- Pencil
- Measuring Tape
- Level
5. Setup and Pre-Installation
5.1 Choosing a Mounting Location
Select a location on the wall directly below your television. For optimal sound quality and aesthetic integration, it is recommended to mount the Sonos Arc 4 to 5 inches (10-12 cm) from the bottom of the TV.

Image: Illustration showing recommended placement of the soundbar mount at least 4 inches below the TV.
5.2 Wall Type Considerations
The included hardware supports installation into drywall, wood studs, and concrete walls. Ensure you use the correct drill bits and anchors for your specific wall material.
- Drywall: Use drywall anchors.
- Wood Stud: Drill pilot holes directly into the stud.
- Concrete/Brick: Use masonry drill bits and concrete anchors.
6. Installation Instructions
Follow these steps carefully to install your HumanCentric Wall Mount:
6.1 Prepare the Wall Mount
- Unfold the wall mount bracket to its full length.
- Secure the two halves of the bracket together using the provided small screws and a Phillips head screwdriver.
Video: This video demonstrates the initial assembly of the wall mount bracket and its attachment to the TV.
6.2 Mark Drilling Locations
- Hold the assembled wall mount against the wall at your desired height, ensuring it is centered horizontally with your TV.
- Use a level to ensure the mount is perfectly horizontal.
- Mark the drilling points through the designated holes on the mount using a pencil.
Video: This video illustrates how to mark the drilling points on the wall for the soundbar mount.
6.3 Drill Holes and Insert Anchors
- Using a drill and the appropriate drill bit for your wall type, drill pilot holes at the marked locations.
- If installing into drywall or concrete, insert the wall anchors into the drilled holes. Tap gently with a hammer if necessary until flush with the wall surface.
Video: This video provides a detailed guide on drilling holes and inserting wall anchors for the soundbar mount.
6.4 Attach Wall Mount to Wall
- Align the wall mount bracket with the drilled holes/anchors.
- Secure the mount to the wall using the provided screws. Tighten all screws firmly until the entire thread portion is in the hole and they can't be tightened anymore. The anti-vibration locker patch on the screw threads may cause some resistance.

Image: The soundbar mount securely attached to the wall, ready for the soundbar.
6.5 Attach Soundbar to Mount
- Carefully align the Sonos Arc/Arc Ultra soundbar with the mounting points on the installed wall bracket.
- Slide the soundbar onto the mount until it clicks securely into place. Ensure it is fully seated and stable.
Video: Official HumanCentric video demonstrating the attachment of the Sonos Arc soundbar to the wall mount.

Image: The HumanCentric Wall Mount with a Sonos Arc soundbar installed, showcasing its hidden design.
7. Operating Considerations
The Sonos Arc is designed with smart EQ optimization. When attached to this mount, the soundbar can detect its mounted position and adjust its equalization settings to temper bass resonance from the wall, ensuring optimal audio quality. The mount's design also minimizes vibration during playback.

Image: Visual representation of the Sonos Arc's smart EQ optimization when mounted.
8. Maintenance
- Periodically check all screws and connections to ensure they remain tight and secure.
- Clean the mount with a soft, dry cloth. Avoid abrasive cleaners or solvents.
9. Troubleshooting
- Soundbar appears to sag or is not secure: Ensure all mounting screws are fully tightened. The anti-vibration patch on the screws may require additional force to fully seat them.
- Vibration during playback: Verify that the soundbar is correctly seated on the mount and all screws are tight. The mount is designed to minimize vibration, but loose connections can cause issues.
- Difficulty with installation: Re-read the instructions carefully. Ensure you are using the correct drill bits and anchors for your wall type. Consider seeking professional assistance if problems persist.
10. Specifications
| Feature | Detail |
|---|---|
| Product Dimensions | 17.87 x 1.34 x 2.4 inches |
| Item Weight | 1.46 pounds |
| Model Number | 101-2092-B |
| Color | Black |
| Compatible Devices | Sonos Arc, Sonos Arc Ultra |
| Mounting Type | Wall Mount |
| Special Features | Hidden design, Smart EQ optimization, Anti-vibration screws |
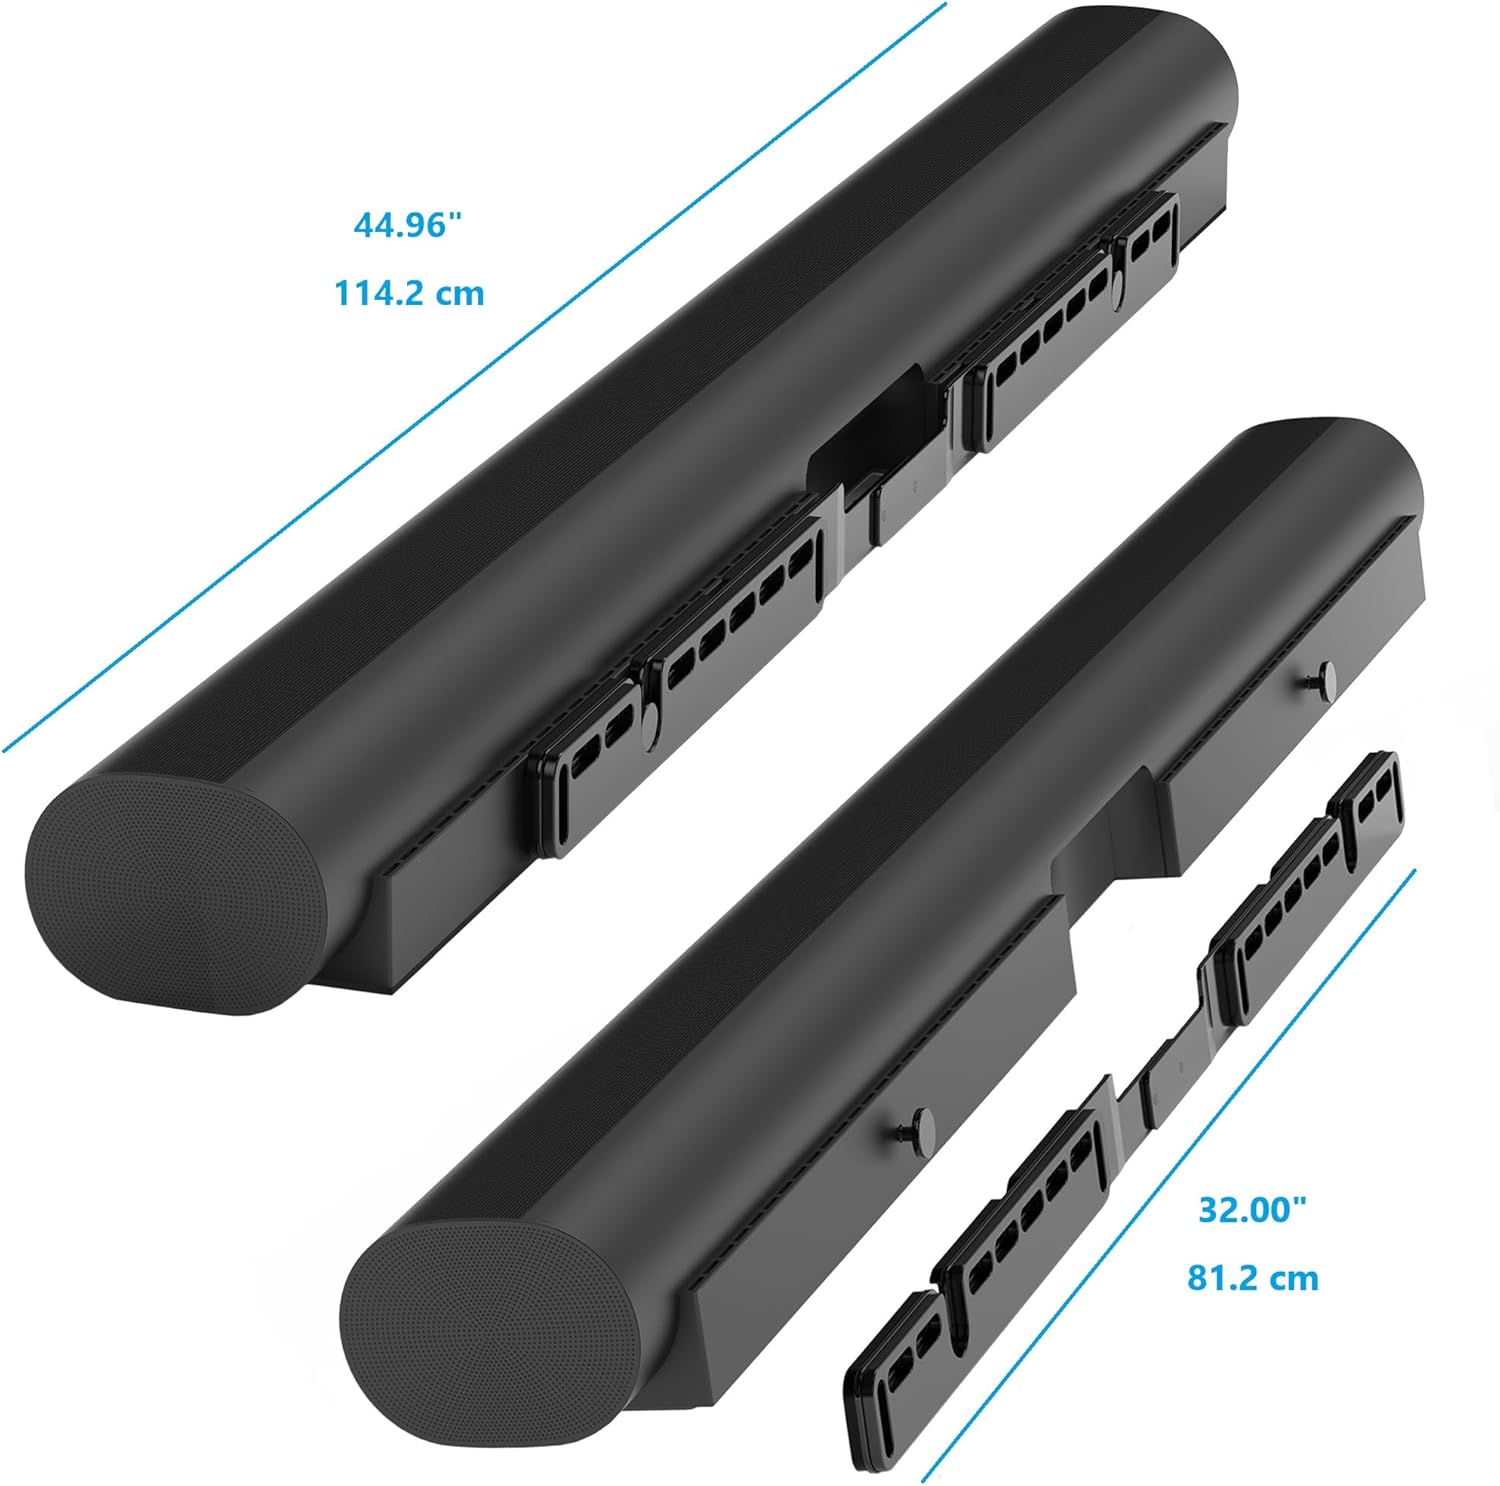
Image: Diagram illustrating the dimensions of the Sonos Arc soundbar and the wall mount.
11. Warranty and Support
For warranty information or technical support, please contact HumanCentric customer service directly. Refer to the product packaging or the official HumanCentric website for contact details.