1. Introduction
Thank you for choosing the Benro GX35 Professional Low-Profile Ball Head. This instruction manual provides detailed guidance on the proper setup, operation, and maintenance of your new ball head. Designed for stability and precision, the GX35 features a low-profile design, dual panoramic control, and Arca-Swiss compatibility, making it suitable for DSLR, mirrorless, and video camera systems.
Please read this manual thoroughly before using the product to ensure optimal performance and longevity.
2. Safety Information
- Always ensure all locking knobs are securely tightened before leaving your camera unattended.
- Do not exceed the maximum load capacity of 77 lbs (35 kg) to prevent damage to the ball head or your equipment.
- Avoid exposing the ball head to extreme temperatures, moisture, or corrosive substances.
- Keep out of reach of children.
- Handle with care to prevent drops or impacts, which can affect precision and functionality.
3. Package Contents
Verify that all items are present in your package:
- Benro GX35 Low-Profile Ball Head
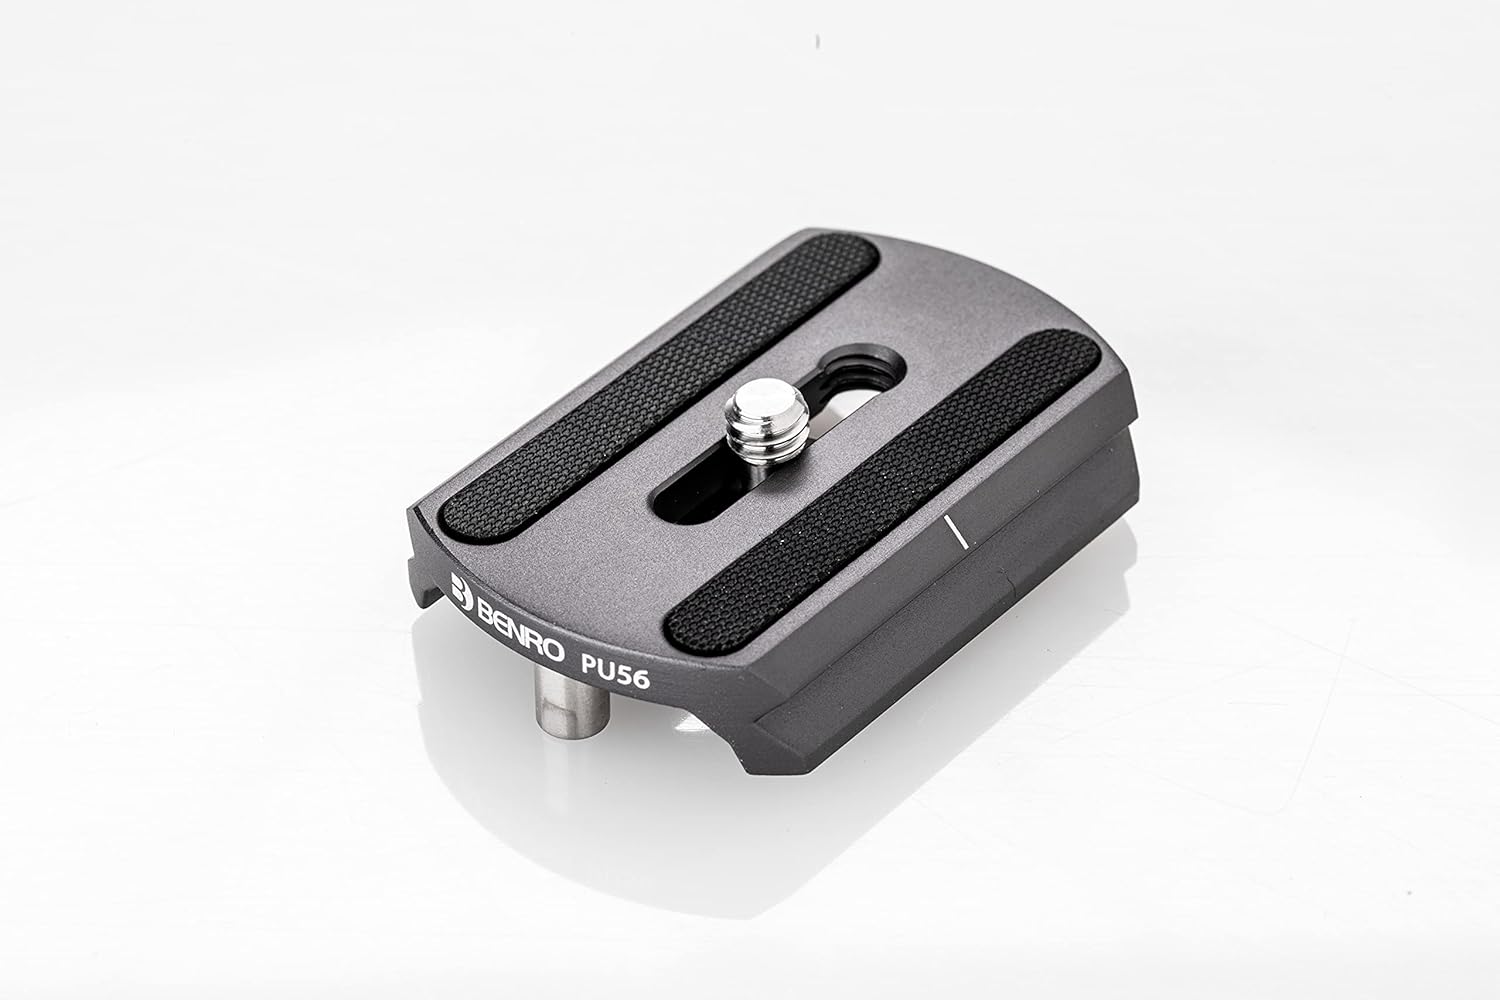
- Benro PU56 Arca-Swiss Compatible Quick Release Plate
4. Component Identification
Familiarize yourself with the key components of your Benro GX35 ball head:

- Main Ball Locking Knob: Controls the movement and locking of the ball. (Refer to Figure 4)
- Friction Control Knob: Adjusts the tension of the ball movement. (Refer to Figure 7)
- Base Panning Lock Knob: Locks the 360° rotation of the ball head base.
- Quick Release Clamp Lever: Secures and releases the quick release plate. (Refer to Figure 3)
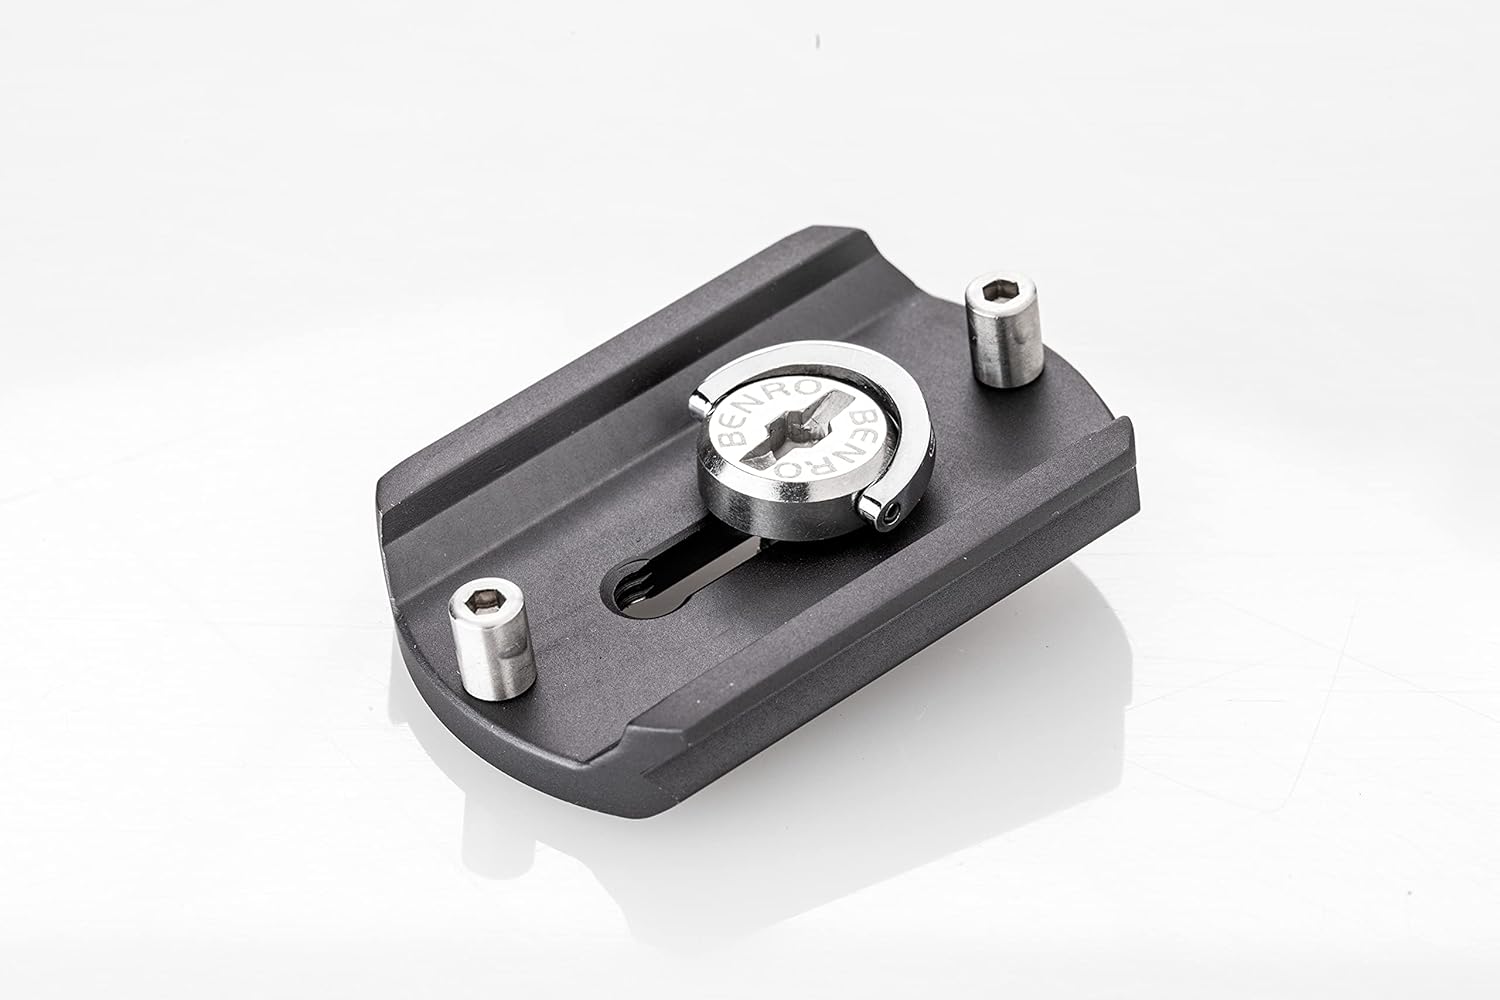
- Quick Release Clamp Safety Knob: Provides additional security for the quick release plate. (Refer to Figure 6)
- Quick Release Plate (PU56): Attaches to your camera. (Refer to Figure 8 & 9)
- Panoramic Scale: Markings for precise 360° panning.
5. Setup
5.1 Attaching the Ball Head to a Tripod
- Ensure your tripod's mounting screw (typically 3/8"-16) is compatible with the ball head.
- Screw the Benro GX35 ball head onto the tripod's mounting platform.
- Rotate the ball head clockwise until it is firmly secured. Do not overtighten.
5.2 Attaching the Quick Release Plate to Your Camera
- Locate the 1/4"-20 camera screw on the quick release plate.
- Align the screw with the tripod socket on the bottom of your camera.
- Tighten the screw using a coin or the integrated D-ring (if available) until the plate is securely attached to the camera. Ensure the plate is flush and does not wobble.
5.3 Mounting the Camera to the Ball Head


- Loosen the Quick Release Clamp Lever (Figure 3) and the Quick Release Clamp Safety Knob (Figure 6) to open the clamp jaws.
- Slide the camera with the attached quick release plate into the clamp.
- Ensure the plate is fully seated within the clamp.
- Tighten the Quick Release Clamp Lever firmly to secure the camera.
- For added security, ensure the Quick Release Clamp Safety Knob is also tightened.
6. Operating
6.1 Adjusting Ball Head Position


- To adjust the camera angle, loosen the Main Ball Locking Knob (Figure 4).
- Position your camera to the desired angle. The ball and socket mechanism (Figure 5) allows for smooth, multi-directional movement.
- Once the desired position is achieved, firmly tighten the Main Ball Locking Knob to lock the camera in place.
6.2 Adjusting Friction Control

- The Friction Control Knob (Figure 7) is integrated into the Main Ball Locking Knob.
- Rotate the smaller inner knob to adjust the tension of the ball movement when the main knob is loosened.
- Turn clockwise for more friction (stiffer movement) and counter-clockwise for less friction (smoother movement). This helps prevent sudden camera drops when the main knob is released.
6.3 Dual Panoramic Control
The Benro GX35 features dual panoramic control, allowing for independent 360° panning at both the base and the quick release clamp.
- Base Panning: Loosen the Base Panning Lock Knob (located at the bottom of the ball head body) to rotate the entire ball head assembly 360° on the tripod. Use the panoramic scale for precise adjustments. Tighten to lock.
- Quick Release Clamp Panning: Loosen the Quick Release Clamp Safety Knob (Figure 6) to allow the quick release clamp to rotate 360° independently. This is useful for precise horizontal adjustments without disturbing the main ball head angle. Tighten to lock.
7. Maintenance
- Cleaning: Use a soft, dry cloth to wipe down the ball head. For stubborn dirt, a slightly damp cloth can be used, followed by immediate drying. Do not use harsh chemicals or abrasive cleaners.
- Lubrication: The ball head is factory-lubricated. Do not attempt to lubricate internal components yourself, as this may attract dust and impair performance.
- Storage: Store the ball head in a clean, dry environment, away from direct sunlight and extreme temperatures.
- Inspection: Periodically check all screws and knobs for tightness. Ensure the quick release plate mechanism operates smoothly.
8. Troubleshooting
- Camera wobbles on ball head: Ensure the quick release plate is securely attached to the camera and the quick release clamp lever is fully tightened. Check that the quick release plate is correctly seated in the clamp.
- Ball head movement is too loose or too stiff: Adjust the Friction Control Knob (Figure 7) to achieve the desired tension.
- Ball head does not pan smoothly: Ensure the Base Panning Lock Knob is loosened. Clean any dust or debris from the panning mechanism.
- Difficulty attaching/detaching quick release plate: Ensure both the Quick Release Clamp Lever and the Quick Release Clamp Safety Knob are fully loosened.
If you encounter issues not covered here, please contact Benro customer support.
9. Specifications
| Feature | Specification |
|---|---|
| Model Number | GX35 |
| Product Dimensions | 4.33 x 3.54 x 3.35 inches |
| Item Weight | 14.1 ounces (0.88 Pounds) |
| Load Capacity | 77 lbs (35 kg) |
| Material | CNC-Machined Aluminum |
| Quick Release Plate | Arca-Swiss Compatible (Benro PU56) |
| Panoramic Control | Dual (Base and Quick Release Clamp) |
| Compatible Devices | Camera, Monitor |
| Color | Black |
10. Warranty and Support
10.1 Limited Warranty
The standard limited warranty for the Benro GX35 Ball Head is 3 years from the date of purchase for the original owner. If you register the product online, the warranty is extended by an additional 2 years, for a total of 5 years, in applicable regions.
Please retain your proof of purchase for warranty claims.
10.2 Customer Support
For further assistance, technical support, or warranty inquiries, please visit the official Benro store or contact their customer service department.
Benro Store: Benro Official Store on Amazon


