1. Introduction
This manual provides detailed instructions for the setup, operation, and maintenance of your BenQ TH685i 1080P Full HD Gaming Projector. Please read this manual thoroughly before using the projector to ensure proper and safe operation. The BenQ TH685i is designed to deliver an immersive gaming and entertainment experience with its 1080p HDR graphics, 3500 ANSI lumens brightness, low input lag, and integrated Android TV.
2. Package Contents
Verify that all items listed below are included in your package. If any items are missing or damaged, please contact your dealer immediately.
- BenQ TH685i Projector
- Power Cord
- Remote Control with Batteries
- Android TV Dongle (QS01)
- Quick Start Guide
- Warranty Card

Image: BenQ TH685i Projector, power cord, and remote control. The power cord is a standard black three-prong cable. The remote control is white with various buttons for power, menu, source, navigation, and volume.
3. Product Overview
3.1 Front and Top View
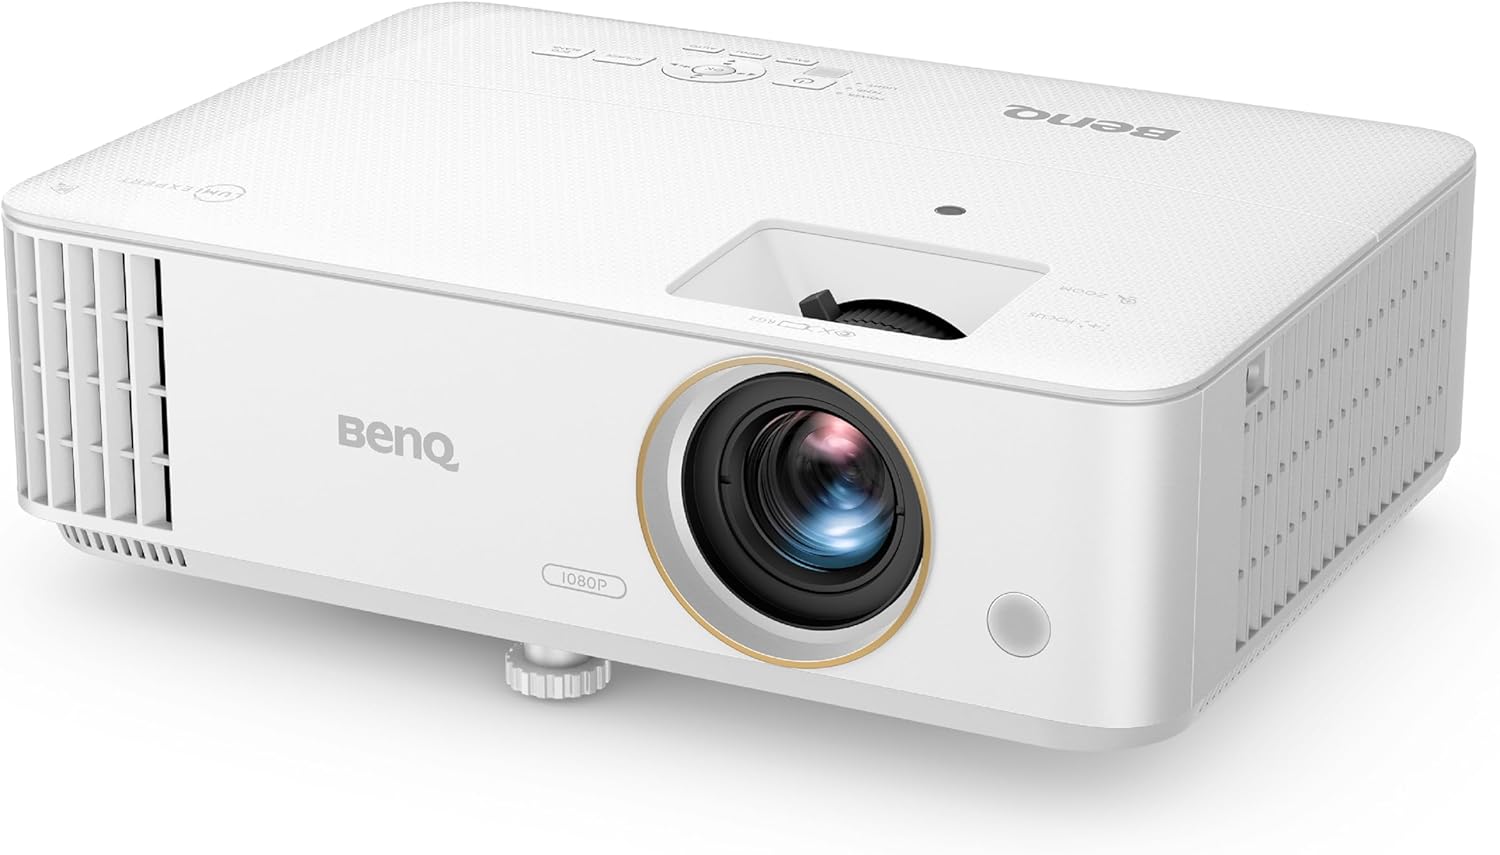
Image: Front and top view of the BenQ TH685i projector. The lens is prominently featured on the front, with ventilation grilles on the left side. Control buttons are visible on the top panel.
- Lens: Projects the image onto the screen.
- Focus Ring: Adjusts image sharpness.
- Zoom Ring: Adjusts image size.
- Control Panel: Buttons for basic projector functions.
- Ventilation Grilles: For air intake and exhaust to prevent overheating.
- Adjustable Feet: For adjusting projection angle.
3.2 Rear Panel and Connections
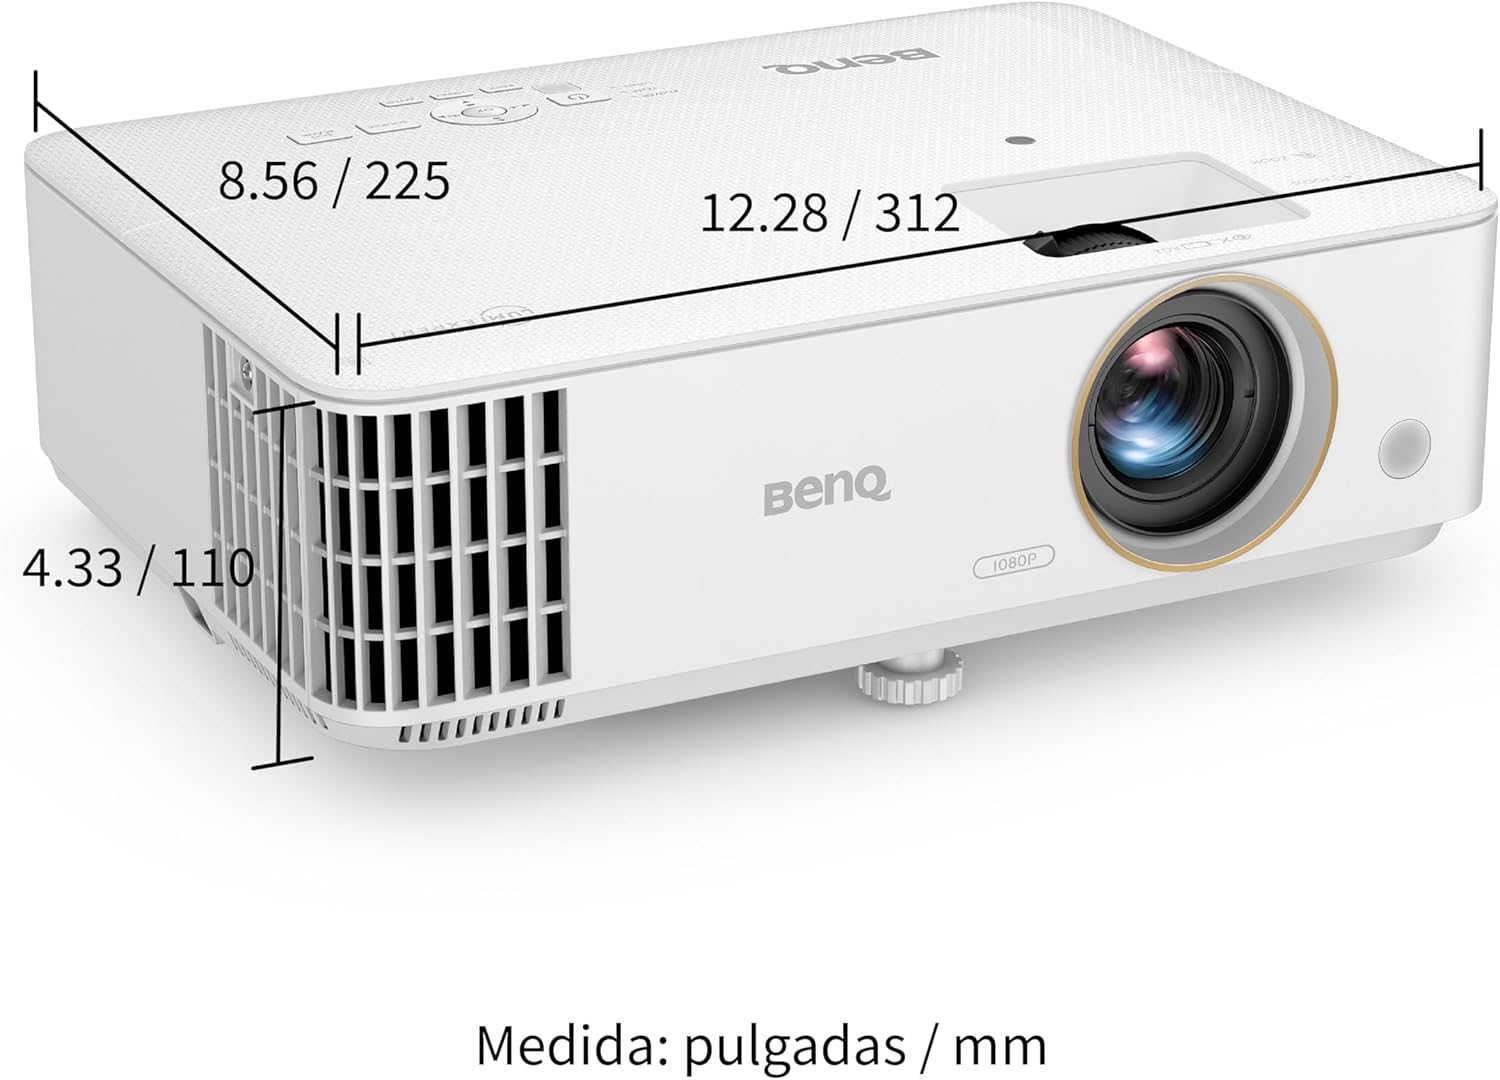
Image: Rear panel of the BenQ TH685i projector. This view displays the various input and output ports, including HDMI, USB, Audio In/Out, and RS232.
- HDMI 1 (HDCP 2.2): Connects to HDMI-enabled devices (e.g., game consoles, Blu-ray players).
- HDMI 2 (HDCP 2.2): Connects to HDMI-enabled devices.
- USB Type-A (1.5A): For power supply to the Android TV dongle or other USB devices.
- Audio In/Out: 3.5mm jacks for audio input or output to external speakers.
- RS232 IN: For projector control via a serial connection.
- Power Inlet: Connects the power cord.
3.3 Key Features
- 1080P Full HD & 4K HDR Support: Delivers crisp, detailed images.
- 3500 ANSI Lumens: Bright display suitable for various lighting conditions.
- 120Hz Refresh Rate & 8.3ms Low Latency: Optimized for smooth gaming.
- Enhanced Game Mode: Fine-tunes audio and visuals for gaming.
- Android TV: Integrated smart TV platform for streaming and apps.
- 1.3X Big Zoom: Flexible installation and image sizing.

Image: Infographic highlighting key features: 1080p HDR, 8.3ms response time, Game Mode, Game Sound Mode, 15,000 hours lamp life, 3500 lumens, 95% Rec.709 color, and 100-inch screen from 8.2 feet with 1.3x zoom.
4. Setup
4.1 Placement
Position the projector on a stable, flat surface or mount it to the ceiling. Ensure adequate ventilation around the projector. The TH685i features a short-throw ratio, allowing for large images from a short distance.

Image: Diagram illustrating throw distances for different screen sizes. For a 100-inch screen, the projector should be approximately 2.5 meters (8.2 feet) away. For 120 inches, about 3 meters, and for 150 inches, about 3.8 meters.
For ceiling mounting, refer to the bottom view for mounting points:

Image: Bottom view of the BenQ TH685i projector, showing air intake and exhaust, along with highlighted circular mounting points for ceiling installation. Dimensions are provided in inches and millimeters.
4.2 Power Connection
- Connect the power cord to the projector's power inlet.
- Plug the other end of the power cord into an electrical outlet.
- Press the power button on the projector or remote control to turn it on.
4.3 Connecting Devices
Use HDMI cables to connect your gaming consoles (PlayStation, Xbox, Nintendo Switch), Blu-ray players, or other media devices to the HDMI 1 or HDMI 2 ports on the projector's rear panel.
For external audio systems, connect an audio cable from the projector's Audio Out port to your sound system.
4.4 Android TV Setup
The BenQ TH685i includes an Android TV dongle (QS01). Insert the dongle into the designated internal HDMI port (usually labeled for the dongle) and power it via the USB Type-A port. Follow the on-screen instructions to set up your Android TV, including connecting to Wi-Fi and logging into your Google account.
5. Operating the Projector
5.1 Basic Operation
- Power On/Off: Use the power button on the projector or remote.
- Source Selection: Press the "Source" button on the remote to switch between HDMI inputs or Android TV.
- Focus Adjustment: Rotate the focus ring around the lens until the image is sharp.
- Zoom Adjustment: Rotate the zoom ring to adjust the image size.
- Keystone Correction: The projector supports auto vertical keystone correction. For manual adjustments, navigate to the OSD (On-Screen Display) menu.

Image: Illustration of auto vertical keystone correction, demonstrating how the projector automatically adjusts the image to be rectangular even when projected at an angle.
5.2 Gaming Features
- Game Mode: Activate Game Mode via the OSD menu for optimized picture settings for gaming, reducing input lag to 8.3ms at 1080p/120Hz.
- Game Sound Mode: Adjust audio profiles specifically for gaming to enhance in-game sounds.
- LumiExpert: This feature helps reduce eye strain during extended play sessions.


Images: Visuals demonstrating the 8.3ms low input lag, the exclusive Game Mode, and the finely-tuned Game Sound Mode, all designed to enhance the gaming experience.
5.3 Android TV and Streaming
Once Android TV is set up, you can access thousands of apps from the Google Play Store, including streaming services, games, and more. Use the remote control to navigate the Android TV interface.
- Casting: The projector supports AirPlay and Chromecast for casting content from your mobile devices without needing additional apps.

Image: Screenshot of the Android TV interface, displaying logos of popular streaming services and apps like Amazon Prime Video, NBA, YouTube, Disney+, Hulu, and more, indicating endless entertainment options.
6. Maintenance
6.1 Cleaning the Projector
- Exterior: Use a soft, lint-free cloth to wipe the projector's casing. Do not use abrasive cleaners or solvents.
- Lens: Gently clean the lens with a lens cleaning cloth and specialized lens cleaning solution. Avoid touching the lens surface directly.
- Ventilation: Ensure the ventilation grilles are free from dust and obstructions to maintain proper airflow.
6.2 Lamp Life
The projector lamp has an estimated lifespan of up to 15,000 hours in certain modes. Lamp life can vary based on usage and environmental conditions. When the lamp approaches its end of life, a warning message may appear on the screen.
7. Troubleshooting
| Problem | Possible Cause | Solution |
|---|---|---|
| No image on screen |
|
|
| Image is blurry |
|
|
| Image is distorted (trapezoid shape) |
|
|
| No sound |
|
|
8. Specifications
| Feature | Detail |
|---|---|
| Model Number | TH685i |
| Display Technology | DLP |
| Native Resolution | 1920 x 1080 (Full HD) |
| Maximum Display Resolution | 1920 x 1080 Pixels (4K HDR compatible) |
| Brightness | 3500 ANSI Lumens |
| Refresh Rate | 120Hz (at 1080p) |
| Input Lag | 8.3ms (at 1080p/120Hz) |
| Connectivity | HDMI (HDCP 2.2), USB Type-A, Audio In/Out, RS232 |
| Special Features | Internet Ready, Short Throw, Android TV, Game Mode |
| Product Dimensions | 22.5 x 31.2 x 11 cm; 2.8 kg (approx. 8.86 x 12.28 x 4.33 inches; 6.17 lbs) |
| Power Source | AC Power |
| Batteries | 1 Lithium Polymer battery required (included for remote) |
| Manufacturer | BenQ |
9. Warranty and Support
For warranty information, please refer to the warranty card included in your product package or visit the official BenQ website. For technical support, product registration, or service inquiries, please contact BenQ customer service through their official channels.
BenQ Official Website: www.benq.com


