
1. Introduction
This manual provides essential information for the safe and efficient operation, installation, and maintenance of your ARCH ARCH-09 24V Electric Oil Transfer Pump. Please read this manual thoroughly before using the pump to ensure proper function and to prevent damage or injury. Keep this manual for future reference.
The ARCH-09 is a self-priming electric pump designed for transferring diesel and kerosene. It features a forward and reverse function, high flow rate, and is suitable for various applications such as refueling boats, excavators, and transferring fuel from oil barrels.
Safety Information
- Always ensure the pump is connected to the correct voltage supply (24V DC for this model) to prevent damage.
- Do not use this pump for transferring gasoline, alcohol, or other flammable liquids with low flash points, as this may cause fire or explosion.
- Ensure all connections are secure and leak-free before operation.
- Operate the pump in a well-ventilated area.
- Keep children and unauthorized personnel away from the operating pump.
- Disconnect power before performing any maintenance or cleaning.
2. Product Overview
The ARCH ARCH-09 24V Electric Oil Transfer Pump is a robust unit designed for efficient fluid transfer. Key features include:
- Forward and Reverse Function: Allows for flexible fluid transfer direction.
- High Flow Rate: Capable of transferring up to 60 liters per minute.
- Durable Construction: Features a high-quality copper wire motor and cast iron housing for longevity.
- Ergonomic Design: Includes a humanized handle for easy portability and a sturdy base for stable placement.
- Versatile Application: Suitable for diesel and kerosene transfer in various mechanical equipment and vehicles.

Figure 2.1: Main view of the ARCH ARCH-09 24V Electric Oil Transfer Pump.

Figure 2.2: Pump showing forward and reverse functionality and included filter for clean fluid transfer.

Figure 2.3: General form factor of ARCH electric oil transfer pumps.
3. Setup
3.1 Unpacking and Inspection
Carefully remove the pump and all accessories from the packaging. Inspect all components for any signs of damage during transit. If any damage is found, do not proceed with installation and contact customer support.
3.2 Components Identification

Figure 3.1: Included accessories: 12V/24V battery clamps, 220V power plug (for 220V variants), and humanized handle design.
- Pump Unit: The main body of the oil transfer pump.
- Inlet/Outlet Ports: Connections for hoses.
- Power Cable/Clamps: For connecting to a 24V DC power source (battery clamps for 12V/24V models).
- Filter: To ensure clean fluid transfer.
- Handle: For easy carrying.
3.3 Connecting Hoses
- Attach the inlet hose securely to the pump's inlet port. Ensure a tight seal to prevent air leaks, which can affect priming.
- Attach the outlet hose securely to the pump's outlet port.
- Place the inlet hose into the fluid source (e.g., oil barrel). Ensure the filter is submerged.
- Direct the outlet hose to the receiving container.
3.4 Power Connection
This model operates on 24V DC. Connect the provided battery clamps to a compatible 24V battery or power supply. Ensure correct polarity: red clamp to positive (+), black clamp to negative (-).
WARNING: Connecting to an incorrect voltage (e.g., 12V or 220V) will damage the pump. This specific model is designed for 24V operation.
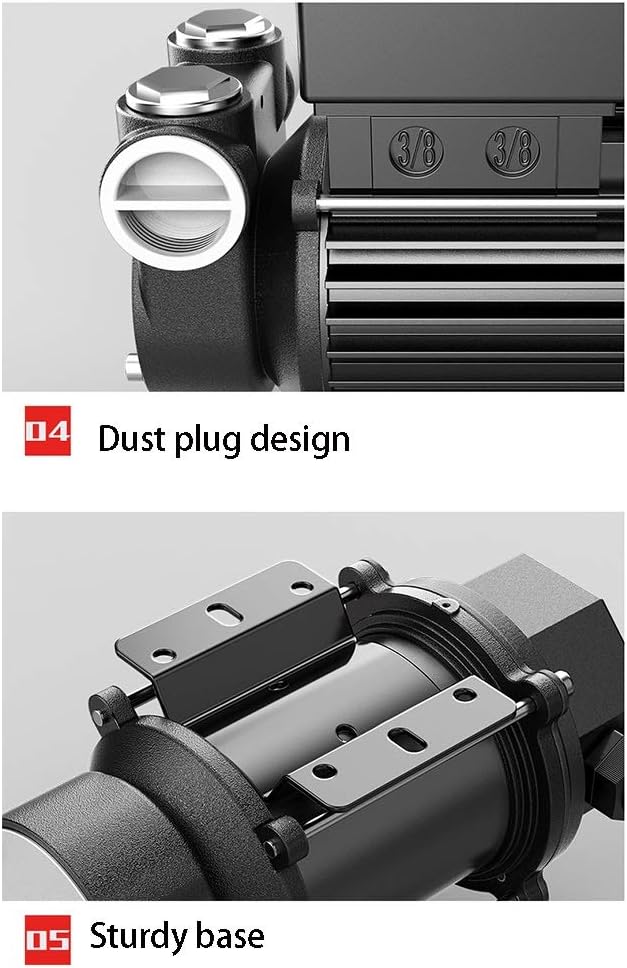
Figure 3.2: Dust plug design and sturdy base for stable operation.
4. Operating Instructions
4.1 Powering On/Off
The pump is equipped with a waterproof power switch. To start the pump, toggle the switch to the 'ON' position. To stop, toggle to the 'OFF' position.

Figure 4.1: Waterproof power switch and high-intensity cooling fan.
4.2 Forward and Reverse Function
This pump features a forward and reverse switch, allowing you to control the direction of fluid flow. Select the desired direction before starting the pump. Ensure the switch is fully engaged in either the forward or reverse position.
4.3 Fluid Transfer
- Ensure all connections are secure and the inlet hose filter is submerged in the fluid source.
- Select the desired flow direction (forward or reverse).
- Turn on the pump using the power switch. The pump will begin to self-prime and transfer fluid.
- Monitor the fluid transfer process. Do not run the pump dry for extended periods, as this can cause damage.
- Once transfer is complete, turn off the pump.
- Disconnect power and hoses.
4.4 Applicable Mediums
This pump is designed for transferring diesel and kerosene only. Do not use with water, gasoline, corrosive chemicals, or other incompatible fluids.

Figure 4.2: Internal motor, robust design, fluid compatibility, and typical applications.
5. Maintenance
5.1 Cleaning
- After each use, especially when transferring different types of compatible fluids, it is recommended to flush the pump with a small amount of clean diesel or kerosene to remove residues.
- Wipe the exterior of the pump with a clean, dry cloth. Do not use harsh chemicals or solvents.
5.2 Filter Inspection
Regularly inspect the inlet filter for debris. Clean or replace the filter as necessary to maintain optimal flow and prevent pump damage.
5.3 Storage
When not in use, store the pump in a clean, dry place, away from direct sunlight and extreme temperatures. Ensure all hoses are drained and disconnected.
6. Troubleshooting
| Problem | Possible Cause | Solution |
|---|---|---|
| Pump does not start | No power supply Incorrect voltage Loose connection Faulty switch | Check power source and connections Ensure 24V DC supply Tighten all electrical connections Contact support if switch is faulty |
| Low flow rate or no fluid transfer | Air leak in inlet hose Clogged inlet filter Inlet hose not submerged Pump running dry Hose kinked or blocked | Check and tighten all hose connections Clean or replace inlet filter Ensure filter is fully submerged Stop pump, re-prime if necessary Inspect hoses for obstructions |
| Pump is noisy | Air in the system Pump running dry Internal wear | Check for air leaks, ensure proper priming Ensure continuous fluid supply Contact support for inspection |
If you encounter problems not listed here or if the suggested solutions do not resolve the issue, please contact customer support.
7. Specifications
| Feature | Specification |
|---|---|
| Model | ARCH-09 |
| Voltage | 24V DC |
| Rated Power | 600W |
| Flow Rate | 60 L/MIN |
| No-load Speed | 4000 r/min |
| Suction Range | 3-5 meters |
| Head | 120 meters |
| Applicable Medium | Diesel, Kerosene |
| Material | Cast Iron |
| Item Weight | 6700 Grams |
| Operation Mode | Electric |
| Fit Type | Universal Fit |
| Compatible Vehicle Type | Car, Boat, Excavator, Truck |
8. Warranty and Support
8.1 Warranty Information
This product is covered by a manufacturer's warranty against defects in materials and workmanship. Please retain your proof of purchase for warranty claims. Specific warranty terms and duration may vary; refer to your purchase documentation for details.
8.2 Customer Support
For technical assistance, troubleshooting, or warranty inquiries, please contact ARCH customer support. We are committed to providing prompt assistance and will respond to your inquiries within 24 hours.
Contact information can typically be found on the product packaging or the retailer's website where the product was purchased.