Introduction
Thank you for choosing the WiMiUS H7 Trail Camera. This camera is designed for wildlife observation, home security, and property surveillance, offering high-quality images and videos with advanced features like infrared night vision and rapid trigger speed. Please read this manual carefully before operating the camera to ensure proper use and optimal performance.
Product Overview
The WiMiUS H7 Trail Camera features a robust, IP66 waterproof design, making it suitable for various outdoor environments. It captures 16-megapixel still images and 1080p video, equipped with a 2-inch LCD display for easy setup and review.
Camera Components
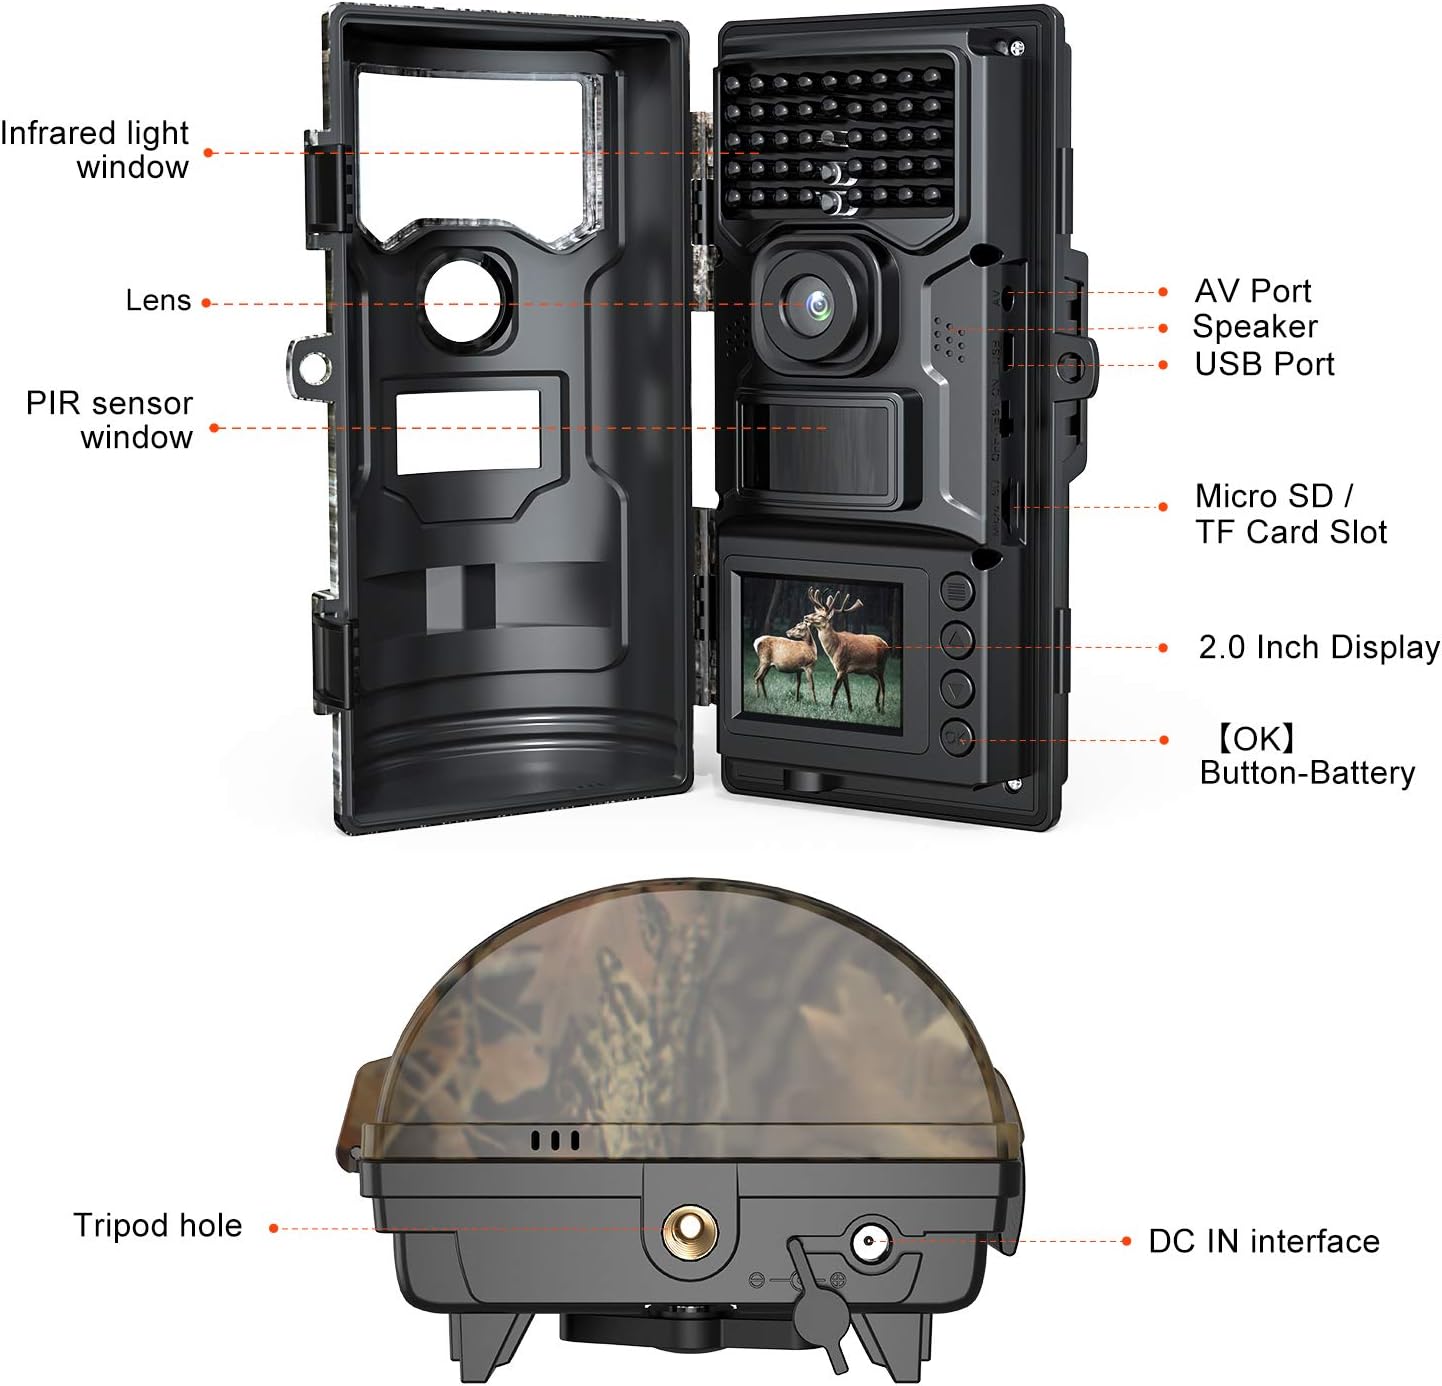
Figure 1: WiMiUS H7 Trail Camera Component Diagram. This image displays the camera with its front cover open, highlighting key parts such as the infrared light window, lens, PIR sensor window, 2.0-inch display, Micro SD/TF card slot, AV port, speaker, USB port, tripod hole, and DC IN interface.
- Infrared Light Window: Houses the IR LEDs for night vision.
- Lens: The primary camera lens for capturing images and videos.
- PIR Sensor Window: Detects motion to trigger recording.
- 2.0 Inch Display: For menu navigation, settings adjustment, and playback.
- Micro SD / TF Card Slot: Insert your memory card here (up to 32GB, not included).
- AV Port: For connecting to an external display.
- Speaker: For audio playback from recorded videos.
- USB Port: For connecting to a computer to transfer files.
- Tripod Hole: Standard thread for tripod or mounting accessories.
- DC IN Interface: For external power supply.
Setup
1. Power Supply
The WiMiUS H7 camera operates on batteries. Ensure you have the correct type and number of batteries (not included). Open the battery compartment and insert the batteries according to the polarity indicators.
2. Insert SD Card
A Micro SD (TF) card is required for storing photos and videos. The camera supports cards up to 32GB. Insert the SD card into the designated slot with the contacts facing down until it clicks into place.
3. Mounting the Camera
The camera can be mounted using the included strap or a tripod. For optimal wildlife monitoring, position the camera on a stable surface or tree, ensuring a clear view of the area you wish to monitor.

Figure 2: Camera Mounted for Wildlife Monitoring. This image shows the WiMiUS H7 camera securely attached to a tree trunk in a snowy environment, demonstrating a typical setup for observing wildlife.

Figure 3: Package Contents. This image displays the items included in the WiMiUS H7 Trail Camera package: the camera unit, user manual, mounting strap, USB cable, and a mounting bracket.
Operating Instructions
1. Powering On/Off
Locate the power switch inside the camera compartment. Switch it to the "ON" position to power on the camera. To power off, switch it to "OFF".
2. Menu Navigation
Use the navigation buttons (up, down, left, right, OK) around the 2.0-inch LCD display to navigate through the camera's menu. The "OK" button confirms selections.
3. Setting Up Recording Modes
The camera offers various recording modes and settings:
- Photo Mode: Captures still images (16MP resolution).
- Video Mode: Records video clips (1080p resolution).
- Photo + Video Mode: Captures a still image followed by a video clip.
- Time-Lapse: Captures images at set intervals.
4. PIR Sensitivity and Trigger Speed
Adjust the PIR (Passive Infrared) sensitivity to control how easily motion triggers the camera. The camera boasts an incredible 0.5-second trigger speed, ensuring quick capture of detected movements.

Figure 4: Incredible Trigger Sensitivity. This image highlights the camera's rapid 0.5-second trigger speed, 90° PIR detection angle, and 70ft infrared distance, along with time-lapse shooting and three shooting modes.
5. Night Vision
The camera is equipped with advanced infrared LED lights for clear black and white night vision. These LEDs operate silently and do not disturb wildlife.

Figure 5: Day and Night Captures. This image demonstrates the camera's capability to capture clear images both in daylight (deer) and at night using infrared vision (lions).
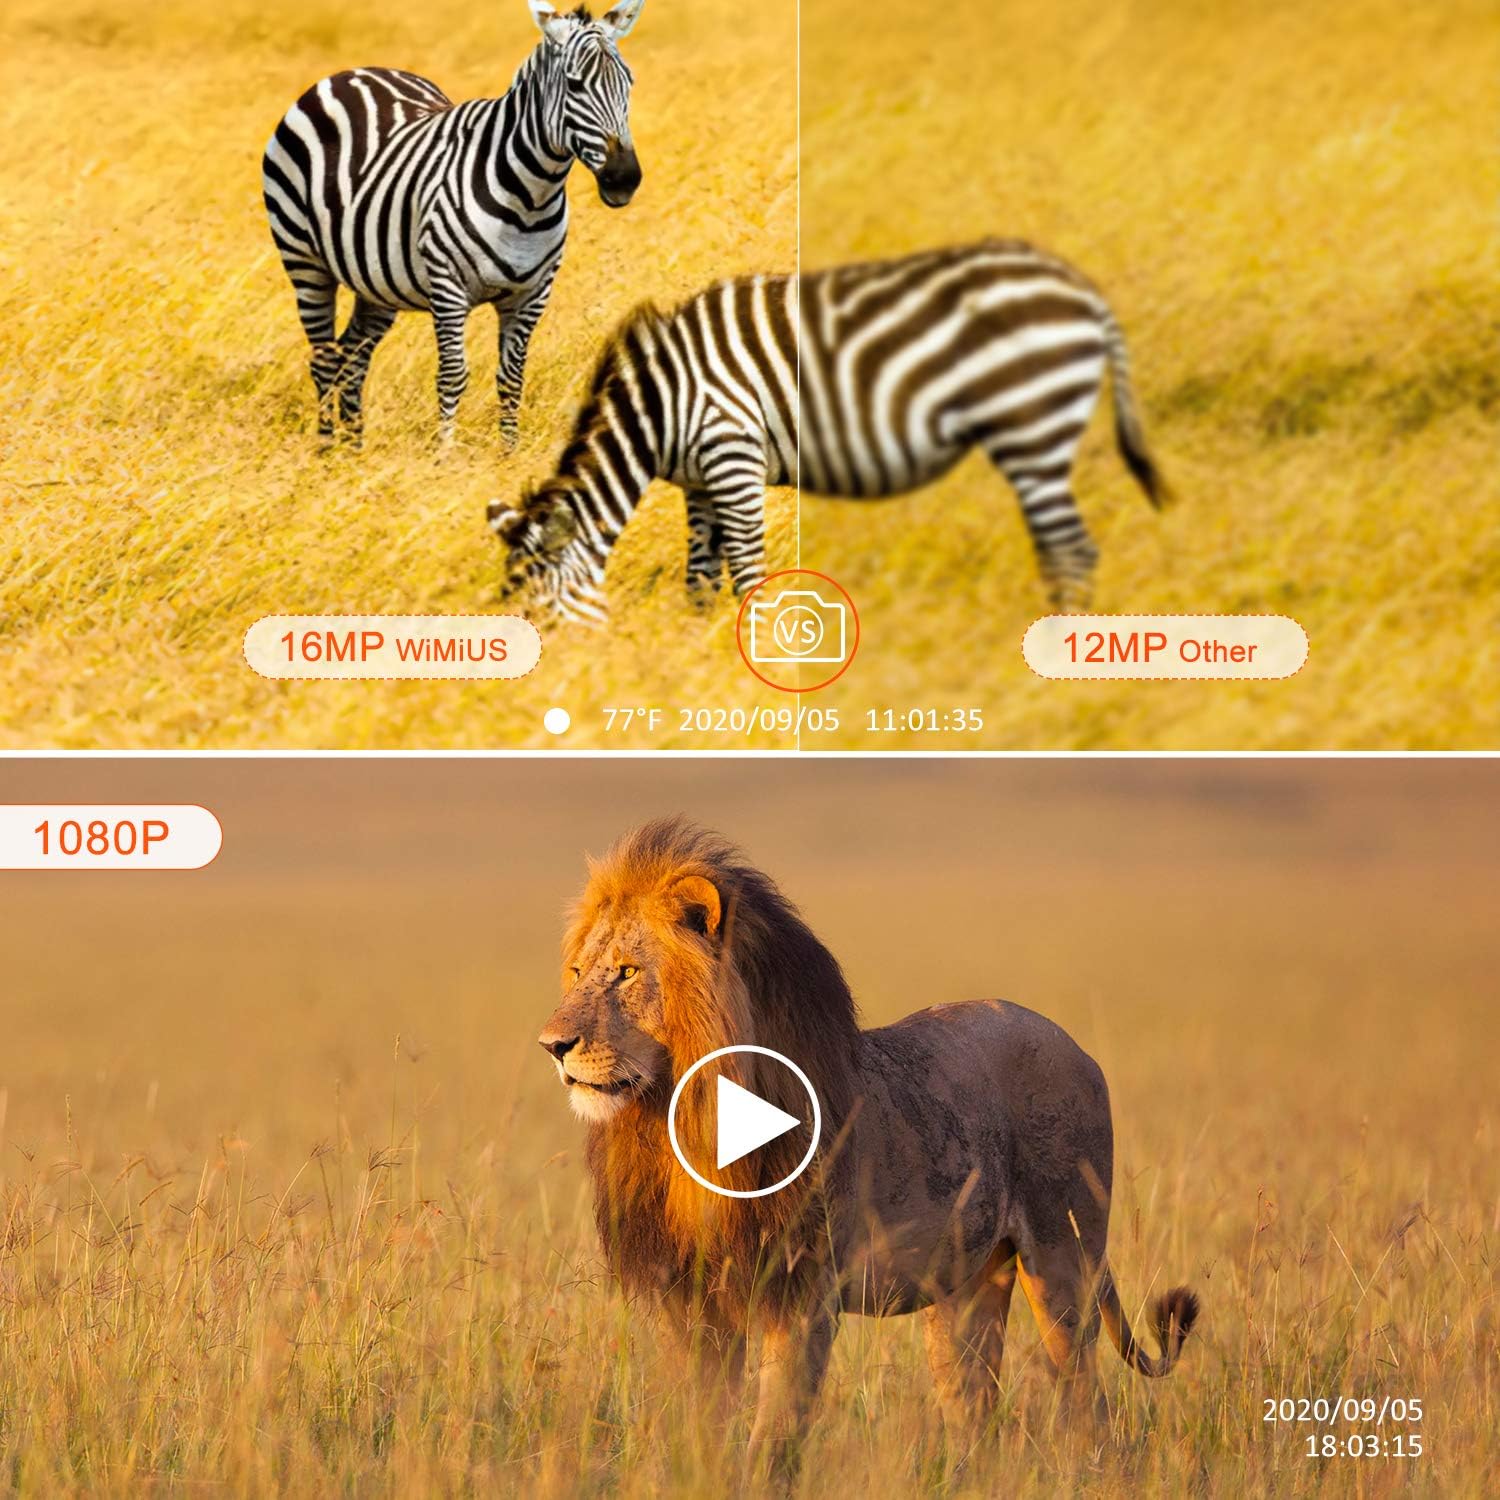
Figure 6: Image and Video Quality. This image illustrates the superior 16MP image quality of the WiMiUS camera compared to a 12MP alternative, and showcases a frame from a 1080p video recording.
Maintenance
1. Cleaning
Wipe the camera's exterior with a soft, damp cloth. Do not use harsh chemicals or abrasive cleaners. Ensure the lens and PIR sensor window are clean for optimal performance.
2. Battery Replacement
Replace batteries when the low battery indicator appears on the display or when performance degrades. Always use fresh batteries of the recommended type.
3. SD Card Management
Regularly check the SD card for available space. Format the SD card periodically to maintain optimal performance and prevent data corruption. Back up important files before formatting.
Troubleshooting
| Problem | Possible Cause | Solution |
|---|---|---|
| Camera not powering on | Low or dead batteries; Incorrect battery insertion; Power switch off. | Replace batteries; Check battery polarity; Ensure power switch is in "ON" position. |
| No images/videos captured | SD card full or not inserted; PIR sensitivity too low; Camera in wrong mode. | Insert/format SD card; Increase PIR sensitivity; Select appropriate recording mode. |
| Poor night vision images | IR LEDs obstructed; Object too far or too close. | Clear obstructions from IR window; Adjust camera position. |
| Short battery life | Frequent triggers; Low quality batteries; Extreme temperatures. | Reduce trigger frequency; Use high-quality batteries; Consider external power in cold weather. |
Specifications
| Feature | Detail |
|---|---|
| Model | H7 |
| Image Resolution | 16 Megapixels |
| Video Resolution | 1080p |
| Trigger Speed | 0.5 seconds |
| PIR Detection Angle | 90 degrees |
| Infrared Distance | Up to 70 feet (approx. 21 meters) |
| Display Screen | 2.0-inch LCD |
| Storage | Micro SD / TF Card (up to 32GB, not included) |
| Waterproof Rating | IP66 |
| Power Source | Batteries (not included) or external DC IN |
| Dimensions (L x W x H) | 18 x 7 x 9 cm (approx. 7.1 x 2.8 x 3.5 inches) |
| Weight | 580 grams (approx. 1.28 lbs) |
| Connectivity | Wireless |
| Recommended Uses | Home, Security, Surveillance |
| Color | Yellow (Camouflage pattern) |
| Number of Channels | 16 |
Warranty and Support
For warranty information and technical support, please refer to the contact details provided with your purchase or visit the official WiMiUS website. Keep your purchase receipt as proof of purchase.
Manufacturer: WiMiUS


