1. Introduction
This manual provides essential information for the safe and effective use, installation, and maintenance of your Oregon 91P033X3 saw chains. These chains are designed for specific chainsaw models requiring a 3/8 inch LP pitch, 1.3 mm (0.050 inch) gauge, and 33 drive links, suitable for 20 cm (8-inch) guide bars. Please read this manual thoroughly before installation and operation.
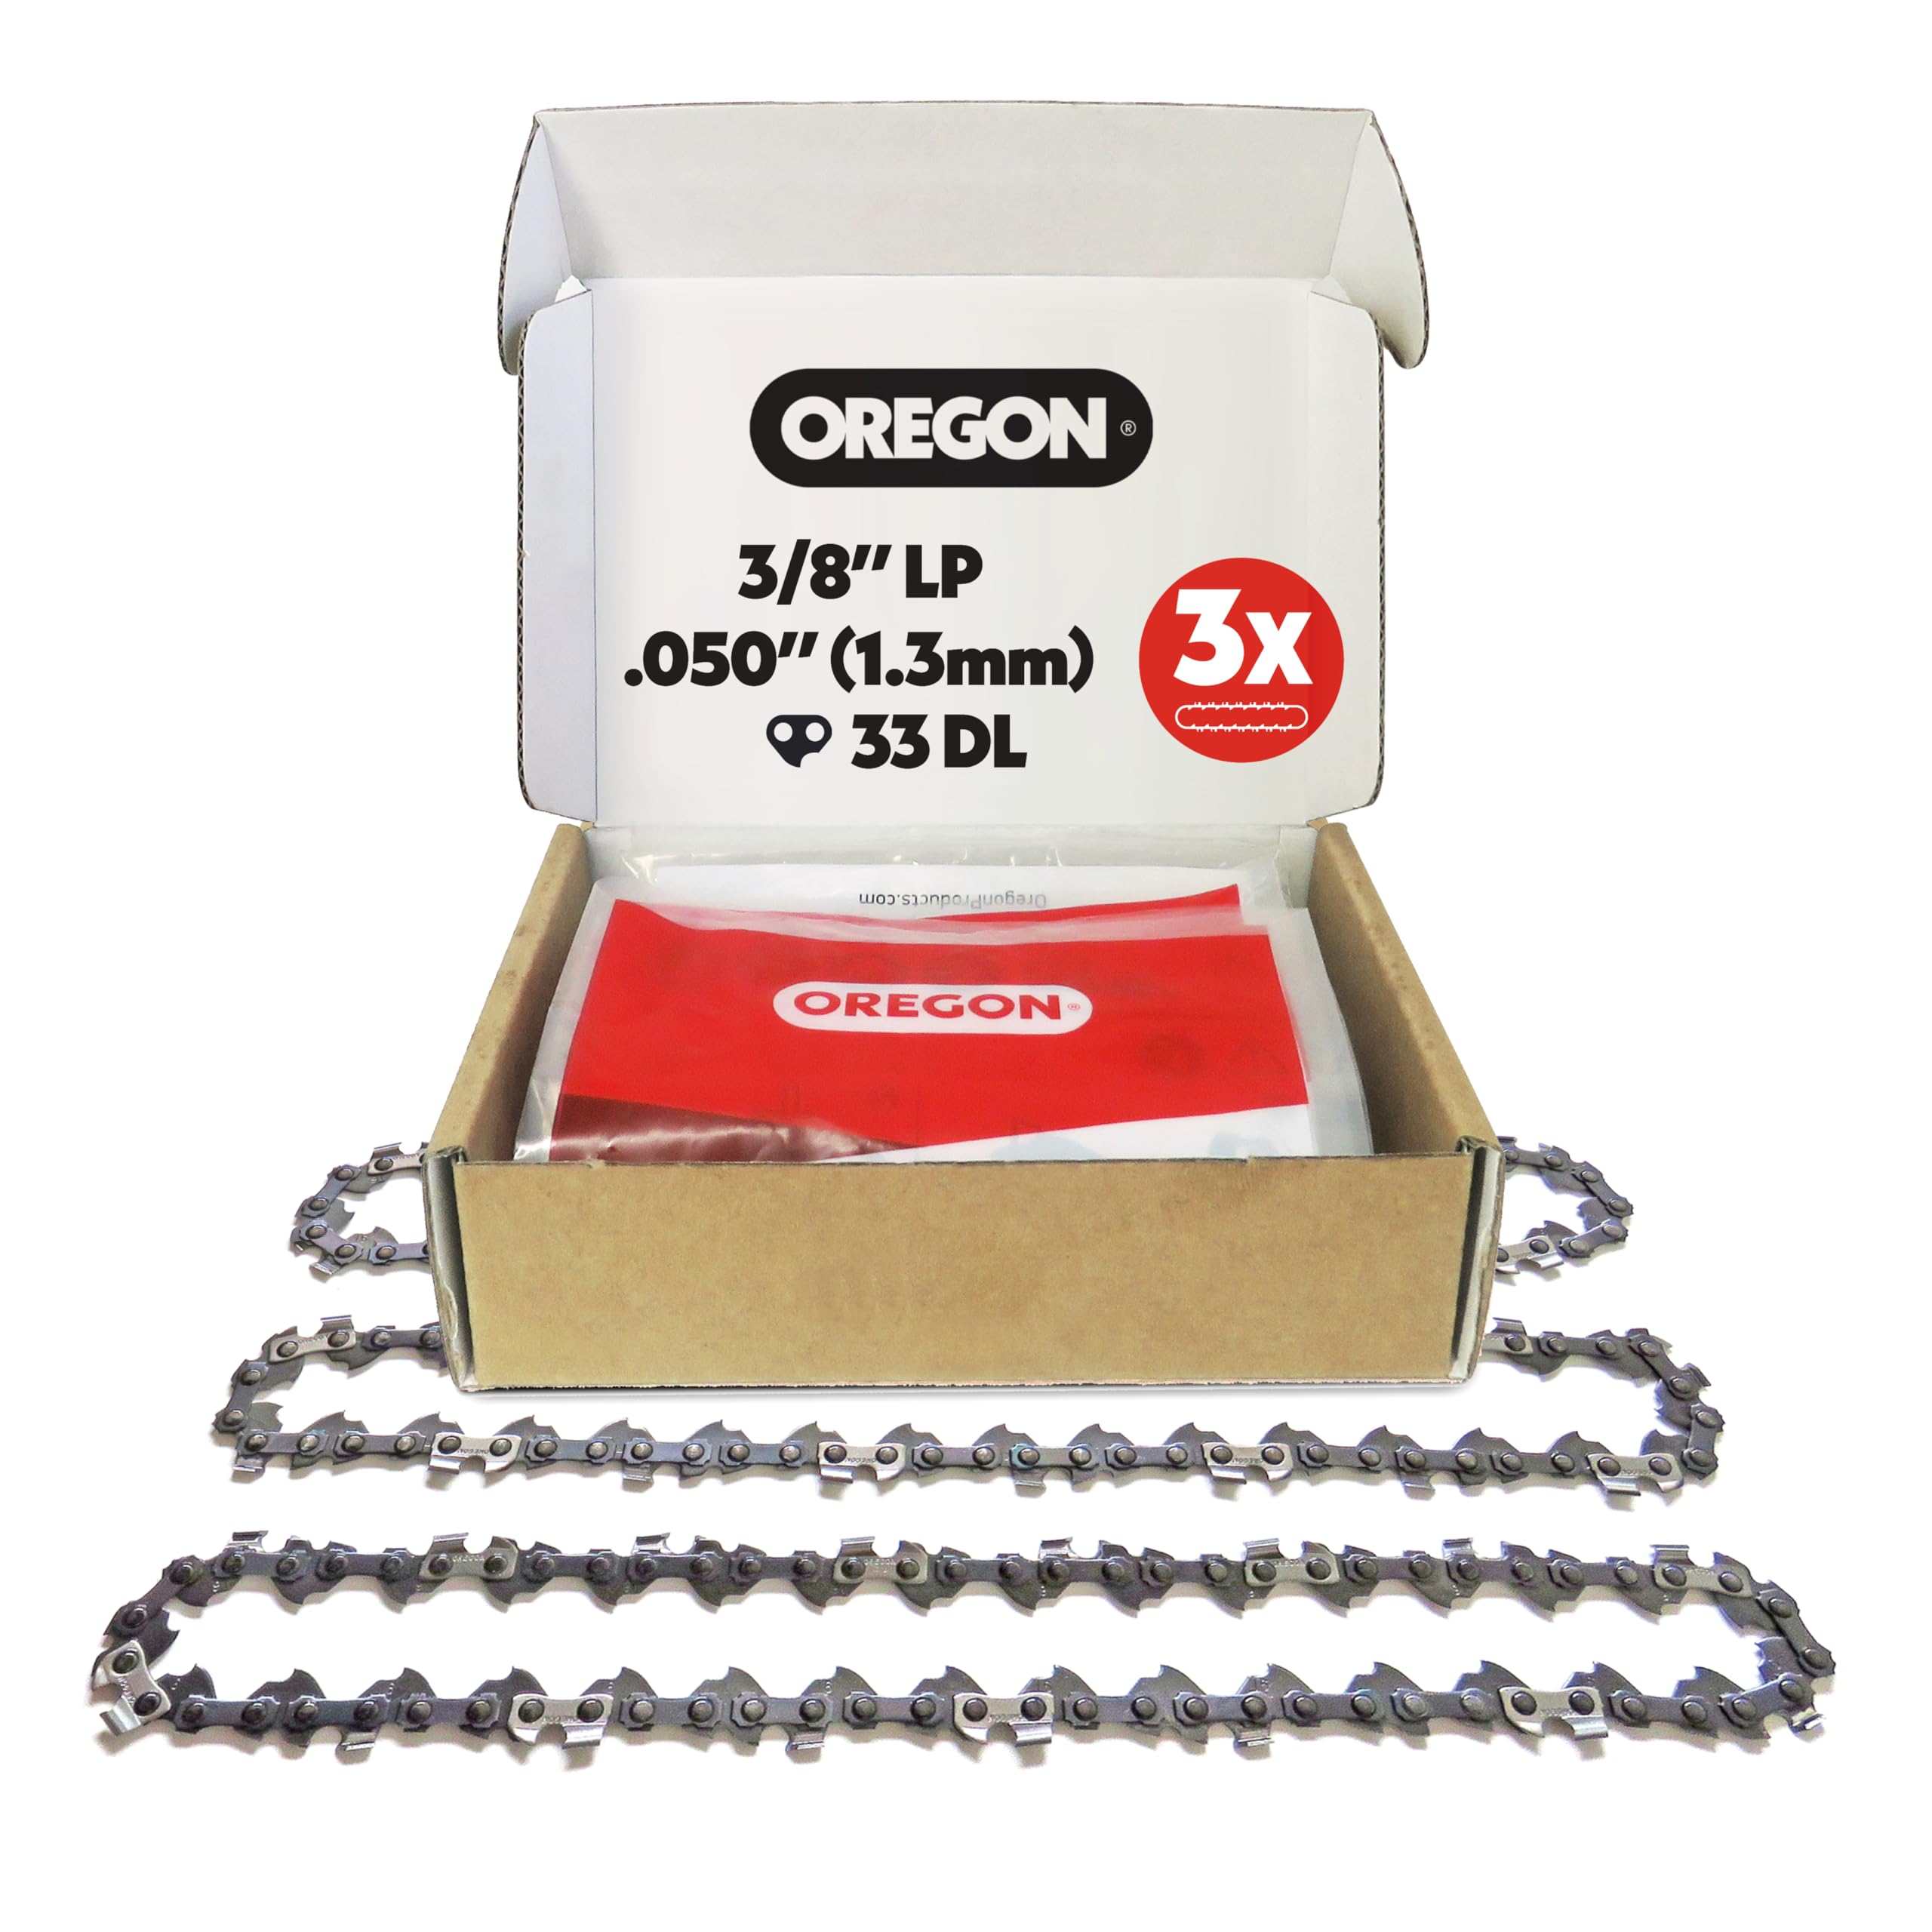
Image 1.1: Close-up view of the Oregon 91P033X3 saw chain links and cutters.
2. Product Features
The Oregon 91P033X3 saw chains are engineered for performance and safety. Key features include:
- Low-Kickback Design: Certified to minimize reactive force, enhancing user safety during operation.
- Low-Vibration: Reduces operator fatigue and improves control.
- Chamfer Chisel Cutters: Provide durability and facilitate easier maintenance and sharpening.
- Shock Absorber Drive Link: Combined with the depth limiter design, this feature contributes to reduced kickback while maintaining strong cutting performance.
- Compatibility: Designed to fit standard chainsaw/rod saw models requiring 3/8" LP pitch, 1.3mm (0.050") thickness, and 33 drive links.
- Pack of 3: Provides multiple replacement chains for extended use.

Image 2.1: Visual representation of the Oregon 91P033X3 saw chain specifications.

Image 2.2: Certification indicating the low-kickback design of the saw chain.
3. Technical Specifications
| Specification | Detail |
|---|---|
| Model Number | 91P033X3 |
| Brand | Oregon |
| Pitch | 3/8 inch LP (Low Profile) |
| Gauge | 1.3 mm (0.050 inch) |
| Drive Links | 33 |
| Guide Bar Length Compatibility | 20 cm (8 inch) |
| Material | Steel (91P033X3) |
| Item Package Quantity | 3 chains |
| Product Dimensions (per chain) | Approximately 15.5 x 11 x 4 cm |
| Weight (total package) | 345 g |
| Safety Standard Compliance | Meets ANSI B175.1-2012 and CSA Z62.3 kickback requirements |
4. Compatibility
These Oregon saw chains are designed to fit various chainsaw and rod saw models that require a 3/8" LP pitch, 1.3mm (0.050") gauge, and 33 drive links. Always verify your chainsaw's specifications before purchasing and installing a new chain.
Known compatible models include, but are not limited to:
- Bosch: UniversalChainPole18, UniversalChain18
- Einhell: GC-EC 750 T, GC-LC 1815 T, GE-HC 18 Li, GE-LC 18Li T
- Grizzly: BKS25L, EKS710T
- Ryobi: ONE+ OPP1820, RPP750S, RPP750S.20
- MacAllister: M4MTP25, Mac 750w, HKPCS06D05-X
- Titan: TTL650GDO, TTK587GDO
- Other brands: Alpina, Florabest, Gardol, Greenworks, Hanseatic, Hurricane, LUX, Mr. Gardener, Pattfield, Qualcast, Scheppach, Stiga, Spear & Jackson, Sterwins, Texas, Wingart.
This chain is suitable for chainsaws up to 42CC.
5. Safety Information
Chainsaws are powerful tools that can cause serious injury if not used correctly. Always prioritize safety when handling, installing, or operating saw chains.
- Read Your Chainsaw Manual: Always refer to your chainsaw's specific instruction manual for detailed safety guidelines, operation procedures, and maintenance schedules.
- Personal Protective Equipment (PPE): Always wear appropriate PPE, including safety glasses, hearing protection, gloves, safety helmet, and protective legwear (chaps) when operating a chainsaw.
- Kickback Prevention: This saw chain is designed with low-kickback features. However, kickback can still occur. Maintain a firm grip, proper stance, and be aware of the chain's rotation and potential contact points. Avoid cutting with the tip of the guide bar.
- Chain Condition: Never operate a chainsaw with a dull, damaged, or improperly tensioned chain. Inspect the chain before each use.
- Proper Installation: Ensure the chain is installed correctly and tensioned according to your chainsaw manufacturer's instructions. An improperly installed chain can derail and cause injury.
- Work Area: Keep your work area clear of bystanders, especially children and pets. Ensure stable footing and clear escape routes.
This saw chain meets ANSI B175.1-2012 and CSA Z62.3 kickback requirements when tested according to these standards.
6. Installation
Proper installation is crucial for safe and efficient chainsaw operation. Always consult your chainsaw's owner's manual for specific instructions regarding chain replacement, as procedures may vary between models.
General Installation Steps:
- Ensure Safety: Disconnect the spark plug wire or remove the battery from your chainsaw to prevent accidental starting. Wear protective gloves.
- Remove Old Chain: Loosen the bar nuts and remove the clutch cover. Carefully remove the old chain and guide bar.
- Clean Components: Clean any sawdust or debris from the guide bar groove, sprocket, and clutch area.
- Install New Chain: Place the new Oregon saw chain onto the sprocket, ensuring the cutters are facing the correct direction (usually forward on the top of the guide bar).
- Mount Guide Bar: Fit the guide bar over the chain and onto the bar studs. Ensure the drive links sit correctly in the guide bar groove.
- Replace Clutch Cover: Reinstall the clutch cover and hand-tighten the bar nuts.
- Adjust Chain Tension: Adjust the chain tension according to your chainsaw's manual. The chain should be snug against the bottom of the guide bar, but still able to be pulled freely by hand. It should not sag.
- Final Tightening: Once tension is correct, fully tighten the bar nuts.
- Check Lubrication: Ensure the chain oil reservoir is full.

Image 6.1: Packaging of the Oregon 91P033X3 saw chain 3-pack, illustrating how to identify original factory-made chains.
For further assistance in identifying genuine Oregon chains, refer to the Global Trade Identification Number (GTIN) 05400591145817, which can be found on the product packaging.
7. Operation
Once the Oregon saw chain is correctly installed and tensioned, you can operate your chainsaw according to its manufacturer's instructions. Always perform a pre-operation check:
- Verify chain tension.
- Check chain lubrication.
- Inspect the chain for any damage or dullness.
- Ensure all safety features of the chainsaw are functional.
- Confirm your work area is clear and safe.
Always maintain a firm grip on the chainsaw with both hands and stand in a balanced position. Avoid overreaching or cutting above shoulder height. Be mindful of potential kickback and always use the chain for its intended purpose.

Image 7.1: Example of a chainsaw in operation, demonstrating proper safety attire and cutting technique.
8. Maintenance
Regular maintenance extends the life of your saw chain and ensures safe operation. Key maintenance tasks include:
- Sharpening: Sharpen the chain regularly to maintain cutting efficiency and reduce wear on the chainsaw motor. Use the correct file size and angle as specified by Oregon for 3/8" LP chains. Dull chains are dangerous and inefficient.
- Cleaning: After each use, clean the chain to remove sap, sawdust, and debris. This prevents buildup that can hinder performance and cause corrosion.
- Lubrication: Ensure your chainsaw's automatic oiler is functioning correctly and that the chain is adequately lubricated during operation. Proper lubrication reduces friction and heat, preventing premature wear.
- Tension Check: Re-check chain tension frequently, especially during initial use and after prolonged cutting. Chains can stretch, requiring re-tensioning.
- Inspection: Periodically inspect the entire chain for damaged or missing drive links, cracked cutters, or excessive wear. Replace the chain if any significant damage is found.
- Storage: When not in use, clean and lightly oil the chain before storing it in a dry place to prevent rust.
9. Troubleshooting
This section addresses common issues related to saw chain performance. For chainsaw-specific problems, refer to your chainsaw's manual.
- Chain Not Cutting Efficiently:
- Cause: Dull chain, incorrect sharpening angle, improper chain tension, or insufficient lubrication.
- Solution: Sharpen the chain, verify sharpening angles, adjust chain tension, and ensure adequate chain oil.
- Chain Smoking or Overheating:
- Cause: Dull chain, improper chain tension (too tight), or lack of lubrication.
- Solution: Sharpen the chain, loosen chain tension slightly (while maintaining proper sag), and check chain oiler function.
- Chain Derailment:
- Cause: Improper chain tension (too loose), worn guide bar groove, or damaged drive links.
- Solution: Adjust chain tension, inspect guide bar for wear, and replace the chain if drive links are damaged.
- Excessive Vibration:
- Cause: Damaged or unevenly sharpened cutters, bent drive links, or improper chain tension.
- Solution: Inspect chain for damage, ensure even sharpening, and adjust tension.
10. Warranty and Support
For information regarding the warranty of your Oregon saw chains, please refer to the official Oregon website or contact Oregon customer support directly. Warranty terms typically cover manufacturing defects but do not cover wear and tear from normal use, improper installation, or misuse.
Oregon Customer Support: For technical assistance, product inquiries, or warranty claims, please visit the official Oregon website or consult the contact information provided with your product packaging.

Image 10.1: The official Oregon brand logo.


