
Introduction
This manual provides comprehensive instructions for the setup, operation, maintenance, and troubleshooting of your Blackmore Pro Audio BMP-12 Dual Wireless UHF Microphone System. Designed for stable, interference-free audio, this portable system offers an operating range of over 200 feet in open areas, making it suitable for various applications including outdoor activities, home entertainment, and professional presentations.
What's in the Box
Upon unpacking, please verify that all components are present:
- 2 x Wireless Microphones (BMP-12)
- 1 x Wireless Receiver
- 4 x AA Batteries
- 1 x USB Charging Cable (for receiver)
- 1 x User Manual (this document)
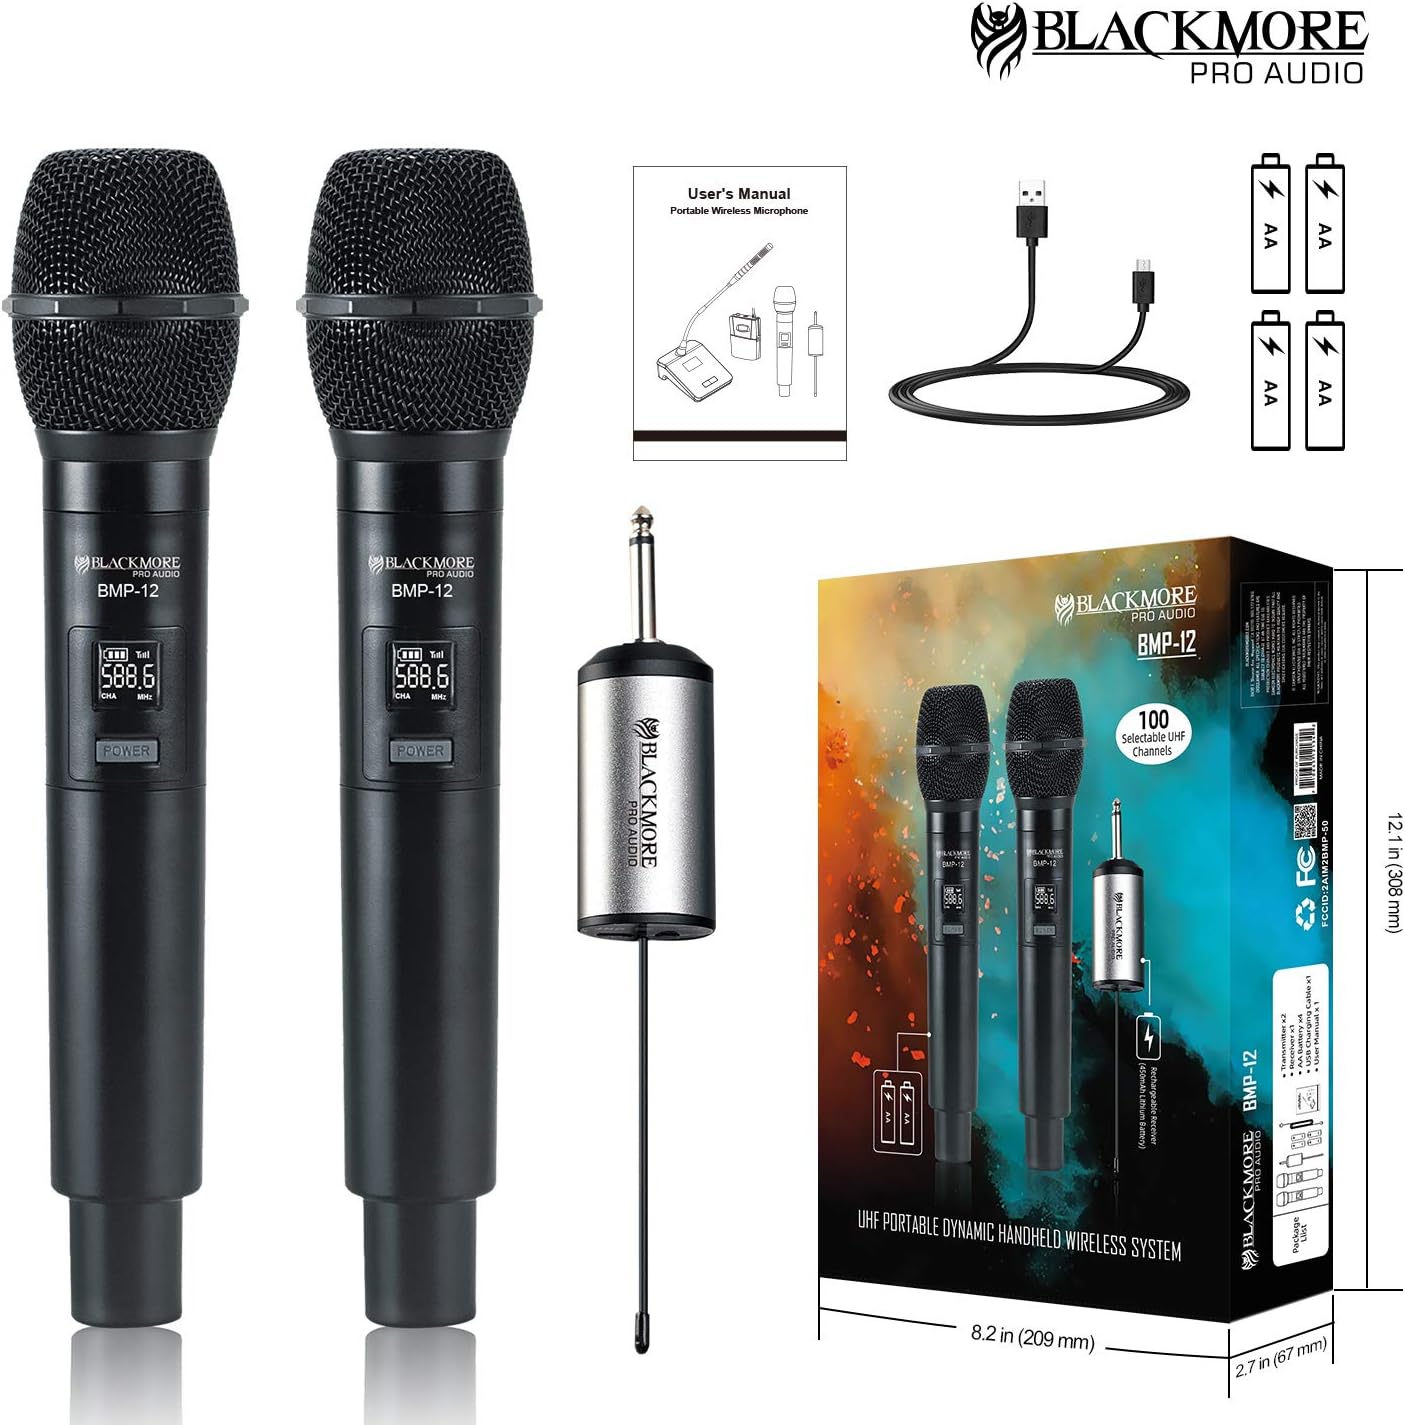
Image: The Blackmore Pro Audio BMP-12 Dual Wireless UHF Microphone System, showing two microphones, a receiver, and the retail packaging.
Product Overview
The BMP-12 system consists of two handheld wireless microphones and a compact receiver. The microphones feature a durable steel construction and an integrated display showing frequency and battery status. The receiver is designed for portability and ease of connection.

Image: Two Blackmore Pro Audio BMP-12 wireless microphones with digital displays and a compact plug-in receiver.

Image: Diagram highlighting key features such as UHF technology, 50 channels, upgraded signal, and long operating distance.
Setup
- Install Batteries in Microphones: Each BMP-12 microphone requires two AA batteries. Unscrew the bottom part of the microphone, insert the batteries according to the polarity markings, and then re-secure the cover. Four AA batteries are included with the system.
- Charge the Receiver: The compact receiver contains a 450mAh lithium battery. Connect the receiver to a USB power source using the provided USB charging cable. The charging indicator will show its status. A full charge provides approximately 5 hours of working time.
- Connect the Receiver: Plug the receiver's 1/4" (6.35mm) jack into the microphone input of your audio device (e.g., mixer, PA speaker system, karaoke machine). Ensure the audio device is powered off before connecting.
- Power On: Turn on your audio device. Then, press the power button on each microphone and on the receiver. The microphones and receiver will automatically connect via UHF technology.

Image: Visual guide for inserting 2 AA batteries into each microphone and connecting the receiver to a USB power source for charging.

Image: Illustration demonstrating the connection of the receiver to an audio input jack, indicating compatibility with MIC inputs.
Operating Instructions
- Power On/Off: Press and hold the power button on each microphone and the receiver to turn them on or off. The microphone display will illuminate when powered on.
- Channel Selection: The system utilizes UHF technology with 100 selectable channels to minimize interference. If you experience interference, briefly press the power button on the microphone to cycle through available channels until a clear frequency is found. The receiver will automatically sync.
- Operating Range: The system offers an operating range of over 200 feet (60m) in open areas and approximately 100 feet (30m) with obstacles. Maintain a clear line of sight between the microphones and the receiver for optimal performance.
- Battery Monitoring: The microphone's display shows the current battery level. Replace AA batteries in the microphones when the indicator is low. Recharge the receiver when its battery indicator is low.
- Recommended Uses: This system is suitable for various applications including gaming, karaoke, singing, speech, streaming, video conferencing, and video recording.

Image: Visual representation of the system's operating distance, showing over 200 feet in open areas and 100 feet with obstacles, along with 100 UHF selectable channels.
Maintenance
- Cleaning: Use a soft, dry cloth to clean the microphones and receiver. Avoid using abrasive cleaners or solvents.
- Battery Care: Remove AA batteries from the microphones if they will not be used for an extended period to prevent leakage. Recharge the receiver's battery regularly to maintain its lifespan.
- Storage: Store the system in a cool, dry place away from direct sunlight and extreme temperatures.
Troubleshooting
| Problem | Possible Cause | Solution |
|---|---|---|
| No sound from microphone | Microphone or receiver not powered on; low batteries; receiver not connected correctly; frequency interference. | Ensure all units are powered on. Replace/recharge batteries. Check receiver connection to audio input. Briefly press microphone power button to change frequency. |
| Interference or static | Other wireless devices operating on similar frequencies; distance too great; obstacles blocking signal. | Change microphone frequency. Reduce distance between microphone and receiver. Ensure clear line of sight. Turn off other wireless devices if possible. |
| Short operating range | Low batteries; environmental obstacles; strong interference. | Replace/recharge batteries. Minimize obstacles between units. Change frequency. |
| Microphone display not working | Low or dead batteries; microphone not powered on. | Replace AA batteries. Ensure microphone is powered on. |
Specifications
| Feature | Detail |
|---|---|
| Model Number | BMP-12 |
| Brand | Blackmore Pro Audio |
| Connectivity Technology | UHF Wireless, XLR (receiver output) |
| Number of Channels | 100 Selectable Channels |
| Operating Range | Over 200 ft (open area), 100 ft (with obstacles) |
| Microphone Power Source | 2 x AA Batteries (per microphone) |
| Receiver Power Source | 450mAh Lithium Battery (rechargeable via USB) |
| Receiver Working Time | Approximately 5 hours |
| Material | Steel (microphone body) |
| Color | Black |
| Item Weight | 2.11 pounds (total package) |
| UPC | 710645121342 |
Safety Information
WARNING: This product contains chemicals known to the State of California to cause cancer and birth defects or other reproductive harm.
Please handle and dispose of batteries responsibly according to local regulations. Do not expose the product to water or excessive moisture. Avoid disassembling the unit, as this may void the warranty and pose safety risks.
Warranty and Support
For detailed warranty information and customer support, please refer to the documentation included with your purchase or visit the official Blackmore Pro Audio website. Keep your proof of purchase for any warranty claims.
