Introduction
The PreSonus AudioBox USB 96 is a 2-channel digital audio and MIDI interface designed for recording musicians and podcasters. It offers high-performance Class A mic preamplifiers and professional-quality 24-bit, 96 kHz converters, making it suitable for various recording applications. This bus-powered, compact, and ruggedly built device is compatible with most recording software for Mac and Windows.
This manual provides essential information for setting up, operating, maintaining, and troubleshooting your AudioBox USB 96 interface.
Key Features
- Bus-powered USB 2.0 audio and MIDI interface.
- Compatible with almost all recording software for Mac and Windows.
- 24-bit resolution with 44.1, 48, 88.2, and 96 kHz sampling rates.
- Two combo mic/instrument inputs featuring high-performance, low-noise, high-headroom Class A mic preamplifiers.
- 48V phantom power for condenser microphones.
- Zero-latency monitoring via an internal analog mixer.
- MIDI I/O for connecting synthesizers or MIDI controllers.
- Rugged steel chassis for durability.
Setup
Follow these steps to set up your PreSonus AudioBox USB 96:
- Software Installation: Install the necessary drivers and the included Studio One Artist DAW software on your Mac or Windows computer. Refer to the software's documentation for detailed installation instructions.
- Connect to Computer: Connect the AudioBox USB 96 to an available USB 2.0 port on your computer using a standard USB cable. The device is bus-powered, so no external power supply is needed.
- Connect Microphones/Instruments: Plug your microphones into the combo XLR inputs (1 and 2) on the front panel. For instruments (guitars, basses), use a 1/4-inch TS cable into the same combo jacks.
- Connect MIDI Devices: If using MIDI devices, connect your MIDI controller's MIDI Out to the AudioBox USB 96's MIDI In, and your MIDI device's MIDI In to the AudioBox USB 96's MIDI Out.
- Connect Speakers/Headphones: Connect your studio monitors to the balanced line-level outputs on the rear panel. Plug your headphones into the headphone jack on the front panel.
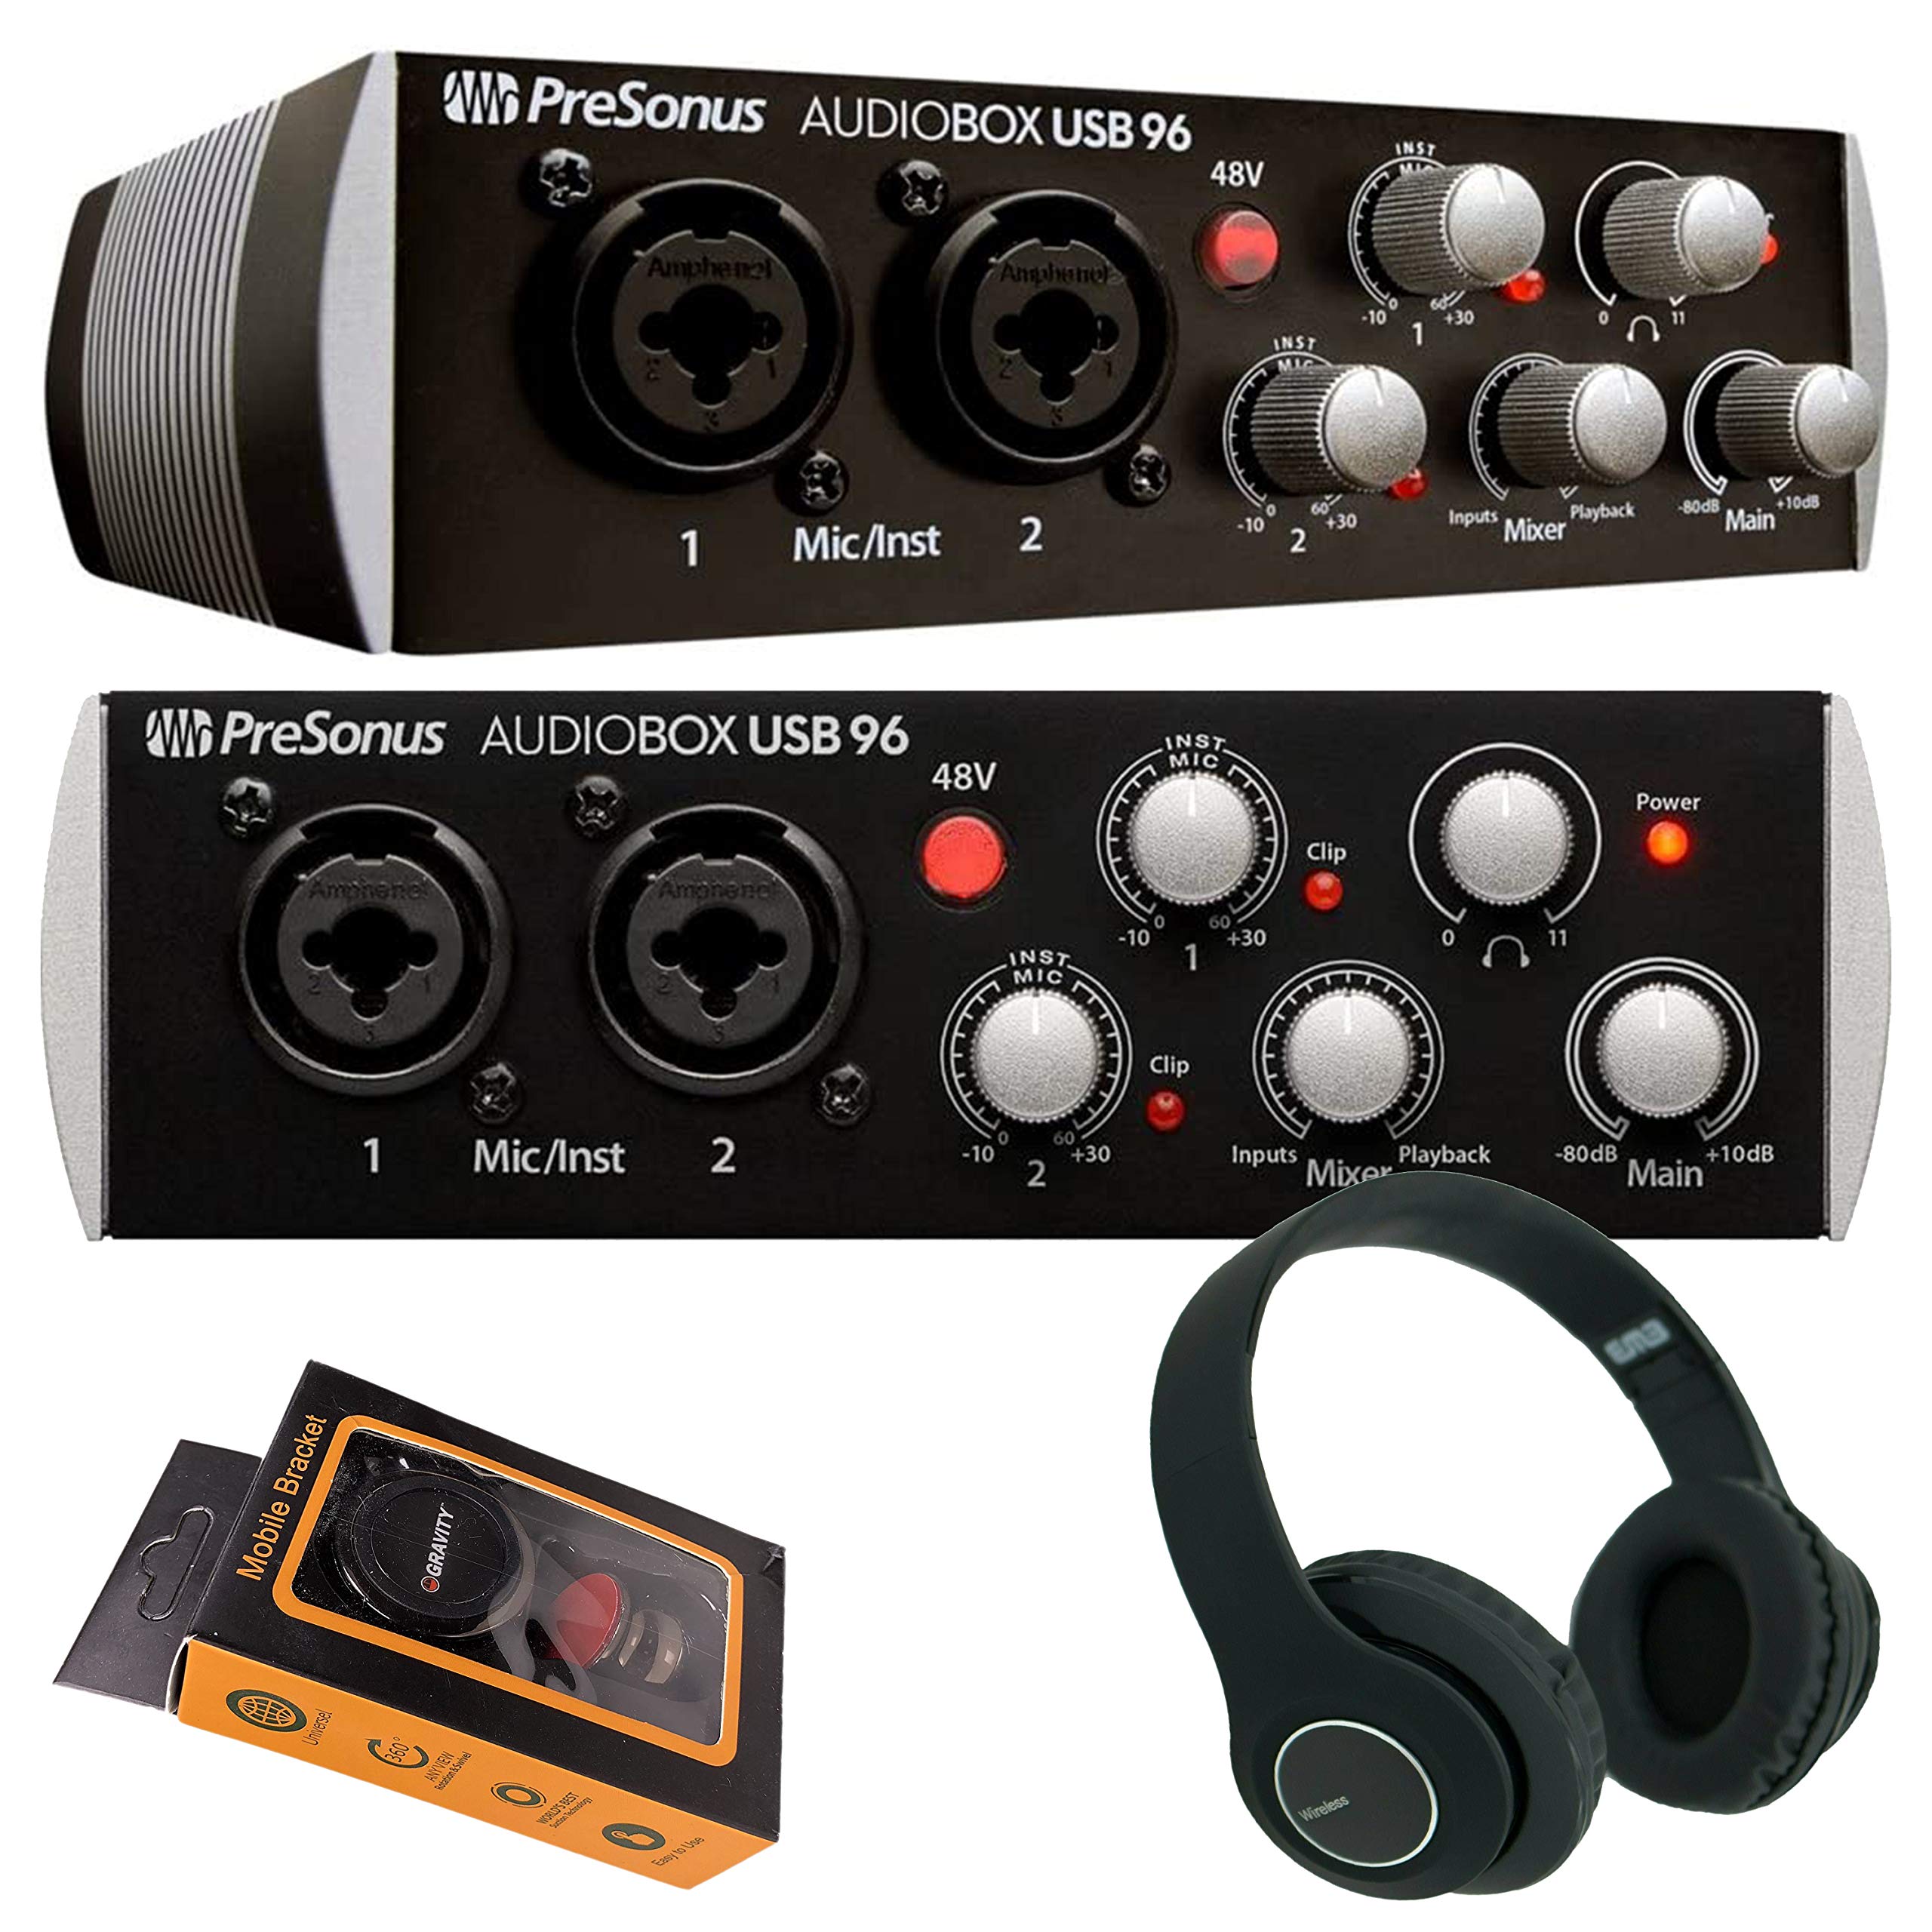
Figure 1: Front panel of the AudioBox USB 96, showing combo inputs, 48V phantom power button, and control knobs.

Figure 2: Side view of the AudioBox USB 96, highlighting the 5-pin DIN MIDI ports and the USB 2.0 connection port.
Operating Instructions
Understanding the controls on your AudioBox USB 96 is crucial for optimal performance.

Figure 3: Detailed view of the AudioBox USB 96 front panel controls.
- Mic/Inst Inputs (1 & 2): These combo jacks accept both XLR (for microphones) and 1/4-inch TS (for instruments) connectors.
- 48V Phantom Power: Press this button to supply 48V phantom power to the XLR inputs for condenser microphones. Ensure it is off when not needed or when using dynamic microphones.
- Gain Knobs (Mic/Inst 1 & 2): Adjust these knobs to set the input level for your microphones or instruments. Aim for a strong signal without clipping (indicated by the Clip LED).
- Mixer Knob: This control blends the input signal (direct monitoring) with the playback signal from your computer. Turn it towards "Inputs" to hear more of your live input, and towards "Playback" to hear more of your computer's audio. This provides zero-latency monitoring.
- Playback Knob: Adjusts the overall playback level from your computer.
- Main Knob: Controls the output level to your main studio monitors connected to the rear panel.
- Headphone Knob: Adjusts the volume for the headphone output.
For recording, ensure your DAW software is configured to use the AudioBox USB 96 as its audio input and output device. Adjust input gain levels to prevent clipping, and use the Mixer knob for comfortable monitoring during recording sessions.
Maintenance
To ensure the longevity and optimal performance of your AudioBox USB 96, follow these maintenance guidelines:
- Cleaning: Use a soft, dry cloth to clean the exterior of the unit. Avoid abrasive cleaners, solvents, or waxes.
- Environment: Operate and store the device in a clean, dry environment, away from direct sunlight, excessive heat, and moisture.
- Protection: While the AudioBox USB 96 features a durable steel chassis, avoid dropping or subjecting it to severe impacts. Protect the knobs and connectors from physical damage.
- Ventilation: Ensure proper airflow around the unit to prevent overheating.
Troubleshooting
If you encounter issues with your AudioBox USB 96, consider the following common troubleshooting steps:
- No Sound Output:
- Check all cable connections (USB, speakers, headphones).
- Ensure the Main and Headphone volume knobs are turned up.
- Verify that the AudioBox USB 96 is selected as the default audio output device in your computer's sound settings and your DAW.
- Adjust the Mixer knob to balance between input and playback.
- No Input Signal:
- Confirm microphones/instruments are properly connected to inputs 1 or 2.
- Increase the corresponding Gain knob.
- If using a condenser microphone, ensure 48V phantom power is engaged.
- Check that the AudioBox USB 96 is selected as the input device in your DAW.
- Test with different cables or microphones/instruments to rule out faulty equipment.
- Latency Issues:
- Utilize the AudioBox USB 96's hardware Mixer knob for zero-latency direct monitoring during recording.
- In your DAW settings, reduce the buffer size. Be aware that very low buffer sizes can strain your computer's CPU.
- Ensure you have the latest drivers installed for the AudioBox USB 96.
- Device Not Recognized:
- Try connecting to a different USB port on your computer.
- Restart your computer.
- Reinstall the AudioBox USB 96 drivers.
Specifications
| Feature | Detail |
|---|---|
| Connectivity | USB 2.0, MIDI I/O |
| Inputs | 2 x Combo XLR/1/4" TRS (Mic/Instrument) |
| Preamps | Class A Mic Preamplifiers |
| Phantom Power | +48V (switchable) |
| Outputs | 2 x 1/4" TRS Main Outputs, 1 x 1/4" Headphone Output |
| Resolution | 24-bit |
| Sample Rates | 44.1, 48, 88.2, 96 kHz |
| Monitoring | Zero-latency analog monitoring |
| Power | USB Bus-Powered |
| Compatible OS | Mac, Windows |
Warranty and Support
For detailed warranty information, product registration, and technical support, please visit the official PreSonus website. You can find drivers, software updates, and additional resources there.
PreSonus Official Website: www.presonus.com
For assistance with the included Studio One Artist software, refer to its dedicated documentation and support resources.


