1. Introduction
This manual provides detailed instructions for the proper use and maintenance of your LEAP PC3860 Stopwatch. Please read this manual thoroughly before operating the device to ensure optimal performance and longevity. This stopwatch is designed for accurate timekeeping in various activities, including sports, laboratory work, and other events requiring precise timing.
2. Product Overview
The LEAP PC3860 Stopwatch features a clear digital display and multiple functions for versatile time measurement. It is equipped with a durable casing and a lanyard for convenient portability.

Image 1: Front view of the LEAP PC3860 Stopwatch, showing the digital display and control buttons. A black lanyard is attached to the bottom.
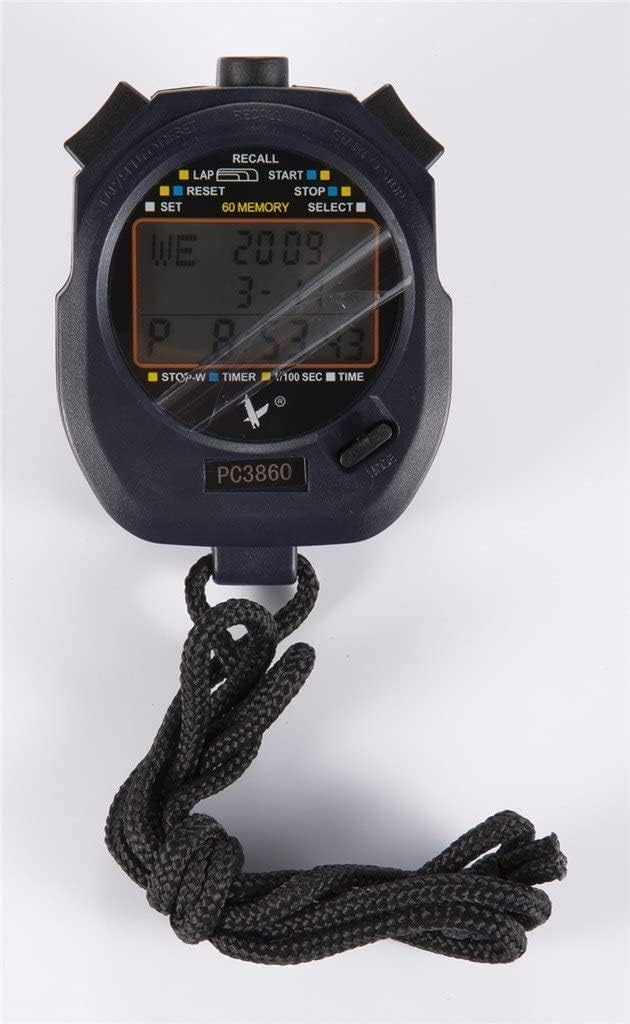
Image 2: Close-up view of the LEAP PC3860 Stopwatch display, highlighting the various indicators for LAP, START, STOP, RESET, SELECT, SET, and 60 MEMORY functions.
Key Components:
- Display: Digital screen showing time, lap, split, and other mode information.
- START/STOP Button: Initiates and pauses timing.
- LAP/RESET Button: Records lap times and resets the stopwatch.
- MODE/SELECT Button: Switches between different operating modes and selects settings.
- SET Button: Used for adjusting time and date in Time Mode.
- RECALL Button: Accesses stored memory records.
- Lanyard: For secure carrying.
3. Setup
3.1 Initial Power-On
Upon first use, or after a battery replacement, the stopwatch may require initial setup. Remove any protective film from the display.
3.2 Setting Time and Date
- Press the MODE/SELECT button repeatedly until the stopwatch is in Time Mode (displaying the current time).
- Press and hold the SET button until the time digits begin to flash.
- Use the START/STOP button to adjust the flashing digit (hours, minutes, seconds).
- Use the LAP/RESET button to move to the next digit or setting (e.g., month, day, year).
- Repeat steps 3 and 4 until all desired settings are configured.
- Press the SET button again to exit the setting mode.
4. Operating Instructions
4.1 Switching Modes
Press the MODE/SELECT button to cycle through the available modes: Time Mode, Stopwatch Mode, and Timer Mode.
4.2 Stopwatch Mode (Timing Events)
- Ensure the stopwatch is in Stopwatch Mode. The display will typically show '00:00:00'.
- Press the START/STOP button to begin timing.
- To pause the timing, press the START/STOP button again. The time will freeze on the display.
- To resume timing from the paused point, press the START/STOP button once more.
- To stop and finalize the timing, press the START/STOP button.
- To reset the stopwatch to zero, press the LAP/RESET button while the stopwatch is stopped.
4.3 Lap and Split Timing
The PC3860 stopwatch supports lap and split timing, allowing you to record intermediate times during an event.
- In Stopwatch Mode, press the START/STOP button to begin timing.
- To record a lap time, press the LAP/RESET button while the stopwatch is running. The lap time will be displayed briefly, and the main timer will continue running in the background.
- Repeat step 2 for subsequent laps. The stopwatch can store up to 60 lap/split records.
- To stop the overall timing, press the START/STOP button.
- To view recorded lap and split times, press the RECALL button. Use the START/STOP and LAP/RESET buttons to navigate through the stored records.
- Press the RECALL button again to exit memory recall mode.
- To clear all stored memory, ensure the stopwatch is stopped and not in recall mode, then press and hold the LAP/RESET button.
4.4 Timer Mode (Countdown)
- Press the MODE/SELECT button until you reach Timer Mode. The display will show a countdown time, or '00:00:00' if not set.
- To set the countdown time, press and hold the SET button until the digits flash.
- Use the START/STOP button to adjust the flashing digit (hours, minutes, seconds).
- Use the LAP/RESET button to move to the next digit.
- Press the SET button again to confirm the countdown time.
- Press the START/STOP button to begin the countdown.
- To pause the countdown, press the START/STOP button. Press again to resume.
- When the countdown reaches zero, an alarm will sound (if enabled).
- To reset the timer to the preset time, press the LAP/RESET button while the timer is stopped.
5. Maintenance
5.1 Cleaning
To clean the stopwatch, use a soft, dry cloth. For stubborn dirt, a slightly damp cloth with mild soap can be used, followed by immediate drying. Avoid using abrasive cleaners, solvents, or harsh chemicals, as these can damage the display or casing.
5.2 Storage
Store the stopwatch in a cool, dry place away from direct sunlight and extreme temperatures. If storing for an extended period, consider removing the battery to prevent leakage, although specific battery type information is not provided.
5.3 Battery Replacement
When the display becomes dim or unresponsive, the battery may need replacement. This typically requires opening the back casing of the stopwatch. It is recommended to have battery replacement performed by a qualified technician to avoid damaging the internal components or compromising water resistance (if applicable).
6. Troubleshooting
- Display is blank or dim:
Check the battery. If the battery is low, replace it. Ensure the stopwatch is not exposed to extreme cold, which can temporarily affect LCD performance. - Buttons are unresponsive:
Try resetting the stopwatch by removing and reinserting the battery (if accessible). Ensure no debris is lodged around the buttons. - Incorrect time/date:
Follow the instructions in Section 3.2 to reset the time and date. - Stopwatch not timing accurately:
Ensure the stopwatch is in Stopwatch Mode and has been reset before starting a new timing session. If issues persist, contact customer support.
7. Specifications
| Feature | Detail |
|---|---|
| Brand | LEAP |
| Model Number | PC3860 (19280086-101) |
| Display Type | Digital |
| Material | Fiber, Metal |
| Weight | 0.09 Kilograms |
| Package Dimensions | 17.78 x 10.16 x 3.05 cm |
| Special Feature | Stopwatch, 60 Memory |
| UPC | 748079196933 |
8. Warranty and Support
LEAP products are manufactured to high-quality standards. For information regarding warranty coverage, please refer to the warranty card included with your purchase or contact the retailer where the product was acquired. For technical support or further assistance, please reach out to the official LEAP customer service channels, typically found on the product packaging or the brand's official website.


