
1. Introduction
This manual provides comprehensive instructions for the safe and efficient operation of your Whirlpool MAGICOOK PRO 22CE Black 20L Convection Microwave Oven. Please read this manual thoroughly before using the appliance and retain it for future reference.

Image 1.1: Front view of the Whirlpool MAGICOOK PRO 22CE Black 20L Convection Microwave Oven.
2. Important Safety Instructions
WARNING: To reduce the risk of fire, electric shock, injury to persons, or exposure to excessive microwave energy, observe the following basic precautions:
- Read all instructions before using the appliance.
- Do not attempt to operate this oven with the door open as this can result in harmful exposure to microwave energy.
- Do not place any object between the oven front face and the door or allow soil or cleaner residue to accumulate on sealing surfaces.
- Do not operate the oven if it is damaged. It is particularly important that the oven door closes properly and that there is no damage to the: (1) door (bent), (2) hinges and latches (broken or loosened), (3) door seals and sealing surfaces.
- The oven should not be adjusted or repaired by anyone except properly qualified service personnel.
- Ensure the appliance is properly grounded.
- Do not heat liquids or other foods in sealed containers as they are liable to explode.
- Do not use corrosive chemicals or vapors in this appliance.
- Close supervision is necessary when the appliance is used by or near children.
- Only use utensils suitable for microwave ovens.
3. Product Overview
3.1 Included Components
Upon unpacking, ensure all the following components are present:
- Whirlpool MAGICOOK PRO 22CE Microwave Oven Unit
- User Manual & Warranty Card
- Grill Rack
- Glass Turntable
3.2 Key Features
- 20 Litre Capacity: Suitable for various cooking needs.
- Convection Mode: Ideal for baking, roasting, and browning.
- Grill Mode: Perfect for grilling and toasting.
- Combination Cooking: Combines microwave, grill, and convection for versatile cooking.
- 118 Auto Cook Menus: Pre-programmed settings for a wide range of dishes.
- Defrost Function: Efficiently thaws frozen foods.
- Jet Start: Quick start function for immediate cooking.
- Child Lock: Prevents accidental operation by children.

Image 3.1: Overview of key features including Tandoor Heater, 118 Auto Cook Menus, Instant 1-Touch Menu, and Glass Turntable.
4. Setup and Installation
4.1 Unpacking
Carefully remove the microwave oven and all packing materials from the carton. Check the oven for any damage, such as dents or a misaligned door. Do not operate the oven if it is damaged. Contact customer service for assistance.
4.2 Placement
- Place the oven on a flat, stable surface strong enough to hold the oven and the food being cooked.
- Ensure adequate ventilation. Leave a minimum of 10 cm (4 inches) clearance at the rear, 20 cm (8 inches) at the top, and 5 cm (2 inches) on each side for proper airflow.
- Do not block air vents.
- Keep the oven away from heat sources and strong magnetic fields.

Image 4.1: Dimensions of the microwave oven: 45.2 cm (Length) x 39.5 cm (Width) x 26.2 cm (Height).
4.3 Electrical Connection
Connect the oven to a properly installed and grounded 230V, 50Hz AC power outlet. Do not use extension cords or adapters.
4.4 Turntable Installation
- Place the turntable support ring in the center of the oven cavity.
- Position the glass turntable securely on the support ring. Ensure it rotates freely.
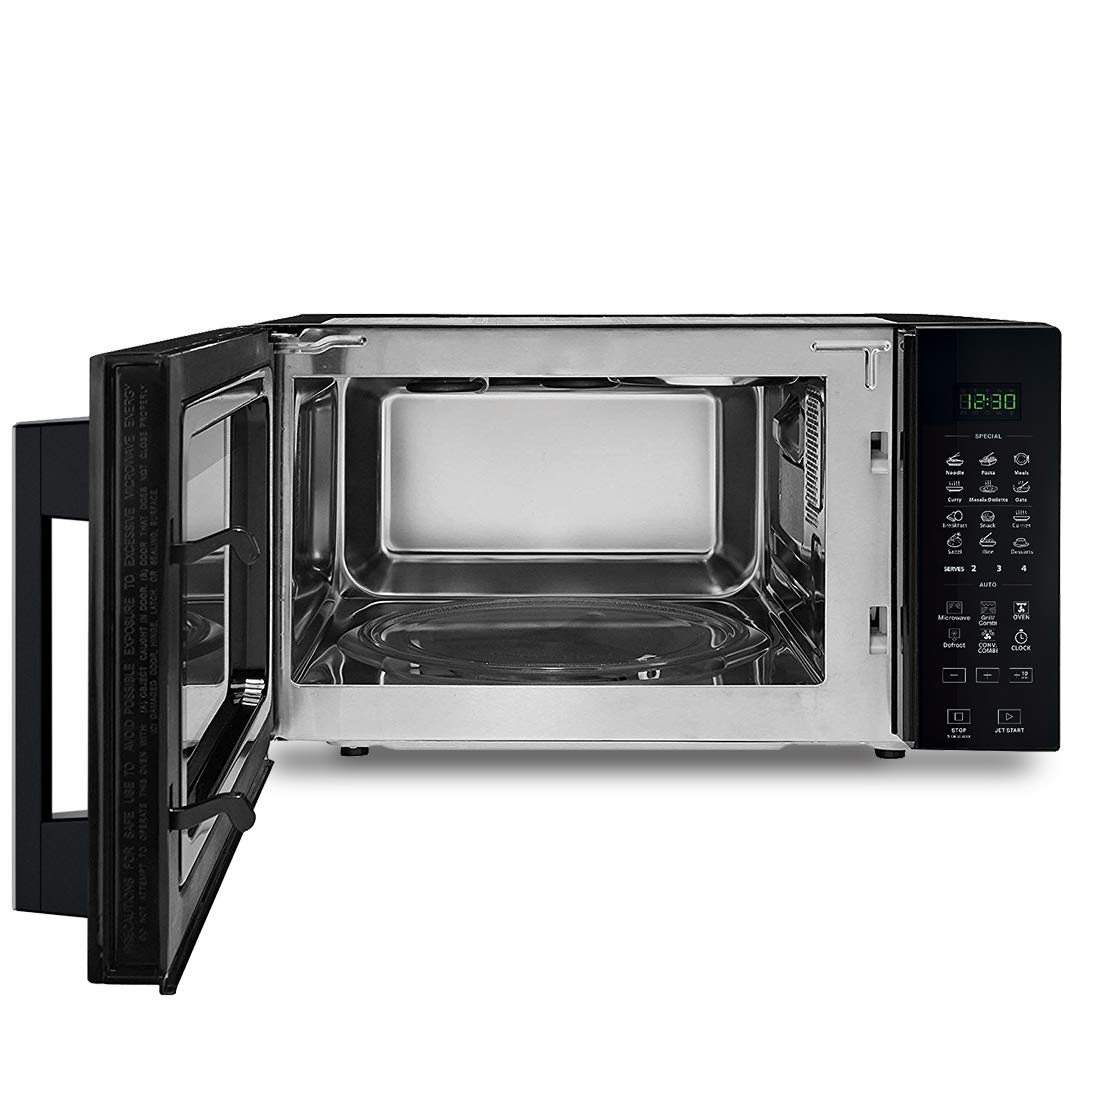
Image 4.2: Interior view of the oven with the glass turntable and support ring correctly installed.
5. Operating Instructions
Familiarize yourself with the control panel before operation.

Image 5.1: Detailed view of the control panel with various function buttons and display.
5.1 Basic Microwave Cooking
- Place food in a microwave-safe container on the glass turntable.
- Close the oven door securely.
- Press the Microwave button.
- Use the +/- buttons to set the desired cooking time.
- Press START to begin cooking.
5.2 Auto Cook Menus
The oven features 118 pre-programmed auto cook menus for various dishes. Refer to the specific menu list provided in the full manual for detailed instructions on each program.
- Press the desired SPECIAL or AUTO category button (e.g., Noodle, Pasta, Meals, Curries, Breakfast, Snacks, Indian, Vegetables & Curries, Rice, Sweets).
- Use the +/- buttons to select the specific menu number.
- Adjust the serving size (if applicable) using the SERVES 2/3/4 buttons.
- Press START to begin.
5.3 Convection Cooking
Use convection mode for baking cakes, cookies, and roasting. Always use heat-resistant bakeware.
- Press the Convection button.
- Set the desired temperature using the +/- buttons.
- Set the cooking time using the +/- buttons.
- Press START to begin. The oven will preheat to the set temperature.
- Once preheated, place food inside and press START again to continue cooking.
5.4 Grill Cooking
Ideal for grilling meats, vegetables, and browning dishes.
- Place food on the grill rack provided.
- Press the Grill button.
- Set the desired cooking time using the +/- buttons.
- Press START to begin.
5.5 Combination Cooking (Grill/Combi, Conv/Combi)
This mode combines microwave power with grill or convection heat for faster and more even cooking results.
- Press the Grill/Combi or Conv/Combi button.
- Select the desired combination level (e.g., Combi 1, Combi 2) if applicable.
- Set the cooking time using the +/- buttons.
- Press START to begin.
5.6 Defrost Function
Use the defrost function to thaw frozen foods by weight or time.
- Press the Defrost button.
- Select defrost by weight or time (refer to display).
- Use the +/- buttons to set the weight or time.
- Press START to begin.
5.7 Child Lock
To activate the child lock, press and hold the STOP/CHILD LOCK button for 3 seconds. The lock indicator will appear on the display. To deactivate, press and hold the same button for 3 seconds again.
5.8 Jet Start
Press the JET START button for quick cooking at full power. Each press adds a specific amount of time (e.g., 30 seconds or 1 minute).
6. Maintenance and Cleaning
Regular cleaning helps maintain the performance and longevity of your microwave oven.
6.1 Exterior Cleaning
- Wipe the exterior with a soft, damp cloth and mild detergent.
- Avoid abrasive cleaners or solvents.
6.2 Interior Cleaning
- Clean the interior cavity after each use to prevent food buildup.
- For stubborn stains, place a bowl of water with lemon slices inside and microwave for 5-10 minutes. The steam will loosen food particles, making them easier to wipe away.
- Wipe with a soft, damp cloth.

Image 6.1: Interior view of the oven, illustrating the space for cleaning.
6.3 Turntable and Support Ring
- The glass turntable and support ring can be removed for cleaning.
- Wash them in warm, soapy water or in a dishwasher.
- Ensure they are completely dry before placing them back in the oven.
7. Troubleshooting
Before contacting customer service, refer to the following table for common issues and their solutions.
| Problem | Possible Cause | Solution |
|---|---|---|
| Oven does not start. | Power cord not plugged in; Door not closed properly; Fuse blown or circuit breaker tripped. | Ensure power cord is securely plugged in; Close the door firmly; Check household fuse or reset circuit breaker. |
| Food not heating. | Incorrect cooking time/power level set; Door not closed properly; Utensil not microwave-safe. | Adjust cooking time and power level; Ensure door is fully closed; Use microwave-safe cookware. |
| Turntable not rotating. | Turntable not properly placed; Obstruction under turntable. | Ensure turntable and support ring are correctly positioned; Remove any obstructions. |
| Oven light not working. | Bulb burnt out. | Contact qualified service personnel for bulb replacement. |
| Unusual noise during operation. | Turntable or support ring not correctly placed; Food container touching oven walls. | Reposition turntable and support ring; Ensure food container does not touch oven walls. |
8. Specifications
| Feature | Detail |
|---|---|
| Brand | Whirlpool |
| Model | MAGICOOK PRO 22CE |
| Capacity | 20 Litres |
| Oven Type | Convection |
| Color | Black |
| Material (Interior) | Stainless Steel |
| Voltage | 230 Volts |
| Wattage | 800 Watts |
| Dimensions (LxWxH) | 45.2 x 39.5 x 26.2 Centimeters |
| Special Features | Auto Cook, Defrost |
| Included Components | Product, user manual & warranty card, grill rack, glass turntable |
9. Warranty and Support
9.1 Warranty Information
Your Whirlpool MAGICOOK PRO 22CE Microwave Oven comes with a:
- 1-year warranty on the entire product.
- 5-year warranty on the magnetron.
Please retain your purchase receipt and warranty card for any warranty claims. The warranty covers manufacturing defects under normal use conditions.
9.2 Customer Support
For service, support, or any queries regarding your appliance, please contact Whirlpool customer service:
- Toll-Free: 1800 208 1800
- Email: helpdeskindia@whirlpool.com
- Manufacturer/Importer Address: Whirlpool of India Ltd. Plot No. A-4, MIDC Ranjangaon, Taluka Shirur, Dist: Pune, Maharashtra 412220, India.