
1. Introduction
Thank you for choosing the Bosch EasyDrill 1200 Cordless Drill Driver. This manual provides essential information for the safe and efficient operation, maintenance, and troubleshooting of your new tool. Please read it thoroughly before first use and keep it for future reference.
The EasyDrill 1200 is designed for various screwdriving and drilling tasks in wood, metal, and plastic. Its compact design and integrated LED light make it suitable for working in confined or poorly lit spaces.
2. Safety Instructions
Always observe basic safety precautions to reduce the risk of fire, electric shock, and personal injury.
- Read all instructions: Familiarize yourself with the tool's operation and safety guidelines.
- Wear eye protection: Always wear safety goggles or safety glasses with side shields.
- Secure workpiece: Use clamps or a vise to hold the workpiece. This is safer than using your hand and it frees both hands to operate the tool.
- Maintain a firm grip: Hold the tool firmly to maintain control.
- Keep work area clean: Cluttered areas invite accidents.
- Avoid dangerous environments: Do not use power tools in damp or wet locations, or expose them to rain.
- Store idle tools: When not in use, tools should be stored in a dry, high, or locked-up place, out of reach of children.
- Do not overreach: Keep proper footing and balance at all times.
- Disconnect tools: Always disconnect the battery pack from the tool before making any adjustments, changing accessories, or storing the tool.
- Use correct tool: Do not force the tool or attachment to do a job for which it was not designed.
3. Product Overview
The Bosch EasyDrill 1200 is a versatile cordless drill driver designed for ease of use and efficiency. Key features include a two-speed gearbox, 20 torque settings plus a drill mode, and an integrated LED work light.
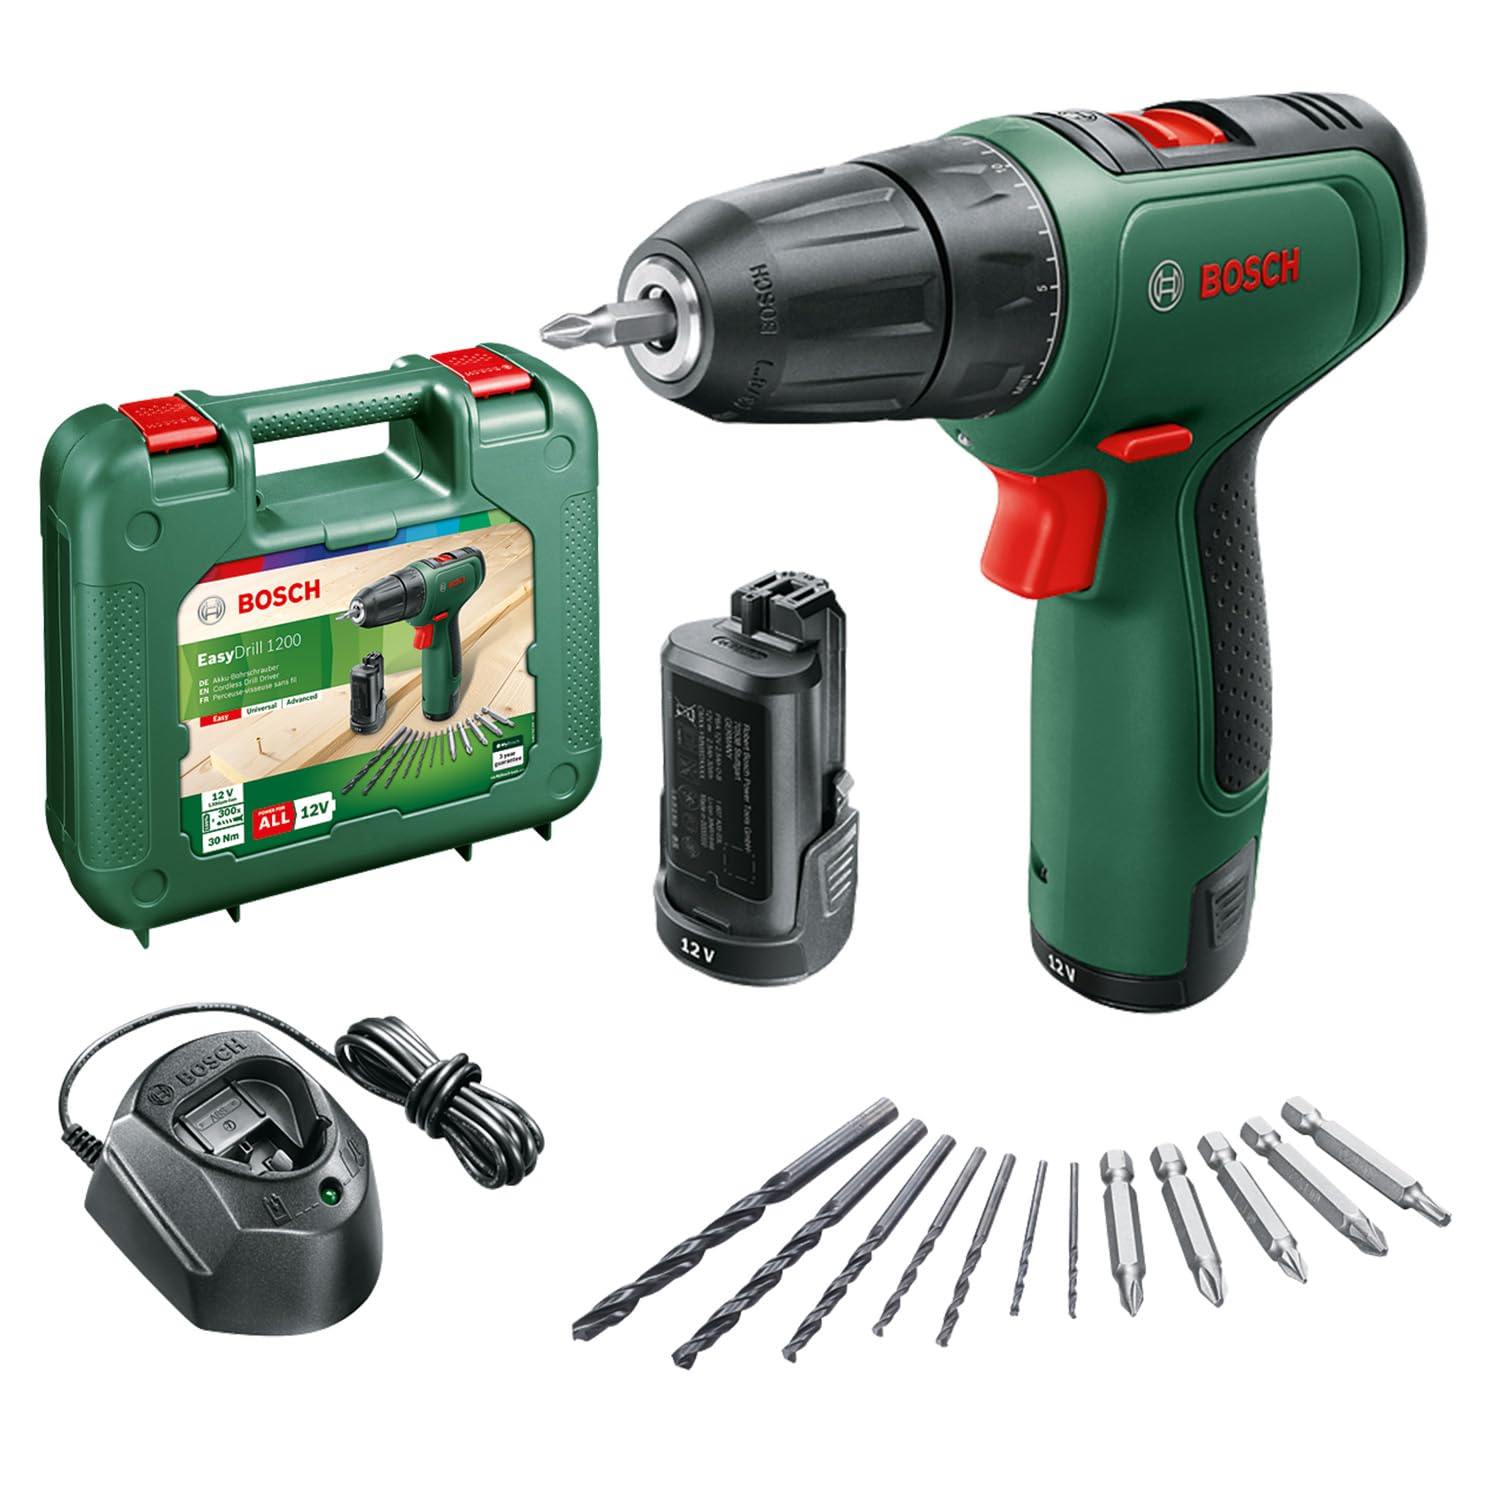
Figure 3.1: Bosch EasyDrill 1200 Cordless Drill Driver with included accessories.
Components:
- Chuck: For inserting drill bits and screwdriver bits.
- Torque Setting Ring: Adjusts the torque for screwdriving or selects drill mode.
- Gear Selector Switch: Switches between 1st speed (low speed, high torque for screwdriving) and 2nd speed (high speed, low torque for drilling).
- Forward/Reverse Switch: Controls the rotation direction.
- Trigger Switch: Activates the tool and controls speed.
- Integrated LED Light: Illuminates the workpiece.
- Battery Pack: 12V Lithium-ion battery.
- Battery Charger: For recharging the battery pack.

Figure 3.2: Detail of the chuck, torque setting ring, and gear selector switch.
4. Setup
4.1. Charging the Battery
The battery pack is not fully charged upon delivery. Before first use, fully charge the battery.
- Insert the battery pack into the charger. Ensure it clicks into place.
- Plug the charger into a power outlet.
- The charging indicator light on the charger will show the charging status. Refer to the charger's specific manual for light indications.
- Once fully charged, disconnect the charger from the power outlet and remove the battery pack.
Figure 4.1: Battery pack inserted into the charger.
4.2. Inserting and Changing Bits
Always ensure the tool is switched off and the battery is removed before changing bits.
- Rotate the chuck counter-clockwise until the jaws are wide enough to insert the bit.
- Insert the desired drill bit or screwdriver bit into the chuck.
- Rotate the chuck clockwise to tighten the jaws securely around the bit. Ensure the bit is centered and firmly held.
Figure 4.2: Inserting a screwdriver bit into the chuck.
5. Operating Instructions
5.1. Selecting Speed and Torque
The EasyDrill 1200 features two speed settings and 20 torque settings for optimal performance across different applications.
- Speed 1 (Gear Selector Switch position '1'): Low speed (0-400 rpm) for high torque applications like screwdriving large screws or drilling large diameter holes.
- Speed 2 (Gear Selector Switch position '2'): High speed (0-1300 rpm) for faster drilling in wood, metal, and plastic.
The Torque Setting Ring allows you to adjust the clutch to prevent overtightening screws or damaging the workpiece. Settings 1-20 are for screwdriving, with higher numbers indicating higher torque. The drill symbol setting bypasses the clutch for maximum power during drilling.
Figure 5.1: Adjusting speed and torque settings.
5.2. Screwdriving
- Select Speed 1 using the gear selector switch.
- Set the Torque Setting Ring to an appropriate value (1-20) for the screw size and material. Start with a lower setting and increase if needed.
- Position the screwdriver bit onto the screw head.
- Press the trigger switch to start driving the screw. The integrated LED light will illuminate the work area.

Figure 5.2: Screwdriving into a wooden surface.

Figure 5.3: Using the drill driver for screwdriving in a cabinet.
5.3. Drilling
- Select Speed 2 for most drilling tasks. For very large holes or tough materials, Speed 1 might be more appropriate.
- Set the Torque Setting Ring to the drill symbol. This provides maximum power without the clutch engaging.
- Position the drill bit on the marked drilling point.
- Press the trigger switch to start drilling. Apply steady, even pressure.

Figure 5.4: Drilling into a wooden board.
6. Maintenance
Regular maintenance ensures optimal performance and extends the life of your tool.
- Cleaning: Keep the ventilation slots clean to prevent overheating. Use a soft, damp cloth to clean the tool casing. Do not use solvents.
- Battery Care: Store batteries in a cool, dry place. Do not expose them to extreme temperatures.
- Bit Storage: Store drill bits and screwdriver bits in a dry place to prevent rust.
- Inspection: Periodically inspect the tool for any damage, loose screws, or worn parts. Contact authorized service personnel for repairs.
7. Troubleshooting
| Problem | Possible Cause | Solution |
|---|---|---|
| Tool does not start. | Battery not charged or not inserted correctly. | Charge battery. Ensure battery is fully inserted until it clicks. |
| Reduced power or speed. | Battery low or incorrect speed/torque setting. | Recharge battery. Adjust speed or torque setting as needed. |
| Bit slips in chuck. | Chuck not tightened sufficiently. | Tighten chuck firmly. Ensure bit shank is clean. |
| Overheating. | Blocked ventilation slots or continuous heavy use. | Clean ventilation slots. Allow tool to cool down. Reduce load. |
8. Specifications
| Model: | Bosch EasyDrill 1200 |
| Power Supply Voltage: | 12 V |
| Battery Capacity: | 2.0 Ah (Lithium-ion) |
| Max. Screw Diameter: | 6 mm |
| Max. Drilling Diameter (Wood/Steel): | 20 mm |
| No-load Speed (1st Gear / 2nd Gear): | 0 – 400 rpm / 0 – 1300 rpm |
| Max. Torque: | 30 Nm |
| Weight with Battery: | 0.94 kg |
| Dimensions (L x W x H): | 18 x 4 x 18.8 cm |
| Included Components: | EasyDrill 1200, 2x PBA 12V 1.5Ah O-A batteries, GAL 1210 CV charger, bit holder, carrying case. |

Figure 8.1: Included components in the carrying case.
9. Warranty and Support
This Bosch EasyDrill 1200 comes with a 2-year manufacturer's warranty. For warranty claims, technical support, or spare parts, please contact your retailer or an authorized Bosch service center. Keep your proof of purchase for warranty validation.
For more information, visit the official Bosch website or refer to the contact details provided with your product packaging.