Product Overview
This manual provides instructions for the weelye RX19-A 12V FCC CE Four-Sided Socket Kids Powered Ride-On Car 2.4G Bluetooth Remote Control and Receiver. This kit is designed as a replacement part for specific children's electric ride-on toys, offering 2.4G Bluetooth remote control functionality and a control box with a slow start feature.
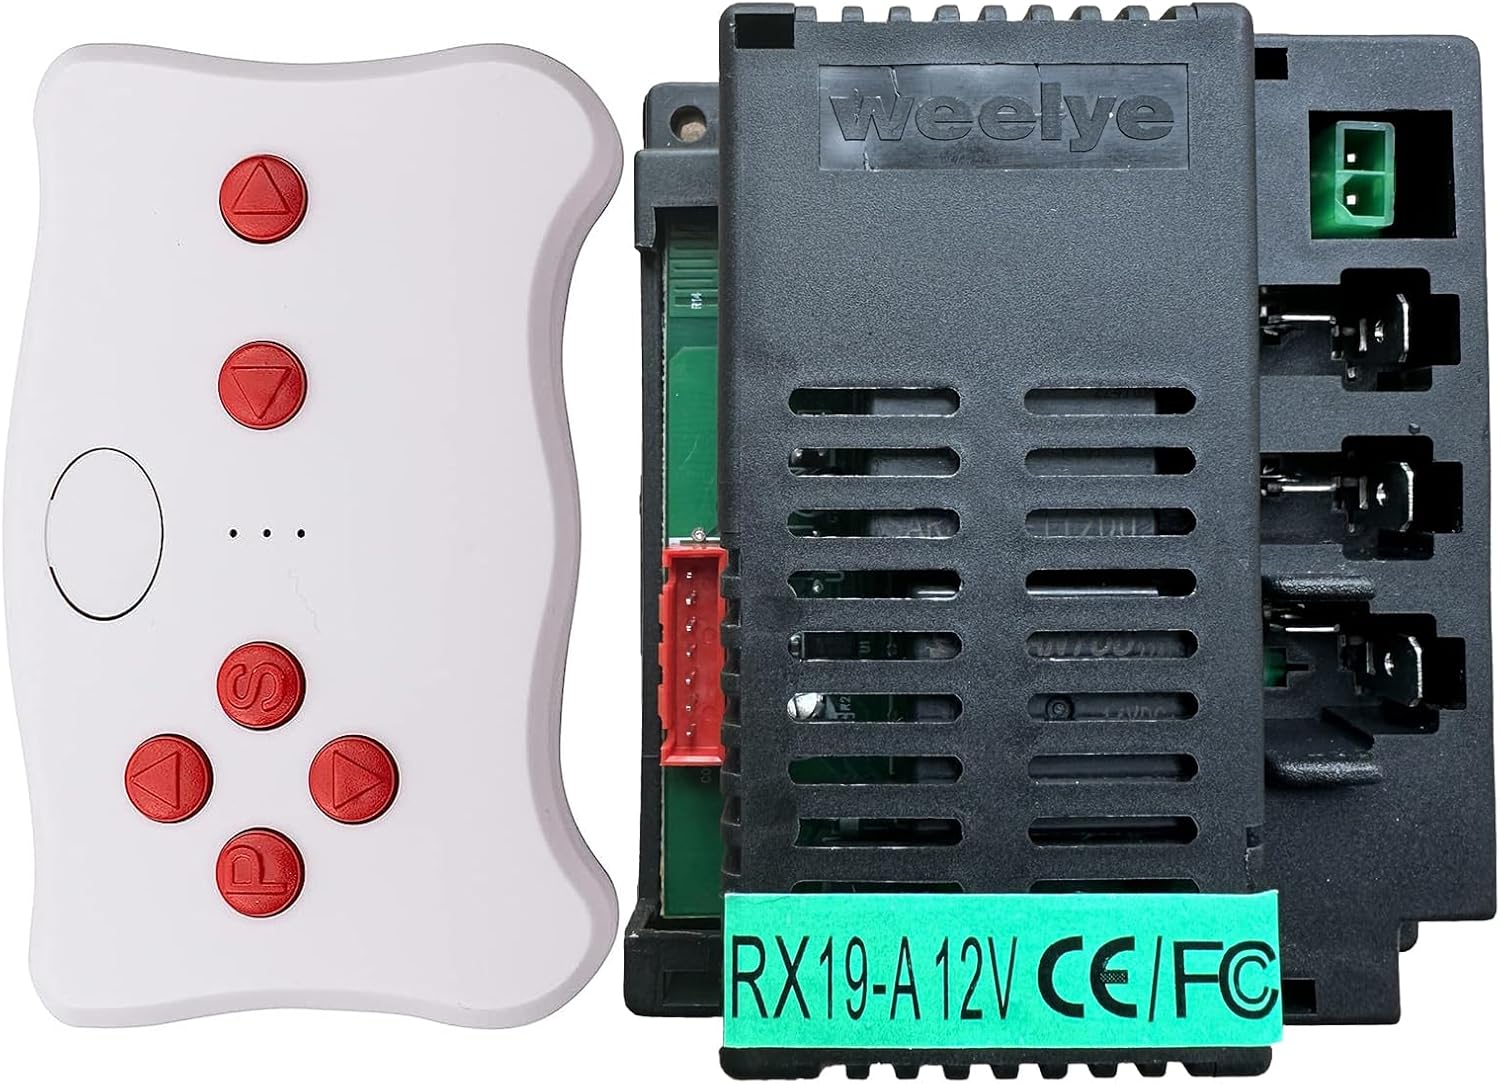
Image: The weelye RX19-A 12V control box (black, rectangular with vents) and the white TX10 Bluetooth remote control with red buttons. The control box has a green sticker indicating "RX19-A 12V CE/FC".
Compatibility Check
Before installation, ensure this control box is compatible with your electric ride-on car. Open your existing electric ride-on car and inspect its control box. If the appearance of the control box is identical to the weelye RX19-A, this replacement part should be compatible.

Image: Top view of the weelye RX19-A 12V control box, showing the vented black casing and various connection ports.

Image: Side view of the weelye RX19-A 12V control box, highlighting the four-sided socket design and connection points.
Setup and Pairing Instructions
Follow these steps for initial setup or when replacing the battery to pair the remote control with the receiver.
Remote Control Battery Installation (TX10)
- Obtain two AAA 1.5V batteries.
- Using a Phillips screwdriver, unscrew the screw on the back of the remote control.
- Open the battery cover and install the batteries, ensuring correct positive and negative polarity.
- Close the battery cover and secure the screw. The indicator light will flash three times, confirming correct battery installation.
- Important: Do not mix old and new batteries, or different types of batteries. Remove exhausted batteries promptly.

Image: The white weelye TX10 remote control with red directional and function buttons.

Image: Packaging for the TX10 remote control, showing a diagram of the remote and text instructions for battery installation and frequency binding.
Frequency Matching (Pairing)
- Step 1: Install two AAA 1.5V batteries into the remote control (TX10), observing positive and negative polarity. Close the battery cover. The indicator will flash three times, confirming correct battery installation.
- Step 2: Press and hold the frequency key (often labeled "car select" or a specific pairing button) on the remote control for approximately 2 seconds. The indicator light on the remote will begin to flash.
- Step 3: Turn on the power supply of the electric ride-on car. The indicator light on the remote control should turn off, indicating successful pairing.
- Step 4: If the matching frequency is unsuccessful (the indicator light does not turn off), turn off the power supply of the car and repeat steps 2 and 3.
The product features a slow start function, eliminating the need for additional slow starter installation.
Basic Assembly Demonstration
The following video demonstrates a basic assembly and connection of the control box and motors, which can be helpful during the setup process.
Video: A person demonstrates connecting the weelye control box to motors and a battery, then testing the functionality with the remote control. This shows the basic wiring and operation of the components.
Operating Instructions
Once the remote control and receiver are successfully paired, you can operate the electric ride-on car using the remote.
- Use the directional buttons on the remote control to move the car forward, backward, turn left, and turn right.
- The "S" button typically controls speed settings (e.g., slow, medium, fast).
- The "P" button is usually an emergency brake. Pressing it will stop the car, and releasing it will allow normal operation to resume.
- The remote control will enter power-saving mode if not operated for about 10 seconds, and the indicator light will turn off.
Maintenance
To ensure optimal performance and longevity of your weelye RX19-A control box and remote control:
- Keep the control box and remote control clean and dry. Avoid exposure to moisture or extreme temperatures.
- Regularly check battery connections in the remote control for corrosion.
- Ensure all wiring connections to the control box are secure and free from damage.
- Replace remote control batteries as soon as they are exhausted to prevent leakage.
Troubleshooting
If you encounter issues with your weelye RX19-A system, consider the following:
- Remote Control Not Responding:
- Check if the remote control batteries are correctly installed and have sufficient charge. Replace if necessary.
- Ensure the remote control and receiver are properly paired by repeating the "Frequency Matching" steps.
- Verify that the electric ride-on car's power supply is on.
- Car Not Moving or Malfunctioning:
- Confirm that the control box is securely connected to the car's wiring, motors, and battery.
- Check if other functions of your car, such as the motors and main battery, are working properly. A faulty motor or a discharged main battery can prevent the car from operating.
- Inspect all wiring for any visible damage or loose connections.
- Indicator Light Issues During Pairing:
- If the remote control indicator does not turn off after attempting frequency matching, turn off the car's power supply and repeat the pairing steps (Step 2 and 3 of Frequency Matching).
Specifications
| Brand | weelye |
| Model Number | RX19-A FCC CE |
| Voltage | 12V |
| Remote Control Type | 2.4G Bluetooth (TX10) |
| Product Dimensions | 5 x 3 x 2.2 inches |
| Item Weight | 8 ounces |
| Manufacturer Recommended Age | 12 months and up |
Warranty Information
Warranty details for the weelye RX19-A 12V Bluetooth Remote Control and Receiver are not available in the provided product data. Please refer to the product packaging or contact the manufacturer directly for warranty information.
Customer Support
Specific customer support contact information is not available in the provided product data. For assistance, please refer to the manufacturer's official website or contact the seller through your purchase platform.


