1. Introduction
This manual provides comprehensive instructions for the setup, operation, and maintenance of your XVICO X3S 3D Printer. The XVICO X3S is a semi-assembled DIY 3D printer kit featuring a heated bed, 2.8" touch screen, filament sensor, and open-source Marlin 2.0 firmware. It is designed for home use and supports various 1.75mm filaments.
Please read this manual thoroughly before operating the printer to ensure proper use and to prevent damage.
2. Safety Instructions
- Always operate the printer in a well-ventilated area.
- Keep the printer away from flammable materials and heat sources.
- Do not touch the hot nozzle or heated bed during operation. Allow components to cool before handling.
- Ensure the power supply is correctly connected and matches your local voltage requirements.
- Keep children and pets away from the printer during operation.
- Do not attempt to modify or disassemble the printer beyond the instructions provided in this manual.
- Unplug the printer from the power outlet before performing any maintenance or cleaning.
3. Package Contents
Verify that all components are present and in good condition upon unpacking. If any items are missing or damaged, please contact customer support.
- XVICO X3S 3D Printer (semi-assembled main frame)
- Gantry Assembly (X and Z axes)
- Filament Holder
- Power Cable
- USB Cable
- SD Card with pre-loaded files and software
- Tool Kit (wrenches, screwdrivers, pliers, etc.)
- Sample Filament
- User Manual (this document)
4. Setup and Assembly
The XVICO X3S is designed for quick assembly, typically taking around 10 minutes.
- Unpacking: Carefully remove all components from the packaging. Remove any protective foam or zip ties.
- Attach Gantry Assembly: Align the gantry assembly (X and Z axes) with the base frame. Secure it using the provided screws. There are typically four bolts connecting the X and Z axis to the rest of the machine.
- Install Filament Holder: Attach the filament holder to the designated slot on the top of the printer using two bolts and two nuts.
- Connect Cables: Connect all labeled cables, including those for stepper motors, end-stops, and the hotend/heated bed. Ensure all connections are secure.
- Power Connection: Connect the power cable to the printer and then to a suitable power outlet.
- Insert SD Card: Insert the provided SD card into the printer's SD card slot.

Image: The XVICO X3S 3D Printer highlighting its build volume of 220x220x250mm, two-step assembly, resume printing, filament detection, and heated bed features.
5. Operating Instructions
5.1. Bed Leveling
Accurate bed leveling is crucial for successful prints. The XVICO X3S features a glass platform on a heated bed for consistent surface temperature and easy model removal.
- Power on the printer.
- Navigate to the "Tools" or "Prepare" menu on the 2.8" touch screen.
- Select "Leveling" or "Auto Home" to move the nozzle to the home position.
- Manually move the nozzle to each of the four corners of the print bed.
- Adjust the thumb screws under each corner of the heated bed until a piece of standard paper slides with slight friction between the nozzle and the bed.
- Repeat the process for all four corners until the bed is consistently leveled.
5.2. Loading Filament
The XVICO X3S supports various 1.75mm filaments like PLA, PETG, SILK, WOOD.
- Preheat the nozzle to the recommended temperature for your filament type.
- Insert the filament into the filament sensor. The blue light on the sensor will indicate filament presence.
- Feed the filament through the extruder's double gear mechanism until it reaches the hotend.
- On the touch screen, use the "Load Filament" or "Extrude" function to push the filament through the nozzle until it comes out smoothly.
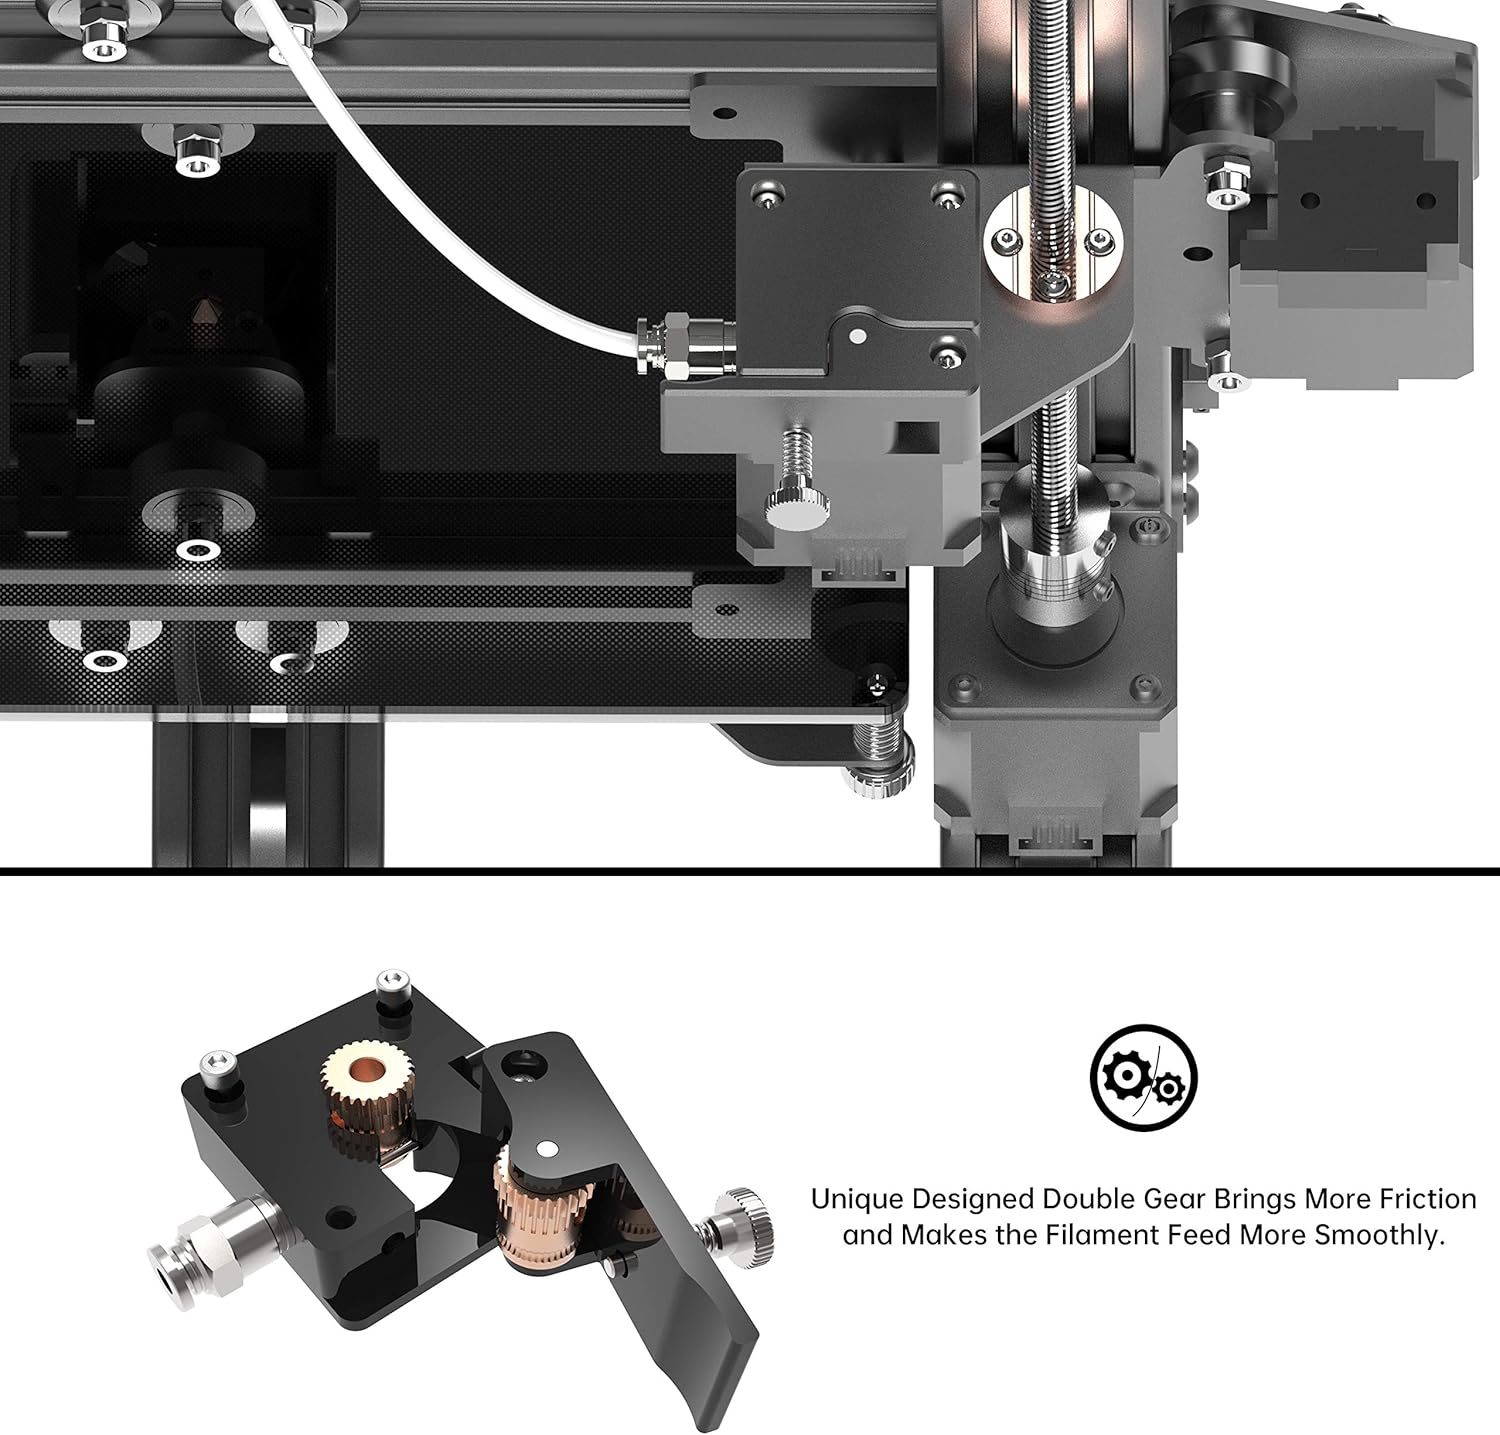
Image: A detailed view of the unique double gear extruder, designed to provide more friction and smoother filament feeding.

Image: The filament sensor on the XVICO X3S, which pauses printing when filament runs out to protect the model. The blue light indicates filament presence.
5.3. Starting a Print
- Prepare your 3D model (.gcode file) using a slicing software (e.g., Cura, which has a profile on the provided SD card).
- Save the .gcode file to the SD card.
- Insert the SD card into the printer.
- On the touch screen, navigate to the "Print" menu.
- Select your desired .gcode file from the list.
- Confirm the print settings and start the print.
5.4. Filament Detection & Resume Printing
The XVICO X3S is equipped with a filament detection sensor that automatically pauses the print if the filament runs out. It also features a resume printing function, allowing the printer to continue from the last position after a power outage. This prevents print failures and wasted material.
6. Maintenance
- Clean the Print Bed: After each print, allow the heated bed to cool and then carefully remove the printed model. Clean the glass surface with isopropyl alcohol to ensure good adhesion for future prints.
- Nozzle Cleaning: Periodically clean the nozzle to prevent clogs. Use a brass brush or a thin needle (provided in the tool kit) to clear any debris.
- Lubricate Moving Parts: Apply a small amount of lithium grease or similar lubricant to the Z-axis lead screw and smooth rods every few months to ensure smooth movement.
- Check Belt Tension: Ensure the X and Y axis belts are properly tensioned. They should be taut but not overly tight. Adjust if necessary.
- Firmware Updates: Check the official XVICO website (if available) or community forums for any firmware updates for Marlin 2.0 to improve performance or add features.
7. Troubleshooting
| Problem | Possible Cause | Solution |
|---|---|---|
| First layer not sticking | Bed not leveled, nozzle too far from bed, bed not heated, dirty print surface. | Re-level the print bed. Adjust Z-offset. Ensure heated bed is at correct temperature. Clean the glass bed with isopropyl alcohol. |
| Filament not extruding | Nozzle clogged, filament tangled, extruder gear slipping, wrong temperature. | Clear nozzle clog. Untangle filament. Check extruder tension. Verify hotend temperature. |
| Poor print quality (layer shifts, stringing) | Loose belts, incorrect print speed, retraction settings, cooling issues. | Check and tighten belts. Adjust print speed. Optimize retraction settings in slicer. Ensure part cooling fan is working. |
| Printer not powering on | Power cable disconnected, power supply issue, faulty wiring. | Check all power connections. Ensure power switch is on. Contact support if issue persists. |
8. Specifications
| Feature | Detail |
|---|---|
| Model | X3S |
| Build Volume | 220 x 220 x 250 mm |
| Product Dimensions | 17.52 x 12.28 x 20.16 inches (44.5 x 31.2 x 51.2 cm) |
| Item Weight | 15.4 pounds (7 kg) |
| Firmware | Open Source Marlin 2.0 |
| Screen | 2.8" Touch Screen |
| Filament Diameter | 1.75 mm |
| Compatible Filaments | PLA, PETG, SILK, WOOD, etc. |
| Print Bed | Heated Bed with Glass Platform |
| Special Features | Filament Detection, Resume Printing, Double Gear Extruder |

Image: The XVICO X3S 3D Printer showing its overall physical dimensions (15.35"D x 16.14"W x 19.29"H).
9. Warranty and Support
XVICO provides a 30-day return and money-back service, along with lifetime technical support and timely online customer service for the X3S 3D Printer.
For any questions or support, please contact XVICO customer service via your order details on the platform where you purchased the product (e.g., "Click Your Account > Your Orders > Find This 3D Printer Order > Click Contact Seller"). Alternatively, refer to the support email address provided on the after-sales card included with your product.
Please retain your proof of purchase for warranty claims.