
1. Introduction
The CarryBright Smart Bike TailLight Turn Signal system is engineered to significantly improve your visibility and communication with other road users. This manual provides detailed instructions for the setup, operation, and maintenance of your new bike light system, ensuring a safer and more enjoyable cycling experience.
This system includes front and rear lights with integrated turn signals, controlled wirelessly via a compact remote. Its robust IPX6 waterproof design ensures reliable performance in various weather conditions, while the USB rechargeable batteries offer convenience and long-lasting power.
2. What's Included
Carefully unpack all components and ensure everything listed below is present and in good condition.

Figure 2.1: Package Contents
- 4 x LED Direction Indicators (Lights)
- 1 x Remote Control
- 4 x Front Installation Brackets
- 1 x Rear Installation Bracket
- 6 x O-Rings (various sizes for mounting)
- 1 x Micro USB Charging Cable (multi-head)
3. Specifications
| Feature | Specification |
|---|---|
| Brand | CarryBright |
| Model Number | CarryBright-524 |
| Light Source | COB LED |
| Battery (Lights) | 230 mAh Lithium Battery |
| Battery (Remote) | 180 mAh Lithium Battery |
| Runtime | Up to 3 hours (continuous flashing) |
| Water Resistance | IPX6 (Heavy Rain) |
| Remote Control Distance | Up to 10 meters |
| Visibility Range | 50-100 meters (day & night) |
| Material | Aluminum |
| Item Weight | 0.3 Kilograms |
4. Setup and Installation
4.1. Charging the Lights and Remote
Before first use, fully charge all lights and the remote control. Use the provided multi-head Micro USB charging cable.

Figure 4.1: Charging Setup
- Connect the multi-head USB cable to a standard USB power source (e.g., wall adapter, power bank, computer USB port).
- Plug the Micro USB connectors into the charging ports on each light unit and the remote control.
- During charging, the indicator LEDs on the units will typically glow red. Once fully charged, they will turn green.
- Charging time is approximately 3 hours for a full charge.
4.2. Mounting the Lights
The system offers versatile mounting options for various bike types and positions.

Figure 4.2: Mounting Options
- Front Lights: Attach two LED Direction Indicators to your handlebars using the Front Installation Brackets and appropriate O-rings. Ensure they are positioned to be clearly visible from the front and sides.
- Rear Lights: Attach the remaining two LED Direction Indicators to your bike's seat post or rear frame using the Rear Installation Bracket and O-rings. Position them to be clearly visible from the rear and sides.
- Remote Control: Secure the remote control to your handlebar within easy thumb reach using the provided O-rings. For added stability, use the included anti-friction adhesive strips between the remote and the handlebar.

Figure 4.3: Lights Installed on Bicycle
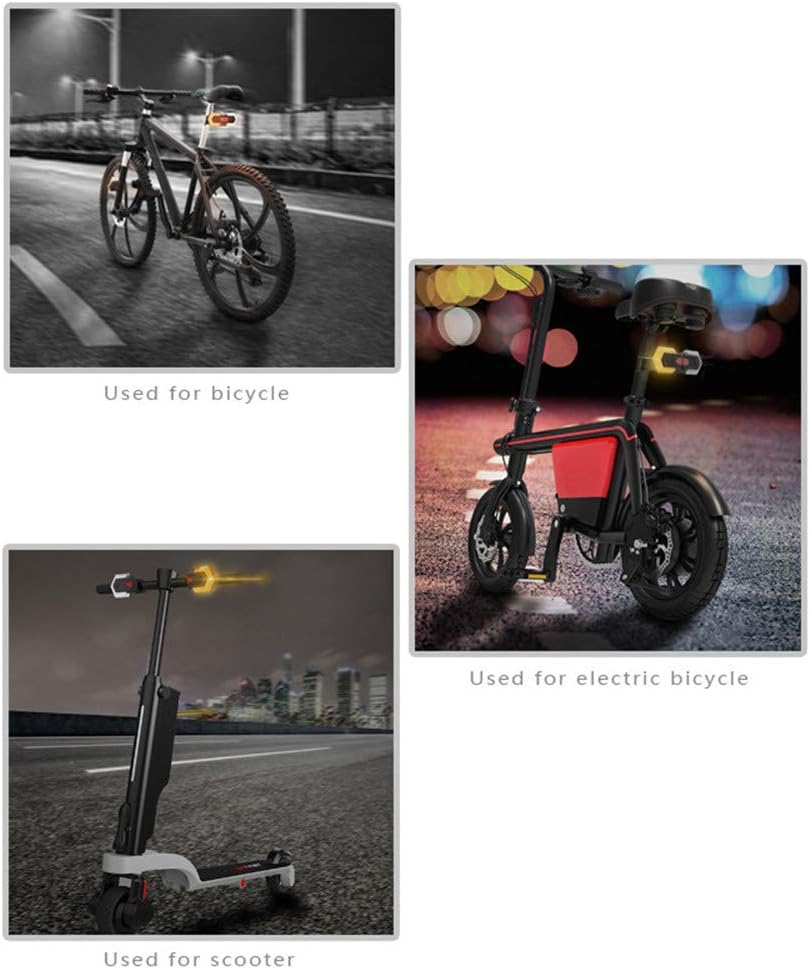
Figure 4.4: Compatibility with Various Bikes
5. Operating Instructions
The remote control allows for easy activation of all light functions.
Video 5.1: Demonstration of CarryBright Bike Turn Signals (Source: Runston)
This video demonstrates the functionality of the bike turn signals, including turn indication, warning lights, and horn operation, as well as installation and charging.
5.1. Remote Control Functions
The remote control features three main buttons:
- Left Arrow Button: Activates the left turn signal. Press once to turn on, press again to turn off.
- Right Arrow Button: Activates the right turn signal. Press once to turn on, press again to turn off.
- Power/Horn Button (Center Hexagon):
- Press once to activate the warning (all lights flashing) mode. Press again to turn off.
- Press and hold to activate the horn. Release to stop.
5.2. Turn Signal Operation
To indicate a turn, simply press the corresponding left or right arrow button on the remote. The front and rear lights will flash in the indicated direction. Press the button again to cancel the turn signal.
5.3. Warning Light Mode
For increased visibility, especially in low-light conditions or emergencies, press the center Power/Horn button once. All lights will flash simultaneously. Press the button again to deactivate this mode.
5.4. Horn Function
To alert pedestrians or other cyclists, press and hold the center Power/Horn button. The horn will sound as long as the button is held down. Release the button to stop the horn.
6. Maintenance
Proper maintenance will extend the life and performance of your CarryBright bike light system.
- Cleaning: Wipe the lights and remote with a soft, damp cloth. Do not use abrasive cleaners or solvents.
- Battery Care: To maintain battery health, avoid fully discharging the batteries frequently. Recharge them regularly, even if not completely depleted. If storing for an extended period, charge them to about 50% and recharge every few months.
- Water Resistance: While rated IPX6, avoid submerging the units in water. Ensure the USB port dust covers are securely closed after charging to maintain water resistance.
- Storage: Store the system in a cool, dry place away from direct sunlight and extreme temperatures.
7. Troubleshooting
If you encounter any issues with your CarryBright bike light system, refer to the following common problems and solutions:
- Lights Not Turning On:
- Ensure the lights and remote are fully charged.
- Check if the remote control is paired with the lights. If not, refer to the pairing instructions (usually involves holding down a button on the light until it flashes, then activating the remote).
- Remote Not Responding:
- Check the remote's battery level. Recharge if necessary.
- Ensure there are no obstructions between the remote and the lights.
- Re-pair the remote with the lights if connection is lost.
- Lights Not Charging:
- Verify the USB charging cable is properly connected to both the power source and the light unit.
- Try a different USB port or power adapter.
- Ensure the charging port on the light is clean and free of debris.
- Lights Not Bright Enough:
- Ensure the batteries are fully charged. Light output can decrease with low battery.
- Clean the light surfaces to remove any dirt or grime that might obstruct light output.
8. Warranty and Support
CarryBright products are designed for durability and performance. For warranty information, technical support, or any questions not covered in this manual, please contact CarryBright customer service through the retailer where you purchased the product or visit the official CarryBright website for contact details.
Please retain your proof of purchase for warranty claims.