Introduction
This user manual provides comprehensive instructions for the installation, operation, and maintenance of your NDS Sun Control 2 MPPT 12V-320W charge controller. Please read this manual carefully before using the device to ensure safe and efficient operation. This MPPT (Maximum Power Point Tracking) charge controller is designed to optimize the energy harvest from your solar panels and efficiently charge your 12V battery system.
Product Overview
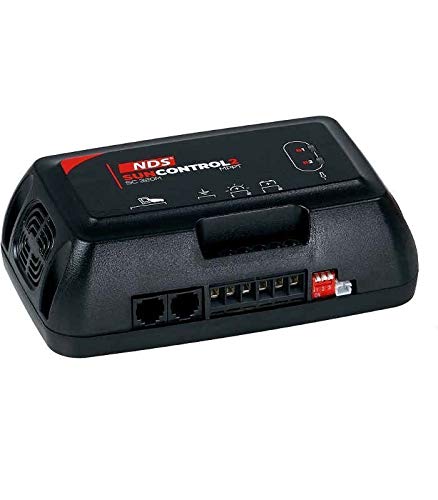
This image displays the NDS Sun Control 2 MPPT 12V-320W charge controller. It is a compact, black rectangular device with the 'NDS SUNCONTROL 2 MPPT' logo visible on the top surface. The front panel features various connection ports, including two RJ45 ports and several screw terminals for wiring. A small red and white switch is also visible on the right side. The device has a fan vent on the left side for cooling.
The NDS Sun Control 2 MPPT 12V-320W is an advanced solar charge controller that utilizes MPPT technology to maximize the power output from your solar array. It is suitable for 12V battery systems and can handle up to 320W of solar input. The controller features robust construction and is designed for reliable performance in various applications, including RVs, boats, and off-grid systems.
Setup and Installation
Safety Precautions
- Ensure all power sources are disconnected before installation.
- Wear appropriate personal protective equipment (PPE), including safety glasses and gloves.
- Use insulated tools to prevent short circuits.
- Verify correct polarity for all connections. Reverse polarity can damage the controller and battery.
- Install the controller in a well-ventilated area, away from flammable materials and direct sunlight.
Mounting
Mount the NDS Sun Control 2 MPPT controller vertically on a flat, non-flammable surface. Ensure there is adequate clearance around the unit for proper ventilation, especially around the fan vent. Use appropriate screws for secure mounting. Avoid mounting in areas exposed to moisture or extreme temperatures.
Wiring Connections
Follow these steps for wiring the charge controller. Refer to the labels on the device for specific terminal identification.
- Battery Connection: Connect the battery cables to the designated battery terminals on the controller. Ensure correct polarity (positive to positive, negative to negative). This connection must be made first.
- Solar Panel Connection: Connect the solar panel cables to the designated PV input terminals. Ensure correct polarity. Do not exceed the maximum input voltage or current ratings of the controller.
- Load Connection (Optional): If your model supports a direct load output, connect your DC loads to the designated load terminals. Ensure the total load current does not exceed the controller's rating.
- Remote Display/Communication (Optional): Use the RJ45 ports for connecting compatible remote displays or communication modules, if applicable.
Once all connections are secure, double-check all wiring for correct polarity and tightness before applying power.
Operating Instructions
Initial Power-Up
After all connections are made, the controller will automatically power on. The LED indicators on the unit will illuminate to show the status of the battery, solar input, and charging process. Refer to the indicator legend on the device or in this manual for specific meanings.
Monitoring
The NDS Sun Control 2 MPPT controller provides visual indicators for its operational status. These typically include:
- Solar Input Status: Indicates if solar power is being received.
- Battery Charge Status: Shows the current charging stage (e.g., bulk, absorption, float).
- Battery Level: May indicate approximate battery charge level.
- Error Indicators: Alerts to potential issues such as over-voltage, over-current, or short circuits.
For detailed monitoring and configuration, a compatible remote display or mobile application (if available for your model) can be connected via the communication ports.
Charging Stages
The MPPT controller employs a multi-stage charging algorithm to optimize battery health and lifespan:
- Bulk Charge: Delivers maximum current to rapidly charge the battery to approximately 80% of its capacity.
- Absorption Charge: Charges the battery at a constant voltage to bring it to 100% charge, reducing current as the battery fills.
- Float Charge: Maintains the battery at a full charge by providing a small, constant voltage, compensating for self-discharge.
Maintenance
Regular maintenance ensures the longevity and optimal performance of your NDS Sun Control 2 MPPT charge controller:
- Cleanliness: Keep the controller clean and free from dust and debris. Use a dry, soft cloth for cleaning. Do not use liquid cleaners.
- Ventilation: Ensure the ventilation openings and fan (if present) are not obstructed. Periodically check for dust buildup in the fan area and clean if necessary.
- Connections: Periodically check all wiring connections for tightness. Loose connections can cause overheating and poor performance.
- Environment: Ensure the operating environment remains within the specified temperature and humidity ranges.
- Battery Health: Monitor your battery's health regularly. A faulty battery can affect the controller's performance.
Troubleshooting
| Problem | Possible Cause | Solution |
|---|---|---|
| No power/LEDs off | No battery connection or reverse polarity; Blown fuse; Faulty wiring. | Check battery connections and polarity; Check inline fuse on battery cable; Verify all wiring. |
| Battery not charging | No solar input; Solar panel disconnected or faulty; Overcast weather; Controller in fault mode. | Check solar panel connections; Verify solar panel output; Wait for better sunlight; Check controller error indicators. |
| Low charging current | Partial shading on solar panels; Dirty solar panels; Battery already near full charge. | Clear shading; Clean solar panels; This is normal behavior if battery is nearly full. |
| Over-voltage/Over-current error | Solar panel voltage/current too high; Short circuit. | Ensure solar panel specifications match controller limits; Check for short circuits in wiring. |
Technical Specifications
| Feature | Specification |
|---|---|
| Model | SC320M |
| Brand | NDS |
| System Voltage | 12 Volt (DC) |
| Max. Solar Input Power | 320W |
| Operating Temperature | Up to 60 ℃ |
| Color | Black |
| ASIN | B08GG7GFDT |
Warranty and Support
NDS products are manufactured to high-quality standards. For specific warranty terms and conditions, please refer to the warranty card included with your product or visit the official NDS website. In case of technical issues or questions not covered in this manual, please contact NDS customer support or your authorized dealer. When contacting support, please have your product model (SC320M) and purchase information ready.
For the latest information and support resources, please visit the official NDS website: www.ndsenergy.it


