1. Introduction
This manual provides detailed instructions for the operation and maintenance of your Douk Audio P2 Mini Bluetooth 5.0 Vacuum Tube Preamp. Please read this manual thoroughly before using the device to ensure proper functionality and to maximize your audio experience. This device combines a vacuum tube preamplifier, a HiFi USB player, and a stereo audio headphone amplifier, offering versatile connectivity options including Bluetooth 5.0, RCA, USB, and TF card inputs.
2. Safety Information
- Power Supply: Use only the provided power adapter. Using an incompatible power supply may damage the device and void the warranty.
- Ventilation: Ensure adequate ventilation around the unit. Do not block ventilation openings.
- Moisture: Keep the device away from water, moisture, and high humidity environments.
- Heat: Avoid placing the unit near heat sources or in direct sunlight.
- Handling Tubes: Vacuum tubes can become hot during operation. Exercise caution when handling or replacing them.
- Cleaning: Disconnect power before cleaning. Use a soft, dry cloth. Do not use liquid cleaners or aerosols.
- Servicing: Do not attempt to service the unit yourself. Refer all servicing to qualified personnel.
3. Package Contents
Verify that all items are present in the package:
- 1x Douk Audio P2 Preamp Unit
- 1x Power Supply Adapter (DC 12V)
- 1x Bluetooth Antenna
- 2x 6K4 Vacuum Tubes
- 1x Remote Control
- 1x Instruction Manual

4. Product Overview
The Douk Audio P2 is a compact and versatile audio device designed to enhance your listening experience. It features multiple input options and a vacuum tube stage for a warm, rich sound.
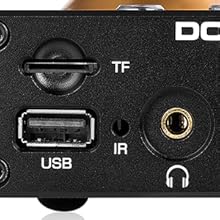
4.1 Front Panel Controls and Connections
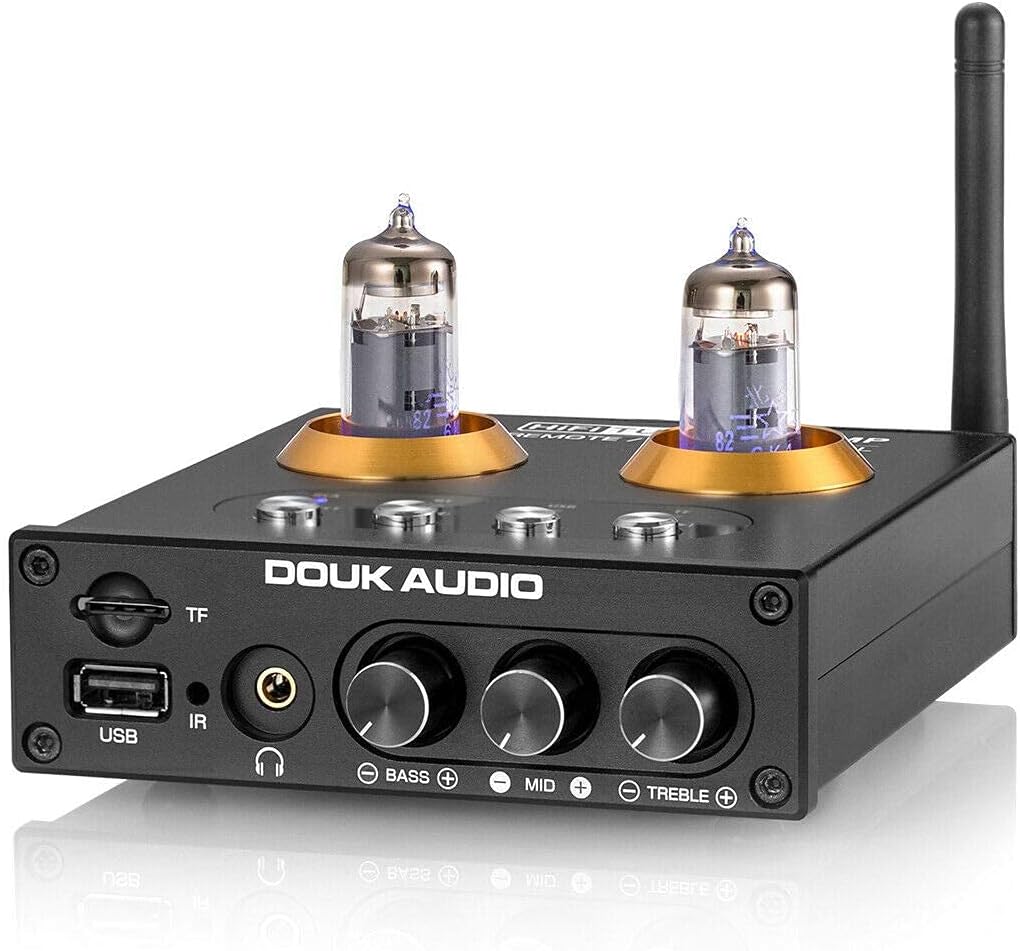
- TF Card Input: Slot for TransFlash (MicroSD) cards for media playback.
- USB Input: USB-A port for connecting USB flash drives for media playback.
- IR Receiver: Infrared receiver for the remote control.
- Headphone Output: 3.5mm jack for connecting headphones.
- Bass Knob: Adjusts low-frequency audio levels.
- Mid Knob: Adjusts mid-range frequency audio levels.
- Treble Knob: Adjusts high-frequency audio levels.
- Input Selection Buttons: Buttons for selecting input sources (RCA, BT, USB, TF).
- Power/Select Button: Powers the unit on/off and cycles through inputs.
4.2 Rear Panel Connections

- Bluetooth Antenna Connector: For attaching the included Bluetooth antenna.
- RCA Input (L/R): Stereo analog audio input for connecting external audio sources.
- RCA Output (L/R): Stereo analog audio output for connecting to an amplifier or active speakers.
- DC 12V Power Input: For connecting the power adapter.
5. Setup
Follow these steps for initial setup:
- Install Vacuum Tubes: Carefully insert the two 6K4 vacuum tubes into their sockets on the top of the unit. Ensure they are seated firmly.
- Attach Bluetooth Antenna: Screw the provided Bluetooth antenna onto the connector on the rear panel.
- Connect Audio Output: Connect the RCA output jacks (L/R) on the rear panel to your amplifier or active speakers using RCA cables.
- Connect Audio Input (Optional): If using an external analog source (e.g., CD player), connect its RCA output to the RCA input jacks (L/R) on the rear panel.
- Connect Power: Connect the DC 12V power adapter to the power input on the rear panel, then plug the adapter into a wall outlet.
- Power On: Press the Power/Select button on the front panel or the power button on the remote control to turn on the unit.

6. Operating Instructions
6.1 Input Selection
Use the input selection buttons on the front panel or the remote control to switch between available audio sources:
- RCA: For external analog audio sources connected via RCA cables.
- BT (Bluetooth): For wireless audio streaming from Bluetooth-enabled devices.
- USB: For audio playback from a USB flash drive.
- TF: For audio playback from a TF (MicroSD) card.
6.2 Bluetooth Operation
- Select the "BT" input using the front panel button or remote. The Bluetooth indicator LED will flash.
- On your mobile device or computer, enable Bluetooth and search for available devices.
- Select "Douk Audio P2" from the list to pair. Once paired, the Bluetooth indicator LED will remain solid.
- You can now stream audio wirelessly to the P2.

6.3 USB/TF Card Playback
- Insert a USB flash drive into the USB port or a TF card into the TF card slot.
- Select the "USB" or "TF" input using the front panel button or remote.
- The unit will automatically begin playing supported audio files (MP3, APE, FLAC, WAV, WMA).
- Use the remote control for playback functions (play/pause, next/previous track).

6.4 Headphone Amplifier Function
Connect your headphones to the 3.5mm headphone jack on the front panel. The P2 will amplify the selected audio source for private listening. The RCA output remains active, allowing simultaneous output to speakers and headphones.

6.5 Preamplifier Function
The P2 acts as a preamplifier, processing the audio signal through its vacuum tube stage before sending it to your main amplifier or active speakers via the RCA output. This tube stage is designed to add warmth and richness to the audio.

6.6 Tone Control
Adjust the Bass, Mid, and Treble rotary knobs on the front panel to fine-tune the audio output to your preference. These controls allow for independent adjustment of different frequency ranges.

6.7 Remote Control
The included remote control provides convenient access to power, input selection, volume adjustment, and media playback controls.

7. Maintenance
7.1 Cleaning
To clean the unit, first disconnect it from the power outlet. Use a soft, dry, lint-free cloth to wipe the exterior surfaces. Do not use abrasive cleaners, solvents, or chemical sprays, as these can damage the finish or internal components.
7.2 Tube Replacement
The 6K4 vacuum tubes are designed to be user-replaceable. If you wish to experiment with different compatible tubes (e.g., 6J1, 6J4, GE5654, 6AK5, 6*1n) or if a tube needs replacement:
- Ensure the unit is powered off and unplugged from the wall outlet. Allow the tubes to cool completely before handling.
- Gently grasp the top of the tube and pull it straight up from its socket. Avoid twisting or bending the pins.
- Align the pins of the new tube with the holes in the socket. Carefully push the new tube straight down until it is firmly seated.
- Reconnect power and test the unit.

8. Troubleshooting
| Problem | Possible Cause | Solution |
|---|---|---|
| No power | Power adapter not connected; power outlet not active. | Ensure power adapter is securely connected to the unit and a working power outlet. |
| No sound output | Incorrect input selected; cables loose; amplifier/speakers off; volume too low. | Verify correct input source. Check all audio cable connections. Ensure connected amplifier/speakers are powered on and volume is adequate. |
| Bluetooth not pairing | Unit not in pairing mode; device too far; interference. | Ensure "BT" input is selected and LED is flashing. Move device closer to the P2. Restart Bluetooth on your device. |
| USB/TF card not playing | Incorrect input selected; unsupported file format; corrupted media. | Select "USB" or "TF" input. Ensure files are supported (MP3, APE, FLAC, WAV, WMA). Try a different USB drive/TF card. Note: USB drives larger than 32GB may not be fully supported. |
| Static or humming noise | Ground loop; faulty cables; tube issue. | Check cable connections. Try a different power outlet. Allow tubes to warm up. If persistent, consider replacing tubes. |
9. Specifications
- Brand: Douk Audio
- Model: P2
- Connectivity Technology: Bluetooth 5.0, RCA, USB, TF Card
- Compatible Devices: Personal Computer, Television, Speaker, Mobile Phones, CD/MP3 Players
- Connector Type: 3.5mm Jack (Headphone Out), RCA (Input/Output)
- Audio Encoding: Stereo
- Audio Output Mode: Stereo
- Number of Channels: 2
- Vacuum Tubes: 2x 6K4 (replaceable with 6J1, 6J4, GE5654, 6AK5, 6*1n)
- Power Input: DC 12V
- Dimensions (L x W x H): Approximately 128mm x 115mm x 33mm (5.04 x 4.53 x 1.30 inches)
- Item Weight: Approximately 420g (0.93 lbs)
- Supported USB/TF Card Capacity: Up to 32GB (for optimal performance)
- Supported Audio Formats (USB/TF): MP3, APE, FLAC, WAV, WMA
10. Warranty and Support
Douk Audio products are designed for reliability and performance. For warranty information and technical support, please refer to the official Douk Audio website or contact your retailer. Keep your purchase receipt as proof of purchase for warranty claims.
Official Website: www.doukaudio.com


