1. Introduction
This manual provides essential instructions for the safe installation, operation, and maintenance of your Wayne WST33 1/3 HP Submersible Thermoplastic Sump Pump. Please read this manual thoroughly before installation and retain it for future reference. Proper installation and adherence to these guidelines will ensure optimal performance and longevity of your sump pump.
2. Safety Information
WARNING: Failure to follow these safety instructions could result in electric shock, fire, serious injury, or death.
- Always disconnect power to the pump before performing any service or maintenance.
- Ensure the pump is connected to a properly grounded 120V AC GFCI (Ground Fault Circuit Interrupter) protected outlet.
- Do not operate the pump with a damaged cord or plug.
- Do not use this pump for flammable or corrosive liquids. It is designed for water only.
- Keep hands and feet clear of the pump inlet and discharge openings when the pump is connected to power.
- Do not lift the pump by its power cord.
- Ensure the sump basin is free of debris that could obstruct the pump or float switch.
3. Product Overview
The Wayne WST33 is a robust 1/3 HP submersible sump pump constructed from reinforced thermoplastic, designed for reliable water removal in sump applications. It features a piggyback tether float switch for automatic or manual operation and a unique top suction design to minimize clogging.
Key Features:
- Horsepower: 1/3 HP oil-filled motor.
- Construction: Reinforced thermoplastic for durability.
- Float Switch: Piggyback tether float switch for automatic or manual control.
- Clog Prevention: Unique top suction design reduces clogging and prevents air lock.
- Discharge: 1.5-inch NPT discharge for standard plumbing connections.
- Power Cord: 8-foot waterproof power cord.
- Efficiency: Energy-efficient operation with a maximum flow rate of 3000 GPH.
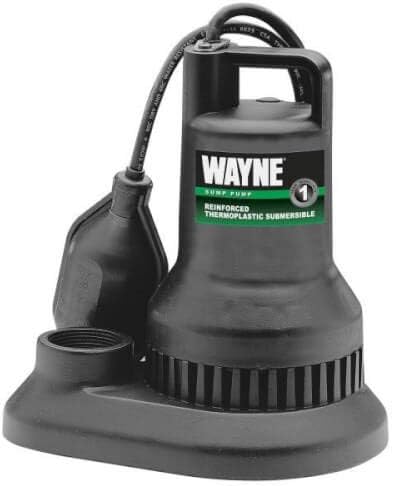
Figure 1: Wayne WST33 Submersible Sump Pump. This image displays the black, reinforced thermoplastic pump unit with its integrated handle, power cord, and piggyback tether float switch. The base of the pump shows the intake screen and the threaded discharge port.
4. Setup and Installation
The WST33 sump pump is designed for straightforward installation, typically completed within 15 minutes. Follow these steps for proper setup:
- Sump Basin Preparation: Ensure your sump basin has a minimum diameter of 14 inches to accommodate the pump and allow for proper float switch operation. Clean the basin of any debris, gravel, or sediment.
- Positioning the Pump: Place the pump on a solid, level surface at the bottom of the sump basin. Avoid placing it directly on dirt or gravel, which could lead to clogging.
- Discharge Pipe Connection: Connect a 1-1/2 inch NPT discharge pipe to the pump's outlet. It is recommended to use a check valve (not included) in the discharge line to prevent water from flowing back into the sump basin when the pump turns off.
- Float Switch Adjustment: The piggyback tether float switch controls the pump's automatic operation. Adjust the tether length to achieve the desired ON and OFF levels. The recommended ON level is 14 inches and the OFF level is 7 inches. Ensure the float switch can move freely without obstruction by the pump, basin walls, or piping.
- Power Connection: Plug the pump's 8-foot waterproof power cord into a dedicated 120V AC GFCI-protected electrical outlet. Do not use extension cords.
- Test Operation: Fill the sump basin with water to verify the pump turns on and off correctly at the desired levels. Observe the discharge flow and ensure no leaks are present.
5. Operation
The Wayne WST33 sump pump can operate in two modes: automatic or manual, controlled by its piggyback tether float switch.
Automatic Operation:
For automatic operation, plug the pump's power cord into the piggyback plug, and then plug the piggyback plug into the GFCI-protected outlet. The pump will automatically turn on when the water level rises to the float switch's ON level (approximately 14 inches) and turn off when the water level drops to the OFF level (approximately 7 inches).
Manual Operation:
To operate the pump manually, unplug the pump's power cord from the piggyback plug and plug the pump's power cord directly into the GFCI-protected outlet. The pump will run continuously until unplugged. Use manual operation for quick water removal or testing, but do not leave unattended for extended periods.
The unique top suction design helps prevent air lock conditions, ensuring consistent pumping performance.
6. Maintenance
Regular maintenance ensures the efficient and reliable operation of your sump pump. Always disconnect power before performing any maintenance.
- Inspect Sump Basin: Periodically check the sump basin for accumulated debris, silt, or gravel. Clean the basin as needed to prevent pump obstruction.
- Check Float Switch: Ensure the float switch moves freely and is not obstructed by wires, pipes, or the basin walls. Manually lift the float to verify the pump activates.
- Inspect Impeller: While the pump's top suction design reduces clogging, occasionally inspect the intake screen and impeller for any lodged debris. Clear any obstructions carefully.
- Power Cord Inspection: Examine the power cord for any signs of damage, fraying, or cuts. Replace if damaged.
- Seasonal Checks: Perform more thorough checks before heavy rain seasons or after extended periods of inactivity.
7. Troubleshooting
If your Wayne WST33 sump pump is not operating as expected, refer to the following troubleshooting guide:
| Problem | Possible Cause | Solution |
|---|---|---|
| Pump does not turn on. | No power to the pump. Float switch obstructed or faulty. Motor overload. | Check GFCI outlet, circuit breaker. Ensure power cord is securely plugged in. Clear obstructions around float switch. Test float switch manually. Replace if faulty. Allow motor to cool. Check for impeller obstructions. |
| Pump runs continuously. | Float switch stuck in ON position. Check valve faulty or missing. Continuous water inflow. | Clear obstructions around float switch. Adjust tether length. Replace if faulty. Install or replace check valve in discharge line. Identify and address source of excessive water inflow. |
| Pump runs but does not remove water. | Discharge pipe clogged or frozen. Impeller clogged. Air lock condition. | Inspect and clear discharge pipe. Ensure it's not frozen. Disconnect power, remove pump, and clear impeller/intake screen. The WST33's top suction design minimizes air lock, but ensure the pump is fully submerged and the discharge line is clear. |
| Pump is excessively noisy. | Debris in impeller. Pump not sitting level. Worn bearings (less common for new pump). | Disconnect power and clear impeller. Ensure pump is on a stable, level surface. Contact customer support if noise persists and pump is new. |
If troubleshooting steps do not resolve the issue, contact customer support for further assistance.
8. Specifications
| Model | WST33 |
| Type | Automatic Submersible Sump Pump |
| Application | Plumbing (Sump Water Removal) |
| Horsepower | 1/3 HP (0.33 HP) |
| Voltage | 120 V |
| Amperage | 9.5 A |
| Max Flow Rate | 3000 Gallons Per Hour (GPH) |
| Flow Rate @ 10 ft. Head | 2130 GPH |
| Flow Rate @ 5 ft. Head | 2610 GPH |
| Flow Rate @ 15 ft. Head | 1404 GPH |
| Discharge Size | 1-1/2 inch NPT |
| Power Cord Length | 8 feet |
| Weight | 9 pounds |
| Construction Material | Reinforced Thermoplastic |
| Impeller Material | Scratch resistant glass reinforced polycarbonate |
| Approvals | cULus Agency, UL/CSA |
9. Warranty and Support
Limited Warranty:
The Wayne WST33 Sump Pump comes with a 2-year limited warranty from the date of purchase. This warranty covers defects in material and workmanship under normal use and service. For specific terms and conditions, please refer to the warranty documentation included with your product or contact the manufacturer.
Customer Support:
For technical assistance, warranty claims, or to order replacement parts, please contact Wayne customer support. Have your model number (WST33) and date of purchase ready when contacting support.
Contact information for Wayne customer support can typically be found on the product packaging or the manufacturer's official website.


