1. Introduction
This manual provides instructions for the installation, operation, and maintenance of the ETI LCD-8 24VAC Snow Melting Controller. The LCD-8 is designed to automatically activate snow melting heaters when precipitation is detected at temperatures below a configurable set point, ensuring efficient and cost-effective snow and ice removal for hydronic and building automation applications.
The controller features an adjustable hold-on time to ensure complete melting after precipitation ceases, and an internal magnetic reed switch for configuration and manual operation.
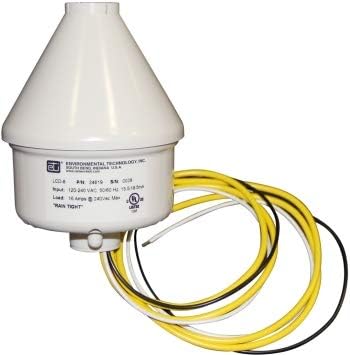
Figure 1: ETI LCD-8 24VAC Snow Melting Controller. This image shows the conical white enclosure of the controller with multiple colored wires (yellow, black, white) extending from its base, indicating electrical connections.
2. Setup and Installation
The LCD-8 controller is designed for simple four-wire installation. It is suitable for 24VAC hydronic and building automation systems. Ensure all local electrical codes and safety regulations are followed during installation.
2.1 Mounting
Mount the controller in a location where it can accurately detect precipitation and ambient temperature. The rugged polycarbonate enclosure provides excellent protection and is rated NEMA 3R, allowing for outdoor installation. Ensure the unit is mounted vertically to allow snow and moisture to shed properly, preventing "iglooing" over the moisture sensor.
2.2 Wiring
Connect the controller to a 24VAC power supply and the snow melting system's contactor or relay. Refer to the wiring diagram provided with the product packaging for specific connection details. The controller is rated for up to 3 amp inductive loads for pilot duty applications and resistive loads up to 16 amps.
- Power Supply: Connect the 24VAC input wires.
- Load Connection: Connect the output wires to the snow melting system's control circuit.
- Ensure all connections are secure and insulated.
3. Operation and Configuration
The LCD-8 automatically activates the snow melting system based on detected precipitation and temperature. Configuration of settings is performed using the internal magnetic reed switch.
3.1 Automatic Operation
The controller will turn on snow melting heaters when precipitation occurs at temperatures below the configured set point. It will remain on for an adjustable hold-on time after precipitation stops to ensure complete ice and snow melting.
3.2 Configuration Settings
The following settings can be configured using the internal magnetic reed switch:
- Hold-on Timer: This setting determines how long the heaters remain active after precipitation stops. Options include:
- Off
- 1 hour
- 3 hours (Default)
- 5 hours
- Operating Temperature Set Point: This defines the temperature threshold below which the controller will activate the system upon detecting precipitation. Options include:
- None (precipitation sensor only)
- 36°F (2.2°C)
- 38°F (3.3°C) (Default)
- 40°F (4.4°C)
- Low-Temperature Lockout: This feature disengages unit operation below 17°F (-8.3°C) to prevent unnecessary operation in extremely cold, dry conditions. This can be enabled or disabled. (Default: Disabled)
Refer to the detailed instructions provided with the product for the specific procedure to access and adjust these settings using the magnetic reed switch.
4. Maintenance
The ETI LCD-8 controller requires minimal maintenance. Regular checks can ensure optimal performance.
4.1 System Testing (Sno-Test)
The controller includes a "Sno-Test" automatic testing function and a manual heater cycle option for system verification. This allows users to confirm the snow melting system is operational before winter conditions arrive.
- Automatic Sno-Test: Consult the product's specific instructions for details on how this feature operates and its schedule.
- Manual Heater Cycle: Use the internal magnetic reed switch to initiate a manual test cycle of the heaters. This can be useful for troubleshooting or pre-season checks.
4.2 Cleaning
Periodically inspect the controller's enclosure for any debris or obstructions that might interfere with the moisture sensor. Clean the exterior with a soft, damp cloth if necessary. Do not use abrasive cleaners or solvents.
5. Troubleshooting
If the ETI LCD-8 controller or your snow melting system is not functioning as expected, consider the following common issues:
- System Not Activating:
- Verify the 24VAC power supply to the controller is active.
- Check all wiring connections for looseness or damage.
- Ensure the operating temperature set point is appropriate for current conditions.
- Confirm that precipitation is actually occurring on the sensor.
- Check if the low-temperature lockout is enabled and if the ambient temperature is below 17°F.
- System Running Continuously:
- Check the hold-on timer setting. The system will run for the configured duration after precipitation stops.
- Inspect the moisture sensor for any persistent moisture or debris that might be falsely triggering it.
- Incorrect Configuration:
- Review the configuration steps for the hold-on timer, operating temperature, and low-temperature lockout using the magnetic reed switch.
For issues not resolved by these steps, it is recommended to contact a qualified electrician or the manufacturer's support.
6. Specifications
| Model | LCD-8 |
| Supply Voltage | 24VAC |
| Load Rating | Up to 3 amp inductive loads (pilot duty), up to 16 amps resistive loads |
| Enclosure | Weather-resistant NEMA 3R polycarbonate |
| Hold-on Time | Configurable (Off, 1 hour, 3 hours, 5 hours) |
| Operating Temperature Set Points | Configurable (None, 36°F, 38°F, 40°F) |
| Low-Temperature Lockout | 17°F (-8.3°C), configurable (enabled/disabled) |
| Certifications | C-UL-US Listed for Temperature Regulating Equipment |
| Date First Available | August 15, 2020 |
7. Warranty and Support
For warranty information, technical support, or service inquiries regarding your ETI LCD-8 24VAC Snow Melting Controller, please contact Environmental Technology Inc. (ETI) directly. Refer to the product packaging or the official ETI website for the most current contact details and warranty terms.
It is recommended to have your product model number (LCD-8) and date of purchase available when contacting support.


