1. Introduction
This manual provides comprehensive instructions for the Teltonika RUT240, a compact industrial 4G LTE cellular router. The RUT240 is designed for professional Machine-to-Machine (M2M) and Internet of Things (IoT) applications, offering reliable cellular communication in demanding environments. It features 2 Ethernet ports, Wi-Fi connectivity, and operates on the RutOS software platform. This specific model is configured for Verizon networks.
Key features include:
- High performance for mission-critical cellular communication.
- WAN failover for automatic switching to an alternative backup connection.
- Wi-Fi functionality supporting both Access Point and Station modes simultaneously.
2. Package Contents
Before proceeding with the installation, please verify that all items are present in your package:
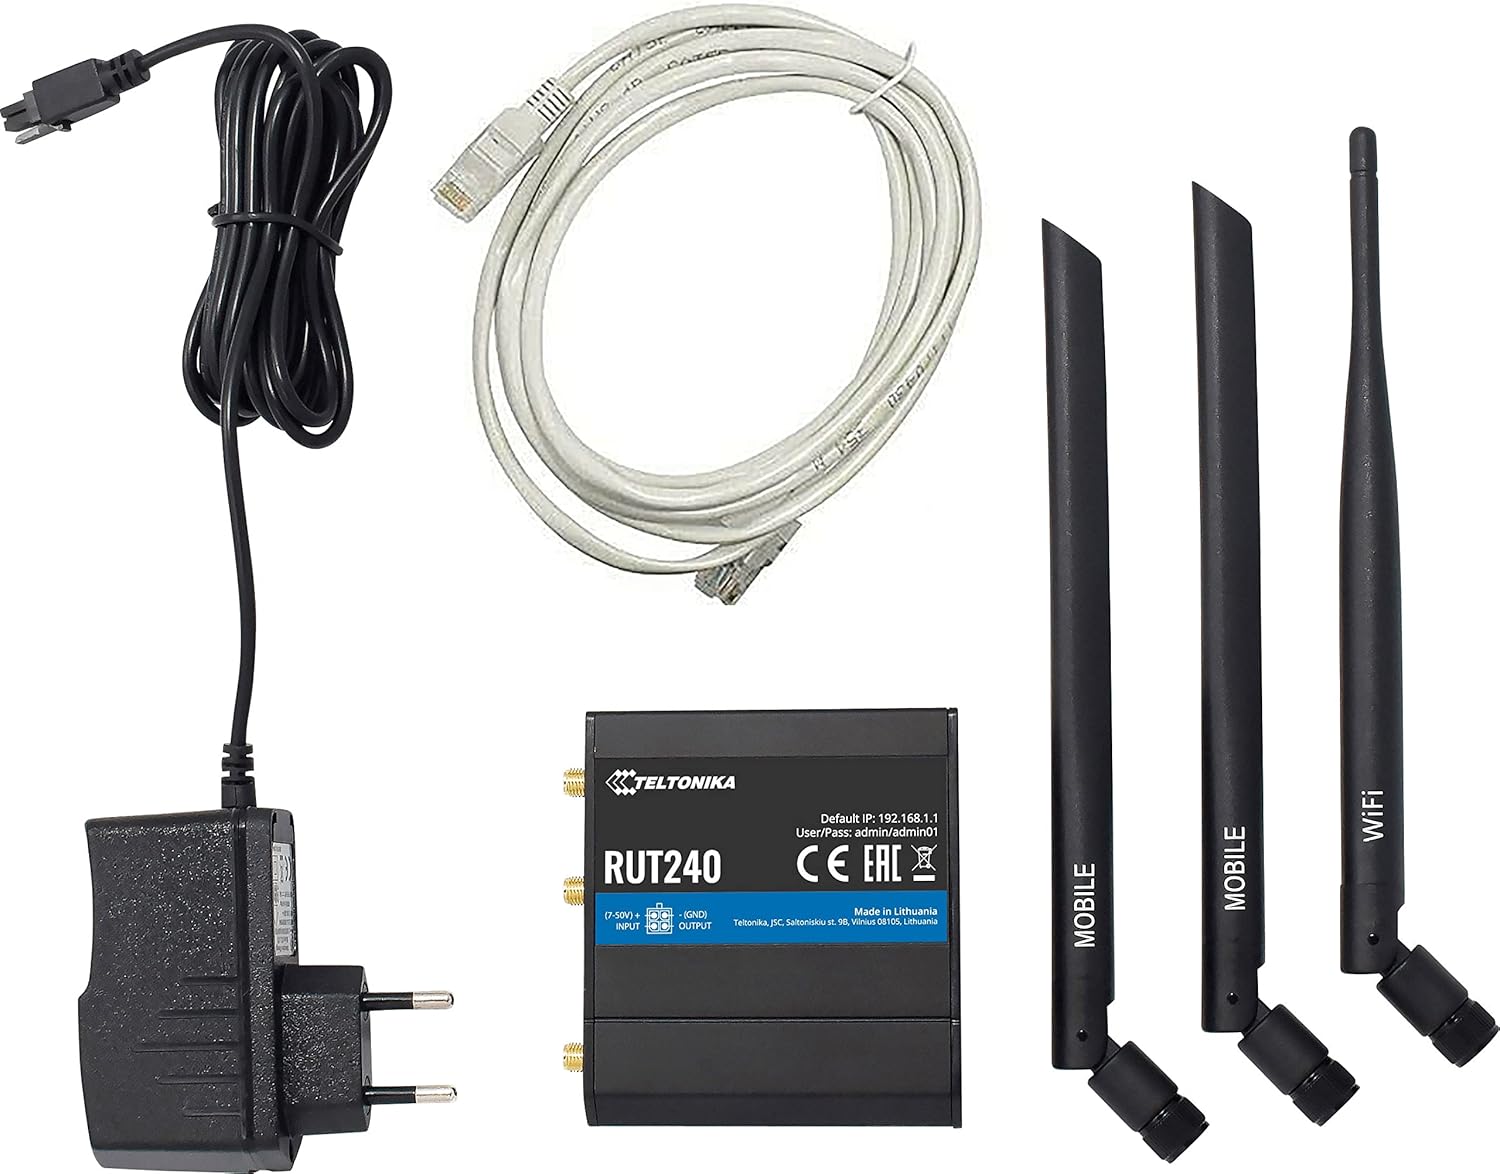
Image: Teltonika RUT240 router, power adapter, Ethernet cable, and three antennas (two mobile, one WiFi).
- Teltonika RUT240 Cellular Router
- Power Adapter (9-30V DC)
- Ethernet Cable
- Two Mobile Antennas
- One WiFi Antenna
3. Product Overview
The Teltonika RUT240 is a compact device designed for easy integration into various setups. Understanding its physical layout is crucial for proper installation and operation.

Image: Top view of the RUT240 router, highlighting the antenna connectors, power input, and I/O ports.

Image: Angled view of the RUT240 router, illustrating the Ethernet ports and power input.
Front View
- Power Socket: For connecting the DC power adapter.
- SIM Card Slots: For inserting your cellular SIM card.
- LAN Ethernet Port: For connecting local network devices.
- WAN Ethernet Port: For connecting to an external network (e.g., DSL/Fiber modem).
Back View
- Reset Button: Used to restore factory default settings.
- LTE Antenna Connectors: For attaching mobile antennas.
- WiFi Antenna Connector: For attaching the WiFi antenna.
4. Setup Guide
Follow these steps to set up your Teltonika RUT240 router for initial operation.
4.1. SIM Card Insertion
- Ensure the router is powered off.
- Locate the SIM card slot(s) on the front of the device.
- Insert your activated Verizon SIM card into the slot until it clicks into place.
4.2. Antenna Connection
- Attach the two mobile antennas to the LTE antenna connectors on the back of the router.
- Attach the WiFi antenna to the WiFi antenna connector on the back of the router.
- Ensure all antennas are securely tightened.
4.3. Power Connection
- Connect the power adapter to the power socket on the front of the router.
- Plug the other end of the power adapter into a power outlet.
- The router will power on automatically. Wait for the status LEDs to indicate readiness.
4.4. Initial Access and Configuration
- Connect your computer to the router using an Ethernet cable (to the LAN port) or via Wi-Fi (default SSID and password can be found on the device label).
- Open a web browser and navigate to the default IP address: http://192.168.1.1.
- Log in using the default username and password: admin / admin01. It is highly recommended to change these credentials immediately after the first login for security purposes.
- Follow the on-screen setup wizard to configure your internet connection and Wi-Fi settings.
5. Operating Instructions
The Teltonika RUT240 operates on RutOS, a Linux-based operating system, providing a robust and flexible platform for network management.
5.1. WAN Failover
The RUT240 supports WAN failover, ensuring continuous connectivity. If the primary internet connection (e.g., cellular) fails, the router will automatically switch to a pre-configured backup connection (e.g., Ethernet WAN). This feature is critical for applications requiring uninterrupted network access.
5.2. Wi-Fi Modes
The router's Wi-Fi module can function simultaneously in two modes:
- Access Point (AP) Mode: Allows other Wi-Fi devices to connect to the RUT240, providing them with network access.
- Station (STA) Mode: Enables the RUT240 to connect to an existing Wi-Fi network as a client.
These modes can be configured via the RutOS web interface.
6. Maintenance
Regular maintenance ensures optimal performance and longevity of your RUT240 router.
- Firmware Updates: Periodically check the Teltonika Networks website for the latest firmware versions. Updating the firmware can provide new features, security enhancements, and bug fixes.
- Cleaning: Keep the router clean and free from dust. Use a soft, dry cloth for cleaning. Do not use liquid cleaners.
- Environmental Conditions: Ensure the router is operated within its specified temperature and humidity ranges to prevent damage.
- Password Management: Regularly change your router's login credentials and Wi-Fi passwords to maintain network security.
7. Troubleshooting
This section provides solutions to common issues you might encounter with your RUT240 router.
7.1. No Internet Connection
- Check SIM Card: Ensure the SIM card is correctly inserted and activated with a data plan.
- Antenna Connection: Verify that the mobile antennas are securely attached.
- Signal Strength: Check the cellular signal strength via the router's web interface. If the signal is weak, try repositioning the router or using external antennas.
- APN Settings: Confirm that the Access Point Name (APN) settings in the router's web interface match those provided by your mobile operator (Verizon).
- WAN Failover: If using WAN failover, ensure both primary and backup connections are configured correctly.
7.2. Cannot Access Web Interface
- IP Address: Ensure you are using the correct default IP address (http://192.168.1.1).
- Network Connection: Verify your computer is connected to the router via Ethernet or Wi-Fi.
- IP Address Conflict: Check if your computer's IP address is in the same subnet as the router.
- Firewall: Temporarily disable any firewall on your computer to rule out interference.
7.3. Router Not Powering On
- Power Adapter: Ensure the power adapter is correctly connected to both the router and a working power outlet.
- Power Source: Test the power outlet with another device to confirm it is functional.
7.4. Factory Reset
If other troubleshooting steps fail, you can perform a factory reset. This will revert all settings to their default values. To perform a factory reset:
- With the router powered on, locate the reset button on the back of the device.
- Use a thin object (e.g., a paperclip) to press and hold the reset button for approximately 10 seconds.
- Release the button when the status LEDs indicate a reset (e.g., all LEDs flash).
- The router will restart with factory default settings.
8. Specifications
Detailed technical specifications for the Teltonika RUT240 router:
| Category | Specification |
|---|---|
| Model Name | RUT240 |
| Item Model Number | RUT24002U000 |
| Brand | Teltonika |
| Manufacturer | Teltonika |
| Connectivity Technology | Wi-Fi, 4G LTE |
| Wireless Communication Standard | 802.11b/g/n |
| Frequency Band Class | Single-Band (2.4 GHz) |
| Operating System | RutOS (OpenWrt based Linux OS) |
| Ethernet Ports | 2 (1x WAN configurable as LAN, 1x LAN) |
| SIM | 1 x External SIM Holder (2FF) |
| Antenna Connectors | 2 x SMA for mobile, 1 x RP-SMA for WiFi |
| Input/Outputs | On 4 pin socket: 1 x Digital input, 1 x Digital open collector output |
| Powering Option | 4 pin power socket, 9-30 VDC |
| Dimensions (W x H x D) | 83 x 25 x 74 mm |
| Item Weight | 14.4 ounces (approximately 135 g) |
| Operating Temperature | -40 °C to 75 °C |
| Security Protocol | WPS, WPA2-Enterprise, WPA2-PSK, WPA-PSK, WEP |
| Special Feature | Access Point Mode, WPS |
| Compatible Devices | Personal Computer |
| Recommended Uses For Product | Monitoring |
9. Warranty and Support
The Teltonika RUT240 is manufactured by Teltonika. For specific warranty information, please refer to the documentation included with your purchase or visit the official Teltonika Networks website. For technical support, firmware downloads, and additional resources, please visit the Teltonika Networks support portal.


