
DEWENWILS HPPS01A
Contents
DEWENWILS 120VAC Dusk to Dawn Sensor Instruction Manual
Model: HPPS01A
1. Introduction
This manual provides instructions for the installation, operation, and maintenance of your DEWENWILS 120VAC Dusk to Dawn Sensor. This photocell light control is designed to automatically manage outdoor lighting by turning lights on at dusk and off at dawn, enhancing convenience and energy efficiency.

Image 1.1: The DEWENWILS 120VAC Dusk to Dawn Sensor, including the main unit and a 3-pin male to male connector.

Image 1.2: Illustration of the photocell sensor's function, demonstrating automatic light activation at dusk and deactivation at dawn for outdoor landscape lighting.
2. Safety Information
Please read and understand all safety instructions before installing or operating this product. Failure to follow these instructions may result in electric shock, fire, or other hazards.
- Always disconnect power at the circuit breaker or fuse box before installation, servicing, or removing the fixture.
- Ensure the product is installed in accordance with national and local electrical codes. If you are unsure about wiring, consult a qualified electrician.
- Do not exceed the specified electrical ratings (120V AC, 50/60Hz, 1800W Tungsten, 1800VA Ballast, 5A E-Ballast).
- This device is designed for outdoor use and is waterproof. However, ensure all connections are secure and protected from direct water exposure where applicable.
- Keep children away from electrical components.
3. Package Contents
Verify that all components are present upon opening the package:
- 1 x DEWENWILS 120VAC Dusk to Dawn Sensor (Photocell Switch)
- 1 x 3-Pin Male to Male Connector
4. Specifications
| Feature | Specification |
|---|---|
| Model Number | HPPS01A |
| Input Voltage | 120VAC, 50/60Hz |
| Max. Tungsten Load | 1800W |
| Max. Ballast Load | 1800VA |
| Max. E-Ballast Load | 5A |
| On Level | 10-16 lux |
| Off Level | <65 lux |
| Sensor Delay | 30-60 seconds |
| Operating Temperature | -40°C to +70°C |
| Material | High-quality PC Plastic |
| Mounting Type | Swivel |
| Threaded Diameter | 0.78 inch |
| Wire Length | 6.5 inches |
| Certifications | UL Listed |
| Dimensions | 4.13 x 2.56 x 1.97 inches |
| Item Weight | 3.2 ounces |

Image 4.1: A detailed view of the photocell sensor, highlighting its technical ratings and UL listing.

Image 4.2: Diagram illustrating the physical dimensions of the photocell sensor and the included male to male 3-pin connector.
5. Installation
The DEWENWILS photocell sensor offers flexible installation options. Always ensure power is disconnected before beginning installation.
5.1 Direct Plug-in Installation
This sensor is compatible with DEWENWILS low voltage transformers (e.g., ASIN B087BPDYJL / B08G4QJ2R5) that feature a photocell receptacle.
- Ensure the power to the transformer is OFF.
- Locate the photocell receptacle on your DEWENWILS low voltage transformer.
- Directly plug the 3-pin male connector of the sensor into the receptacle. No wire nuts or terminal wiring are required for this method.
- If the existing plug type does not match, use the included male to male connector to switch the plug as needed.
- Adjust the swivel mount to position the sensor for optimal light detection.
- Restore power to the transformer.

Image 5.1: The photocell sensor being directly plugged into the designated receptacle on a DEWENWILS low voltage transformer.
5.2 Swivel Mount Adjustment
The sensor features a 180° flexible swivel base, allowing you to adjust its direction for optimal light detection and to avoid interference from artificial light sources.
- Loosen the screw on the swivel mount slightly.
- Adjust the sensor head to the desired angle.
- Tighten the screw to secure the sensor in position.
- Note: If installing into an enclosure, please remove the smaller knockout to thread your photocell sensor out.

Image 5.2: Visual representation of the 180-degree swivel capability of the sensor's mount, allowing for flexible positioning.
5.3 Alternative Wiring (Advanced Users)
For applications requiring direct wiring, the sensor can be integrated into a 120VAC circuit. Consult a qualified electrician if you are not familiar with electrical wiring.
- Black Wire: Connects to the LINE (hot) input.
- White Wire: Connects to NEUTRAL.
- Red Wire: Connects to the LOAD (lighting fixture).
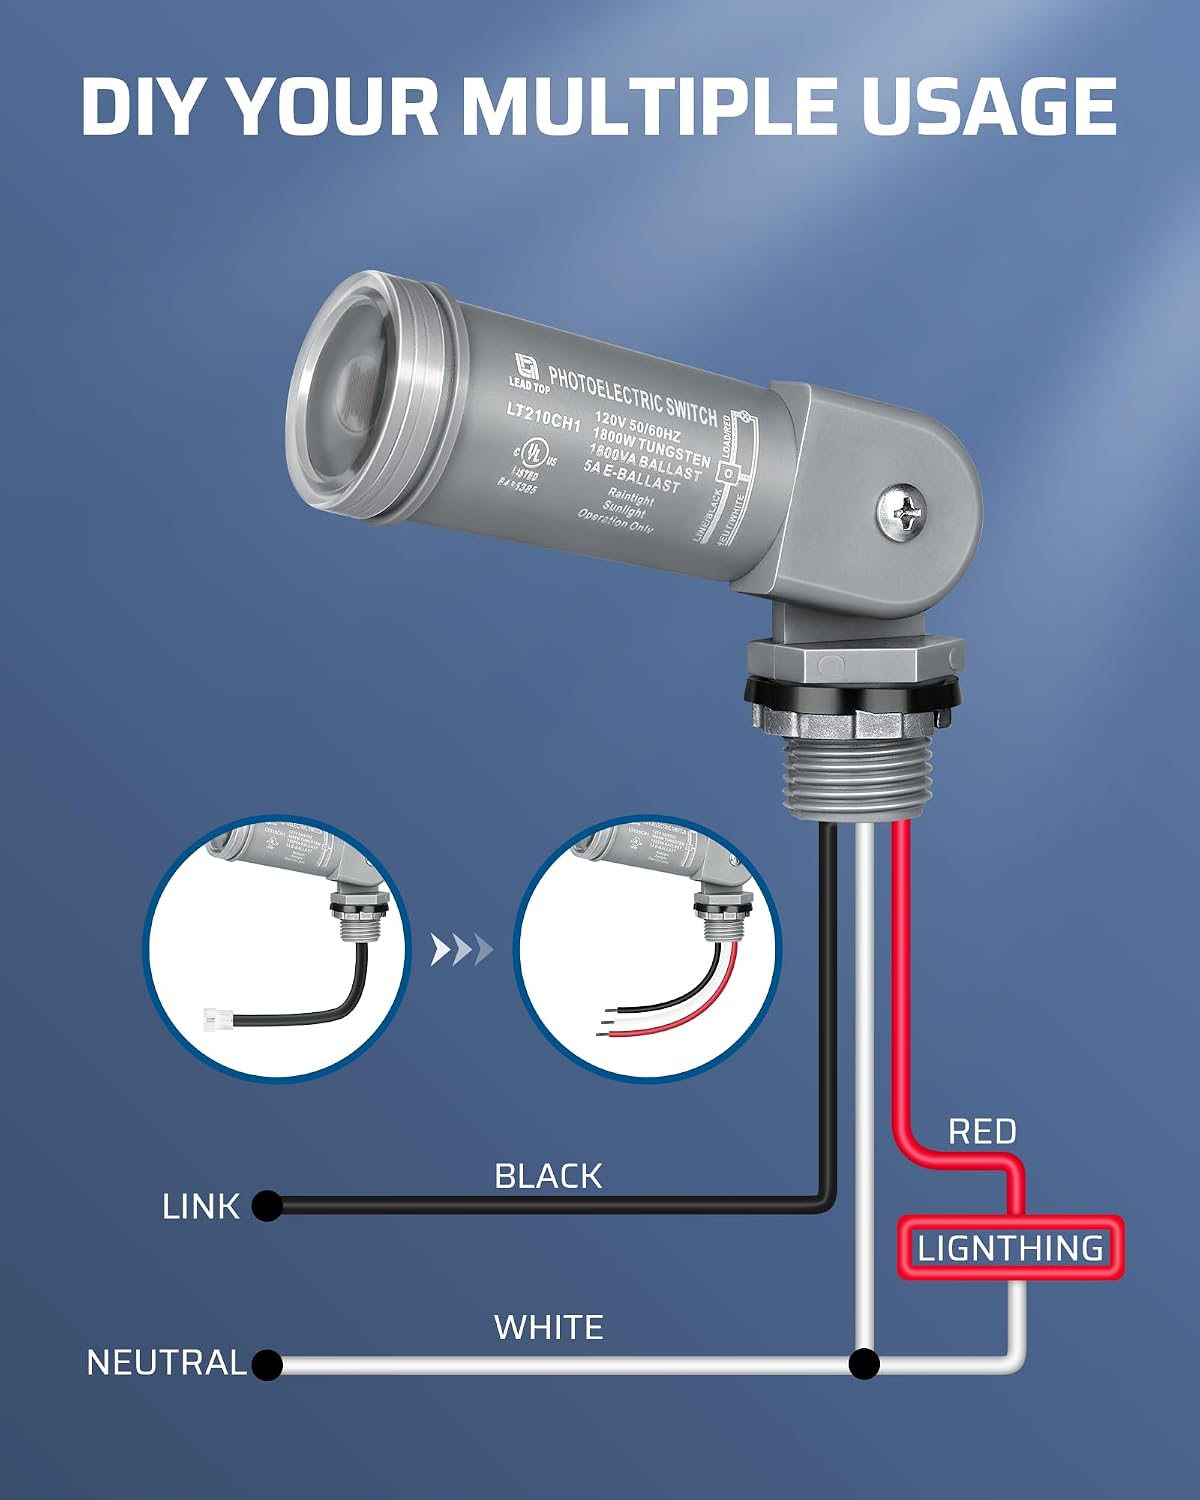
Image 5.3: A wiring diagram illustrating how to connect the photocell sensor for direct integration into a lighting circuit.
6. Operation
The DEWENWILS Dusk to Dawn Sensor operates automatically based on ambient light levels.
- Automatic Activation: The sensor will automatically turn on connected lights when the ambient light level drops to 10-16 lux (dusk).
- Automatic Deactivation: The sensor will automatically turn off connected lights when the ambient light level rises above 65 lux (dawn).
- Sensor Delay: A built-in 30-60 second delay prevents accidental triggering of the lights due to momentary light changes (e.g., car headlights, lightning flashes).
Ensure the sensor is positioned where it can accurately detect natural light and is not obstructed or exposed to artificial light sources that could interfere with its operation.
7. Maintenance
The DEWENWILS photocell sensor is designed for durability and minimal maintenance.
- Cleaning: Periodically clean the sensor lens with a soft, damp cloth to ensure accurate light detection. Avoid abrasive cleaners.
- Weather Resistance: Constructed from high-quality PC material, the sensor is waterproof (IP65 rated), protecting it against rain, snow, dust, and abrasion. It is shock and erosion resistant, suitable for wet locations and extreme temperatures (-40°C to +70°C).
- Inspection: Regularly inspect the sensor and its connections for any signs of damage or wear.
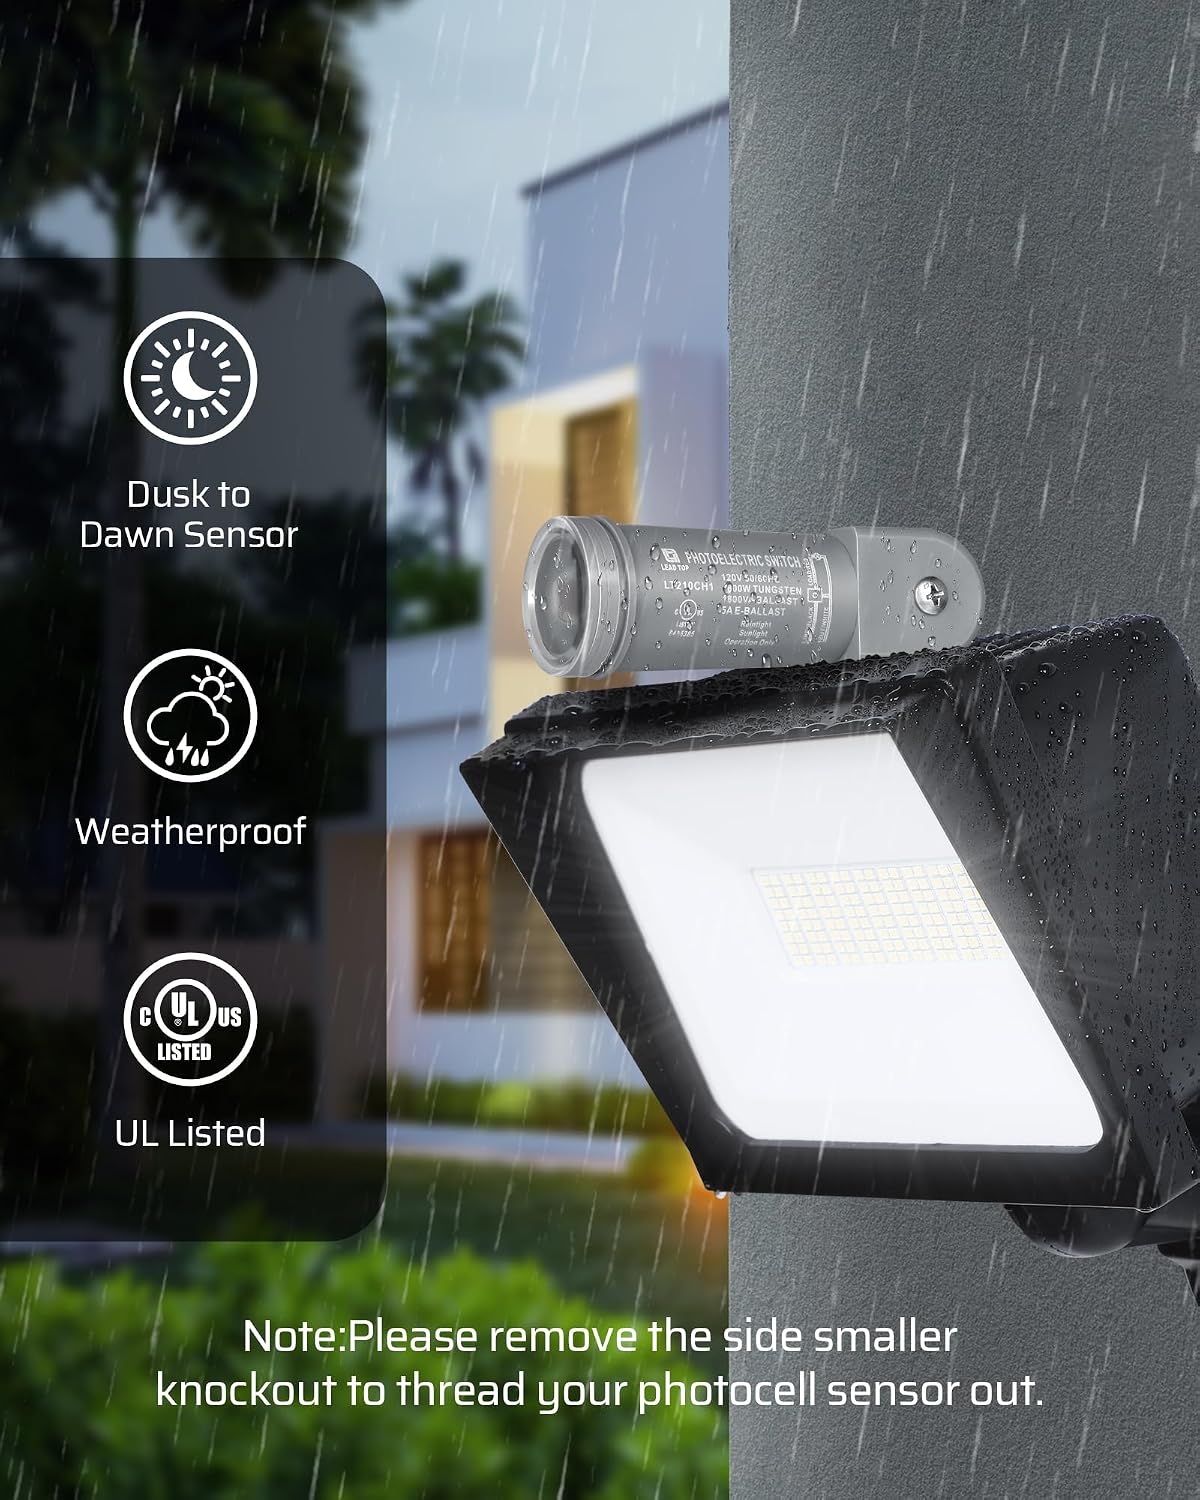
Image 7.1: Overview of key features, emphasizing the sensor's dusk-to-dawn functionality, weatherproof design, and UL certification.
8. Troubleshooting
If you experience issues with your DEWENWILS Dusk to Dawn Sensor, refer to the following common problems and solutions:
| Problem | Possible Cause | Solution |
|---|---|---|
| Lights stay on during the day. | Sensor is obstructed or not receiving enough natural light. | Relocate the sensor or clear any obstructions. Ensure it is not in a shaded area during the day. |
| Lights do not turn on at dusk. | Sensor is exposed to artificial light (e.g., streetlights, porch lights) or is faulty. | Reposition the sensor to avoid artificial light sources. Check electrical connections. If problem persists, the sensor may need replacement. |
| Lights flicker or cycle on/off rapidly. | Interference from nearby light sources or unstable power supply. | Ensure the sensor is not directly facing other light sources. Check power supply stability. The 30-60 second delay should prevent most rapid cycling. |
| Sensor does not respond. | No power, loose connection, or faulty unit. | Verify power supply to the transformer/circuit. Check all wiring connections. If all else fails, the unit may be defective. |
For further assistance, please contact DEWENWILS customer support.
9. Warranty and Support
The DEWENWILS 120VAC Dusk to Dawn Sensor is UL certified, ensuring compliance with safety standards.
DEWENWILS offers 24/7 troubleshooting and hassle-free return policies through Amazon. Your purchase is guaranteed. For support, please refer to your Amazon order details or visit the DEWENWILS brand store.
DEWENWILS Brand Store: Visit Store
Ask a question about this manual
Ask about setup, troubleshooting, compatibility, parts, safety, or missing instructions. Manuals+ will review the question and use this page’s manual context to help answer it.