
1. Introduction
This manual provides detailed instructions for the proper installation, operation, and maintenance of your AmeriLite 3D C-Type LED Tube Bar Clear Replacement Tail Light Set. Please read this manual thoroughly before installation to ensure correct procedure and safe operation. This product is designed as a direct OEM replacement for specified Ford truck models.
2. Safety Information
- Always disconnect the vehicle's battery before performing any electrical work to prevent electrical shock or damage to the vehicle's electrical system.
- Wear appropriate personal protective equipment, such as safety glasses and gloves, during installation.
- Ensure all connections are secure and properly insulated to prevent short circuits.
- Do not modify the product in any way, as this may void the warranty and compromise safety.
- If you are unsure about any step of the installation process, consult a qualified automotive technician.
3. Package Contents
Your AmeriLite Tail Light Set includes the following components:
- 1x Driver Side (Left) Tail Light Assembly
- 1x Passenger Side (Right) Tail Light Assembly
4. Compatibility
This tail light set is compatible with the following vehicle models:
- 1989-1996 Ford F-150 / Bronco
- 1989-1998 Ford F-250 / F-350
- Compatible with Styleside bed models only.
- Only for trucks built after October 1989 production.
- Compatible with 1997 F-250/F-350/F-450 Old Body Trims only.


5. Setup (Installation)
The AmeriLite 3D C-Type LED Tube Bar Clear Replacement Tail Light Set is designed for direct OEM replacement, requiring no modifications to your vehicle. Follow these general steps for installation:
- Preparation: Park your vehicle on a level surface and engage the parking brake. Disconnect the negative terminal of your vehicle's battery.
- Remove Old Tail Lights: Locate and remove the screws or fasteners holding the existing tail light assembly in place. Carefully pull the assembly away from the vehicle body.
- Disconnect Wiring: Disconnect the electrical connectors from the old tail light assembly. You may need to twist and pull out bulb sockets for the reverse light if they are separate.
- Prepare New Tail Lights: If your new tail lights require transferring the reverse light bulb or socket from your old assembly, do so now. Ensure the reverse receptacle is ready.
- Connect New Tail Lights: Connect the main electrical connector of the new AmeriLite tail light assembly to the vehicle's wiring harness. Ensure a secure connection.
- Mount New Tail Lights: Align the mounting tabs on the new tail light assembly with the corresponding holes on your vehicle. Gently push the assembly into place and secure it with the original screws or fasteners.
- Repeat for Other Side: Follow the same steps for the other side of the vehicle.
- Test Functionality: Reconnect the vehicle's battery. Test all light functions: running lights, brake lights, turn signals, and reverse lights, before driving.
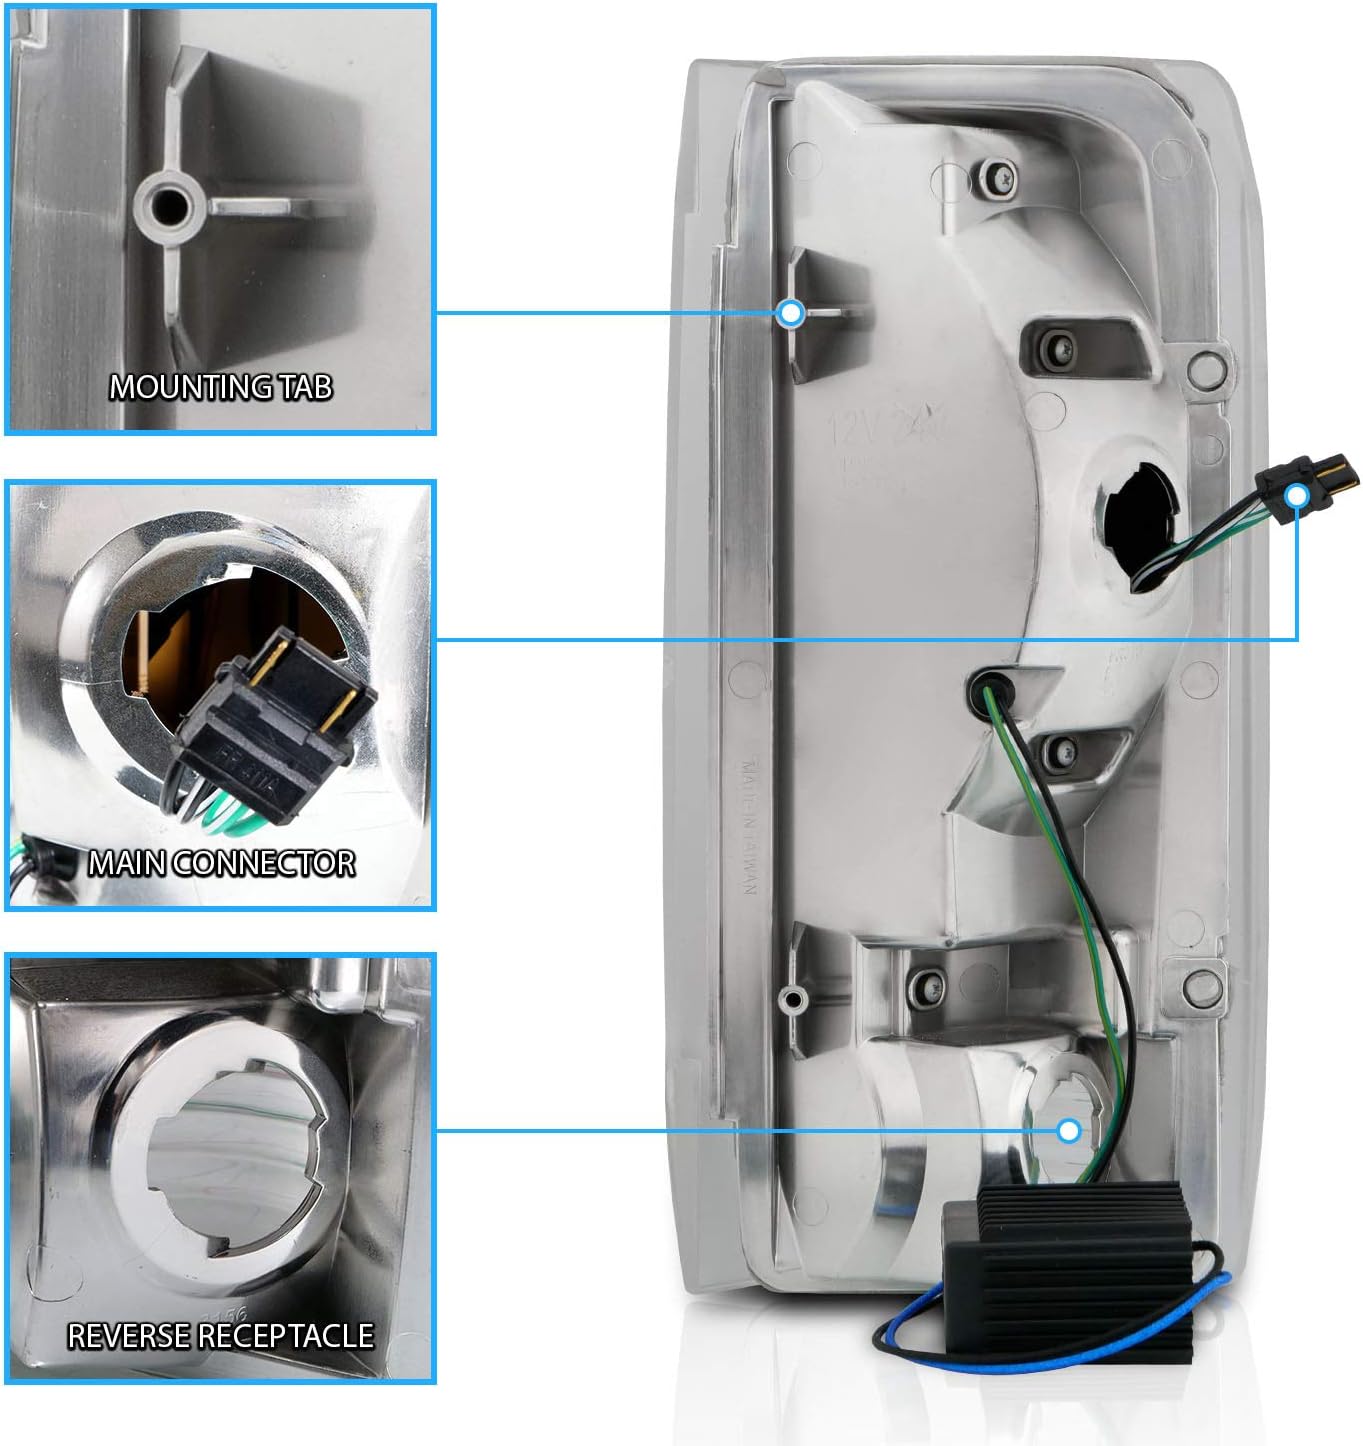
Note on Turn Signals: Due to the low power consumption of LED lights, some vehicles may experience hyper-flashing (rapid blinking) of the turn signals. This is a common issue with LED conversions and can typically be resolved by installing an LED flasher relay or adding load resistors to the turn signal circuit. These components are usually sold separately.
6. Operating Instructions
Your AmeriLite 3D C-Type LED Tail Light Set integrates multiple lighting functions for enhanced visibility and safety:
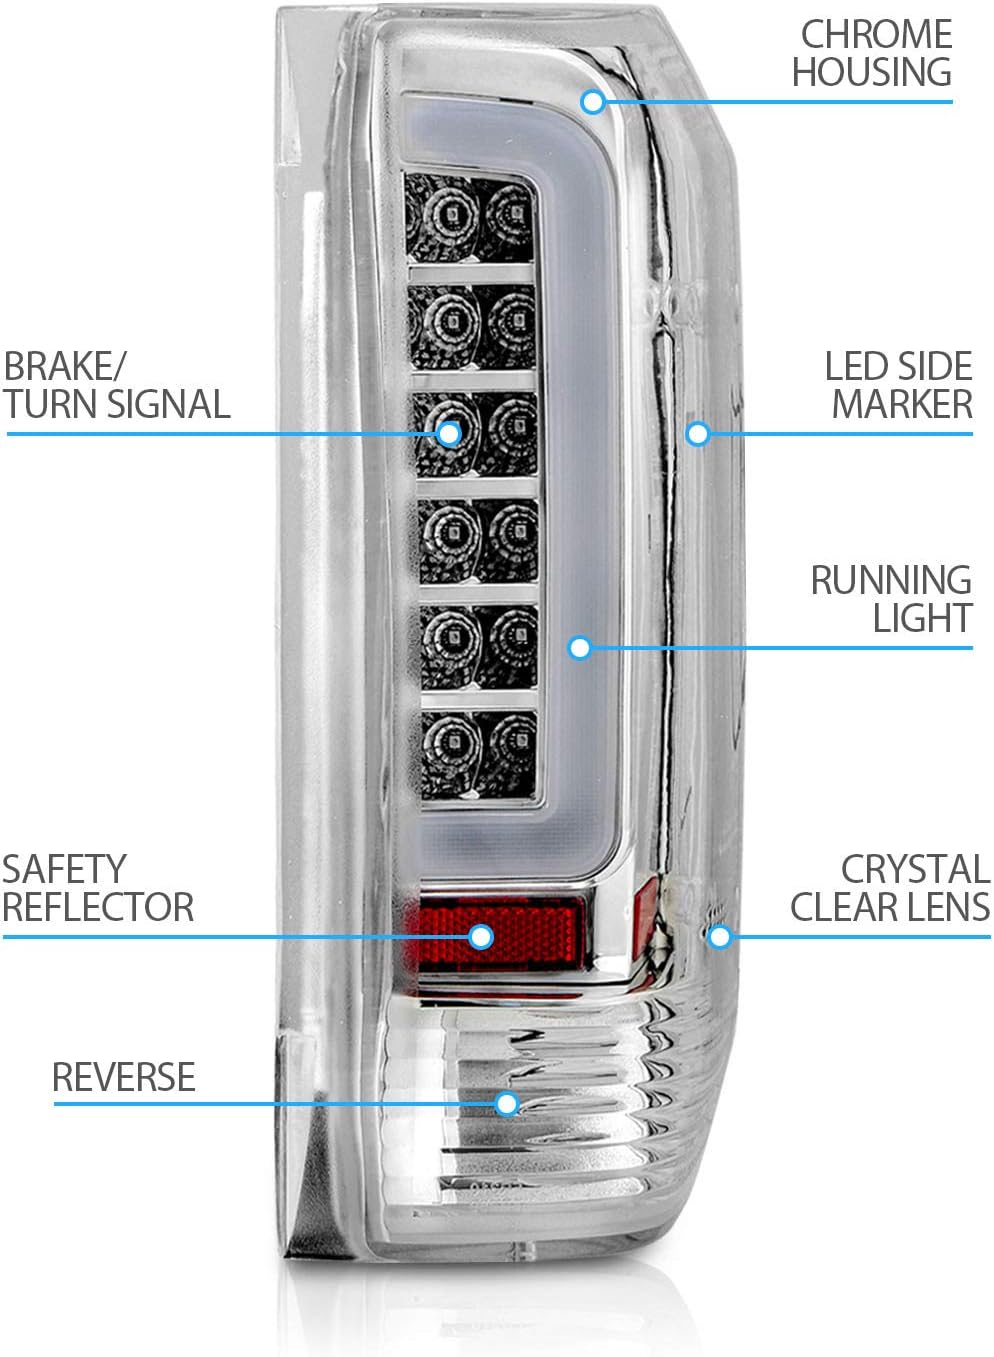
- Running Lights: The C-Type LED tube bar illuminates when your vehicle's headlights or parking lights are on, providing a distinct and modern appearance.
- Brake/Turn Signal: The high-intensity LEDs within the main housing illuminate brightly for braking and flash for turn signals, ensuring clear communication to other drivers.
- LED Side Marker: Integrated LED side markers enhance lateral visibility.
- Reverse Light: Utilizes your vehicle's existing reverse light bulb (or a compatible LED bulb, if upgraded) for clear illumination when backing up.
- Safety Reflector: A built-in safety reflector provides passive visibility even when the lights are off.

7. Maintenance
To ensure the longevity and optimal performance of your AmeriLite tail lights, follow these simple maintenance guidelines:
- Cleaning: Clean the lens with a soft cloth and mild automotive soap and water. Avoid abrasive cleaners or harsh chemicals that could damage the polycarbonate lens.
- Inspection: Periodically check the tail lights for any signs of damage, cracks, or loose connections. Ensure all mounting screws are tight.
- Wiring: Inspect the wiring harness for any fraying or corrosion. Ensure all electrical connections remain secure and free from moisture.
- Bulb Replacement (Reverse): If your reverse light uses a replaceable bulb, replace it with the correct type and wattage if it burns out.
8. Troubleshooting
| Problem | Possible Cause | Solution |
|---|---|---|
| Lights not illuminating | Loose electrical connection, blown fuse, incorrect wiring. | Check all wiring connections. Inspect vehicle's fuse box for a blown fuse and replace if necessary. Verify wiring against vehicle's electrical diagram. |
| Turn signals hyper-flashing (blinking too fast) | Low power draw of LED lights causing the vehicle's flasher relay to misinterpret the load. | Install an LED compatible flasher relay or add load resistors to the turn signal circuit. |
| Moisture inside the lens | Condensation due to temperature changes, seal compromise. | Small amounts of condensation are normal and should dissipate. If excessive or persistent, check for proper sealing and ensure all vents (if present) are clear. |
9. Specifications
| Feature | Detail |
|---|---|
| Brand | AmeriLite |
| Model Number | 03-FF89TLEDAC-C |
| Compatible Vehicles | 1989-1996 Ford F150/Bronco, 1989-1998 F250/F350 (Styleside only) |
| Light Source Type | LED (Brake/Turn/Running), Halogen (Reverse - user supplied) |
| Voltage | 12 Volts (DC) |
| Lens Color | Clear |
| Lens Material | Polycarbonate |
| Housing Color | Chrome |
| Special Feature | Waterproof |
| Safety Rating | DOT Compliant |
| Item Weight (Pair) | 7.7 pounds |
| Package Dimensions | 15.55 x 13.62 x 6.89 inches |
| OEM Part Number Equivalents | E7TZ13404A, E7TZ13405A, E9TZ13404C, E9TZ13405C |
10. Warranty Information
Specific warranty details for this AmeriLite product are not provided in the available information. Please refer to the product packaging or contact AmeriLite directly for warranty terms and conditions.
11. Support
For technical assistance, troubleshooting beyond this manual, or inquiries regarding your AmeriLite product, please contact the manufacturer directly through their official website or customer service channels. Always provide your product model number (03-FF89TLEDAC-C) and vehicle information when seeking support.