1. Introduction
This user manual provides essential information for the safe and efficient operation, setup, and maintenance of your Scheppach PLC40 Plasma Cutter. Please read this manual thoroughly before using the device to ensure proper handling and to prevent injury or damage.

Figure 1: The Scheppach PLC40 Plasma Cutter, showcasing its compact design and included accessories.
The Scheppach PLC40 is a powerful and compact plasma cutter designed for precise and clean cutting of various metals, including copper, stainless steel, aluminum, iron, and steel. It features a robust handle for portability and continuously adjustable cutting current.
2. Safety Instructions
WARNING: Plasma cutting can be dangerous if proper safety precautions are not followed. Always prioritize your safety and the safety of others.
- Eye and Face Protection: Always wear a welding helmet with appropriate shade settings to protect your eyes and face from intense light, UV radiation, and sparks.
- Body Protection: Wear flame-resistant clothing, heavy-duty gloves, and closed-toe shoes to protect against sparks, molten metal, and electrical shock.
- Ventilation: Ensure adequate ventilation in the work area to disperse fumes and gases produced during cutting. Use a fume extractor if necessary.
- Electrical Safety: Ensure the power supply is properly grounded. Do not operate the machine in wet conditions. Inspect cables and connections for damage before each use.
- Fire Hazards: Keep flammable materials away from the cutting area. Have a fire extinguisher readily available. Sparks and hot metal can travel.
- Workpiece Safety: Secure the workpiece firmly before cutting. Ensure the ground clamp has good contact with the workpiece.
- Children and Bystanders: Keep children and unauthorized persons away from the work area.
- Maintenance: Disconnect the power supply before performing any maintenance or changing consumables.
3. Product Components
The Scheppach PLC40 Plasma Cutter comes with the following main components:
- Plasma Cutter Unit (PLC40)
- Plasma Torch with Cable
- Ground Clamp with Cable
- Air Pressure Regulator with Gauge
- Air Hose
- Consumables (electrodes, nozzles, ceramic cups)

Figure 2: Overview of the Scheppach PLC40 Plasma Cutter and its standard accessories, including the torch, ground clamp, and various consumables.

Figure 3: Detailed view of the PLC40's control panel, showing the current adjustment knob and indicator lights, alongside the plasma torch.
4. Setup
Follow these steps for the initial setup of your plasma cutter:
- Unpacking: Carefully remove all components from the packaging and inspect for any shipping damage.
- Placement: Place the plasma cutter on a stable, level surface in a well-ventilated area, away from flammable materials.
- Connect Ground Clamp: Connect the ground clamp cable to the designated terminal on the front panel of the plasma cutter. Ensure a secure connection.
- Connect Plasma Torch: Connect the plasma torch cable to its corresponding connection point on the front panel. Twist to secure if applicable.
- Connect Air Supply: Attach the air pressure regulator to the air inlet on the rear of the plasma cutter. Connect a compressed air source (not included) to the regulator using the air hose. Ensure the air supply is clean, dry, and oil-free.
- Power Connection: Connect the power cord to a suitable, grounded power outlet. Ensure the power supply matches the requirements listed in the specifications.

Figure 4: Side view of the PLC40, highlighting the air pressure regulator and its connection point, crucial for proper air supply management.
5. Operating the Plasma Cutter
Before operating, ensure all safety precautions are in place and the setup is complete.
- Prepare Workpiece: Clean the metal surface to be cut, removing any rust, paint, or grease. Secure the workpiece firmly.
- Attach Ground Clamp: Securely attach the ground clamp to the workpiece, ensuring good electrical contact.
- Power On: Turn on the main power switch of the plasma cutter.
- Adjust Air Pressure: Set the air pressure regulator to the recommended pressure for your cutting application (refer to the specifications or a cutting chart for guidance).
- Adjust Cutting Current: Use the current adjustment knob on the front panel to set the desired amperage (15 to 40 A) based on the material type and thickness.
- Initiate Arc: Position the torch nozzle close to the starting point of the cut. Press the trigger on the torch to initiate the pilot arc.
- Begin Cutting: Once the pilot arc is established, move the torch steadily along the desired cut line. Maintain a consistent speed and standoff distance for a clean cut.
- Complete Cut: Release the trigger once the cut is complete. Allow the machine to cool down if operating for extended periods.

Figure 5: An operator demonstrating the use of the Scheppach PLC40 Plasma Cutter for cutting metal, emphasizing the sparks and proper protective gear.
Cutting Tips:
- For thicker materials, a slower travel speed and higher amperage may be required.
- For thinner materials, a faster travel speed and lower amperage will help prevent warping.
- Practice on scrap material to find the optimal settings for your specific task.
6. Maintenance
Regular maintenance ensures the longevity and optimal performance of your plasma cutter. Always disconnect the power supply before performing any maintenance.
- Consumables Inspection: Regularly inspect the torch consumables (electrode, nozzle, swirl ring, shield cup) for wear. Replace them when they show signs of degradation to maintain cut quality.
- Air Filter/Water Trap: Check and drain the water trap on the air pressure regulator regularly. If the air filter is present, clean or replace it as needed to ensure clean, dry air supply.
- Cleaning: Keep the plasma cutter unit clean and free of dust and metal particles. Use compressed air to blow out internal components periodically, ensuring vents are clear.
- Cable Inspection: Inspect all cables (power, torch, ground) for cuts, abrasions, or loose connections. Repair or replace damaged cables immediately.
- Storage: Store the plasma cutter in a dry, clean environment when not in use.
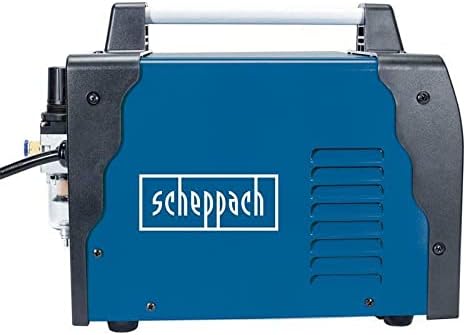
Figure 6: Another side view of the PLC40, illustrating the ventilation grilles that should be kept clear for proper cooling and maintenance.
7. Troubleshooting
This section provides solutions to common issues you might encounter:
| Problem | Possible Cause | Solution |
|---|---|---|
| No arc/No cutting | No power; Loose connections; Worn consumables; Insufficient air pressure; Poor ground connection. | Check power supply; Secure all cables; Replace consumables; Adjust air pressure; Ensure good ground contact. |
| Poor cut quality/Rough cut | Worn consumables; Incorrect cutting speed; Incorrect amperage/air pressure; Contaminated air supply. | Replace consumables; Adjust travel speed; Adjust amperage/air pressure; Check air filter/drain water trap. |
| Machine overheats/Shuts down | Exceeding duty cycle; Blocked ventilation; High ambient temperature. | Allow machine to cool down; Clear ventilation openings; Operate in a cooler environment. |
| Air leaks | Loose air hose connections; Damaged air hose or regulator. | Tighten connections; Inspect and replace damaged components. |
8. Technical Specifications
| Specification | Value |
|---|---|
| Model Number | SC-PLC40 |
| Manufacturer | Scheppach |
| Item Weight | 7.7 pounds |
| Product Dimensions | 0.39 x 0.39 x 0.39 inches |
| Cutting Current Range | 15 to 40 A (Continuously adjustable) |
| Max. Material Thickness | Up to 12 mm |
| Grounding Cable Length | 2 m |
| Batteries Required? | No |
9. Warranty and Support
Scheppach products are manufactured with high-quality materials and undergo strict quality control. In the unlikely event of a defect, please refer to your purchase documentation for warranty terms and conditions.
For technical support, spare parts, or service inquiries, please contact Scheppach customer service. Have your model number (SC-PLC40) and purchase date ready when contacting support.
You can typically find contact information on the official Scheppach website or through your retailer.


