
1. Introduction
This manual provides detailed instructions for the installation, operation, and maintenance of the 1PZ HC3-LT1 Carburetor and Throttle Cable. This product is designed as a replacement part for Honda FourTrax 300 TRX300 ATV models manufactured between 1988 and 2000.
It is crucial to verify compatibility by matching the OEM part numbers before installation. This carburetor replaces OEM numbers such as 17910-HC4-000, 17910-HC5-970, 16100-HC4-033, 16100-HC4-750, 16100-HC4-840, 16100-HM5-671, 16100-HM5-730, 16100-HM5-L01, and 16100-HM5-850.
2. Product Components
The 1PZ HC3-LT1 Carburetor package includes the following components:
- 1x Carburetor Assembly
- 1x Throttle Cable
- 1x Fuel Filter

Figure 2.1: Overview of the 1PZ HC3-LT1 Carburetor kit, showing the carburetor assembly, throttle cable, and fuel filter.

Figure 2.2: Additional accessories included with the carburetor, such as the cover, washer, screw, valve set, and oil cup.

Figure 2.3: The 1PZ throttle cable, measuring 104cm (40.94 inches) in length, with detailed views of its ends showing 5.6mm dimensions.
Exploded View
Understanding the internal components of the carburetor is essential for proper installation and maintenance.

Figure 2.4: An exploded view diagram illustrating the various parts of the 1PZ carburetor, including the float chamber, fuel inlet needle, throttle lever, vacuum piston, and adjustment screws.
3. Installation Guidelines
Before beginning installation, ensure the engine is cool and the fuel supply is turned off. It is recommended to consult a service manual for your specific Honda FourTrax 300 TRX300 model for detailed removal and installation procedures.
- Preparation: Disconnect the battery and drain the fuel tank.
- Removal: Carefully remove the old carburetor and throttle cable, noting the routing of all hoses and cables.
- Inspection: Inspect the intake manifold, gaskets, and fuel lines for any damage or wear. Replace as necessary.
- Installation:
- Install the new 1PZ HC3-LT1 Carburetor, ensuring all gaskets are properly seated.
- Connect the fuel lines, vacuum lines, and electrical connections to their correct ports. Refer to your vehicle's service manual for port identification.
- Install the new throttle cable, ensuring smooth operation without binding.
- Install the included fuel filter in the fuel line between the fuel tank and the carburetor.
- Initial Adjustments: After installation, perform initial adjustments for idle speed and mixture as per your vehicle's service manual.
- Leak Check: After refilling the fuel tank, check for any fuel leaks before starting the engine.
Important: Always match the fitment and OEM numbers before purchasing and installing any replacement parts.
4. Operating Principles
Carburetor Function
The primary function of the carburetor is to atomize fuel and mix it with air, supplying a fine spray of air-fuel mixture to the engine for combustion. This process is essential for the engine to run normally.

Figure 4.1: Diagram illustrating how the carburetor mixes air and fuel to create the necessary mixture for engine operation.
Fuel System
The carburetor's fuel system controls the fuel height and quantity within the float chamber. This control is precisely managed by the float and needle valve assembly, ensuring a consistent fuel supply to the engine.
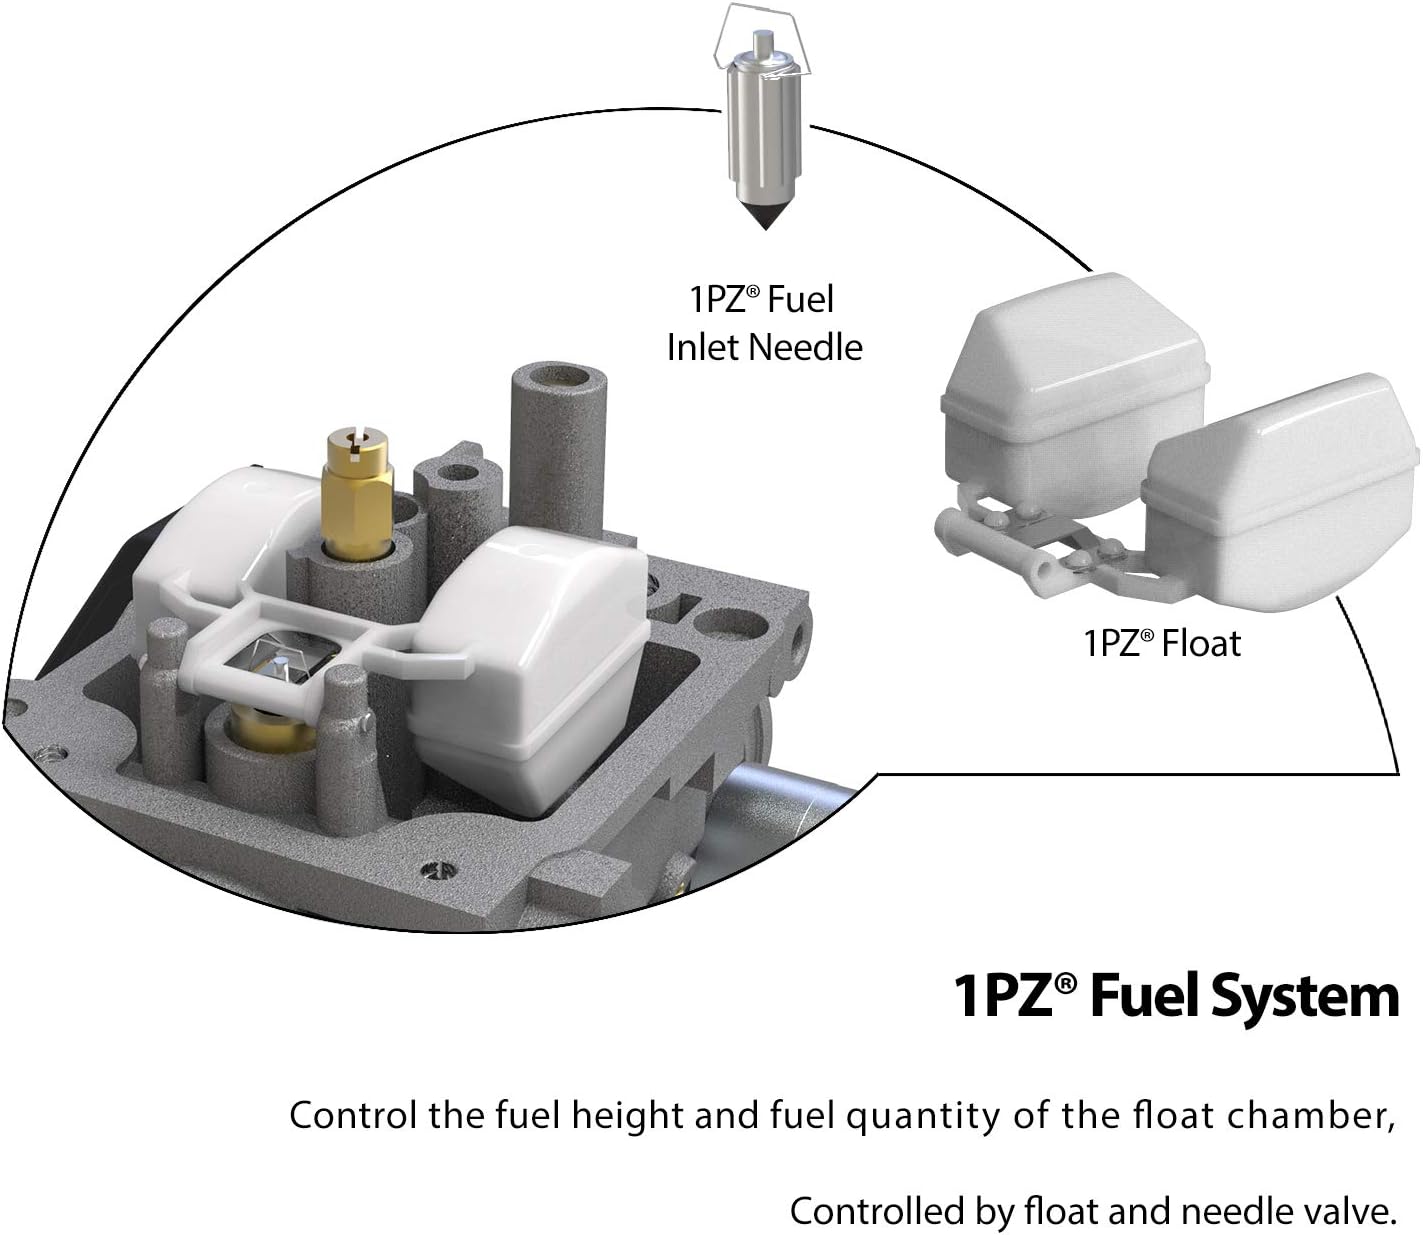
Figure 4.2: Illustration of the 1PZ fuel system components, including the fuel inlet needle and float, which regulate fuel levels in the float chamber.
Carburetor Venturi Tube
The venturi tube within the carburetor is engineered to reduce disturbances in the airflow around the throttle valve and its seat. This design promotes a smooth and efficient flow of the air-fuel mixture.

Figure 4.3: Diagram showing the design of the 1PZ carburetor venturi tube, optimized for smooth airflow.
5. Maintenance
Regular maintenance ensures optimal performance and longevity of your carburetor. It is recommended to:
- Fuel Filter: Periodically inspect and replace the fuel filter to prevent debris from entering the carburetor.
- Fuel Quality: Use clean, fresh gasoline. Stale or contaminated fuel can lead to carburetor issues.
- Cleaning: If the ATV is stored for extended periods, drain the fuel from the carburetor float bowl or use a fuel stabilizer to prevent gumming and varnish buildup.
- Adjustments: Check and adjust idle speed and air-fuel mixture as needed, referring to your ATV's service manual.
6. Troubleshooting
If you experience issues after installing the new carburetor, consider the following common problems and solutions:
Carburetor Fuel Leakage
Fuel leakage after a new carburetor installation is a common issue. Potential causes include:
- Debris in Float Valve: Old debris from the fuel tank can travel to the carburetor and prevent the tapered float valve from closing and sealing properly.
- Solution: Clean the fuel tank and fuel lines thoroughly before installation. Inspect and clean the float valve assembly.
- Incorrect Fuel Line Connection: Connecting the fuel line to the wrong port on the carburetor can cause leaks.
- Solution: Verify that the fuel line is connected to the correct inlet port as per your ATV's service manual.
- Defective Float Valve Assembly: The float (which is air-filled) inside the carburetor might have a small hole, allowing gasoline to enter and compromise its buoyancy. Alternatively, the seal on the tapered needle could be malformed.
- Solution: Inspect the float for damage and the needle valve for proper sealing. Replace if defective.
- Incorrect Carburetor Angle/Float Level: The angle at which the carburetor is mounted on the engine or an improperly set float level can lead to leakage.
- Solution: Adjust the float level according to specifications. Ensure the carburetor is mounted correctly.
- High Float Level from Factory: A common issue is the float level being set too high from the factory. This can cause the engine to bog over bumpy terrain or die when coming to a stop.
- Solution: Adjust the float level to the manufacturer's recommended setting.
7. Specifications
| Feature | Detail |
|---|---|
| Brand | 1PZ |
| Model Number | HC3-LT1 |
| Compatible Vehicle Type | ATV (All Terrain Vehicle) |
| Recommended Uses | All Terrain Vehicle |
| Fuel Type | Gasoline |
| Item Weight | 2.23 pounds |
| Package Dimensions | 6.65 x 5.28 x 5.16 inches |
| Manufacturer | Dragonpartify LLC |
8. Warranty and Support
1PZ is committed to customer satisfaction. We offer a hassle-free return and money-back policy for our products.
For any questions regarding installation, operation, troubleshooting, or product defects, please contact our dedicated support team. We are available to assist you with replacements, refunds, or technical guidance.
Please reach out to us via email or message for prompt assistance.