Introduction
This manual provides comprehensive instructions for the installation, operation, and maintenance of your 360 G500H Dash Cam. Designed for optimal road safety and incident recording, this dual-camera system offers crystal-clear video quality, built-in GPS, and advanced parking surveillance features. Please read this manual thoroughly before using the device to ensure proper functionality and longevity.
What's in the Box
Upon unboxing your 360 G500H Dash Cam, please verify that all the following components are included:
- 360 G500H Front Dash Camera Unit
- Rear Camera
- Power Cable (for cigarette lighter connection)
- Rear Camera Connection Cable
- 32GB Micro SD Card (pre-installed or included)
- Mounting Bracket with 3M Adhesive
- Cable Management Tool (pry tool)
- User Manual (this document)

Figure 1: Main components of the 360 G500H Dash Cam package, including the front camera, rear camera, and a 32GB Micro SD card.
Product Features
Crystal-Clear Video Quality
The front camera records in crisp 1440p (2K FHD) resolution, while the rear camera captures clear 1080p video. This ensures that important details, such as license plates and road signs, are clearly visible in your recordings.

Figure 2: Visual representation of the 2K front camera and 1080P rear camera video capabilities, highlighting the clarity for capturing road details.
Wide Angle Coverage
Equipped with a 160° wide-angle front lens and a 130° rear lens, the G500H provides extensive coverage of the road, minimizing blind spots and capturing more of your surroundings.

Figure 3: Illustration demonstrating the wide 160-degree field of view for the front camera and 130-degree for the rear camera, ensuring comprehensive coverage.
Color Night Vision
Unlike traditional dash cams that offer black and white night recordings, the 360 G500H Premium features advanced low-light true color technology, allowing you to see video in full color even at night.

Figure 4: Example of the dash cam's low light and true color night vision, providing enhanced visibility in dark conditions.
Incident Detection and GPS
The dash cam automatically saves video when it detects an incident (e.g., sudden braking or collision) using its G-sensor. With built-in GPS, recordings are tagged with precise location and time data, providing crucial evidence if needed.
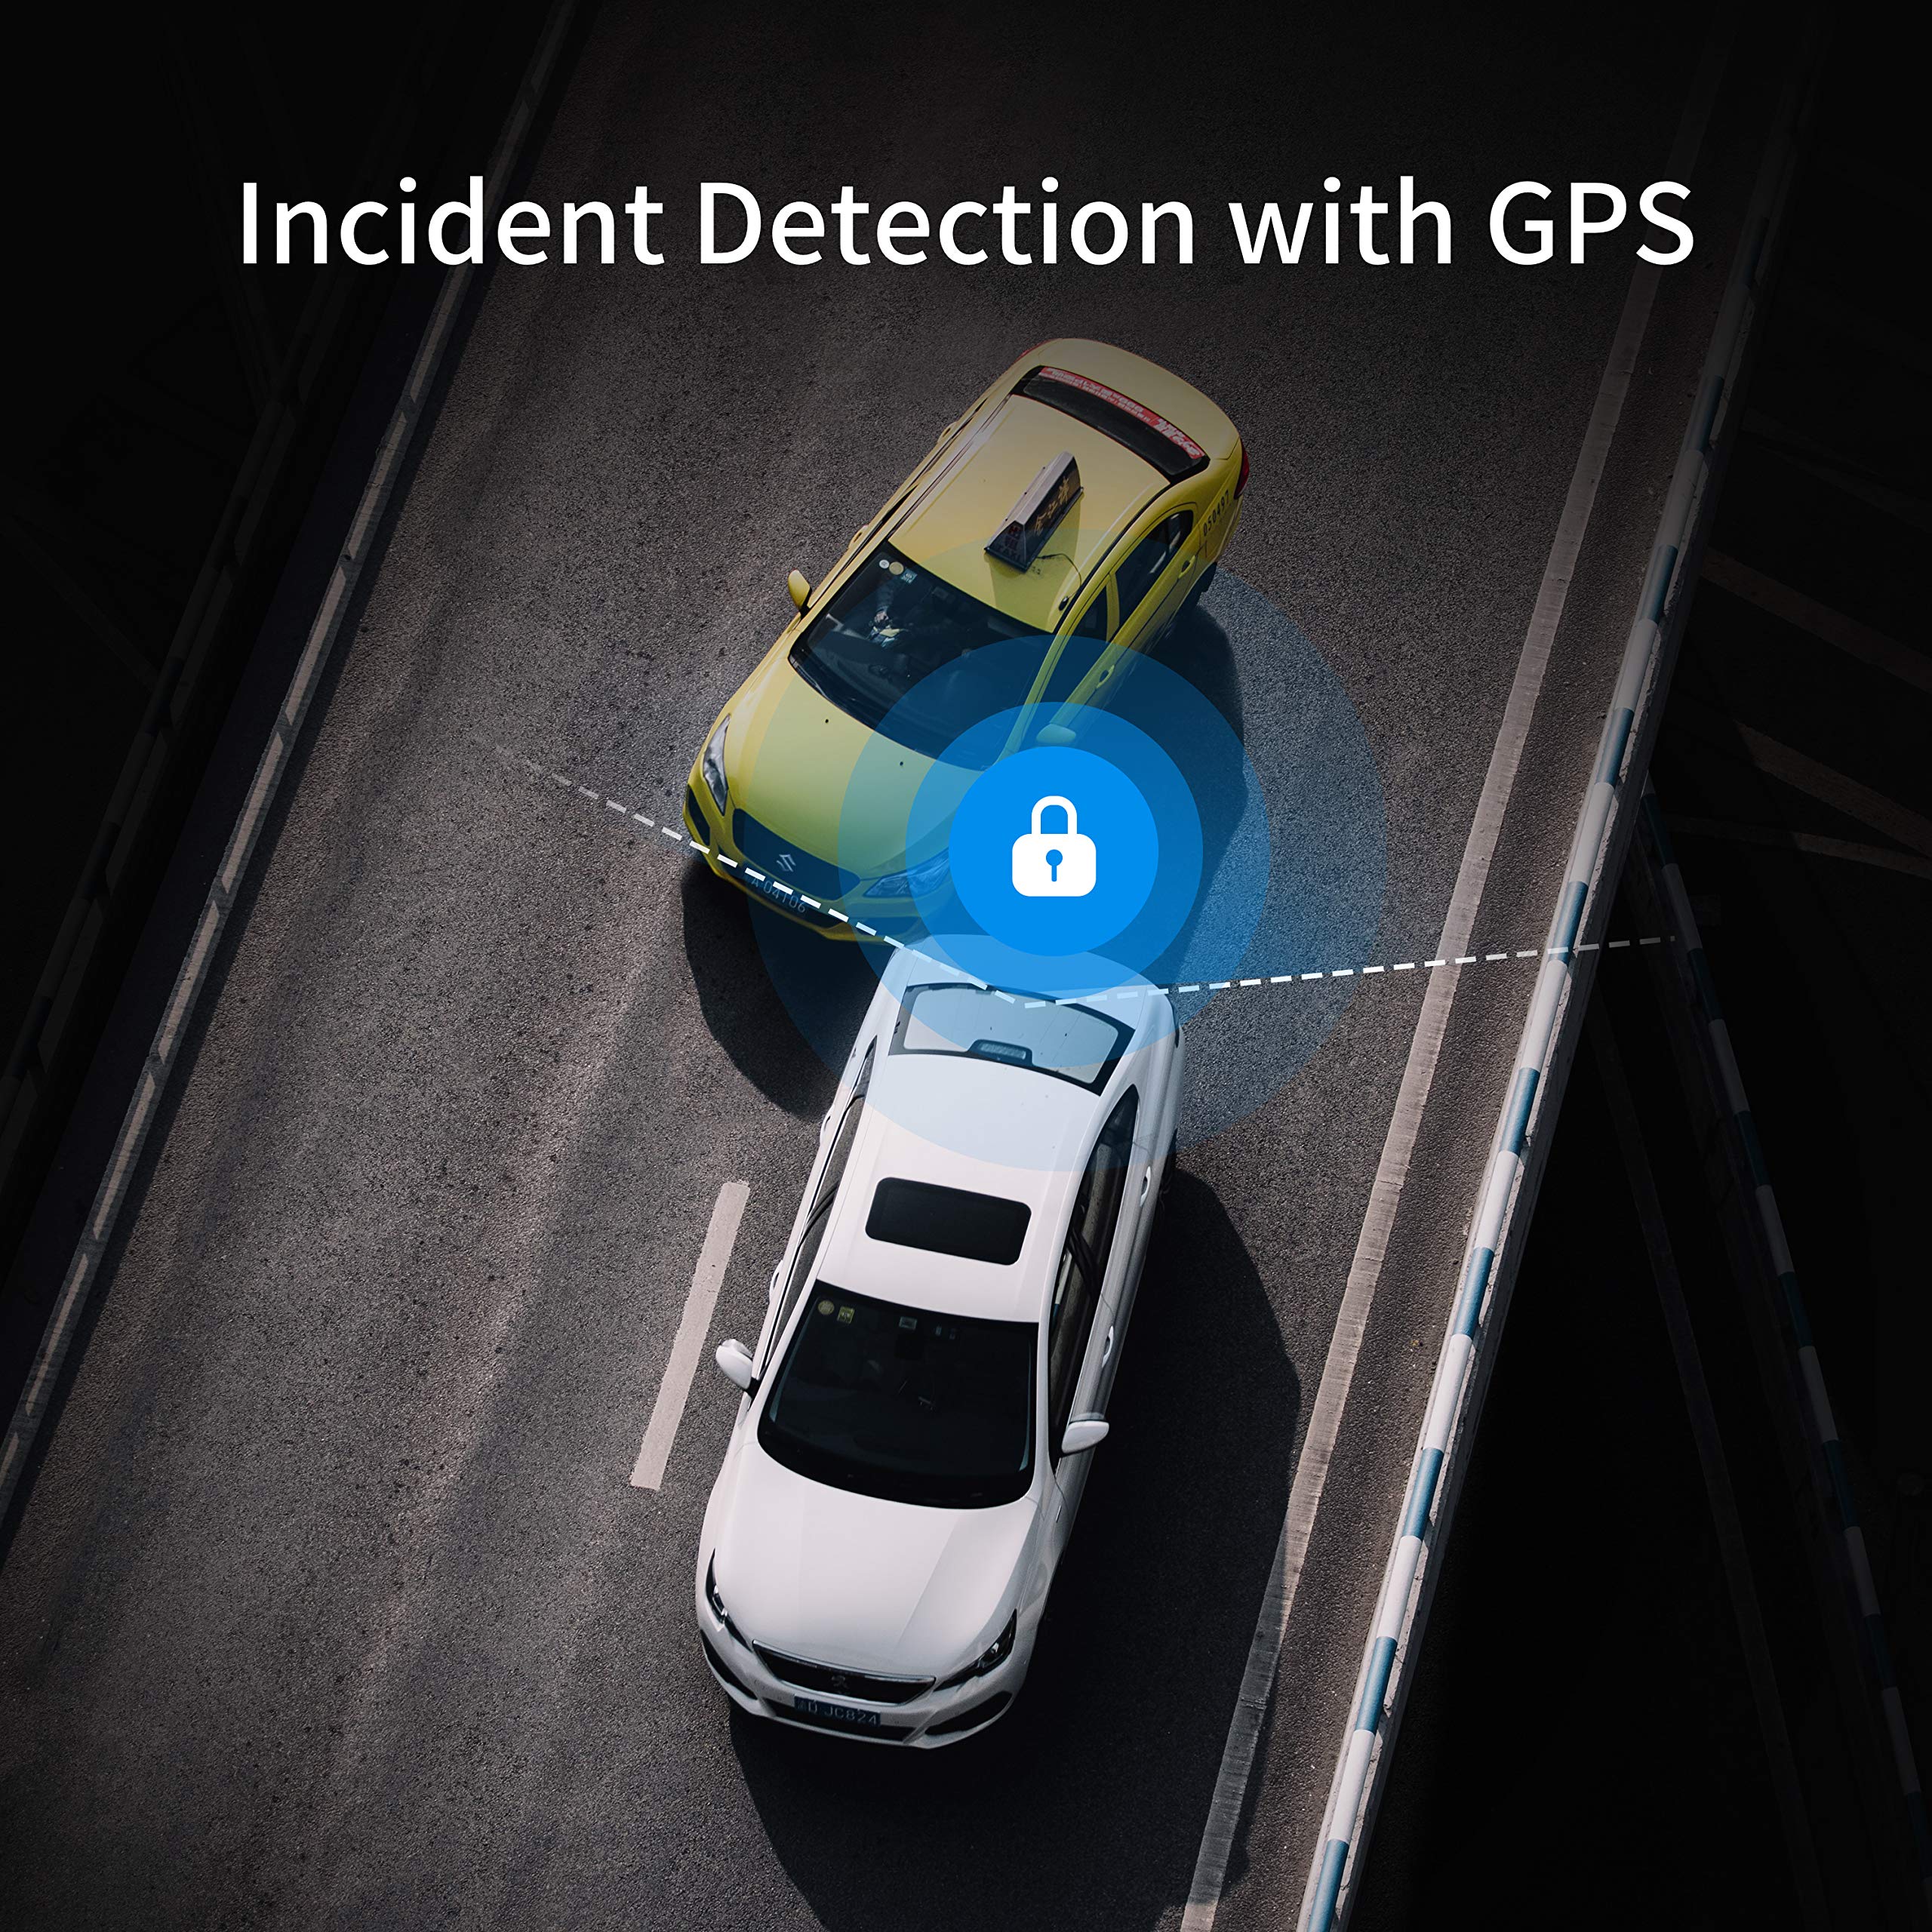
Figure 5: Depiction of the incident detection system, which automatically secures footage during events and logs GPS data.
24H Parking Surveillance Mode
When your vehicle is parked and turned off, the dash cam can continue to record motion in front of and behind your vehicle, offering continuous protection against bumps or vandalism.

Figure 6: Visualizing the 24-hour parking surveillance feature, showing the detection zones around a parked vehicle.
Loop Recording
The dash cam automatically overwrites the oldest footage when the memory card is full, ensuring continuous recording without manual intervention. Important incident videos are locked and protected from being overwritten.
Setup & Installation
Follow these steps to properly install your 360 G500H Dash Cam in your vehicle.
Front Camera Installation
- Prepare the Windshield: Wipe the front windshield thoroughly to ensure the surface is dry and clean before installing the dash cam. This ensures optimal adhesion of the mounting bracket.
- Mount the Dash Cam: Mount the main camera unit directly onto the selected proper location on your windshield using the provided 3M adhesive mount. Ensure it does not obstruct your view.
- Connect Power Cable: After selecting the mounting location, remove any protective film from the camera and plug the power cable into the dash cam unit.
- Route the Power Cable: Walk the power wire up to the headliner. Use the cable management tool to tuck the cable neatly into the headliner. Continue tucking the wire behind the A-pillar (the pillar between the windshield and the front door) and run the cable down towards your vehicle's cigarette lighter or power outlet.
- Connect to Power Outlet: Plug the power cable's USB adapter into your vehicle's 12V cigarette lighter or power outlet. The camera will automatically power on when your vehicle is started.

Figure 7: Illustration of the recommended power cable routing for the front dash camera, ensuring a clean and secure installation.
Rear Camera Installation
- Route Rear Camera Cable: Walk the rear camera wire from the front unit along the headliner, continuing past the B-pillar (between front and rear doors) and C-pillar (between rear door and trunk/hatch).
- Extend to Trunk: Run the cable down to the seat crevice and extend it to the trunk area.
- Mount Rear Camera: Get the wire through the license plate area. Connect the rear camera to its dedicated line and stick the camera on top of the license plate using its 3M adhesive. Ensure the camera lens is clear and unobstructed.

Figure 8: Detailed diagram illustrating the routing of the rear camera cable and its connection points within the vehicle.
Installation Video Guide
Video 1: Official installation guide for the 360 G500H Dash Cam, demonstrating step-by-step setup for both front and rear cameras.
Operating Instructions
Once installed, your 360 G500H Dash Cam is designed for simple, automatic operation. For advanced features and settings, use the dedicated mobile application.
Basic Operation
- Automatic Power On/Off: The dash cam will automatically power on and begin recording when your vehicle's ignition is turned on. It will power off shortly after the ignition is turned off.
- Loop Recording: Continuous recording is enabled by default. When the Micro SD card is full, the oldest unprotected video files will be overwritten.
- Incident Recording: The built-in G-sensor detects sudden impacts or movements and automatically locks the current video segment to prevent it from being overwritten.
- Parking Mode: If enabled, the dash cam will monitor your vehicle for motion or impacts while parked, recording and saving relevant footage.
Mobile App Connection Guide
The 360 Dash Cam app allows you to view live footage, access recorded videos, change settings, and download files directly to your smartphone via Wi-Fi.
- Download the App: Search for "360 Dash Cam" in your device's app store (App Store for iOS, Google Play Store for Android) and install it.
- Enable Wi-Fi on Dash Cam: Ensure the Wi-Fi hotspot feature is enabled on your dash cam. Refer to the dash cam's on-screen menu for Wi-Fi settings.
- Connect to Dash Cam Wi-Fi: On your smartphone, go to Wi-Fi settings and connect to the Wi-Fi network broadcast by your dash cam (usually named "360CAR-XXXX" or similar). The default password is often "12345678" or found in the dash cam's settings.
- Open 360 Dash Cam App: Launch the app. It should automatically detect and connect to the dash cam. You may need to grant location and local network permissions for the app to function correctly.
Video 2: Guide for connecting the 360 G500H Dash Cam to an iOS device via the mobile application.
Video 3: Guide for connecting the 360 G500H Dash Cam to an Android device via the mobile application.
Maintenance
- SD Card Maintenance: Regularly format the Micro SD card (at least once a month) using the dash cam's menu to ensure optimal performance and prevent data corruption. Back up any important videos before formatting.
- Lens Cleaning: Keep the camera lenses clean and free from dust, fingerprints, or smudges. Use a soft, lint-free cloth to gently wipe the lenses.
- Firmware Updates: Check the 360 Dash Cam official website or app periodically for firmware updates. Keeping your firmware updated ensures the best performance and access to new features.
- Operating Temperature: Avoid exposing the dash cam to extreme temperatures for prolonged periods. Refer to specifications for recommended operating temperature ranges.
Troubleshooting
| Problem | Possible Cause | Solution |
|---|---|---|
| Dash cam does not power on. | No power supply; loose connection; faulty power adapter. | Check the cigarette lighter connection. Ensure the vehicle's ignition is on. Try a different power outlet or adapter. |
| App connection fails or is unstable. | Incorrect Wi-Fi password; Wi-Fi Assist (iOS) or WLAN+ (Android) enabled; app permissions not granted. |
|
| Video quality is poor or blurry. | Protective film on lens; dirty lens; incorrect resolution settings. | Remove any protective film. Clean the lenses. Check video resolution settings in the app. |
| SD card error message. | SD card full; corrupted SD card; incompatible SD card. | Format the SD card via the dash cam menu. Try a different, high-quality Micro SD card (Class 10 or higher). |
| Dash cam freezes or crashes. | Firmware issue; SD card issue; power supply issue. | Perform a hard reset (if available). Format the SD card. Update firmware. |
Specifications
| Feature | Detail |
|---|---|
| Model Name | G500H |
| Product Dimensions | 4.72 x 3.15 x 3.94 inches |
| Item Weight | 7 ounces |
| Front Video Resolution | 1440p (2K FHD) |
| Rear Video Resolution | 1080p |
| Front Field of View | 160 Degrees |
| Rear Field of View | 130 Degrees |
| Connectivity Technology | Wi-Fi |
| Special Features | Color Night Vision, Built-in GPS, 24H Motion Detection Parking Mode, Loop Recording, Incident Detection |
| Control Method | App |
| Included Components | Memory Card (32G SD card) |
| Manufacturer | 360 Smart Network |
| Date First Available | August 4, 2020 |
Warranty & Support
360 Smart Life provides a 12-month warranty for the G500H Dash Cam. For any technical assistance, troubleshooting, or warranty claims, please feel free to contact our customer support team. We are committed to providing efficient communication and support to ensure your satisfaction.
Please refer to the official 360 Smart Life website for the most up-to-date contact information and support resources.


