
1. Introduction
Welcome to the user manual for your new Samsung Galaxy A21S smartphone. This guide provides essential information to help you set up, operate, maintain, and troubleshoot your device. Please read this manual carefully to ensure proper use and to maximize the performance of your phone.
2. Safety Information
Before using your device, please read all safety warnings and precautions to prevent injury or damage. Keep the device away from water and extreme temperatures. Use only Samsung-approved chargers and accessories. Do not attempt to disassemble or repair the device yourself.
3. Package Contents
Verify that your product box contains the following items:
- Samsung Galaxy A21S Smartphone
- Power Adapter
- USB Cable
- SIM Ejector Tool
- Quick Start Guide
The actual items supplied with the device may vary depending on the region and service provider.
4. Device Layout
Familiarize yourself with the physical features and button locations of your Samsung Galaxy A21S.
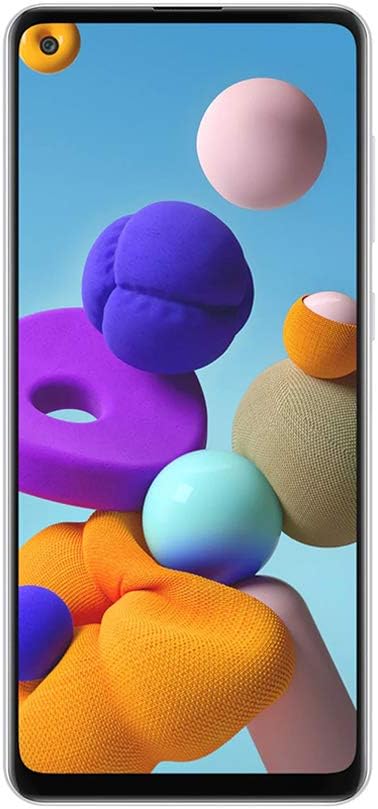
Figure 4.1: Front view of the Samsung Galaxy A21S, highlighting the 6.5-inch display and the punch-hole front camera.

Figure 4.2: Rear view of the Samsung Galaxy A21S, featuring the quad camera array and the rear-mounted fingerprint sensor.

Figure 4.3: Side view of the Samsung Galaxy A21S, illustrating the placement of the volume rocker and power button.
5. Setup
5.1. Installing the SIM and microSD Card
- Locate the SIM card tray on the side of your device.
- Insert the SIM ejector tool into the small hole next to the tray to open it.
- Place your Nano-SIM card(s) and/or microSD card (up to 64GB) into the tray with the gold contacts facing down. Ensure they are correctly seated.
- Gently push the tray back into the slot until it clicks into place.
5.2. Initial Power On
Press and hold the Power button (located on the side of the device) until the Samsung logo appears. Follow the on-screen prompts to complete the initial setup, including language selection, Wi-Fi connection, Google account setup, and security settings (fingerprint recognition).
6. Operating Your Device
6.1. Basic Navigation
Your Galaxy A21S uses a touchscreen interface. Swipe to navigate between screens, tap to open apps, and pinch to zoom. Use the navigation bar at the bottom of the screen or gesture navigation for Home, Back, and Recent Apps functions.
6.2. Making Calls and Sending Messages
To make a call, open the Phone app, enter the number, and tap the call icon. To send a message, open the Messages app, tap the new message icon, enter the recipient and your message, then tap send.
6.3. Using the Camera
The Galaxy A21S features a versatile quad-camera system. Open the Camera app to capture photos and videos. Tap the shutter button to take a picture. Swipe left or right to switch between modes like Photo, Video, and Macro. The front camera is 8 MP, and the main rear camera is 48 MP.
6.4. Connectivity
- Wi-Fi: Connect to wireless networks for internet access. Go to Settings > Connections > Wi-Fi.
- Bluetooth: Pair with other Bluetooth devices like headphones or speakers. Go to Settings > Connections > Bluetooth.
- Mobile Data (LTE): Enable mobile data for internet access when Wi-Fi is unavailable. Go to Settings > Connections > Data usage.
6.5. Dual SIM Functionality
Your device supports two SIM cards, allowing you to manage two phone numbers or data plans simultaneously. You can set a preferred SIM for calls, messages, and mobile data in Settings > Connections > SIM card manager.
7. Maintenance
7.1. Battery Care
The device is equipped with a 5000 mAh Lithium-Ion battery. To prolong battery life, avoid fully discharging the battery frequently. Charge your device using the provided adapter and cable. Avoid exposing the device to extreme heat or cold during charging.
7.2. Software Updates
Keep your device's software up to date to ensure optimal performance and security. Go to Settings > Software update to check for and install available updates. Ensure your device is connected to Wi-Fi and has sufficient battery before starting an update.
7.3. Cleaning Your Device
Use a soft, lint-free cloth to clean the screen and body of your phone. Avoid using harsh chemicals or abrasive materials, as these can damage the device's finish.
8. Troubleshooting
8.1. Common Issues
- Device not turning on: Ensure the battery is charged. If not, connect the charger and wait a few minutes before attempting to power on.
- Apps freezing or crashing: Close the problematic app and reopen it. If the issue persists, restart your device.
- Network connectivity issues: Check if Airplane mode is off. Restart your device or reset network settings in Settings > General management > Reset > Reset network settings.
8.2. Factory Data Reset
If your device experiences persistent issues, a factory data reset can resolve many software-related problems. Warning: This will erase all data on your device. Back up important data before proceeding. Go to Settings > General management > Reset > Factory data reset.
9. Specifications
Below are the key technical specifications for the Samsung Galaxy A21S (A217M/DS):
| Feature | Specification |
|---|---|
| Model Name | Galaxy A21s (A217M/DS) |
| Operating System | Android 10.0 |
| Screen Size | 6.5 inches |
| Display Resolution | 720x1600 pixels |
| RAM Memory | 4 GB |
| Storage Capacity | 64 GB |
| Expandable Memory | microSD up to 64 GB (Flash Memory Supported Size Maximum) |
| Rear Camera | 48 MP (Main) + 8 MP + 2 MP + 2 MP (Quad Camera) |
| Front Camera | 8 MP |
| Battery Capacity | 5000 mAh (Lithium-Ion) |
| SIM Card Slot | Dual SIM (Nano) |
| Connectivity | Wi-Fi, LTE, GSM, UMTS, Bluetooth |
| Biometric Security | Fingerprint Recognition |
| Headphones Jack | 3.5 mm |
| Item Dimensions | 6 x 4 x 2 inches |
10. Warranty and Support
Your Samsung Galaxy A21S is covered by a manufacturer's warranty. For detailed warranty information, please refer to the warranty card included in your product packaging or visit the official Samsung website. For technical support, software updates, or service inquiries, please contact Samsung customer service or visit an authorized service center. You can find more information and support resources on the Samsung Store.


