
EVGA 220-GP-1300-X1
EVGA Supernova 1300 G+ Power Supply User Manual
Model: 220-GP-1300-X1
Introduction
Thank you for choosing the EVGA Supernova 1300 G+ Power Supply. This fully modular, 80 PLUS Gold certified power supply is designed to deliver stable and efficient power to your computer system. This manual provides essential information for proper installation, operation, and maintenance of your new power supply.
Safety Information
Please read and follow all safety instructions carefully before installing or operating the power supply. Failure to do so may result in damage to the unit, other components, or personal injury.
- Ensure the power supply is disconnected from the AC power outlet before installation or maintenance.
- Do not open the power supply casing. There are no user-serviceable parts inside, and opening it will void the warranty.
- Install the power supply in a well-ventilated area, away from heat sources and moisture.
- Use only the modular cables provided with your EVGA Supernova G+ power supply. Using incompatible cables may cause damage.
- Ensure all cables are securely connected before powering on the system.
Package Contents
Verify that all items are present in your package:
- EVGA Supernova 1300 G+ Power Supply Unit
- Modular Cable Set (various types for motherboard, CPU, PCIe, SATA, Peripherals)
- AC Power Cord
- Power On Self Tester
- Mounting Screws
- Cable Ties
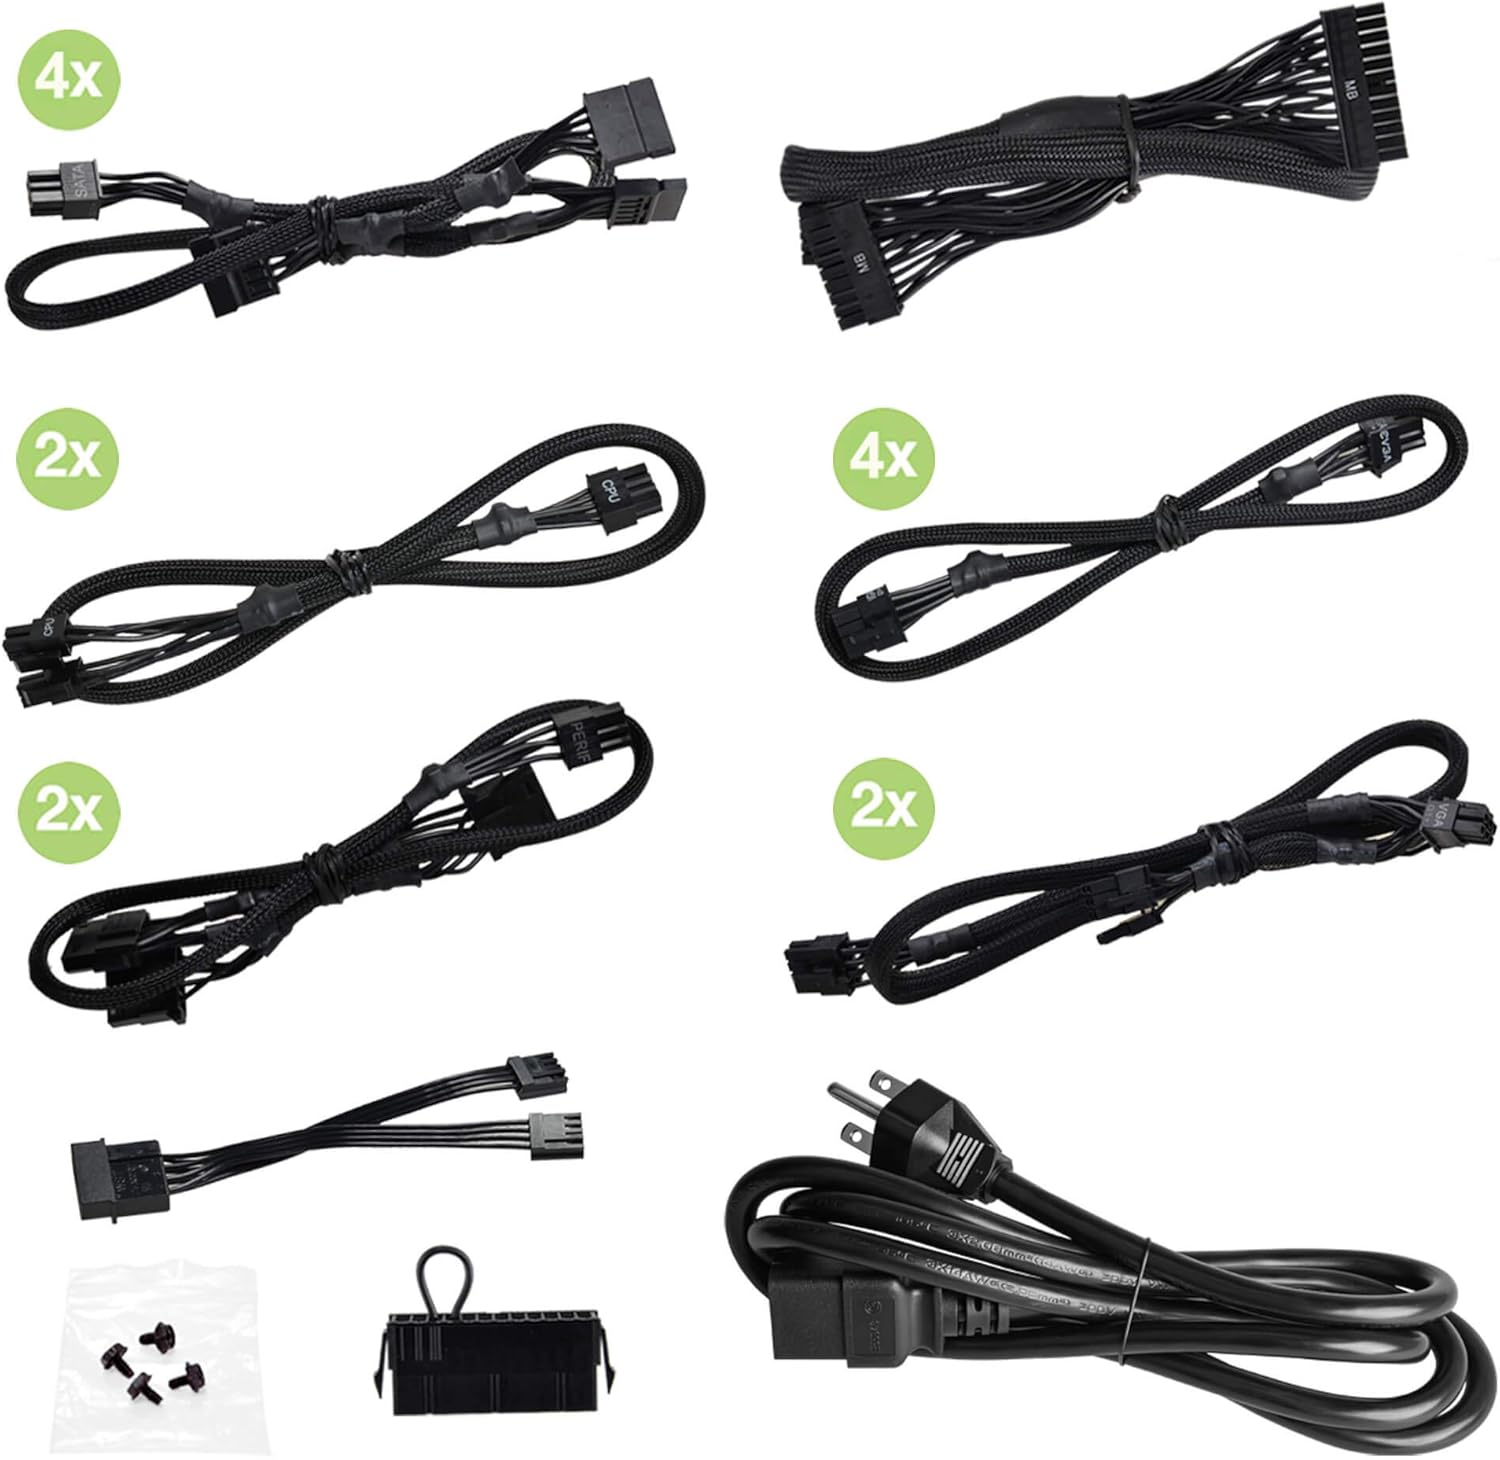
Image: Included modular cables, power cord, power on self tester, and mounting screws.
Product Overview
Familiarize yourself with the key components and features of your EVGA Supernova 1300 G+ power supply.
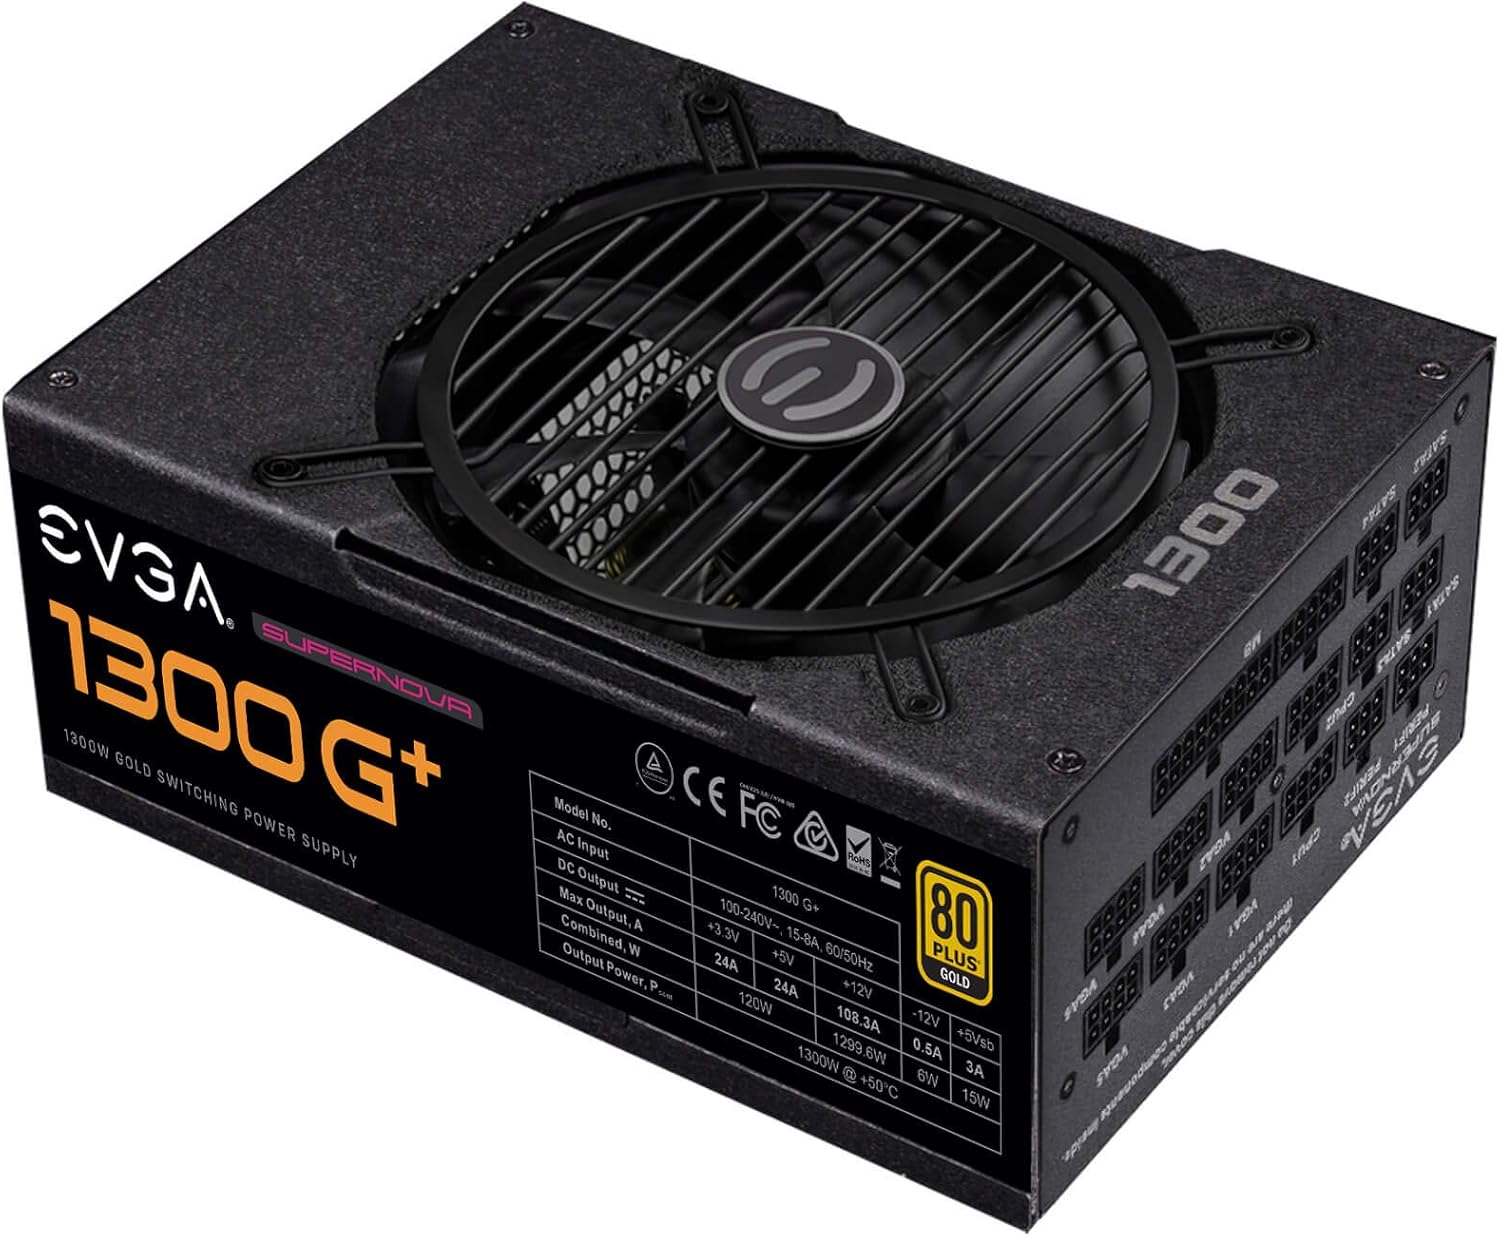
Image: Top view of the power supply unit, highlighting the cooling fan and the main product label.

Image: The fully modular cable connection panel, showing clearly labeled ports for various components like motherboard, CPU, VGA, and SATA.

Image: Rear panel of the power supply, featuring the AC power inlet, the main power switch, and the ECO mode toggle switch.
Setup and Installation
Follow these steps to properly install your EVGA Supernova 1300 G+ power supply into your computer system.
- Prepare Your System: Ensure your computer is completely powered off and unplugged from the wall outlet. Open your computer case.
- Remove Old PSU (if applicable): Disconnect all cables from your old power supply and remove it from the case.
- Mount the New PSU: Place the EVGA Supernova 1300 G+ into the power supply bay of your computer case. Secure it with the provided mounting screws.
- Connect Modular Cables:
- Connect the 24-pin ATX cable to your motherboard.
- Connect the 4+4-pin or 8-pin EPS/CPU cables to your motherboard's CPU power connectors.
- Connect the 6+2-pin PCIe cables to your graphics cards.
- Connect SATA power cables to your storage drives (HDDs, SSDs) and optical drives.
- Connect peripheral (Molex) cables to any other components requiring them.
Note: Only connect the cables you need to reduce clutter and improve airflow.
- Cable Management: Route cables neatly to ensure proper airflow and a clean build.
- Close Case and Connect Power: Close your computer case. Connect the AC power cord to the power supply and then to a wall outlet.
Operating Instructions
Once installed, operating your EVGA Supernova 1300 G+ is straightforward.
- Power On: Flip the main power switch on the back of the power supply to the 'I' (On) position. You can then power on your computer using its case power button.
- ECO Mode: The EVGA Supernova G+ series features an ECO mode switch on the rear panel.
- When the ECO mode switch is in the 'ON' position, the power supply fan will remain off during low to moderate loads, providing silent operation. The fan will only spin up when the temperature or load exceeds a certain threshold.
- When the ECO mode switch is in the 'OFF' position, the fan will operate continuously, adjusting its speed based on temperature and load.
Note: ECO mode is designed to optimize noise levels and fan longevity. Both modes provide stable power delivery.
- Power On Self Tester: The included power on self tester can be used to verify the basic functionality of the power supply independently of the computer system. Connect the 24-pin ATX cable to the tester and plug in the AC power cord. If the power supply is functioning, the fan may briefly spin, and the indicator light on the tester will illuminate.
Maintenance
Proper maintenance helps ensure the longevity and optimal performance of your power supply.
- Dust Removal: Periodically clean dust from the power supply's fan grill and vents using compressed air. Ensure the power supply is off and unplugged before cleaning.
- Cable Inspection: Occasionally check all modular cable connections to ensure they are secure.
- Environment: Maintain a clean, dry, and well-ventilated environment for your computer system.
Troubleshooting
If you encounter issues with your power supply, refer to the following common problems and solutions:
| Problem | Possible Cause | Solution |
|---|---|---|
| Power supply does not turn on. |
|
|
| System powers on but shuts down immediately. |
|
|
| Fan is not spinning in ECO mode. |
|
|
If the problem persists after trying these solutions, please contact EVGA customer support.
Specifications
Detailed technical specifications for the EVGA Supernova 1300 G+ Power Supply.
| Feature | Detail |
|---|---|
| Model Number | 220-GP-1300-X1 |
| Wattage | 1300W |
| 80 PLUS Certification | Gold |
| Efficiency | 90% or higher under typical loads |
| Form Factor | ATX |
| Modularity | Fully Modular |
| Capacitors | 100% Japanese Capacitors |
| Fan Type | Fluid Dynamic Bearing Fan |
| ECO Mode | Yes, for ultra-quiet operation |
| Operating Temperature | 0° to 50° C |
| Dimensions (L x W x H) | 7.87 x 5.9 x 3.4 inches (200mm x 150mm x 86mm) |
| Weight | 5 pounds (approx. 2.27 kg) |

Image: Side view of the power supply, showing the detailed electrical specifications label.
Warranty and Support
EVGA stands behind the quality of its products.
- Warranty: The EVGA Supernova 1300 G+ Power Supply comes with a 10-Year Warranty from the date of purchase. Please retain your proof of purchase for warranty claims.
- Online Resources: For the most up-to-date information, FAQs, and driver downloads, please visit the official EVGA website.
- Customer Support: If you require technical assistance or have warranty inquiries, please contact EVGA customer support through their official website or contact channels.
- User Manual (PDF): A detailed PDF version of the user manual can be found here.
Related documents220-GP-1300-X1


Ask a question about this manual
Ask about setup, troubleshooting, compatibility, parts, safety, or missing instructions. Manuals+ will review the question and use this page’s manual context to help answer it.