1. Introduction
This manual provides detailed instructions for the assembly and finishing of the Trumpeter TRU01080 1:35 scale US MK23 MTVR MAS Truck plastic model kit. Please read all instructions carefully before beginning assembly. This kit is designed for experienced modelers and is not a toy.

Image 1.1: Example of the completed Trumpeter 1:35 US MK23 MTVR MAS Truck model kit.
2. Safety Information
- Small Parts: This kit contains small parts which may pose a choking hazard. Keep out of reach of small children.
- Sharp Tools: Assembly requires the use of sharp tools such as hobby knives and nippers. Exercise extreme caution to prevent injury.
- Adhesives and Paints: Use plastic cement and paints in a well-ventilated area. Refer to the manufacturer's safety data sheets for specific product warnings. Avoid prolonged skin contact and inhalation of fumes.
- Eye Protection: Consider wearing eye protection during assembly to guard against flying plastic fragments.
3. Kit Contents
Before starting, verify that all parts are present and undamaged. The kit includes multiple plastic sprues, rubber tires, and a decal sheet. Refer to the parts diagram in your kit for a complete list.
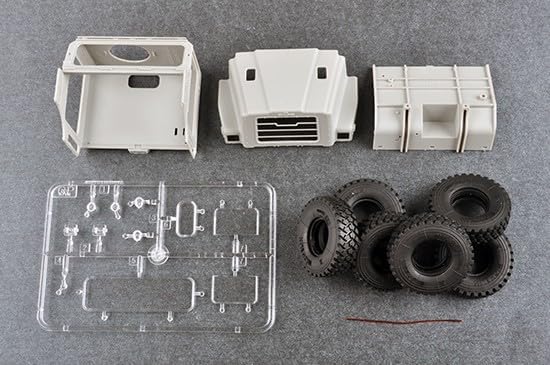
Image 3.1: Main components of the Trumpeter TRU01080 kit, including the cab, hood, truck bed, rubber tires, and a clear plastic sprue.
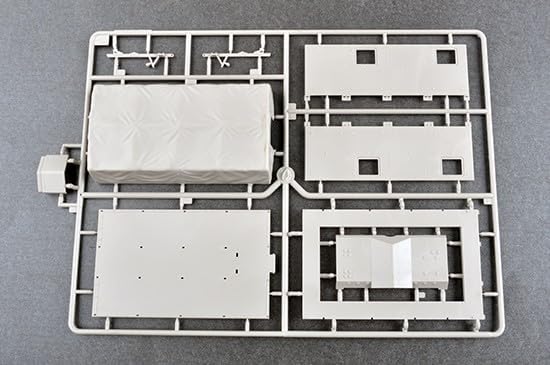
Image 3.2: A plastic sprue containing parts for the truck bed and canopy.

Image 3.3: A plastic sprue featuring chassis and frame components for the vehicle.
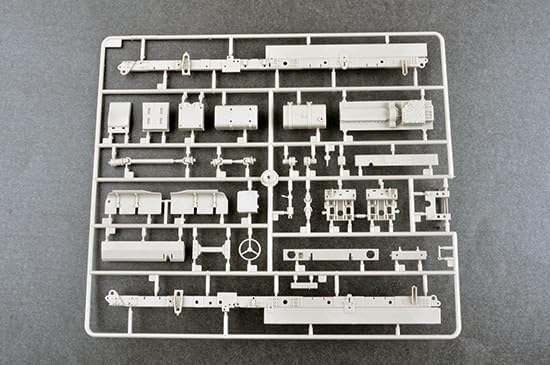
Image 3.4: A plastic sprue containing engine and suspension parts.

Image 3.5: A plastic sprue with various interior and small detail parts.

Image 3.6: An additional plastic sprue showing more chassis and suspension components.
4. Assembly Instructions
Follow the numbered steps provided in the kit's printed instruction booklet. The general process involves:
- Part Preparation: Carefully cut parts from the sprues using nippers. Clean any mold lines or excess plastic with a hobby knife or sanding stick.
- Dry Fitting: Before applying glue, dry-fit parts to ensure proper alignment and fit. Trim or sand as necessary.
- Gluing: Apply a small amount of plastic cement to the joining surfaces. Hold parts together firmly until the glue sets. Avoid using excessive glue, which can damage the plastic.
- Sub-Assemblies: Build smaller sections (e.g., engine, chassis, cab interior) before combining them into the main model.
- Painting Considerations: Some parts may be easier to paint before full assembly. Refer to the painting guide for recommendations.
5. Painting and Decals
Achieving a realistic finish requires careful painting and decal application. Refer to the provided painting and marking guide for color schemes and decal placement.

Image 5.1: The painting and marking guide, illustrating various views of the truck with color references and decal positions.
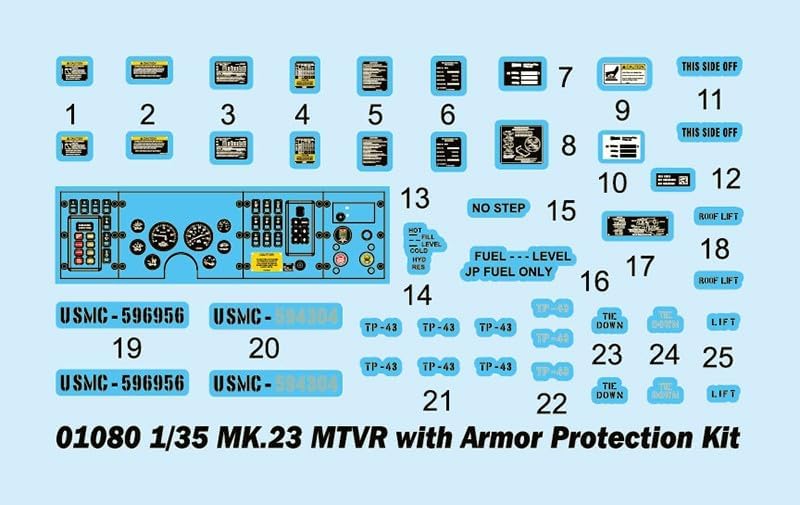
Image 5.2: The decal sheet for the Trumpeter TRU01080 kit, showing various markings and stencils.
Painting Steps:
- Preparation: Ensure the model surface is clean and free of dust or grease. Apply a primer coat for better paint adhesion.
- Base Coats: Apply base colors according to the guide. Use thin, even coats to avoid obscuring detail. Allow each coat to dry thoroughly.
- Detail Painting: Paint smaller details such as lights, tools, and interior components.
- Weathering (Optional): For a more realistic appearance, consider weathering techniques like washes, dry-brushing, and pigments.
Decal Application:
- Gloss Coat: Apply a clear gloss coat over the areas where decals will be placed. This prevents 'silvering' of the decals.
- Cutting Decals: Carefully cut out each decal as close to the edge of the design as possible.
- Soaking: Dip the decal in lukewarm water for a few seconds until it slides freely from the backing paper.
- Placement: Slide the decal onto the model surface. Use a wet brush or cotton swab to position it correctly.
- Setting Solution: Apply a decal setting solution to help the decal conform to surface details and eliminate air bubbles.
- Matte Coat: Once decals are dry, apply a final clear matte or satin coat to seal them and unify the finish.
6. Maintenance
Once assembled and painted, your model requires minimal maintenance to preserve its appearance:
- Dusting: Regularly dust the model with a soft brush or compressed air to prevent dust buildup.
- Display: Display the model in a stable, dust-free environment, away from direct sunlight and extreme temperature fluctuations, which can cause paint fading or plastic warping.
- Handling: Handle the model by its sturdy parts to avoid damaging delicate details.
7. Troubleshooting
Common issues encountered during model assembly and their solutions:
- Parts Not Fitting: Dry-fit parts before gluing. If a part doesn't fit, gently sand or trim the mating surfaces. Ensure no excess plastic or mold flash is present.
- Gaps Between Parts: Use plastic putty or filler to fill any noticeable gaps after gluing. Sand smooth once dry.
- Paint Issues:
- Uneven Coat: Apply paint in thin, multiple layers. Ensure proper paint thinning.
- Rough Texture: Ensure the surface is clean before painting. Adjust paint consistency and spraying distance if using an airbrush.
- Decal Silvering: Apply decals over a gloss surface. Use decal setting solutions to help them conform and eliminate trapped air.
8. Specifications
| Model Number | TRU01080 |
| Scale | 1:35 |
| Product Type | Plastic Model Kit |
| Manufacturer | Trumpeter |
| Item Weight | 11.8 ounces |
| Recommended Age | 3 years and up (Note: Kit complexity suggests older modelers) |
9. Warranty and Support
For specific warranty information regarding manufacturing defects or missing parts, please contact the retailer where the kit was purchased or the manufacturer, Trumpeter, directly. Keep your proof of purchase for any warranty claims.
For technical support or inquiries about the model kit, please refer to the contact information provided on the kit packaging or visit the official Trumpeter website.


