
1. Important Safety Information
Please read these instructions carefully before installation and use. Retain this manual for future reference.
- Always disconnect power at the circuit breaker before installing, cleaning, or servicing the light fixture.
- Installation should be performed by a qualified electrician or a person with adequate electrical knowledge.
- This fixture is designed for indoor use only.
- Do not use this LED ceiling light with an external dimmer switch. The dimming and color temperature adjustments are controlled solely by the included remote control.
- Ensure all electrical connections are secure and comply with local codes and ordinances.
- Avoid touching the LED light source directly when the fixture is on, as it may be hot.
2. Package Contents
Verify that all components are present before beginning installation:
- LED Leaf Ceiling Light Fixture
- Remote Control
- Mounting Hardware (screws, wire nuts, etc.)
- Instruction Manual
3. Product Specifications
| Feature | Specification |
|---|---|
| Brand | Garwarm |
| Model Number | 6055-5-WJ |
| Dimensions | 23.6"L x 23.6"W x 3.15"H |
| Power | 60W |
| Voltage | 110V |
| Light Output | 4800 Lumens (Max) |
| Color Temperature | 3000K-6500K (Dimmable) |
| Material | Iron, Acrylic |
| Light Source Type | LED |
| Control Method | Remote Control |
| Installation Type | Flush Mount |
| Item Weight | 3.8 Pounds |

Image: Product dimensions and material specifications.
4. Setup & Installation
Follow these steps to install your Garwarm LED Leaf Ceiling Light. For a visual guide, refer to the installation video provided by the manufacturer.
- Prepare for Installation: Ensure the power supply to the installation area is turned off at the circuit breaker. Gather all necessary tools (screwdriver, wire strippers, ladder, etc.).
- Mount the Bracket: Attach the mounting bracket to the ceiling junction box using the provided screws. Ensure it is securely fastened.
- Connect Wiring: Connect the household electrical wires to the fixture's wires according to standard electrical codes (usually black to black, white to white, and ground to ground). Use the provided wire nuts to secure connections.
- Assemble Light Petals: Carefully attach the acrylic leaf-shaped light panels to the main fixture base. Ensure each panel is properly aligned and secured.
- Secure the Fixture: Carefully lift the assembled fixture and attach it to the mounting bracket on the ceiling. Secure it with the provided screws.
- Restore Power: Once the fixture is securely installed and all connections are checked, restore power at the circuit breaker.
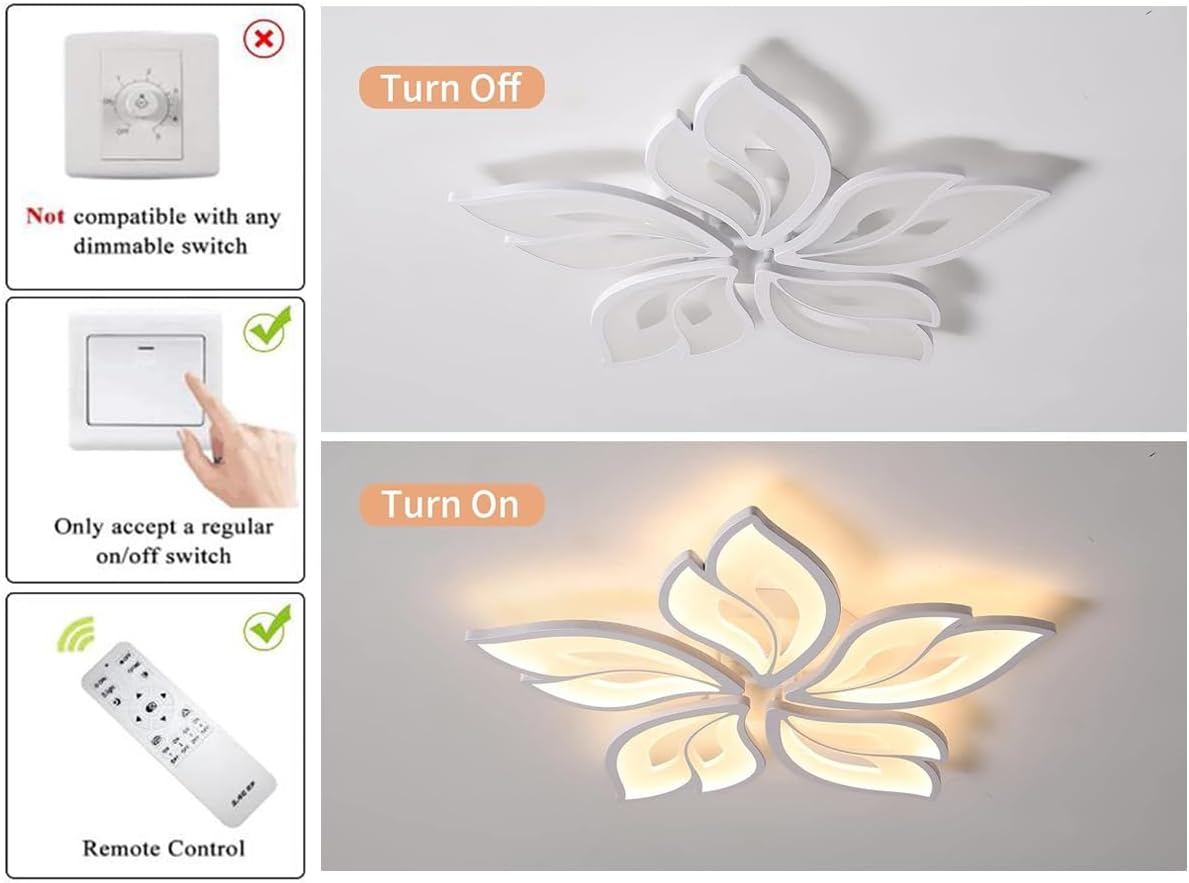
Image: Compatibility with standard on/off switches and remote control. Not compatible with external dimmer switches.
Video: An overview of the Garwarm Leaf Shape LED Ceiling Light, demonstrating its design and features relevant to assembly.
5. Operating Instructions
Your Garwarm LED Leaf Ceiling Light is operated using the included remote control. Ensure the remote has working batteries (not included, typically AAA).
- Power On/Off: Use the 'ON' and 'OFF' buttons on the remote to turn the light on or off.
- Adjust Brightness: Use the brightness adjustment buttons (usually marked with sun icons or +/-) to increase or decrease the light intensity (10%-100%).
- Change Color Temperature: Use the color temperature buttons (usually marked with 'K' or sun/moon icons) to cycle through different color temperatures: 3000K (Warm Light), 4500K (Neutral Light), and 6500K (White Light).
- Memory Function: The light fixture has a memory function. If the light is kept on for at least 20 seconds with your desired settings (brightness and color temperature), it will remember these settings and turn on with them the next time.

Image: Demonstrates the different color temperature effects (Warm, Neutral, White) and the light off state.
Video: Demonstrates the dimmable feature and color temperature changes of the Garwarm LED Leaf Ceiling Light using the remote control.
6. Maintenance
Proper maintenance ensures the longevity and optimal performance of your light fixture.
- Cleaning: Before cleaning, ensure the power to the fixture is turned off. Use a soft, dry, or slightly damp cloth to wipe the surface of the fixture. Do not use abrasive cleaners, solvents, or polishes as they may damage the finish or acrylic.
- Bulb Replacement: This fixture uses integrated LED lights and does not require bulb replacement. If the LEDs malfunction, contact customer support.
- Inspection: Periodically check the fixture for any loose connections or damage. If any issues are found, disconnect power and consult a qualified electrician.
7. Troubleshooting
If you encounter any issues with your Garwarm LED Leaf Ceiling Light, refer to the following troubleshooting guide:
| Problem | Possible Cause | Solution |
|---|---|---|
| Light does not turn on | No power supply; Loose wiring; Faulty remote control batteries. | Check circuit breaker. Ensure all wiring connections are secure. Replace remote control batteries. |
| Light flickers or dims unexpectedly | Incompatible dimmer switch; Loose wiring; Power fluctuations. | Ensure the fixture is connected to a standard on/off switch, not an external dimmer. Check all wiring connections. If flickering persists, consult an electrician. |
| Remote control not working | Dead batteries; Obstruction between remote and fixture; Remote not paired (if applicable). | Replace batteries. Ensure clear line of sight to the fixture. Refer to remote pairing instructions in the full manual if provided. |
| Incorrect color temperature or brightness | Incorrect remote setting. | Use the remote control to adjust brightness and color temperature to your desired setting. |
8. Warranty & Support
Garwarm products are designed for quality and durability. For any warranty claims, technical support, or assistance with your product, please contact the Garwarm Home Decor Store directly.
Please have your model number (6055-5-WJ) and purchase information ready when contacting support.