1. Product Overview
The Browning BTC-6HDPX Dark Ops HD Pro X Trail Camera is designed for outdoor surveillance, offering advanced detection capabilities for both day and night use. It captures high-resolution images and videos, making it suitable for monitoring wildlife or property.
This camera features a 20-megapixel image resolution and records 1600x900p HD videos with sound. A 1.5-inch color view screen allows for immediate review of captured media. The Dark Ops HD Pro X supports multiple operating modes, including Still Pictures, TimeLapse Plus, and Video mode. The TimeLapse Plus Mode captures images during the day and activates motion detection at night, ensuring comprehensive coverage.

Figure 1.1: Front view of the Browning Dark Ops HD Pro X Trail Camera in its closed state.
2. Setup Guide
2.1. Battery Installation
The BTC-6HDPX camera requires 6 AA alkaline batteries for operation. For optimal performance, especially in cold weather, lithium batteries are recommended.
- Open the camera housing latch.
- Locate the battery compartment.
- Insert 6 AA batteries, ensuring correct polarity (+/-) as indicated inside the compartment.
- Close the battery compartment securely.
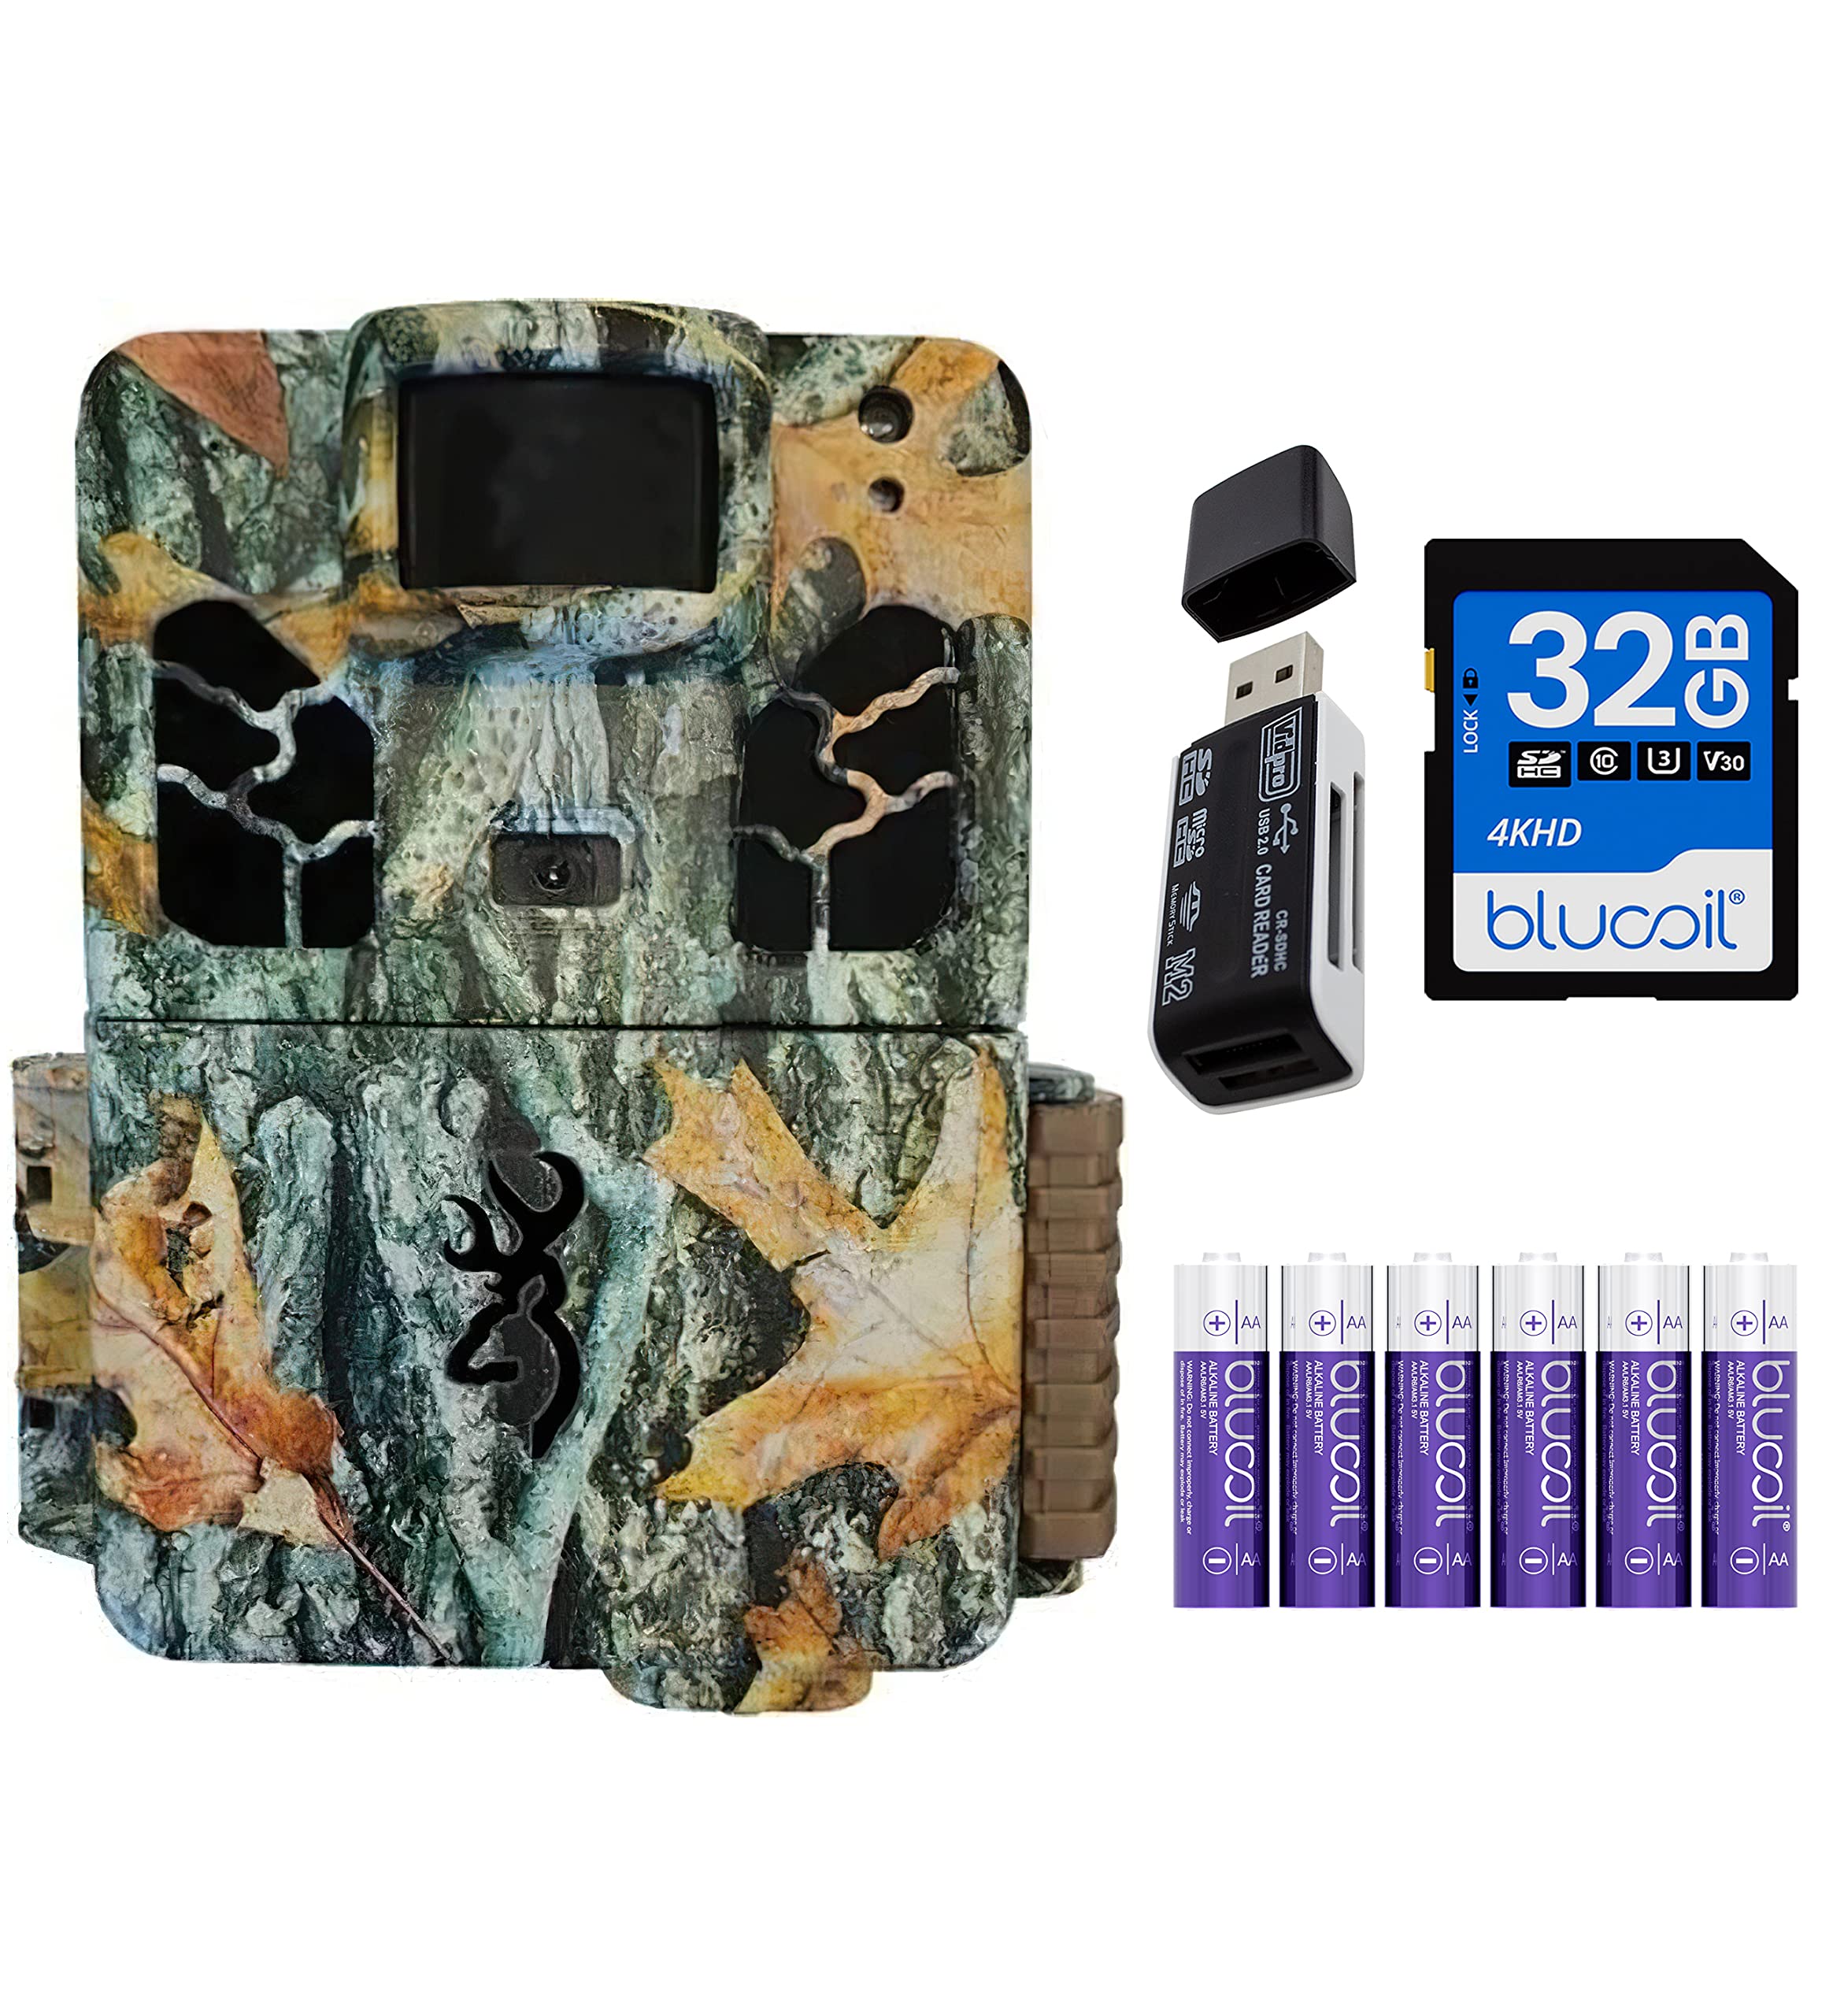
Figure 2.1: The camera opened, showing the internal display, control buttons, and battery compartment.

Figure 2.2: Example of AA alkaline batteries suitable for the camera.
2.2. SD Card Installation
A memory card is required to store images and videos. The camera supports SD cards up to 512GB.
- With the camera housing open, locate the SD card slot.
- Insert the SD card into the slot with the label facing up until it clicks into place.
- To remove, press the card gently until it springs out.
2.3. Mounting the Camera
The camera comes with a 6-foot tree strap for secure mounting.
- Select a suitable location, such as a tree or post, that provides a clear view of the desired surveillance area.
- Thread the tree strap through the mounting brackets on the back of the camera.
- Securely fasten the strap around the mounting surface, ensuring the camera is stable and pointed correctly.
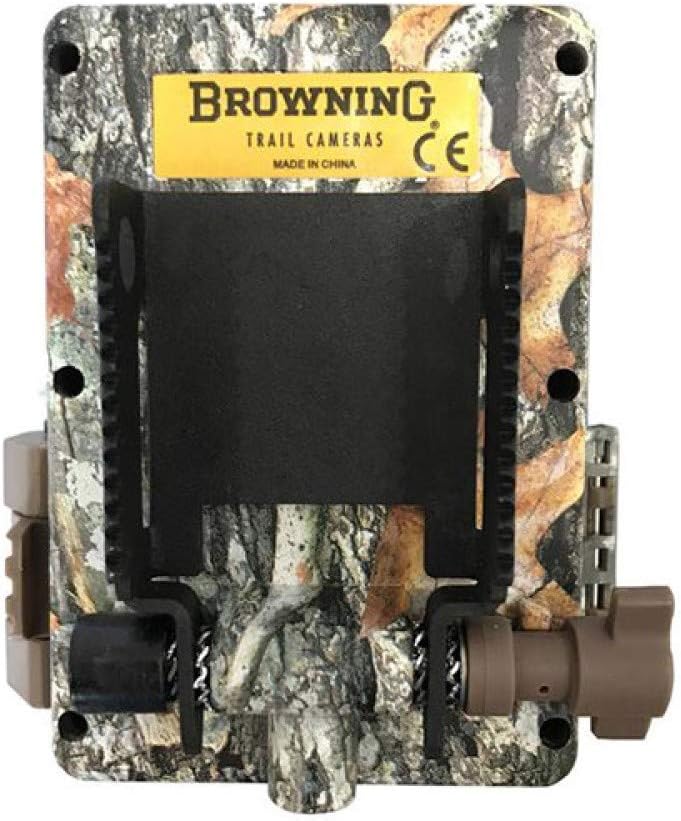
Figure 2.3: Rear view of the camera, highlighting the mounting bracket for the tree strap.
3. Operating Modes
The BTC-6HDPX offers several operating modes to suit different surveillance needs.
3.1. Powering On/Off
To power on the camera, slide the ON/OFF switch to the 'ON' position. The camera will perform a self-check and enter setup mode or the last used operating mode. To power off, slide the switch to 'OFF'.
3.2. Still Pictures Mode
In this mode, the camera captures still images when motion is detected. You can configure settings such as image resolution (up to 20 MP), multi-shot (up to 8 images), and rapid fire (up to 8 images).
3.3. TimeLapse Plus Mode
This mode combines time-lapse photography during the day with motion-activated capture at night. It is ideal for monitoring large areas over extended periods.
3.4. Video Mode
The camera records high-definition videos with sound. Video resolution is 1600x900p, and clip lengths can be set from 5 seconds to 2 minutes.
3.5. Viewing Images and Videos
You can view captured media directly on the camera's 1.5-inch color view screen or by transferring the SD card to a computer.
- On Camera: Navigate through the menu using the control buttons to access the image/video gallery.
- On Computer: Remove the SD card from the camera and insert it into your computer's SD card reader. Alternatively, use the included VidPro USB 2.0 Card Reader for efficient data transfer.

Figure 3.1: The VidPro USB 2.0 Card Reader for transferring files from the SD card to a computer.
4. Maintenance
4.1. Battery Replacement
Regularly check battery levels. Replace all batteries simultaneously to ensure consistent power. If using alkaline batteries in cold conditions, be aware that performance may degrade below 35% charge or 30 degrees Fahrenheit.
4.2. SD Card Management
Periodically format your SD card using the camera's menu option to maintain optimal performance and prevent data corruption. Back up important files before formatting.
4.3. Cleaning
Keep the camera lens and PIR sensor window clean from dirt, dust, and debris. Use a soft, dry cloth for cleaning. Avoid abrasive materials or harsh chemicals.
5. Troubleshooting
- Camera Not Powering On: Ensure batteries are correctly installed and fully charged. Check the ON/OFF switch position.
- Poor Image/Video Quality: Verify lens is clean. Check camera settings for resolution and focus. Ensure adequate lighting for daytime shots.
- No Motion Detection: Confirm the PIR sensor window is clear. Adjust camera placement and sensitivity settings. Ensure the detection range (80-FT) is appropriate for the area.
- SD Card Errors: Reformat the SD card using the camera's menu. Try a different SD card if errors persist.
- Short Night Videos: The camera is designed to conserve battery life at night, resulting in shorter video clips (e.g., 20 seconds). This is normal operation.
6. Technical Specifications
| Feature | Specification |
|---|---|
| Model | BTC-6HDPX |
| Image Resolution | 20 MP Effective Still Resolution |
| Video Resolution | 1600x900p (with Sound) |
| Detection Range | 80-FT |
| IR Flash Range | 80-FT (Invisible "Night Vision" Infrared LED) |
| Trigger Speed | 0.2 seconds |
| Recovery Time | 0.6 seconds |
| Screen Size | 1.5 Inches (Color View Screen) |
| Memory Card Type | SD Card (up to 512GB) |
| Power Source | 6 AA Batteries |
| Dimensions (L x W x H) | 4.3 x 3 x 2.5 inches |
| Weight | 1 pound |
| Water Resistance Level | Water Resistant (IP65) |
| Connectivity Technology | Wireless (IR) |
| Special Features | Illuma-Smart Technology, Multi-Shot, Rapid Fire |
7. Warranty & Support
For warranty information and technical support, please refer to the official Browning Trail Cameras website or contact their customer service directly. Keep your purchase receipt as proof of purchase.